- Step 1: Install WooCommerce and Dokan
- Step 2: Install DriveHub and DriveHub Pro
- Step 3: Connect Your Google Account
- Step 4: Enable Vendor Uploads
- Step 5: The Vendor Connects Their Google Drive
- Step 6: Choose Where the Upload Box Shows
- Step 7: Pick the Upload Folder and Folder Names
- Step 8: Make a Product Uploadable
- Step 9: Set the Upload Rules
- Step 10: The Customer Uploads Files
- Step 11: The Vendor Sees the Files
- Benefits of Customer Uploads for Dokan Vendors
Do your Dokan vendors need files from their customers, like a photo to print, a logo or a brief? If you’re looking for a simple way to send those files straight to each vendor’s Google Drive, you’re in the right place.
You can easily do this with DriveHub. Vendors add an upload box to their products, and every customer file lands in the vendor’s own Google Drive, in a separate folder for each order.
Here is an easy, step-by-step guide to help you set it all up!
Step 1: Install WooCommerce and Dokan #
First, make sure your marketplace plugins are in place:
- From your WordPress admin, click on Plugins > Add New.
- Search for WooCommerce, then click Install and Activate.
- Search for Dokan, then click Install and Activate.
- Finish the WooCommerce and Dokan setup wizards.
Step 2: Install DriveHub and DriveHub Pro #
Next, add DriveHub to your site:
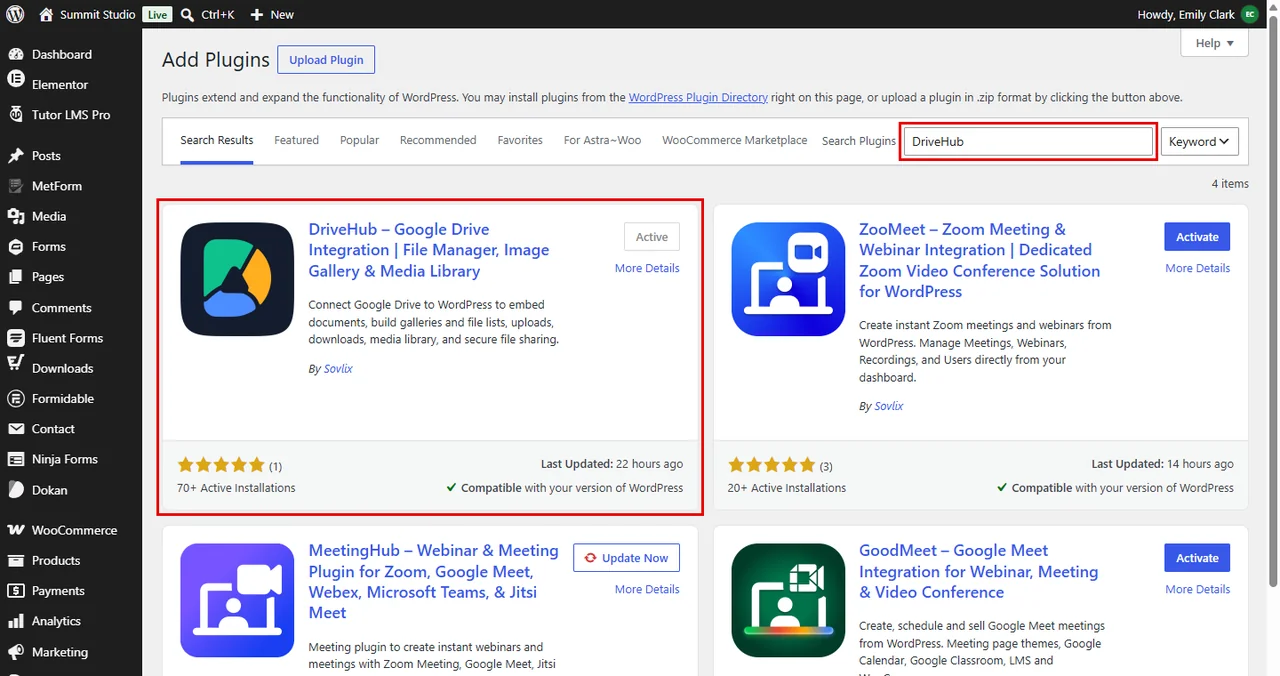
- Go to Plugins > Add New and search for DriveHub.
- Click Install and then Activate.
- Install and activate DriveHub Pro as well.
Note: This needs DriveHub Pro.
Step 3: Connect Your Google Account #
As the store admin, connect your own Google account first. Vendors sign in through the same app later:
- Go to DriveHub and follow the setup screen to add your Google account.
Read our step by step setup guide to avoid any confusion.
Step 4: Enable Vendor Uploads #
In this step, you allow vendors to collect uploads:
- Go to DriveHub > Integrations.
- Find the Dokan card under Stores and courses and turn on the switch.
- Click on the settings icon next to the switch.
- Turn on Vendor uploads.
- Click Done.
- Click Save changes in the bar at the bottom of the screen.
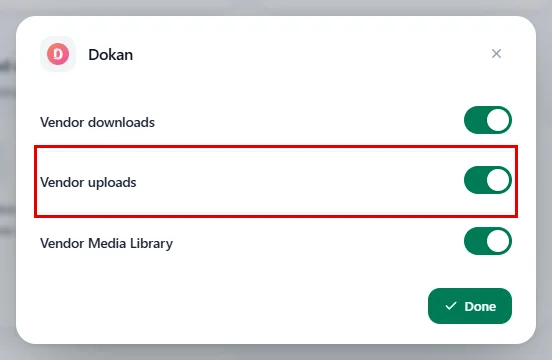
Don’t forget to click Save changes. Done only closes the window.
Step 5: The Vendor Connects Their Google Drive #
From here on, the steps happen in the vendor’s dashboard. Customer files go to the vendor’s own Drive, so the vendor connects it once:
- Go to Vendor Dashboard > Settings > Google Drive.
- Click Sign in with Google and allow access.
See How to Connect Google Accounts for Dokan Vendors for every detail. The Upload Settings panel shows up as soon as an account is connected.
Step 6: Choose Where the Upload Box Shows #
On the same Google Drive Settings page, scroll to Upload Settings:
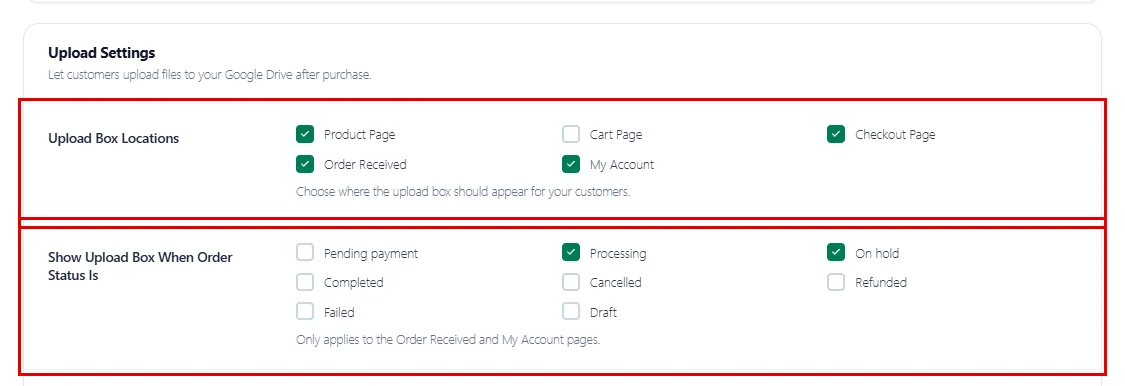
- Under Upload Box Locations, tick where customers see the upload box: Product Page, Cart Page, Checkout Page, Order Received and My Account.
- Under Show Upload Box When Order Status Is, tick the order statuses that allow uploads, for example Processing and On hold. This only applies to the Order Received and My Account pages.
Step 7: Pick the Upload Folder and Folder Names #
Next, decide where the files go in the vendor’s Drive:
- Under Upload Folder, click Select Folder and pick a folder (for example, Customer Artwork). Leave it empty to use your Drive’s default location.
- In Folder Naming Template, set the name of the folder made for each order. Click a tag such as
{order_id},{product_name}or{user_email}to add it. Leave it blank for the default,Order - {order_id} - {product_name} ({user_email}). - Turn on Allow File Deletion if customers may delete files they uploaded.
- Click Save Upload Settings.
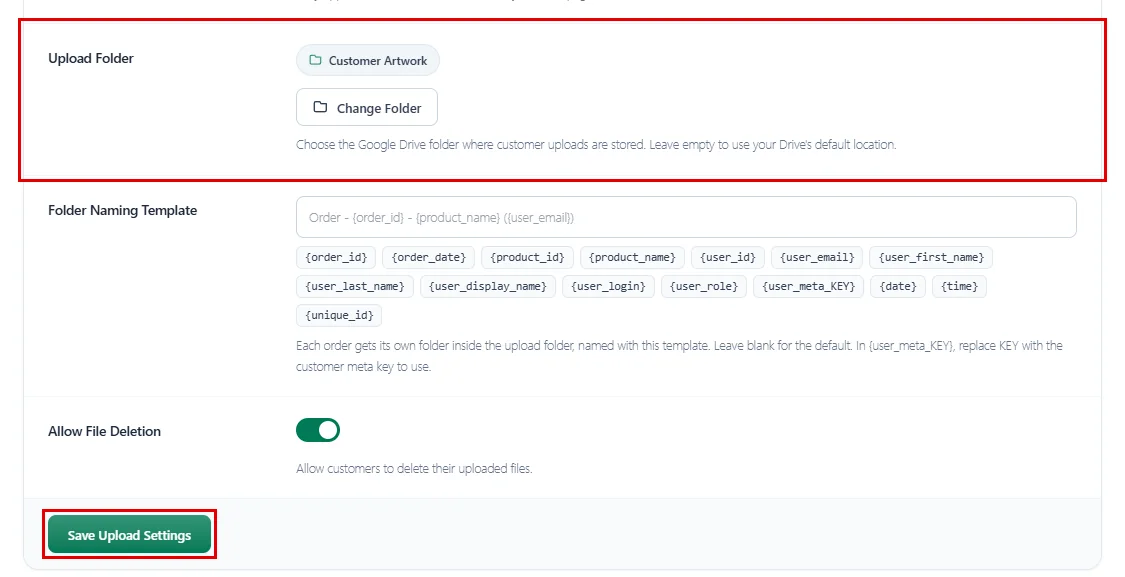
Tip: In {user_meta_KEY}, replace KEY with a customer meta key to use any custom profile field in the folder name.
You’ll see Upload settings saved. at the top right when it worked.
Step 8: Make a Product Uploadable #
Now the vendor, Northwind Prints in our example, turns on uploads for a product:
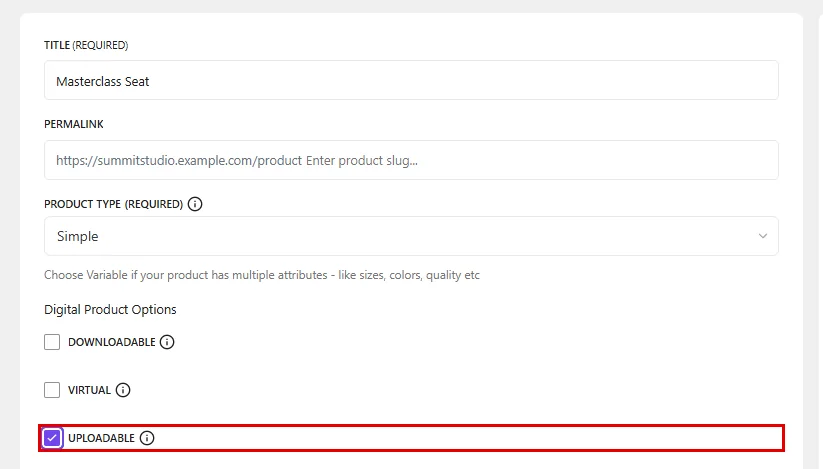
- Go to Vendor Dashboard > Products and add or edit a product (for example, Masterclass Seat, $129).
- Tick Uploadable, next to Downloadable and Virtual.
Step 9: Set the Upload Rules #
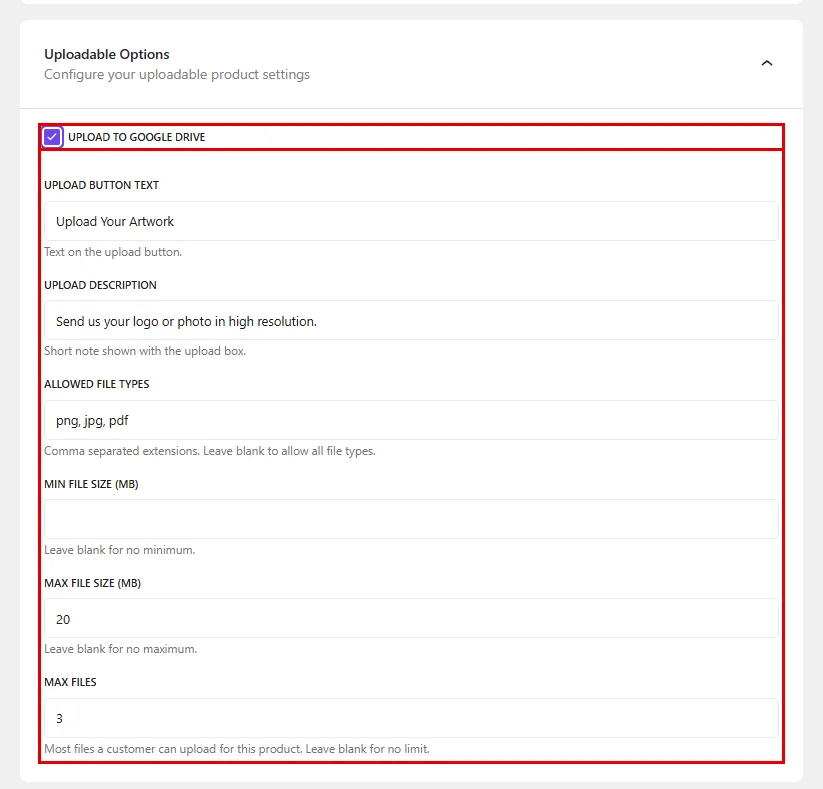
Scroll down to the Uploadable Options section and tick Upload to Google Drive. The upload fields appear right below. Fill in only what you need:
- Upload Button Text: the text on the upload button (default Upload Documents).
- Upload Description: a short note shown with the upload box.
- Allowed File Types: comma separated extensions, for example
png, jpg, pdf. Leave blank to allow all types. - Min File Size (MB) and Max File Size (MB): size limits. Leave blank for no limit.
- Max Files: the most files a customer can upload for this product. Leave blank for no limit.
- Click Save Changes at the top of the page.
Step 10: The Customer Uploads Files #
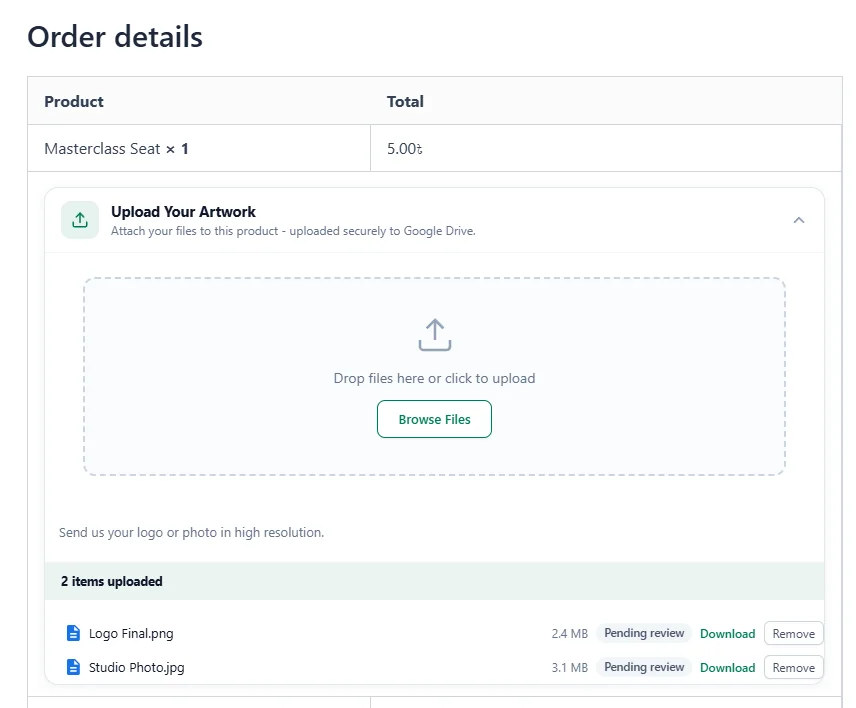
That’s it for setup! After placing an order, the customer sees the upload box on the thank you page. When both Order Received and My Account are ticked, the thank you message adds You can now start uploading your documents.
- The customer clicks Browse Files, or drags files into the box.
- Each file is listed with a Pending review badge.
- The same box is available later under My Account > Orders, through the Upload Documents button.
Step 11: The Vendor Sees the Files #
Vendors can find every file in two places:
- In the dashboard: go to Vendor Dashboard > Orders and open the order. The Customer uploads panel lists each file with its status.
- In Google Drive: open the upload folder. Each order has its own folder, named with your Folder Naming Template.
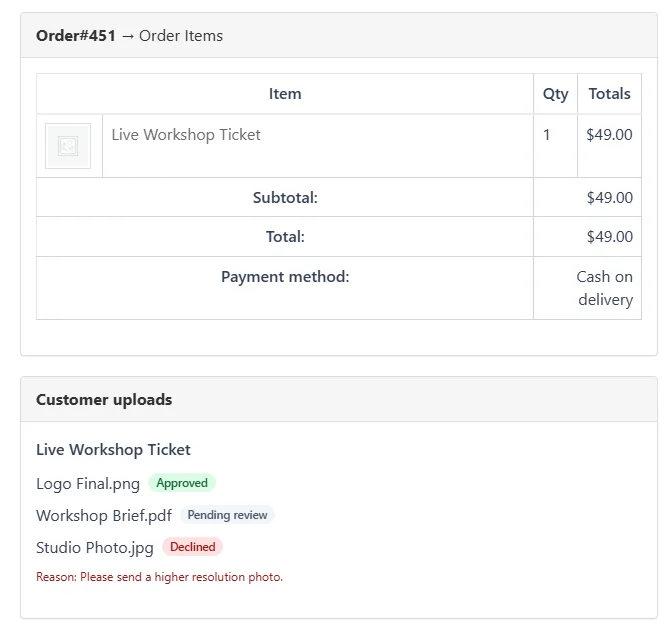
The store admin approves or declines files from WooCommerce > Orders, and the customer gets an email either way. A declined file shows its reason in the vendor’s panel too.
Benefits of Customer Uploads for Dokan Vendors #
- Straight to the right Drive: Files go to the vendor who sold the product, not to your server.
- Tidy folders: One folder per order, named the way the vendor likes.
- Clear rules: File type, size and count limits stop wrong files before they upload.
- Upload any time: Customers can add files from the product, cart, checkout or their account.
- Everyone stays informed: Vendors see each file’s status, and customers get an email when it’s reviewed.
With DriveHub and Dokan, collecting customer files becomes part of every order.
Related guides:


