- Step 1: Install WooCommerce and Dokan
- Step 2: Install DriveHub and DriveHub Pro
- Step 3: Connect the Store's Google Account
- Step 4: Enable the Dokan Integration
- Step 5: Open the Google Drive Settings (Vendor)
- Step 6: Connect Your Google Account
- Step 7: Add More Accounts (Optional)
- Step 8: Keep Your Accounts Healthy
- Step 9: Use Google Drive in Your Media Library (Optional)
- Benefits of Vendor Google Accounts
Do you want each vendor in your Dokan marketplace to use their own Google Drive for downloads, customer uploads and product images? You’re in the right place.
You can easily do this with DriveHub. Every vendor signs in with their own Google account from the vendor dashboard, so their files stay in their Drive and never mix with the store’s.
Here is an easy, step-by-step guide to help you set it all up!
Step 1: Install WooCommerce and Dokan #
First, make sure your marketplace plugins are in place:
- From your WordPress admin, click on Plugins > Add New.
- Search for WooCommerce, then click Install and Activate.
- Search for Dokan, then click Install and Activate.
Step 2: Install DriveHub and DriveHub Pro #
Next, add DriveHub to your site:
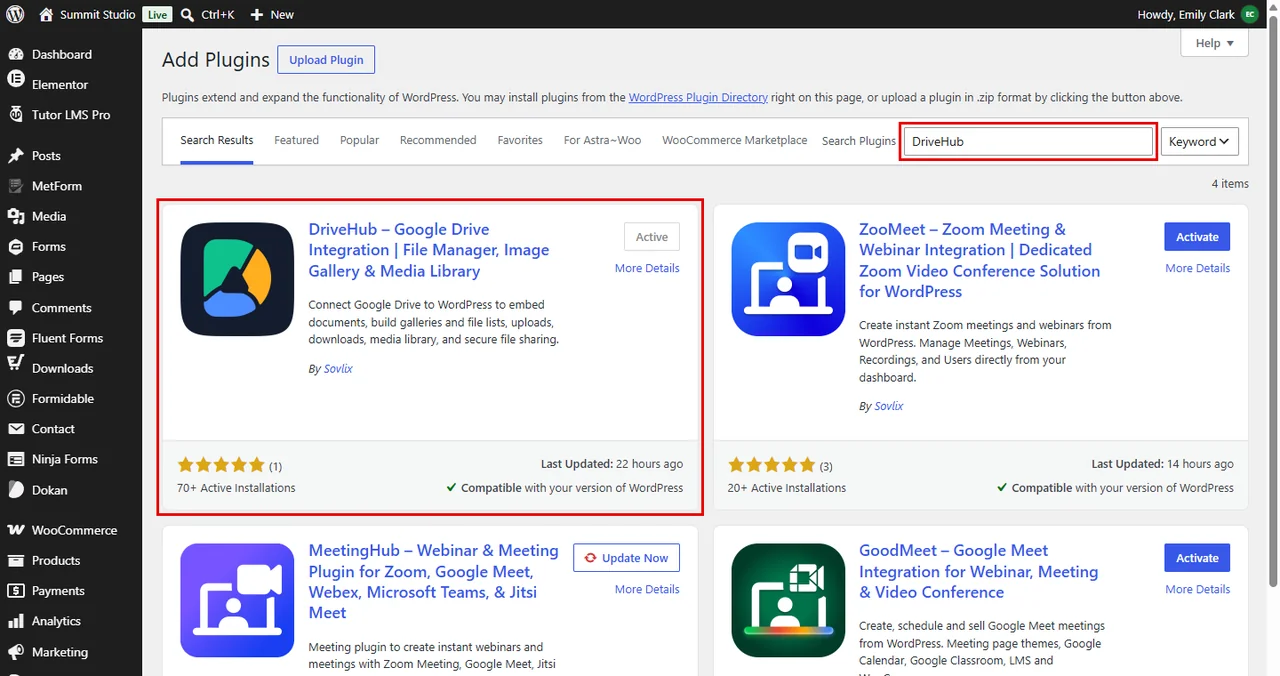
- Go to Plugins > Add New and search for DriveHub.
- Click Install and then Activate.
- Install and activate DriveHub Pro as well.
Note: This needs DriveHub Pro.
Step 3: Connect the Store’s Google Account #
As the store admin, connect your own Google account first. Vendors sign in through the same app you set up here:
- Go to DriveHub and follow the setup screen to add your Google account.
Read our step by step setup guide to avoid any confusion.
Step 4: Enable the Dokan Integration #
Vendors only see the Google Drive page once you turn on at least one vendor feature:
- Go to DriveHub > Integrations.
- Find the Dokan card under Stores and courses and turn on the switch.
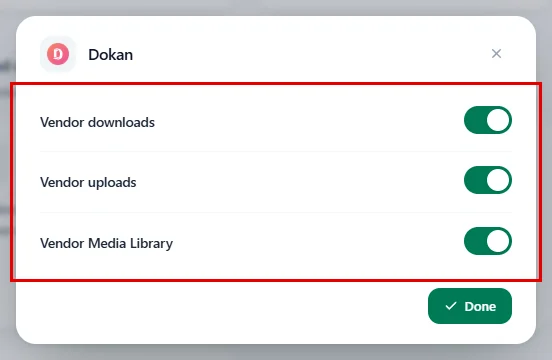
- Click on the settings icon next to the switch.
- Turn on any of Vendor downloads, Vendor uploads or Vendor Media Library.
- Click Done.
- Click Save changes in the bar at the bottom of the screen.
Step 5: Open the Google Drive Settings (Vendor) #
From here on, the steps happen in the vendor’s dashboard:
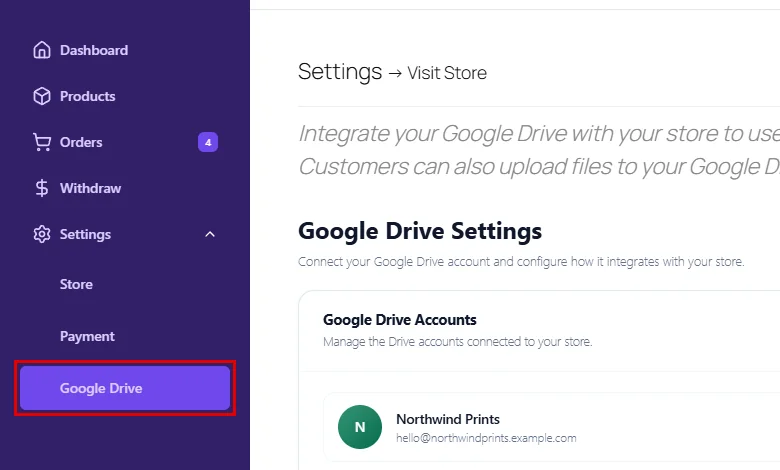
- Log in and go to your Vendor Dashboard.
- Click Settings in the sidebar.
- Click Google Drive.
Step 6: Connect Your Google Account #
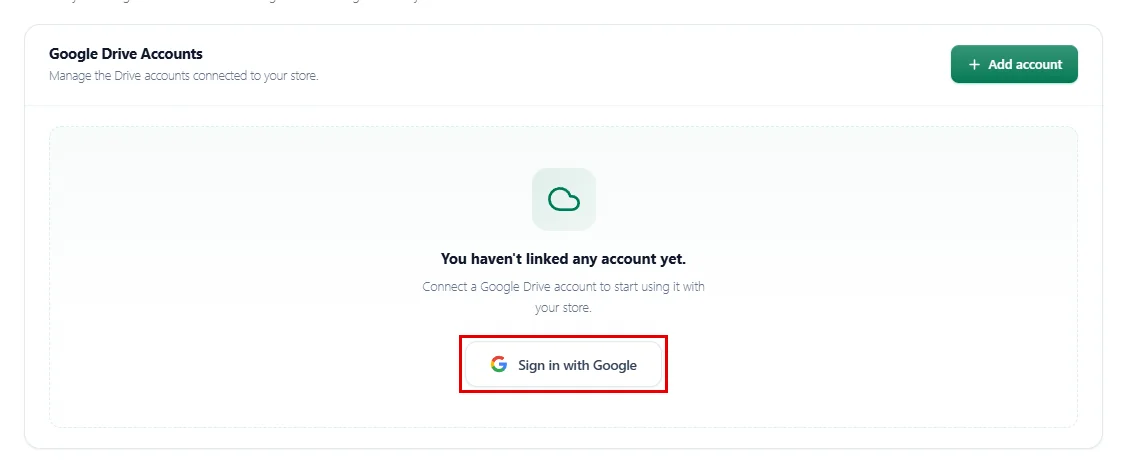
The Google Drive Accounts panel says You haven’t linked any account yet. Let’s fix that:
- Click on Sign in with Google.
- In the Google window, choose the account you want to use (for example, the Northwind Prints account).
- Allow the permissions Google asks for.
The window shows Connected! Closing window… and closes on its own. Your account now appears with a green Active badge.
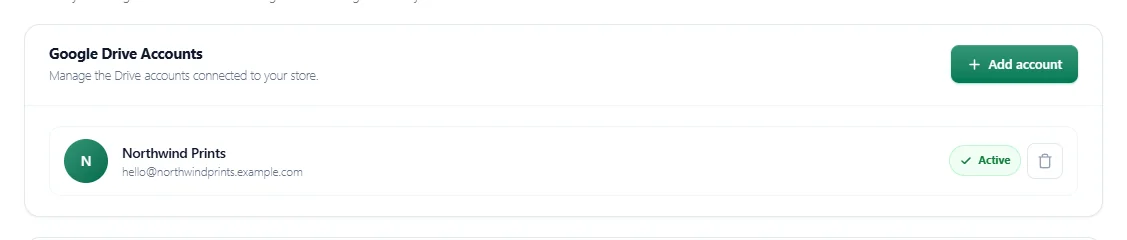
Tip: If nothing opens, your browser blocked the pop-up. You’ll see Your browser blocked the Google sign-in window. Please allow pop-ups for this site and try again. Allow pop-ups for the site and click the button again.
Step 7: Add More Accounts (Optional) #
A vendor can link more than one Google account, for example one for downloads and one for a second brand:
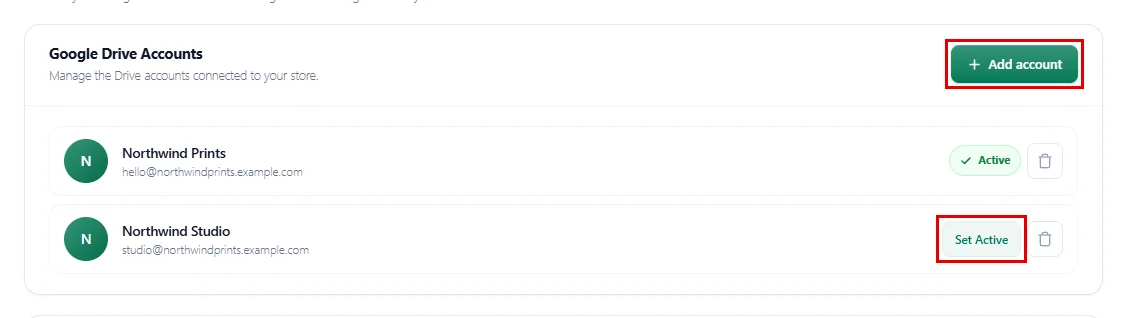
- Click Add account at the top of the Google Drive Accounts panel.
- Sign in with the other Google account and allow access.
Only one account is in use at a time, the one with the Active badge. To switch, click Set Active next to another account.
Step 8: Keep Your Accounts Healthy #
Here is how to handle the other account actions:
- Fix a disconnected account: an account marked Needs reconnect has lost access. Click its Reconnect icon and sign in again.
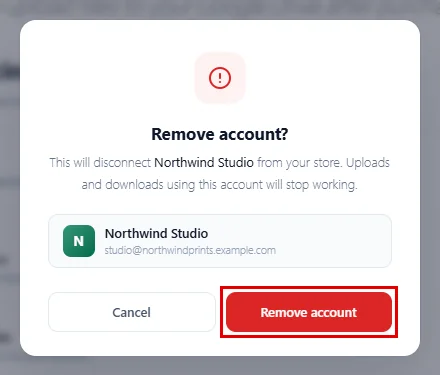
- Remove an account: click the bin icon, then confirm with Remove account. Uploads and downloads using that account stop working.
Step 9: Use Google Drive in Your Media Library (Optional) #
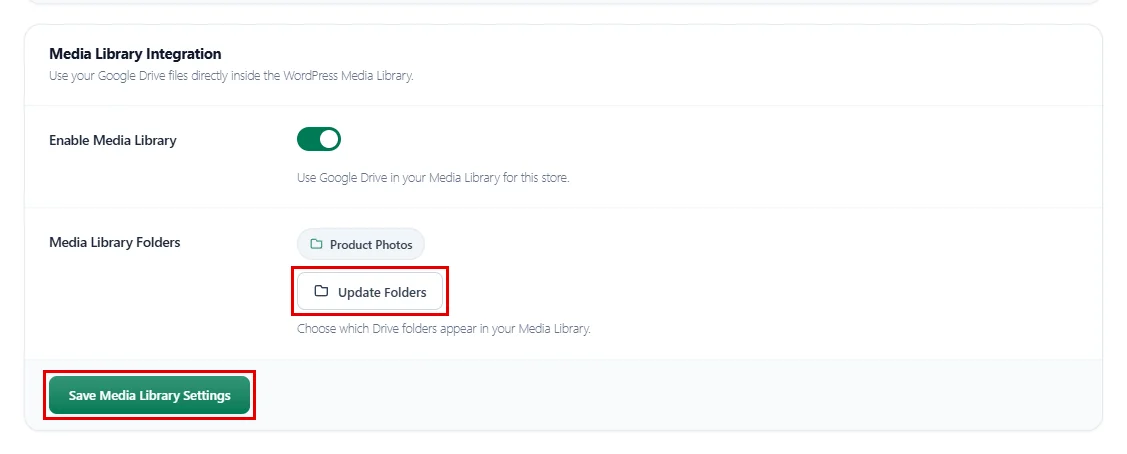
If the store admin turned on Vendor Media Library, a Media Library Integration panel appears below your accounts:
- Turn on Enable Media Library.
- Under Media Library Folders, click Select Folders and pick the Drive folders you want (for example, Product Photos). Once folders are picked, the button says Update Folders.
- Click Save Media Library Settings.
That’s it! Your Google Drive is now part of your store. Here is where it is used:
- Downloadable products: the Google Drive button in Downloadable Options opens this Drive. See How to Let Dokan Vendors Sell Their Google Drive Files.
- Customer uploads: customer files are saved in this Drive. See How to Let Dokan Vendors Collect Customer Uploads.
- Media Library: your chosen folders show up when you add product images.
Benefits of Vendor Google Accounts #
- Each vendor’s own space: Files stay in the vendor’s Drive, separate from the store and other vendors.
- Quick sign-in: One click on Sign in with Google, no keys or settings to copy.
- Several accounts: Switch between accounts with Set Active whenever you need to.
- Easy to fix: A clear Needs reconnect badge tells you when to sign in again.
With DriveHub and Dokan, every vendor brings their own Google Drive in a minute.
Related guides:


