Do you still write your pages and posts with the Classic Editor and want to show your Google Drive files on them? You can easily do this with DriveHub.
DriveHub adds a Google Drive button right next to Add Media, so you can drop a gallery, a file list or an embedded document exactly where your cursor is, without copying any shortcode by hand.
Here is an easy, step-by-step guide to help you set it all up!
Step 1: Install the Classic Editor and DriveHub #
If your site already uses the Classic Editor and DriveHub is connected, skip to Step 2.
- From your WordPress admin, click on Plugins > Add New.
- Search for Classic Editor (by WordPress Contributors), then click Install and Activate.
- Do the same for DriveHub, then follow the setup screen to add your Google account.
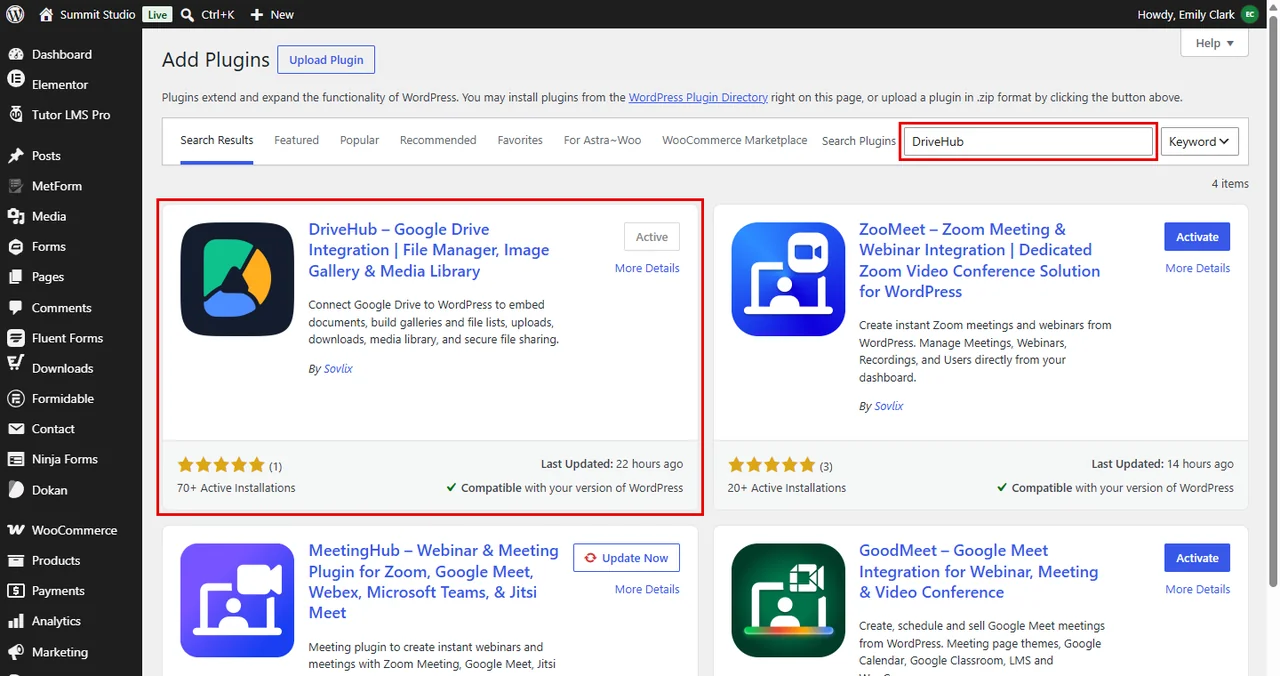
Read our step by step setup guide to avoid any confusion.
Step 2: Check That the Classic Editor Integration Is On #
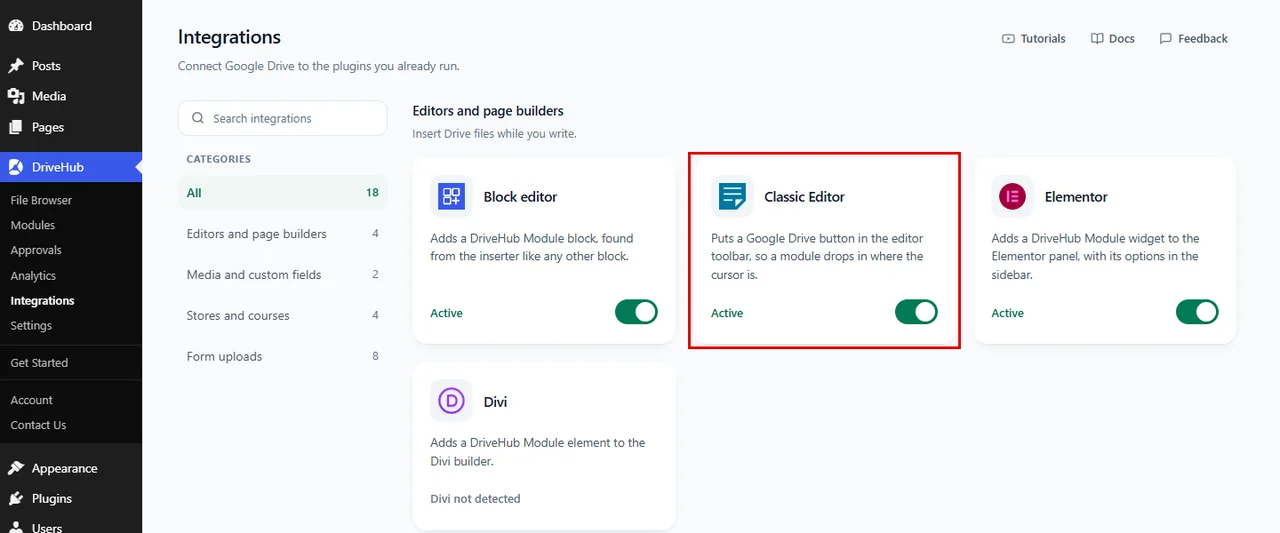
The Google Drive button only appears when the Classic Editor integration is turned on. It is on by default, but it is worth checking:
- Go to DriveHub > Integrations.
- Find the Classic Editor card under Editors and page builders.
- Make sure the switch is on and the card says Active.
- If you turned it on just now, click Save changes in the bar at the bottom of the screen.
Step 3: Open Your Page and Click Google Drive #
Now open the page where you want to show your Google Drive files:
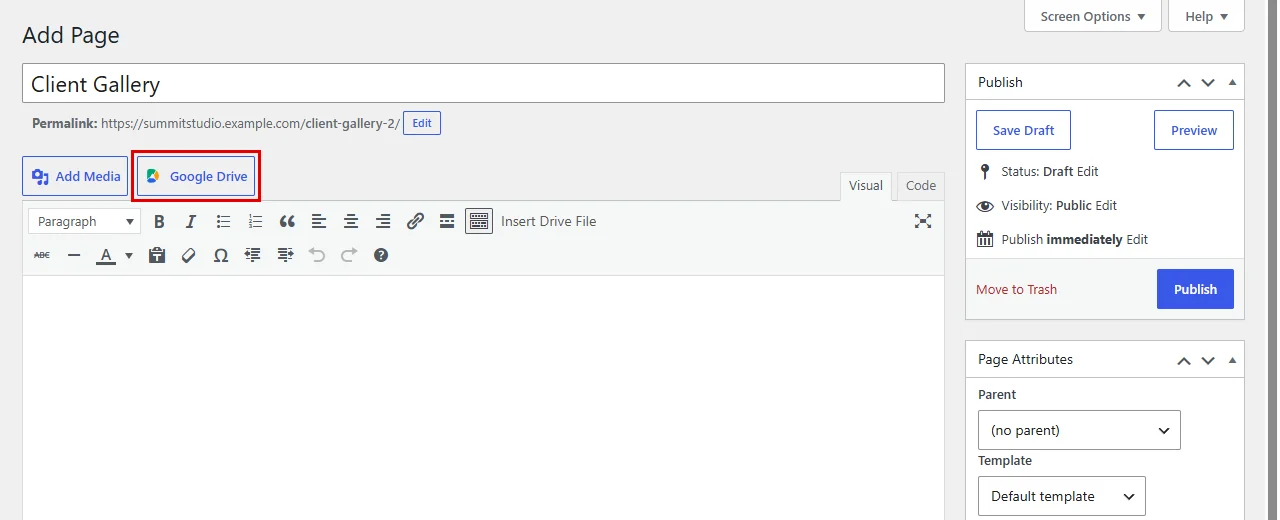
- Go to Pages > Add Page, or open an existing page or post.
- Give your page a title (for example, Client Gallery).
- Place your cursor where the files should appear.
- Click on the Google Drive button next to Add Media.
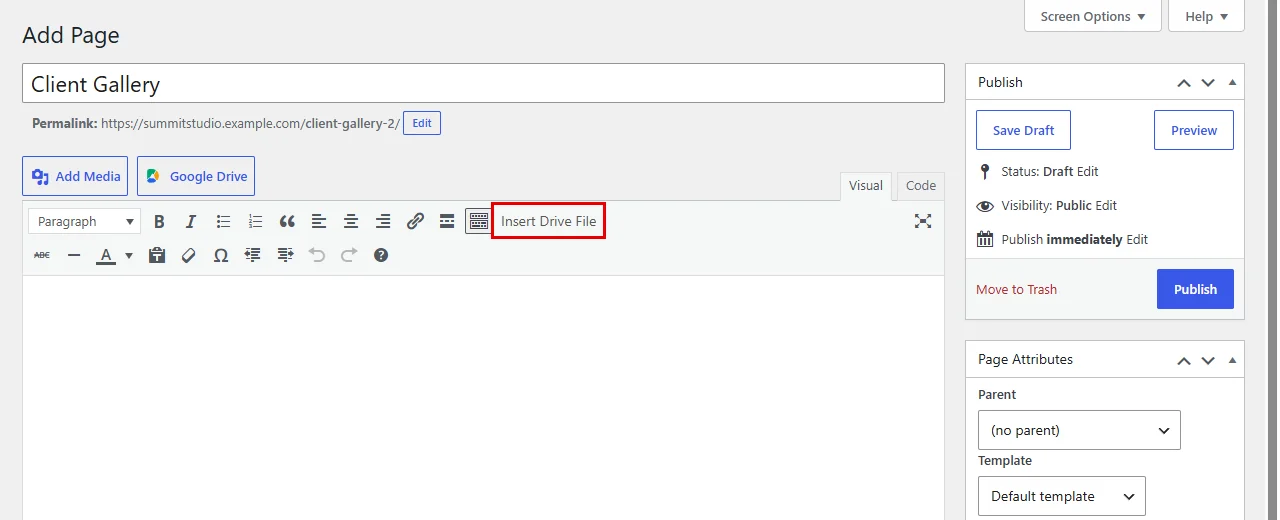
You can also use the Insert Drive File button in the editor toolbar. It opens the same window.
Step 4: Insert a Module #
The Insert DriveHub Module window opens with a list of your modules:
- Find the module you want (we’ll use the Studio Photo Gallery gallery module).
- Click on Insert module next to it.
- Don’t have a module yet? Click on Add module at the top right to build one without leaving the page.
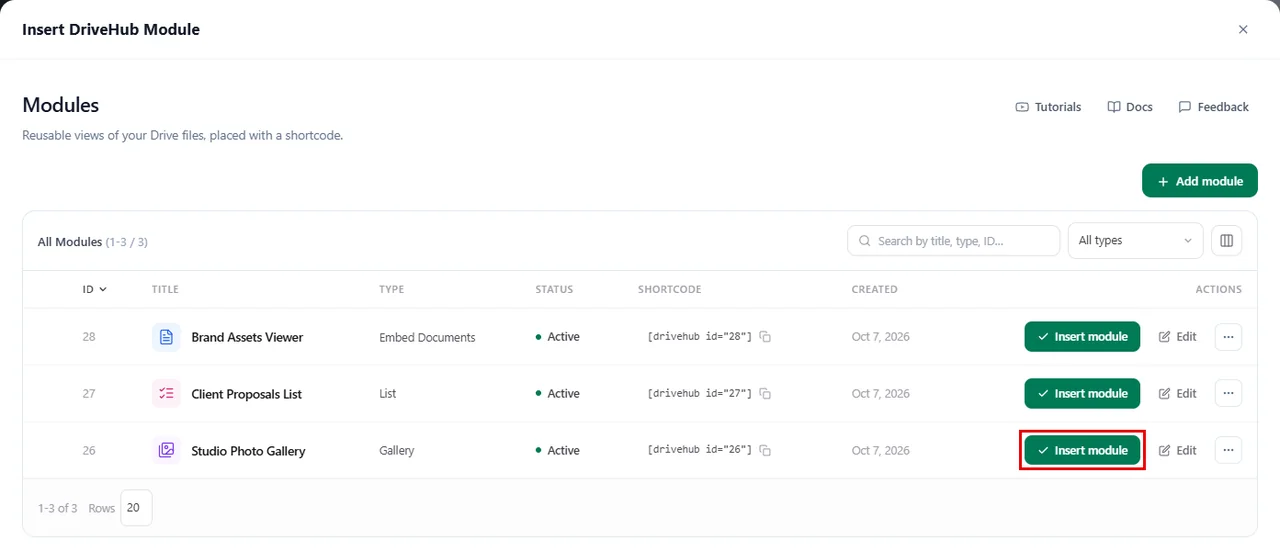
Note: The free version of DriveHub lets you insert Gallery, List and Embed Documents modules here.
Step 5: Check the Module in the Editor #
DriveHub adds the module’s shortcode, [drivehub id="26"], to your page. In the Visual tab it shows as a DriveHub Module #26 box, so it is easy to spot:
- Click on the box to see two small buttons: Edit to pick a different module, and Remove to take it out.
- In the Code tab you see the plain shortcode instead.
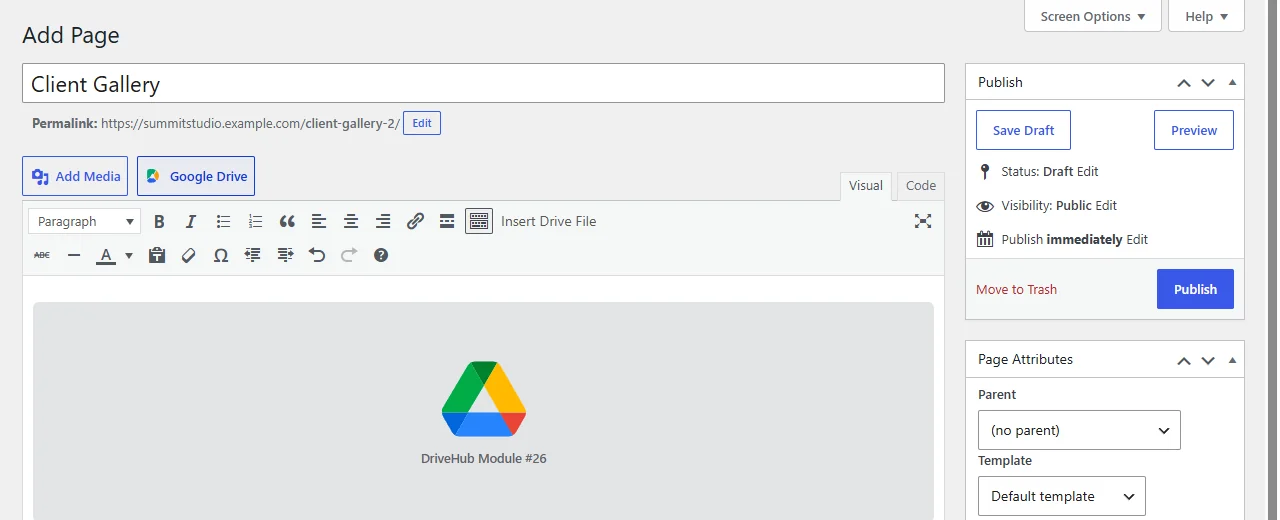
Your module ID may be different. DriveHub always fills in the right one for the module you picked.
Step 6: Publish Your Page #
Once you’re happy with the page, it’s time to make it live:
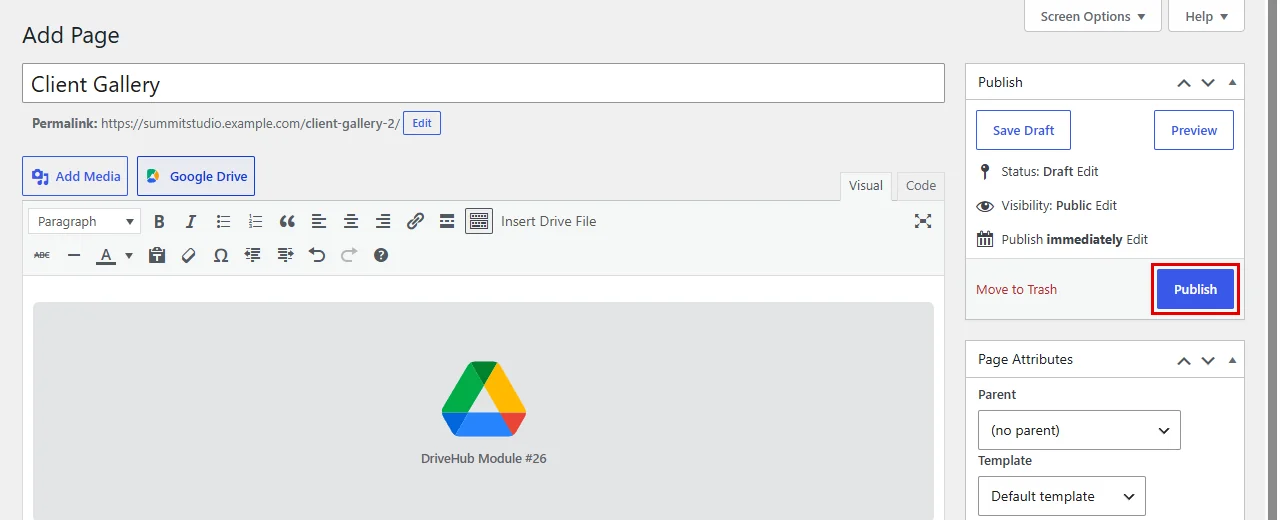
- Click on Publish in the Publish box on the right (or Update if the page is already live).
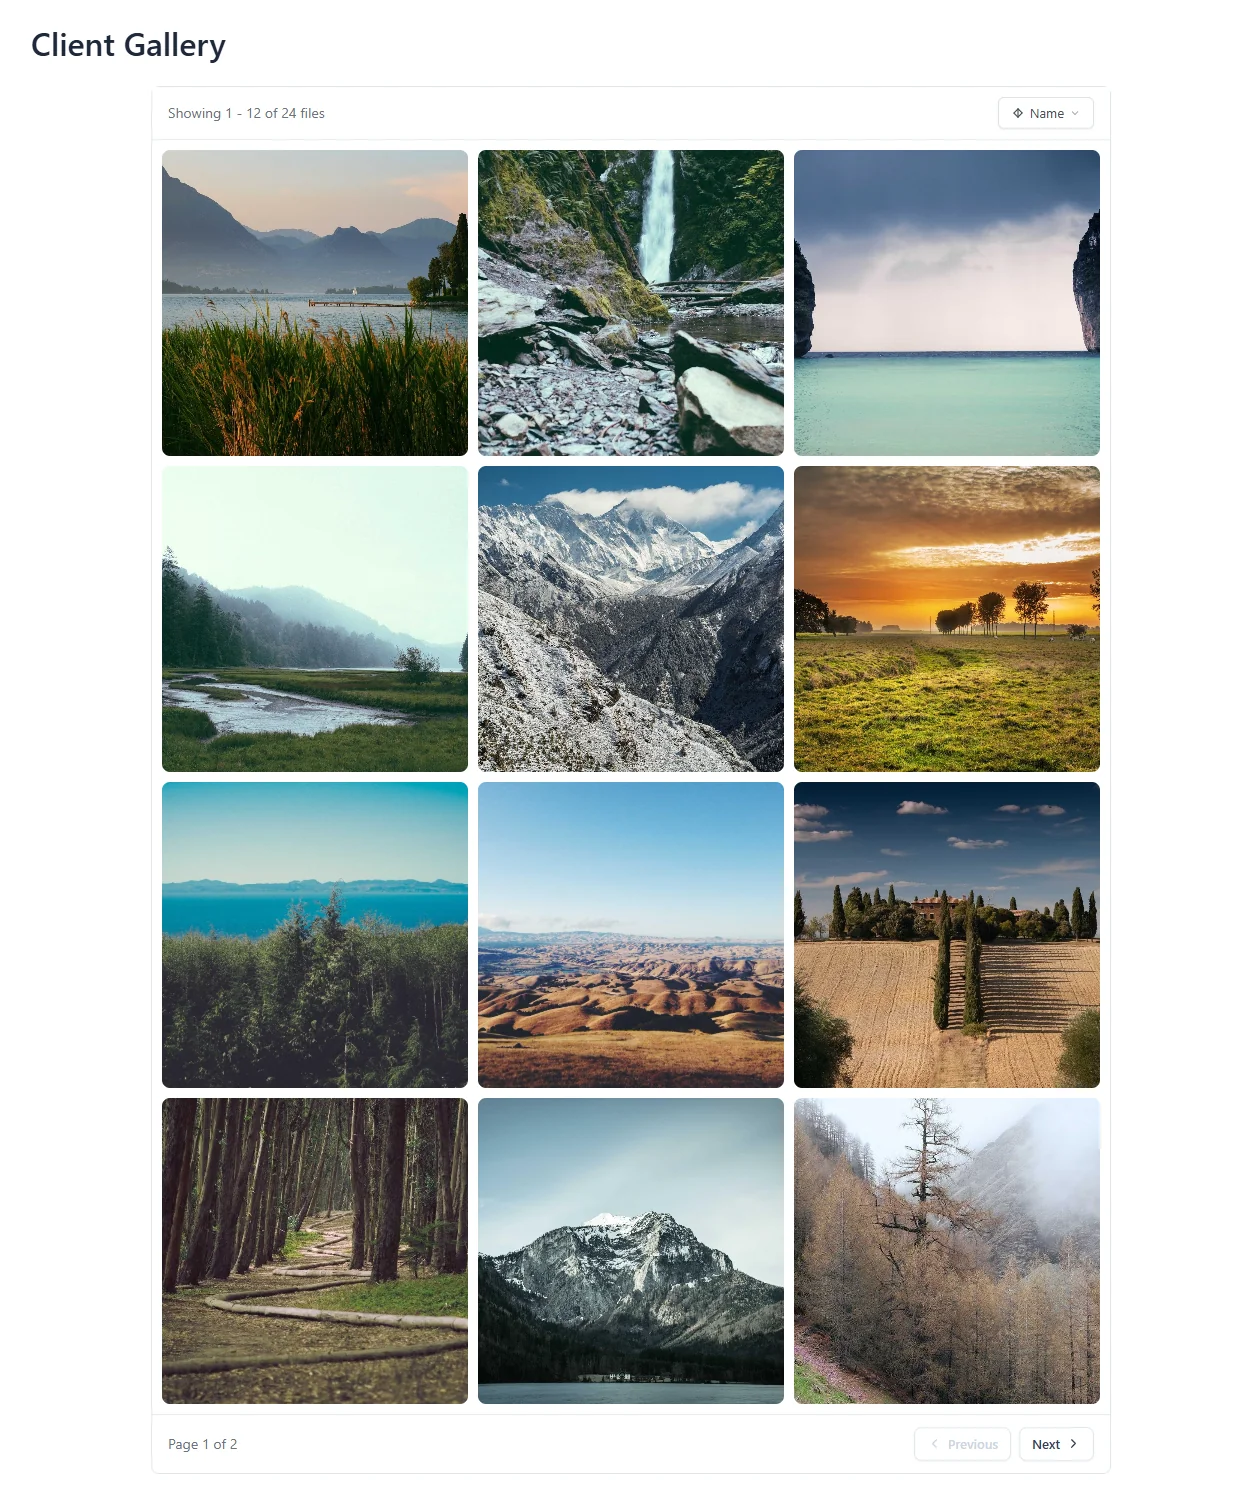
And that’s it. Your Google Drive files are now live on your page, shown with the layout and options you set in the module.
Benefits of Using DriveHub with the Classic Editor #
- One click to insert: The Google Drive button sits right where you already add media.
- No shortcode hunting: Pick a module from a list instead of copying IDs.
- Easy to spot later: Each module shows as a clear box in the Visual tab.
- Save WordPress storage: Your files stay in Google Drive instead of your Media Library.
- Keeps your workflow: No need to switch to a page builder or the block editor.
With DriveHub and the Classic Editor, adding Google Drive files to your pages stays simple and familiar.


