Did you add new photos to Google Drive, but your website still shows the old ones? Or do you want your pages to pick up changes by themselves? You can easily do this with DriveHub.
DriveHub keeps a short-lived copy of your Google Drive file lists, so your pages load fast. Synchronization refreshes that copy on a schedule you choose, and Clear Cached Files refreshes it right away whenever you need it.
Let’s get started!
Note: Auto synchronization needs DriveHub Pro. Clearing the cache by hand (Step 5) works in the free version too.
Step 1: Open the Synchronization Tab #
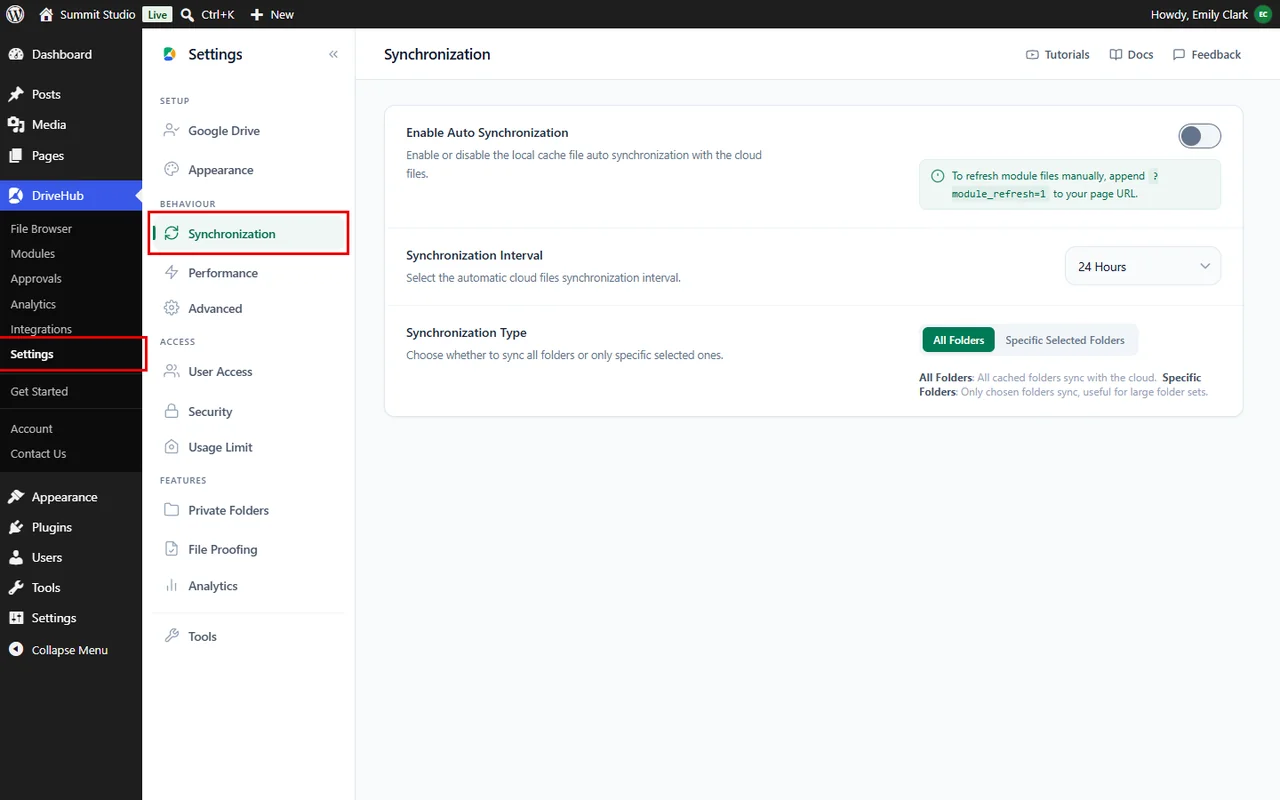
- Go to DriveHub > Settings from your WP-Admin.
- Click on Synchronization in the settings menu (under Behaviour).
Step 2: Turn On Auto Synchronization #
- Turn on Enable Auto Synchronization.

DriveHub now checks your Google Drive files in the background and updates your website, so you don’t have to remember to do it.
Step 3: Choose How Often It Syncs #
- Open Synchronization Interval and pick 1 Hour, 6 Hours, 24 Hours, 2 Days, 3 Days or 7 Days.
- Need something else? Pick Custom and type the time in seconds (60 seconds or more).

If your files change every day, 6 Hours or 24 Hours is a good choice. A shorter interval keeps pages fresher, but it also makes more requests to Google.
Step 4: Choose Which Folders to Sync #
- In Synchronization Type, choose All Folders to refresh every folder DriveHub has cached.
- Or choose Specific Selected Folders to refresh only the folders you pick. This is handy if you have many big folders but only a few that change often.
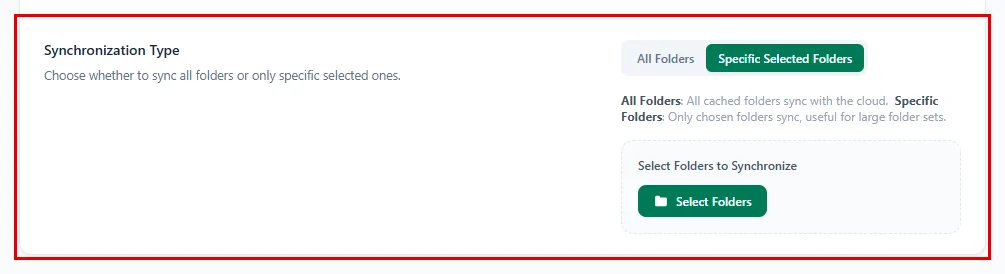
If you chose Specific Selected Folders:
- Click on Select Folders.
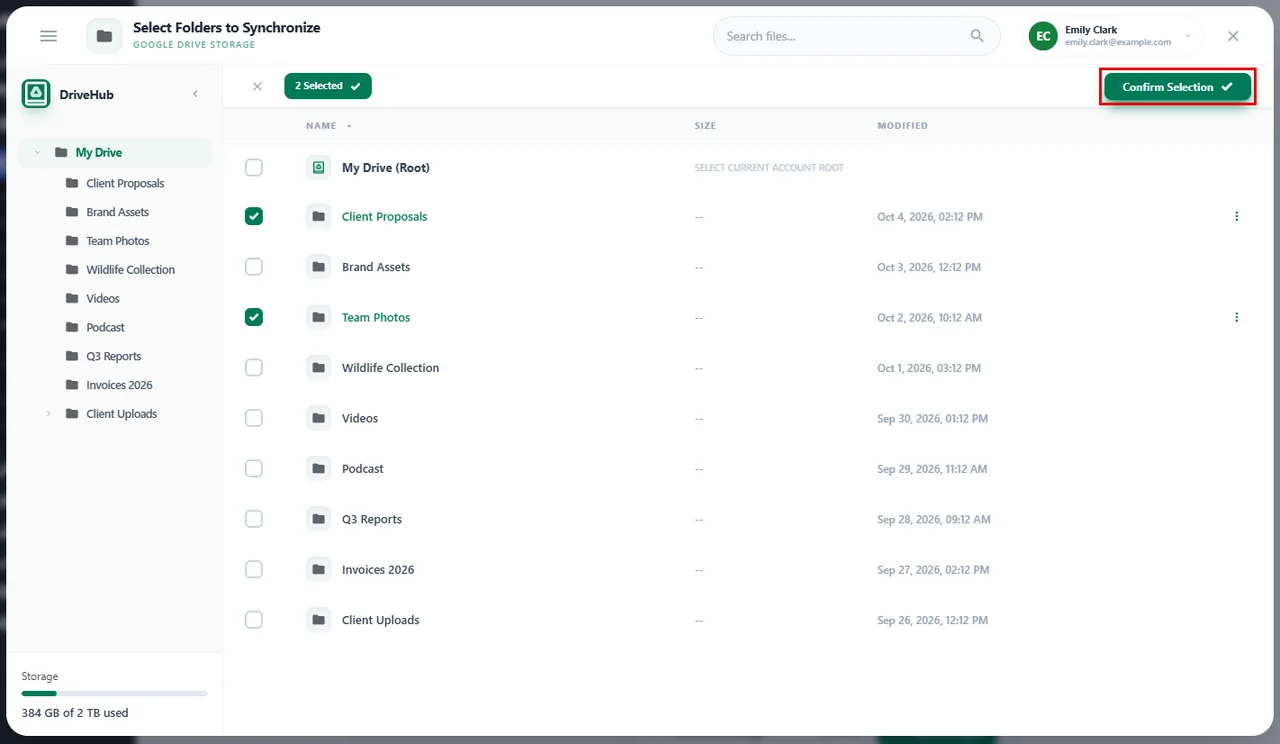
- In the Select Folders to Synchronize window, tick the folders you want (for example, Team Photos and Client Proposals).
- Click Confirm Selection.
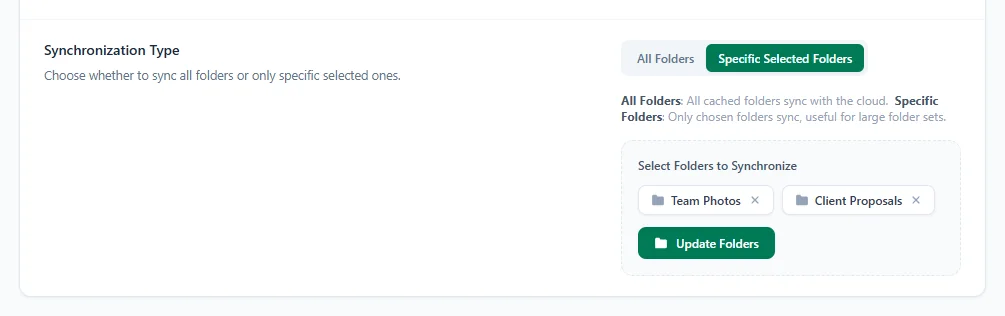
Your folders now show as small tags. Click the x on a tag to remove a folder, or click Update Folders to add more.
Then click Save changes in the bar at the bottom of the screen. Don’t forget this step, or the schedule won’t start.

Step 5: Clear the Cache Right Away (when you need it) #
Just changed something in Google Drive and want to see it on your site now, without waiting for the next sync?
- Go to DriveHub > Settings > Tools.
- In the Saving and cache group, click on Clear Cache next to Clear Cached Files.

- Click Clear cache to confirm.
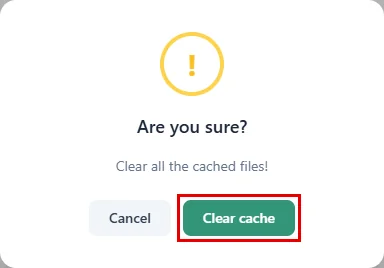
You will see Cache cleared and re-sync triggered. Reload your page and your latest Google Drive files show up.
Benefits of Keeping DriveHub in Sync #
- Always up to date: New, renamed and deleted files show up on your site by themselves.
- Fast pages: Visitors still get the quick cached list between syncs.
- Your schedule: Sync every hour, once a week, or anything in between.
- Focus on what changes: Sync only the busy folders and leave the rest alone.
- Instant fix: One click on Clear Cache when you can’t wait.
With DriveHub, your website and your Google Drive always tell the same story.


