- Step 1: Install and Activate DriveHub
- Step 2: Add your Google Account
- Step 3: Enable WPForms Integration
- Step 4: Creating a Module
- Step 5: Choose Your Google Drive Folder (Source Tab)
- Step 6: Choose File Rules (Filter Tab)
- Step 7: Change How It Looks (Advanced Tab)
- Step 8: Set Up Email Alerts (Notifications Tab)
- Step 9: Choose Who Can Use It (Permissions Tab)
- Step 10: Configuring WPForms
- Step 11: Publish the Form
Do you want people to send files straight to your Google Drive when they fill out a form on your website? You can easily do this by using DriveHub with WPForms.
This setup is super useful because it keeps your website server light since large files don’t clog up your hosting space, and it keeps all your documents neatly organized in one secure place.
Here is an easy, step-by-step guide to help you set it all up!
Step 1: Install and Activate DriveHub #
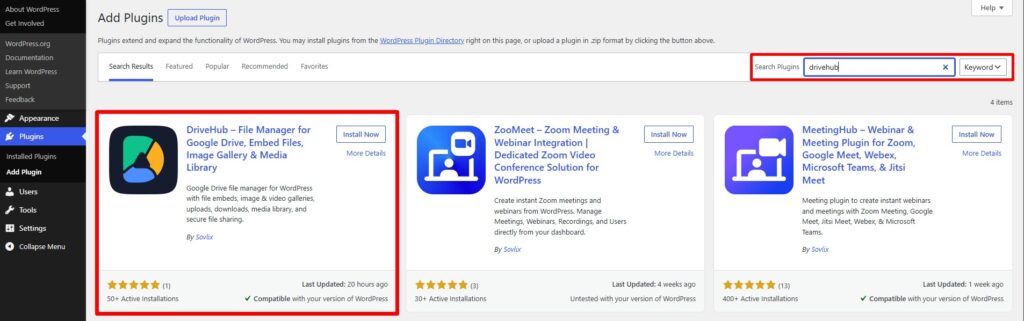
From the WordPress plugin repository install and activate Drivehub using the following method.
- Go to Plugins from your WP-Admin.
- Click on Add New.
- Search for DriveHub.
- Click Install and then Activate the plugin
Step 2: Add your Google Account #
Once activated you’ll be redirected to the Setup menu.
- Click on Start Setup
- Choose the setup method (Whole Drive/Selected Folder)
- Click on Add Account.
- Select the Google Account you want to add.
- Allow the necessary permissions.
Read our step by step setup guide to avoid any confusion.
Step 3: Enable WPForms Integration #
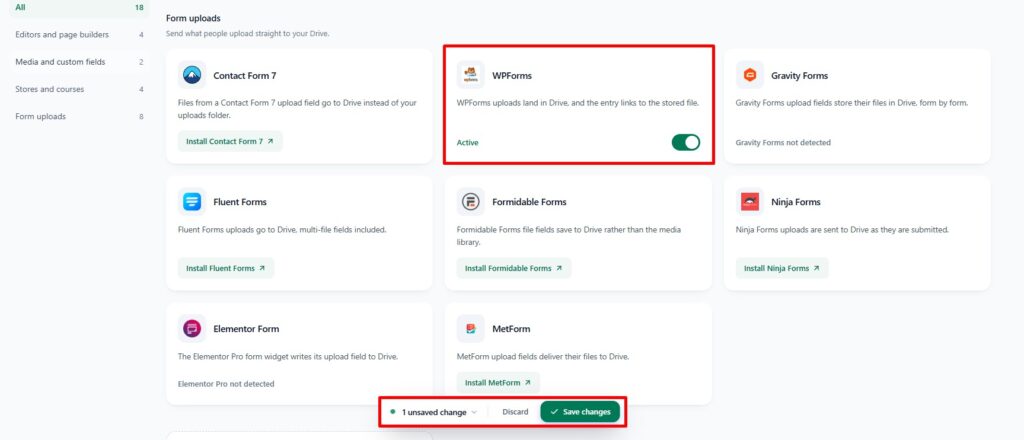
From the DriveHub settings > choose Integrations.
- Select Integrations.
- Enable WPForms
- Click Save Changes.
Step 4: Creating a Module #
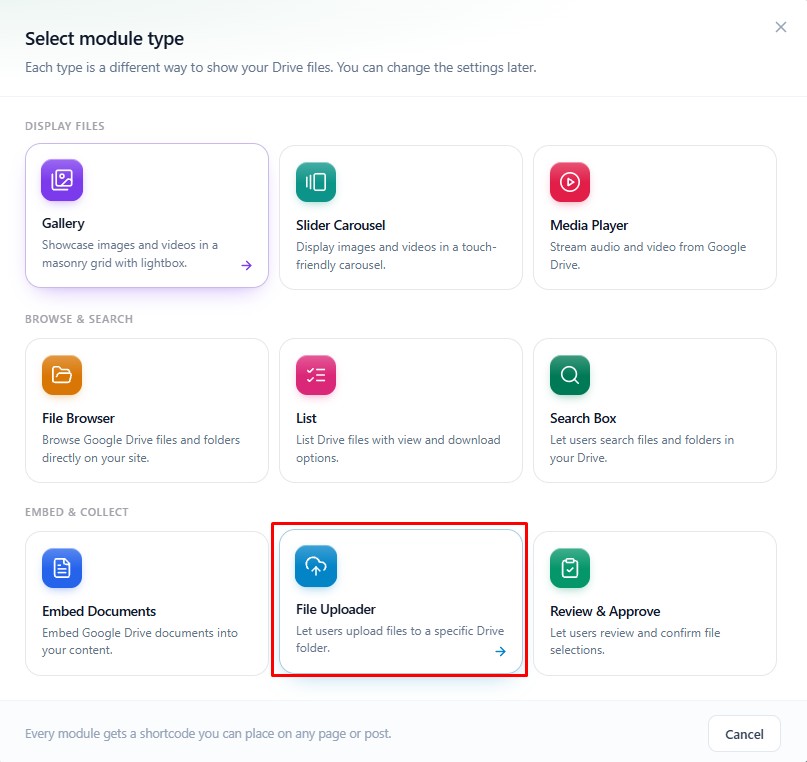
The next step is to create a module so that we can use it with the integration.
- Go to DriveHub and click on Module.
- Create a new File Uploader Module.
Step 5: Choose Your Google Drive Folder (Source Tab) #
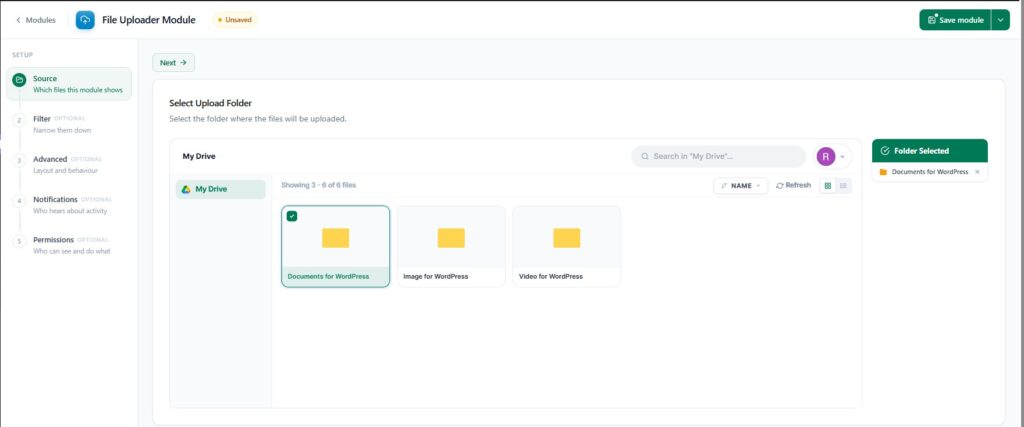
In this step, you pick where the files from your form will go:
- Go to the Source Tab.
- Pick the Google Drive folder where you want people’s uploaded files to be saved.
Step 6: Choose File Rules (Filter Tab) #
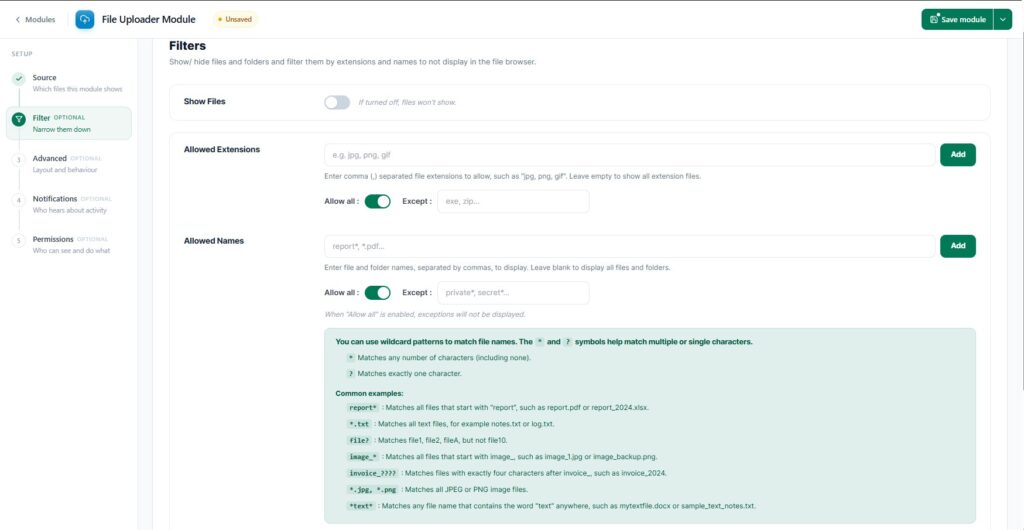
Here, you can decide what kinds of files people are allowed to send:
- Go to the Filter Tab.
- Allowed Extensions: Type in the types of files you want (like jpg, png, gif) separated by commas. If you leave this blank, people can upload any file type.
- File Limits: Choose the maximum or minimum number of files people can upload, and how big or small the file size can be.
Step 7: Change How It Looks (Advanced Tab) #
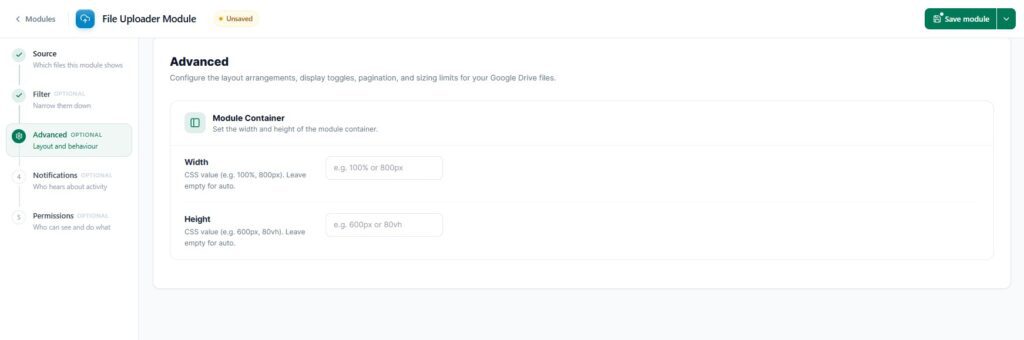
- Go to the Advanced Tab.
- Here, you can change the size and width of the upload box on your website.
Step 8: Set Up Email Alerts (Notifications Tab) #
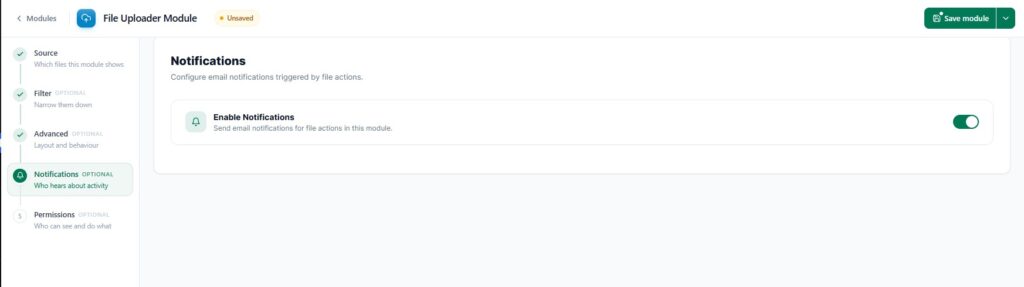
- Go to the Notifications Tab.
- Turn this on if you want to get an email every time someone uploads a file through your form.
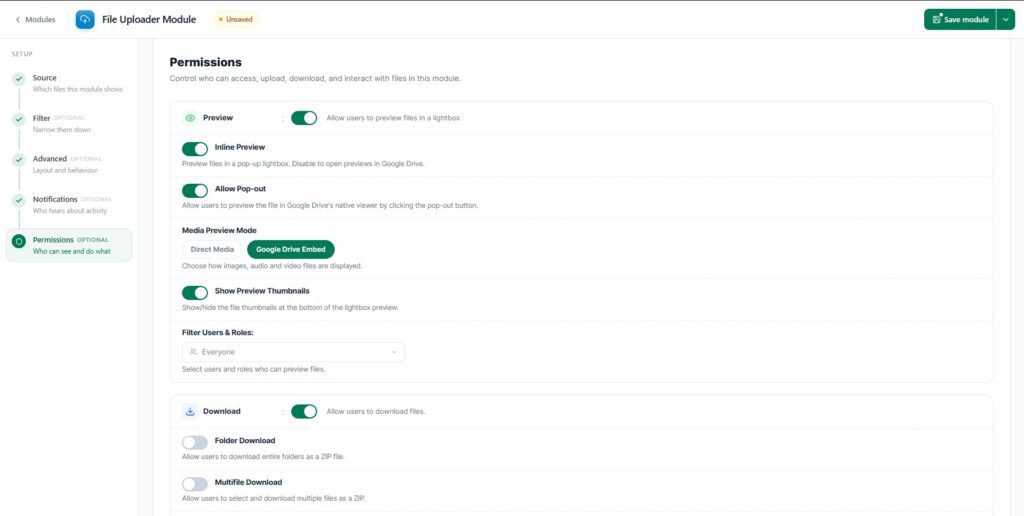
Step 9: Choose Who Can Use It (Permissions Tab) #
- Go to the Permissions Tab.
- Here, you can choose if Everyone can use the upload box, or only people who are Logged In to your website.
- You can also set a password if you want to keep the uploader extra safe.
- There are several other options to configure based on your needs and requirements.
Don’t forget to click the Save Changes button at the top right when you are finished!
Step 10: Configuring WPForms #
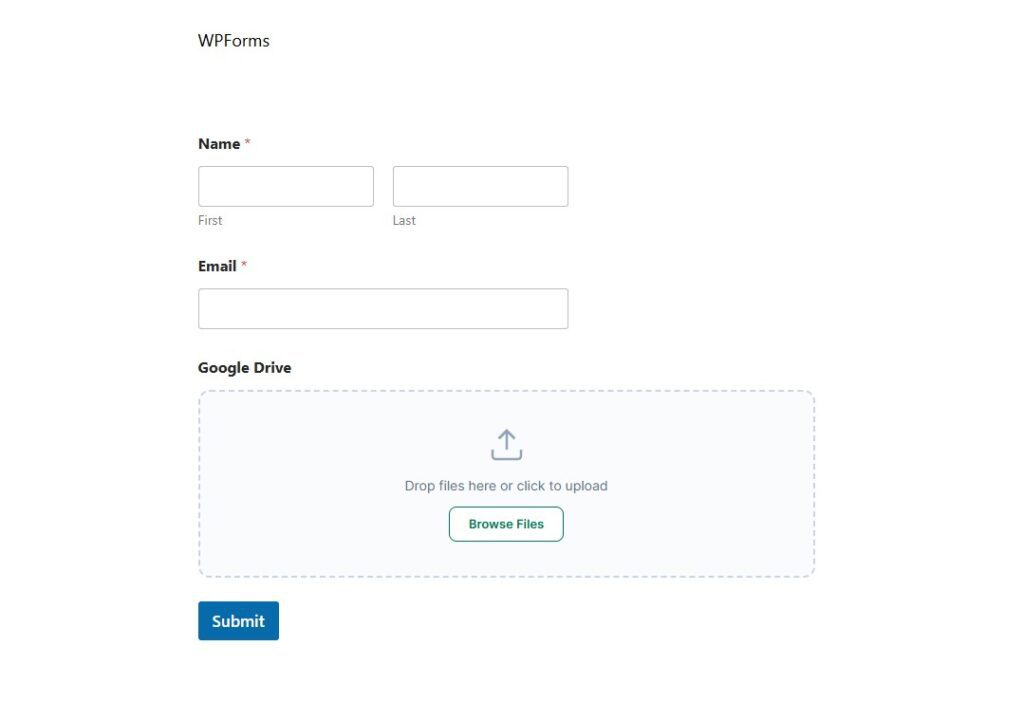
From the WPForms settings, create a New form or edit an existing one.
- Add all the necessary fields (e.g., name, email, etc.)
- From the Add Fields tab, scroll down and find the Google Drive field.
- Drag it and place it inside your form.
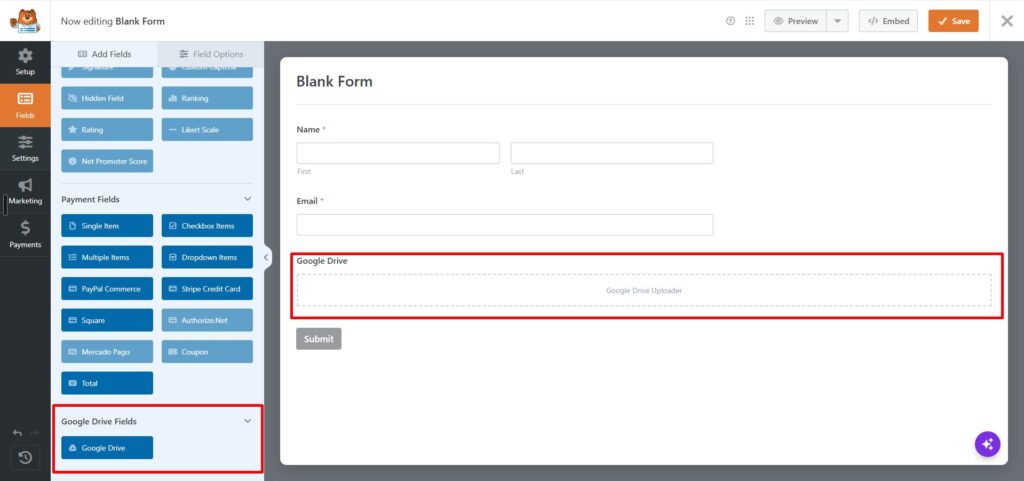
- An uploading field will be created below your form.
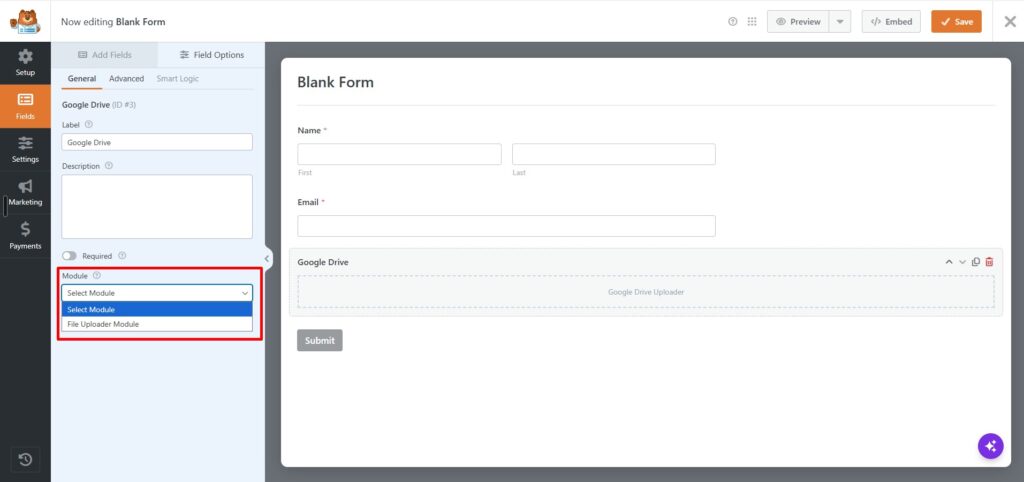
- Click on Google Drive field, then the field configuration options will open.
- Pick your module from there (e.g., File Uploader Module).
- Configure the rest of the settings according to your needs.
Step 11: Publish the Form #
Once you’re happy with all the settings, publish the form. Copy the shortcode and embed it inside one of your existing pages, or create a new page straight from the WPForms settings.
Now whenever someone uploads a file, image, or any other attachment, you will receive an email suggesting the activity and also the file or attachment will be saved inside your connected folder.