- Before you begin
- Step 1: Open the Style group
- Step 2: Set the brand colour
- Step 3: Pick a custom colour (optional)
- Step 4: Choose a button shape
- Step 5: Choose the sidebar position
- Step 6: Show or hide the thumbnail and site header
- Step 7: Set the page background
- Step 8: Choose the heading and body fonts
- Step 9: Add custom CSS (optional)
- Step 10: Check for "Not used by" hints
- Step 11: Save your changes
- What visitors see
- Benefits of customizing the meeting page style
- Troubleshooting
- My new colour does not show in the preview
- A setting shows "Not used by the … theme."
- Sidebar position has no effect
- The header and footer are hidden on one meeting only
- Page background, fonts or Custom CSS show a Pro badge
- The font looks the same after saving
- My custom CSS has no effect
- Text is hard to read on my custom background
- Frequently asked questions
- You're ready to style your meeting pages
A meeting theme sets the layout of your meeting pages. Style settings adjust that layout to match your brand. They cover the main colour, button corners, sidebar side, thumbnail, site header, page background, fonts and your own CSS.
Your meeting pages can use the same colours and buttons as the rest of your site. Below you set each style option in turn. Style settings apply to every theme, including meetings that use their own theme, so you set them once and every meeting page follows.
By the end of this guide, you will have:
- Your brand colour on buttons, countdowns and highlights
- A button shape that matches your site
- The sidebar, thumbnail and site header set the way you want
- A page background, heading font and body font that fit your brand, if you use ZooMeet Pro
- Your own CSS on meeting pages, if you need a change no setting covers
- Your style saved and live on every meeting page
Estimated setup time: 5 minutes. Each setting has a default you can go back to at any time.
Before you begin #
Make sure you have:
- ZooMeet installed and activated
- An administrator account on the site
- At least one published meeting, so you can check the result
- ZooMeet Pro activated, if you want Page background, Heading font, Body font or Custom CSS
Let’s get started.
Step 1: Open the Style group #
Style settings sit right below the theme gallery, so you can see which theme they apply to.
- In the WordPress admin menu, go to ZooMeet > Settings.
- Under Appearance, click Event themes.
- Scroll below the theme gallery to the Style group. Its summary reads Applies to every theme.
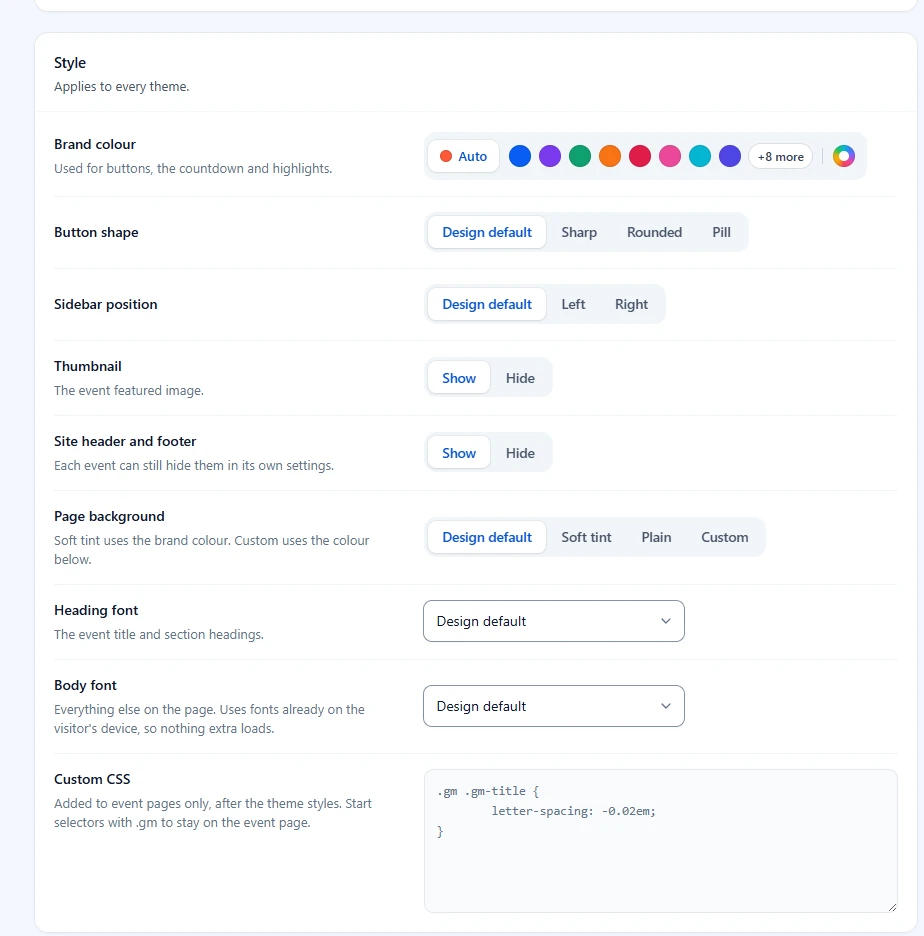
Note: Without ZooMeet Pro, Page background, Heading font, Body font and Custom CSS show a Pro badge and an Upgrade link. The other five settings work in the free plugin.
Step 2: Set the brand colour #
Brand colour is “Used for buttons, the countdown and highlights.”, so it is the setting visitors notice first.
- In Brand colour, click a colour dot, for example the red dot, Rose.
- Check the hex code of the chosen colour at the end of the row.

To go back to the theme’s own colour, click Auto.
Note: Auto uses each theme’s built-in colour. The small dot beside Auto shows that colour for the theme selected in the gallery.
Step 3: Pick a custom colour (optional) #
If none of the presets matches your brand, pick the exact colour yourself.
- Click the rainbow circle at the end of the colour row.
- Drag in the colour square and the hue slider, or type a hex code in the field below them.
- Click outside the picker, or press Esc, to close it.
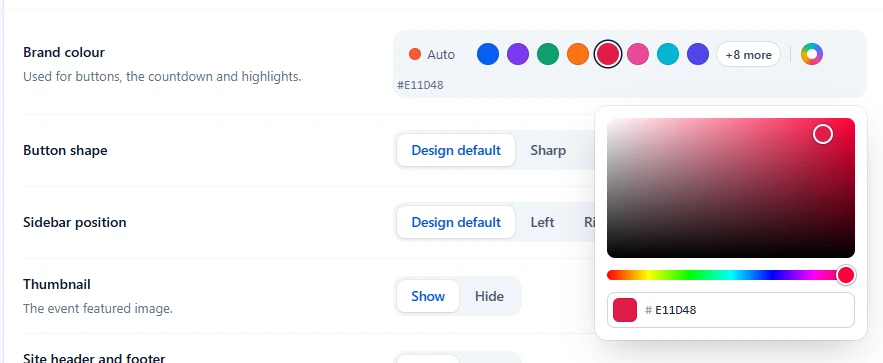
Tip: Colours you pick here are kept in a Recent row inside the picker, so you can reuse them later.
Step 4: Choose a button shape #
Button shape changes the join buttons and every other button on the meeting page.
- In Button shape, click one option:
– Design default keeps the theme’s own corners.
– Sharp gives square corners.
– Rounded gives softly rounded corners.
– Pill gives fully round ends.

Step 5: Choose the sidebar position #
Many themes put the meeting details in a column beside the main content. You decide which side it sits on.
- In Sidebar position, click Design default, Left or Right.

Design default keeps the side each theme was drawn with.
Step 6: Show or hide the thumbnail and site header #
Hiding the thumbnail or your site header gives the meeting more room on the page.
- In Thumbnail, click Show or Hide. The thumbnail is “The meeting featured image.”
- In Site header and footer, click Show or Hide. Hide removes your WordPress theme header and footer from meeting pages.
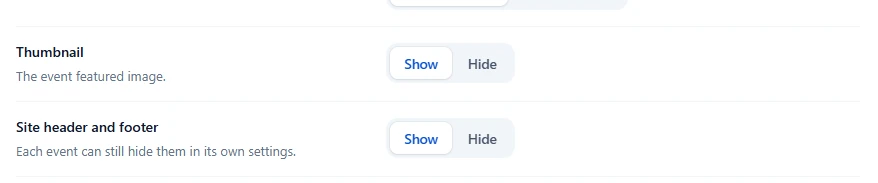
Tip: A single meeting can hide the header and footer with Hide header and footer in its Page design step, even when this setting is Show.
Step 7: Set the page background #
The page background sits behind the whole meeting page, so it sets the mood more than any other setting.
Note: Page background and Custom background colour require ZooMeet Pro.
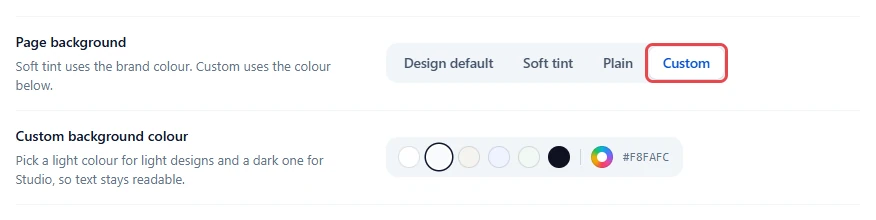
- In Page background, click one option:
– Design default keeps the theme’s own background.
– Soft tint uses a light shade of your brand colour.
– Plain uses plain white, or near black on the dark Studio theme.
– Custom uses a colour you pick. - If you clicked Custom, a new row appears: Custom background colour. Click a preset, or click the rainbow circle for any colour.
Step 8: Choose the heading and body fonts #
Fonts change the voice of the page more than colour does. ZooMeet uses fonts already on the visitor’s device, so nothing extra loads and the page stays fast.
Note: Heading font and Body font require ZooMeet Pro.
- Click the Heading font list. It sets “The meeting title and section headings.”
- Pick a font, for example Serif or Rounded sans.
- Click the Body font list and pick a font for everything else on the page.
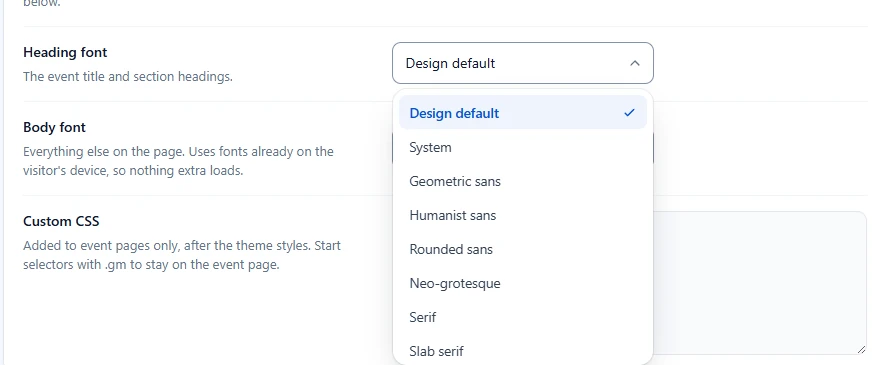
Tip: A serif heading with a sans-serif body is a safe pairing. Keep Monospace for headings on technical events; it is hard to read as body text.
Step 9: Add custom CSS (optional) #
When no setting covers what you want, add your own CSS. It is “Added to meeting pages only, after the theme styles”, so it wins over them.
Note: Custom CSS requires ZooMeet Pro, and only administrators can change it.
- Click in the Custom CSS box.
- Type your CSS. Start each selector with
.gmso it only touches the meeting, for example:
.gm .gm-title {
    letter-spacing: -0.02em;
}
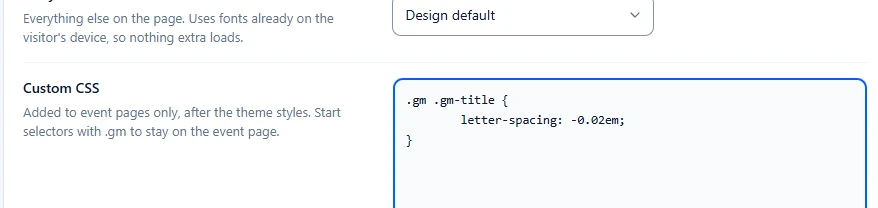
Important: HTML and style tags are removed when you save. Custom CSS takes CSS only.
Step 10: Check for “Not used by” hints #
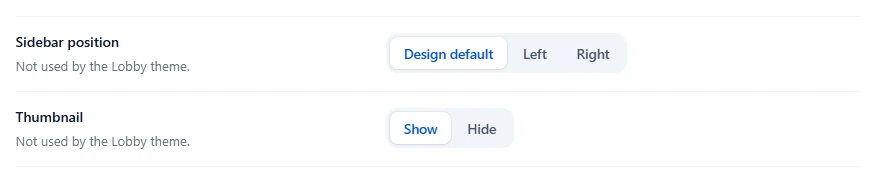
Some themes do not use every setting. If the theme selected in the gallery ignores one, its row shows a hint instead of the help text. For example: Not used by the Lobby theme.
- Read the hint under each row.
- Keep or change the setting as you like. It stays editable, because meetings that use their own theme can still use it.
Step 11: Save your changes #
Nothing changes on your site until you save. As soon as you change a setting, a bar appears at the bottom of the screen with You have unsaved changes.
- Click Save changes.
- Wait for the confirmation message, Appearance saved.

To drop every change since the last save, click Discard instead.
What visitors see #
Open a meeting page in a private browser window. The style applies on top of the meeting’s theme. Here is the Intro to Product Design meeting with the Paper theme, before and after.
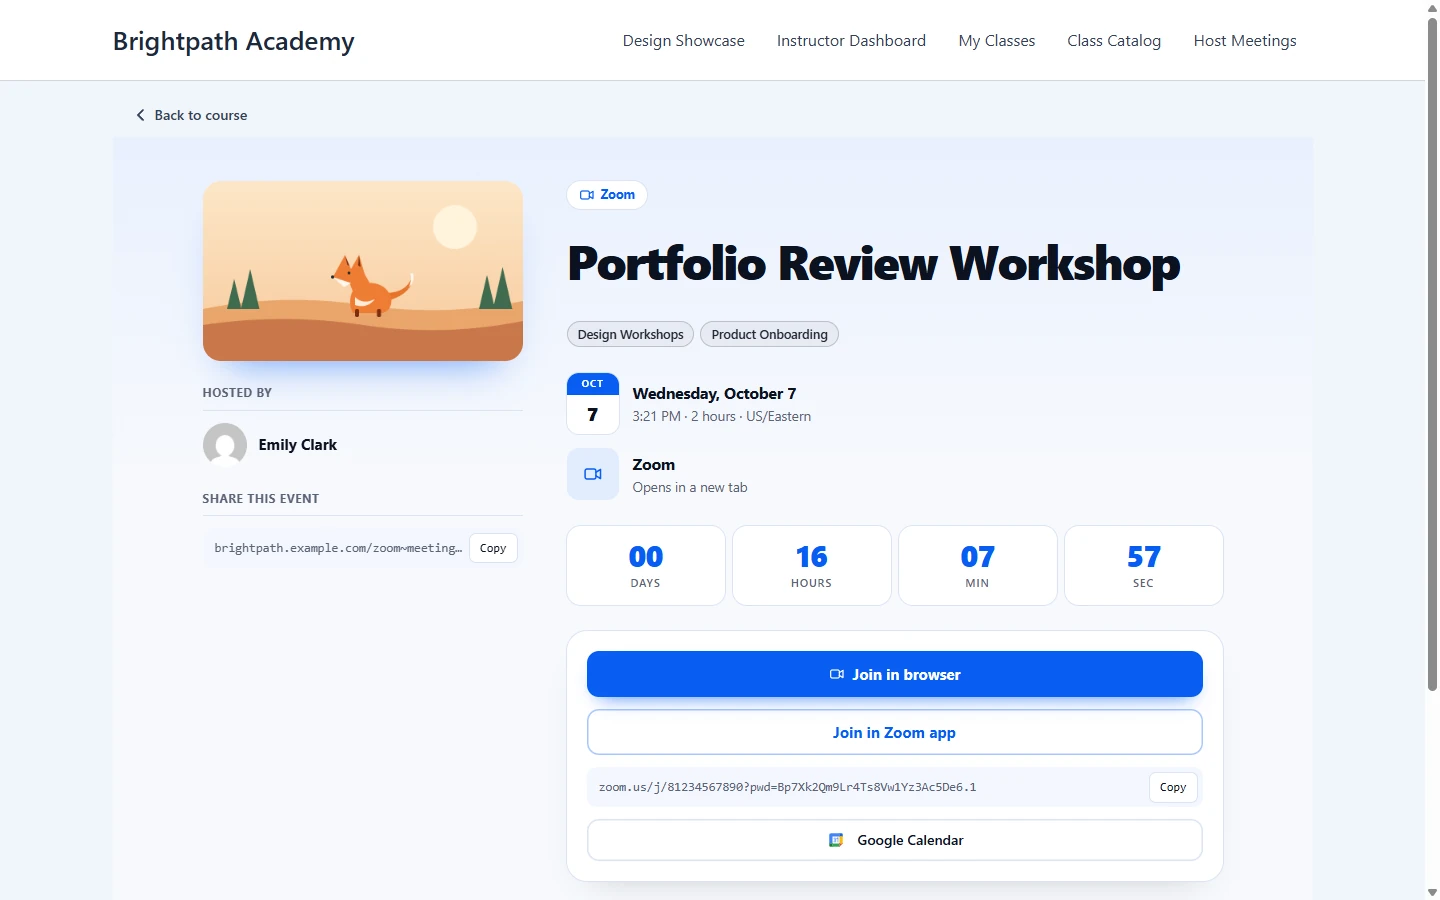
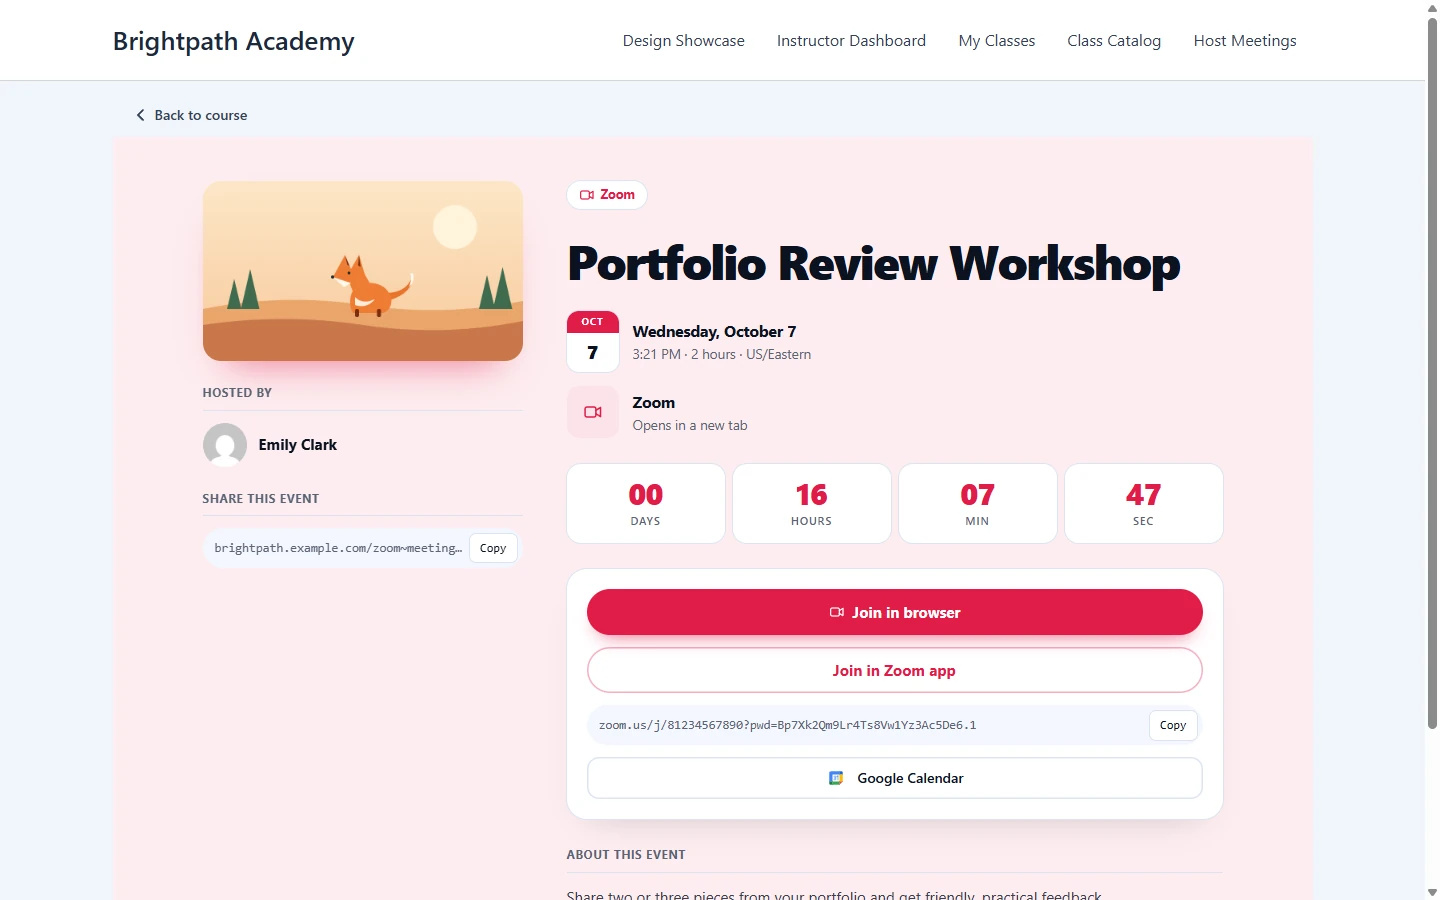
Note: This meeting uses Paper as its own theme, while the site default is a different theme. Style settings still apply, because they apply to every theme.
Benefits of customizing the meeting page style #
- Your colour on every theme: Buttons, countdowns and highlights use your brand colour, whichever theme a meeting has.
- One setting for all meetings: Style applies to meetings with their own theme too, so you never style meetings one by one.
- More room when you need it: Hide the thumbnail or your site header for a cleaner page.
- An easy way back: Every setting has a default, and Discard drops changes you have not saved.
Troubleshooting #
My new colour does not show in the preview #
Preview on latest meeting shows the selected theme only. Style changes apply after saving. Click Save changes, then reload the meeting page.
A setting shows “Not used by the … theme.” #
The theme selected in the gallery does not support that setting. For example, Lobby and Consult have no sidebar and no thumbnail. No action is needed. The setting still applies to meetings that use a theme that supports it.
Sidebar position has no effect #
Check that:
- Sidebar position is set to Left or Right, not Design default.
- The meeting uses a theme with a sidebar, such as Classic or Paper.
The header and footer are hidden on one meeting only #
That meeting has Hide header and footer turned on in its Page design step.
- Edit the meeting and open Page design.
- Turn off Hide header and footer.
- Click Update meeting.
Page background, fonts or Custom CSS show a Pro badge #
These settings come with ZooMeet Pro. Activate ZooMeet Pro, then reload the Event themes tab.
The font looks the same after saving #
ZooMeet uses fonts already on the visitor’s device. If a device has none of the fonts in that family, it falls back to a similar one, which can look close to the theme’s own. Try a family with a clearer shape, such as Serif or Slab serif, then reload the meeting page.
My custom CSS has no effect #
Check that:
- Your selectors start with
.gm, for example.gm .gm-title. - You clicked Save changes and reloaded the meeting page.
- Your account is an administrator. For other roles, the saved CSS stays as it was.
Text is hard to read on my custom background #
The custom colour is too dark for a light theme, or too light for Studio. Pick a light colour for light themes and a dark one, such as Night, for Studio.
Frequently asked questions #
Do style settings apply to meetings with their own theme? #
Yes. Style settings apply to every theme, including meetings that picked their own.
Can one meeting have its own brand colour? #
No. Brand colour and the other style settings are site-wide. Each meeting can pick its own theme, and hide its sidebar or header and footer, in its Page design step.
How do I go back to the original look? #
Set Brand colour to Auto, set Thumbnail and Site header and footer to Show, set every other setting to Design default, and empty the Custom CSS box. Then click Save changes.
Does Hide in Site header and footer affect other pages? #
No. It only removes the header and footer from ZooMeet meeting pages.
You’re ready to style your meeting pages #
Your meeting pages now use your brand colour and button shape on every theme. Next, pick the theme that fits your meetings, or give one meeting its own theme.


