- Step 1: Install Elementor Website Builder
- Step 2: Install and Activate DriveHub
- Step 3: Activate and Connect Google Account to DriveHub
- Step 4: Enable Elementor Integration
- Step 5: Edit with Elementor
- Step 6: Selecting Widget & Choosing a Module
- Step 7: Creating a Module
- Step 8: Choose Your Files
- Step 9: Choose File Rules (Filter Tab)
- Step 10: Change How It Looks (Advanced Tab)
- Step 11: Set Up Email Alerts (Notifications Tab)
- Step 12: Choose Who Can Use It (Permissions Tab)
- Step 12: Publish Your Page
- Benefits of Using Google Drive Files in Elementor
If you’re looking for a simple way to use Google Drive files in Elementor, you’re in the right place. In this guide, we’ll show you how to connect and use your Google Drive files with the Elementor page builder, step by step.
Let’s get started!!
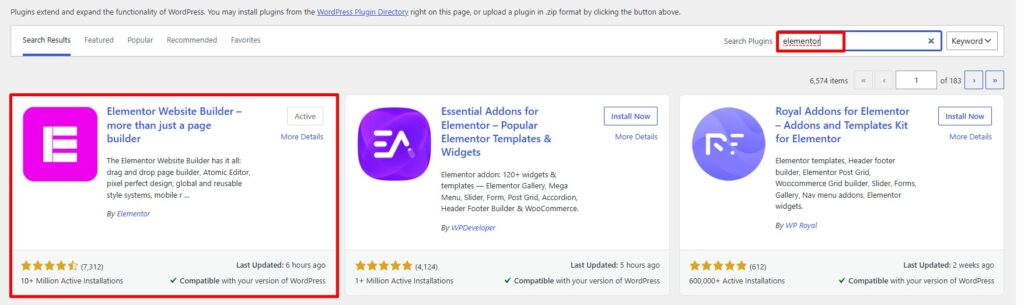
Step 1: Install Elementor Website Builder #
First you need to make sure that Elementor is installed and activated on your site.
- From your WordPress admin, click on Plugins > Add New.
- Search for Elementor
- Click Install then Activate.
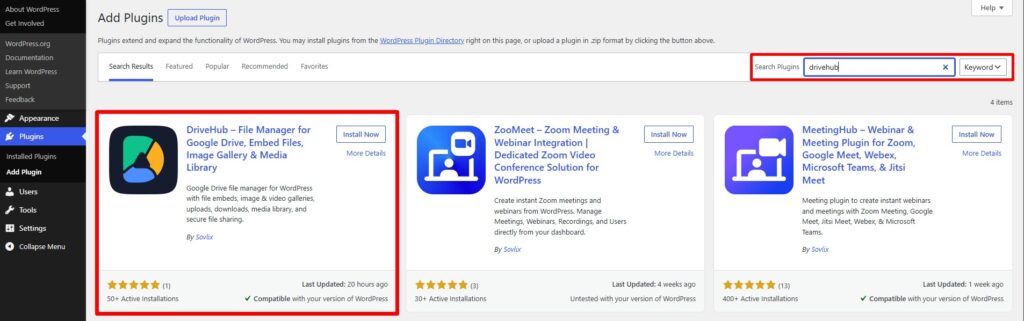
Step 2: Install and Activate DriveHub #
Similar to Elementor you need to install DriveHub on your WordPress site.
- From your WordPress admin, click on Plugins > Add New.
- Search for DriveHub
- Click Install then Activate.
Step 3: Activate and Connect Google Account to DriveHub #
Once DriveHub is activated you’ll be redirected to the Setup menu.
- Click on Start Setup
- Choose the setup method (Whole Drive/Selected Folder)
- Click on Add Account.
- Select the Google Account you want to add.
- Allow the necessary permissions.
Read our step by step setup guide to avoid any confusion.
Step 4: Enable Elementor Integration #
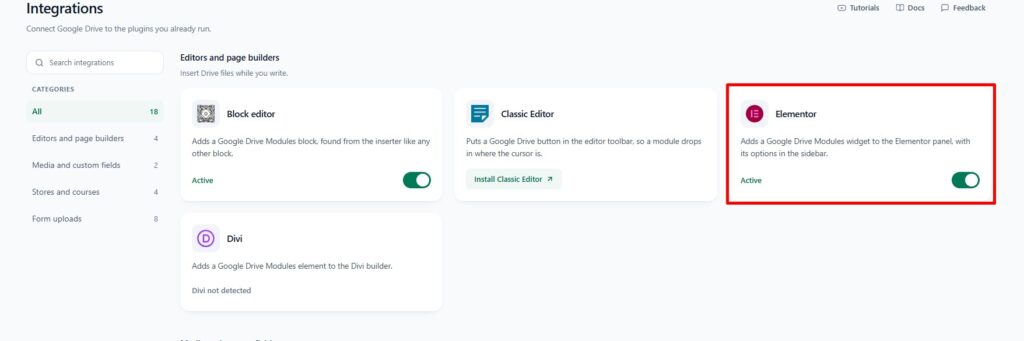
The next step is to enable the Elementor integration inside DriveHub.
From the DriveHub settings > choose Integrations.
- Select Integrations.
- Enable Elementor.
- Click Save Changes.
Step 5: Edit with Elementor #
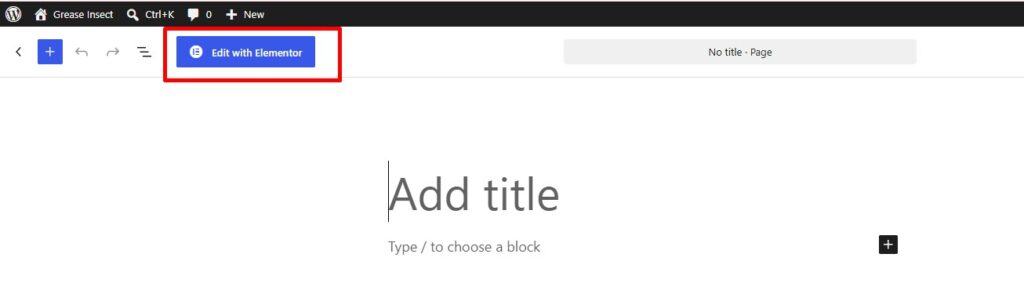
- Create a New Page/Post or head over to your Existing Post/Page where you want to display modules.
- Click on Edit with Elementor.
This will allow the Elementor page builder to start working.
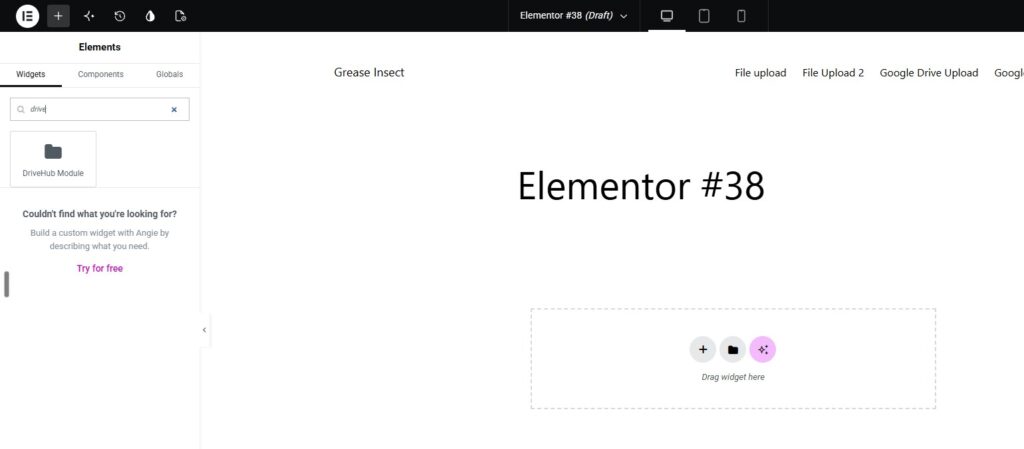
Step 6: Selecting Widget & Choosing a Module #
First you need to search for the DriveHub inside Elementor widgets. Once the widget is there you can just drag it and drop it inside your page.
Step 7: Creating a Module #
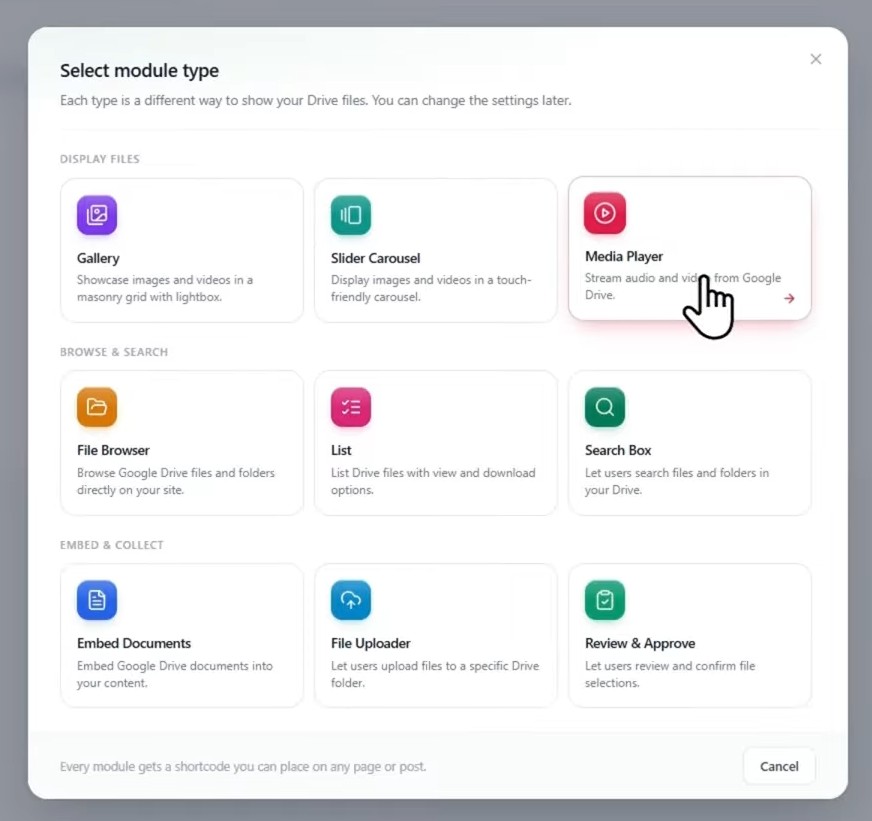
You can now choose an existing module or create a new one. Driveup offers a variety of modules. You can create-
- Image gallery
- Slider carousel
- Media player
- File browser
- Document embedder
- File Uploader, and a lot more.
Based on your need you can pick whichever module you want.
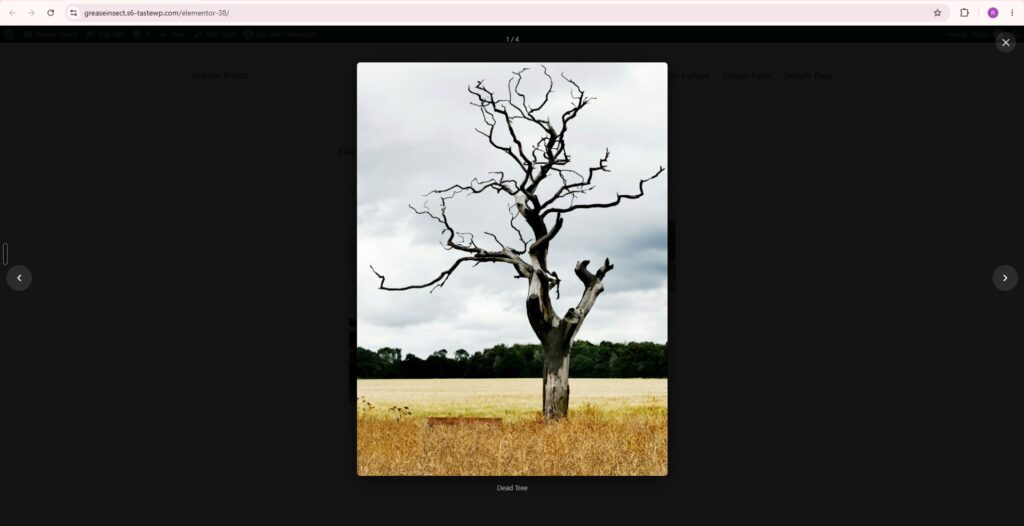
We’ll just pick the gallery module.
Step 8: Choose Your Files #
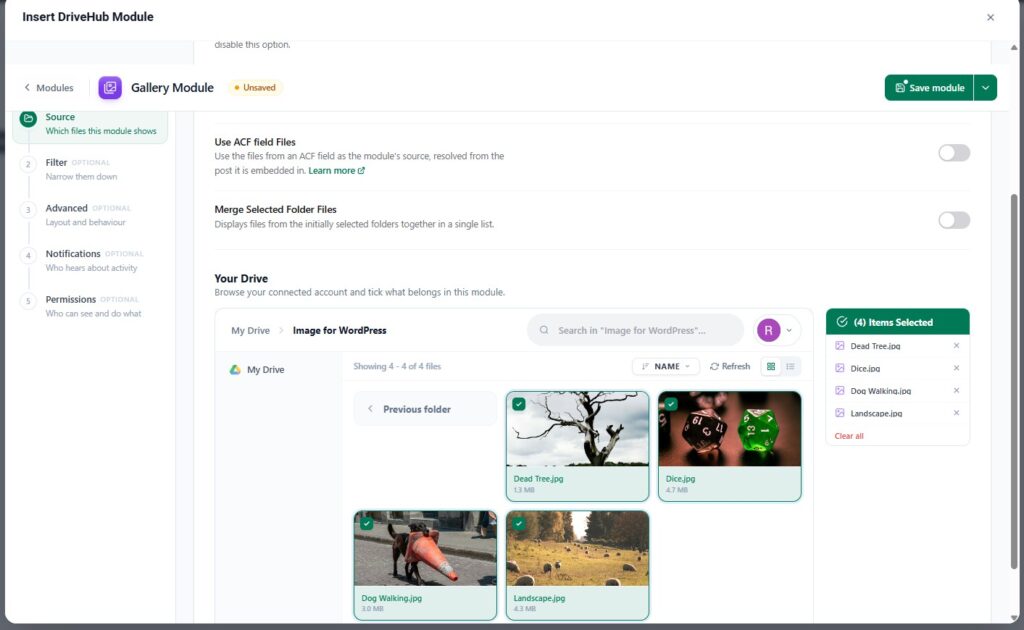
In this step, you pick which files you want to show inside your elementor site.
- Go to the Source Tab.
- Navigate to your desired folder.
- Pick the Google Drive images you want to showcase.
Step 9: Choose File Rules (Filter Tab) #
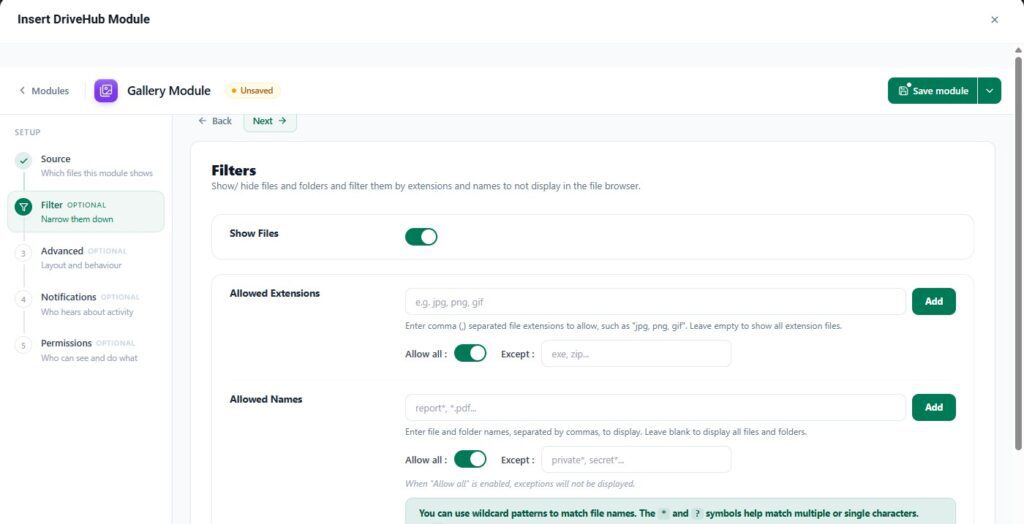
Here, you can decide what kinds of files people are allowed to send:
- Go to the Filter Tab.
- Allowed Extensions: Type in the types of files you want (like jpg, png, gif) separated by commas. If you leave this blank, people can upload any file type.
- File Limits: Choose the maximum or minimum number of files people can upload, and how big or small the file size can be.
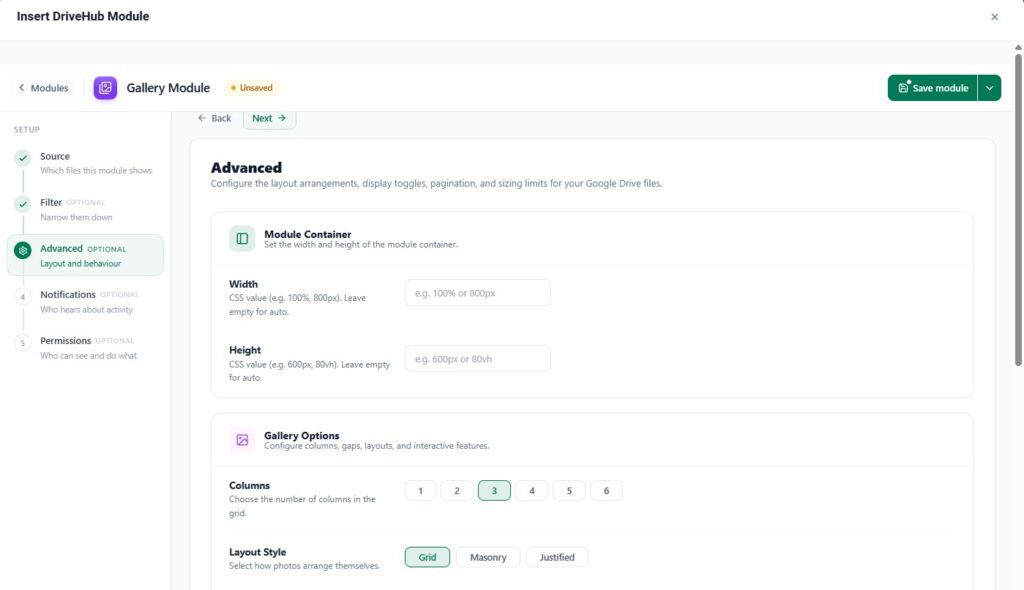
Step 10: Change How It Looks (Advanced Tab) #
- Go to the Advanced Tab.
- Here, you can change the height and width of the module container.
- Configure the number of columns shown
- Choose image resolution, gap between each image
- Add sorting options.
- And do a lot more.
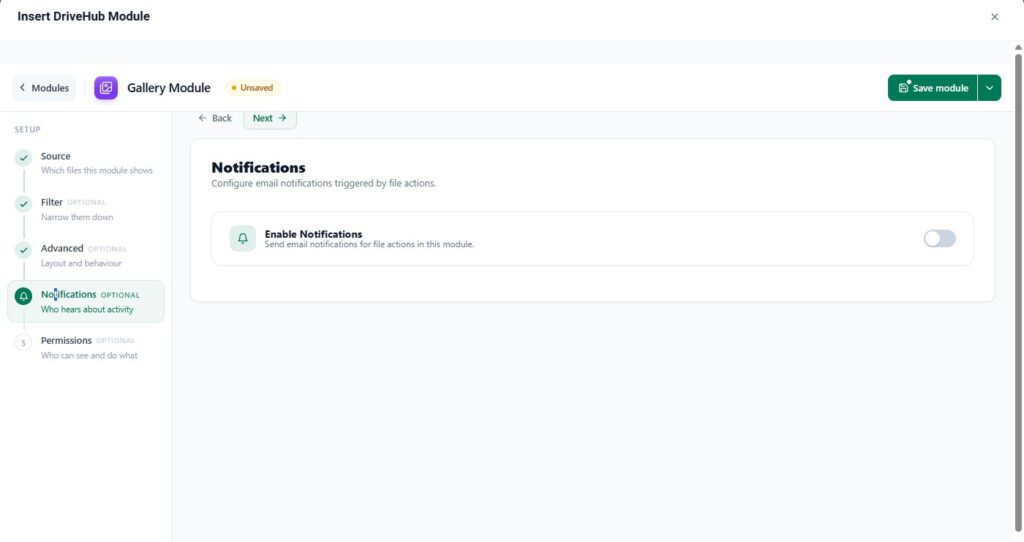
Step 11: Set Up Email Alerts (Notifications Tab) #
- Go to the Notifications Tab.
- Turn this on if you want to get an email every time someone uploads a file through your form.
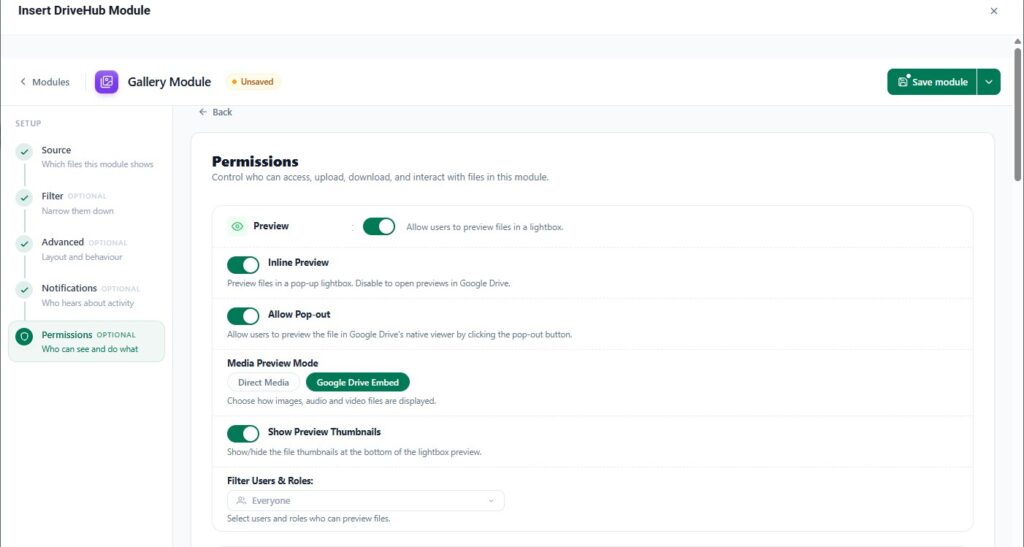
Step 12: Choose Who Can Use It (Permissions Tab) #
- Go to the Permissions Tab.
- Modify download options.
- Allow sharing option.
- Add a password for extra security
- Configure who can view the image: logged-in user or everyone.
- And do a lot more.
Don’t forget to click the Save Changes button at the top right when you are finished!
Step 12: Publish Your Page #
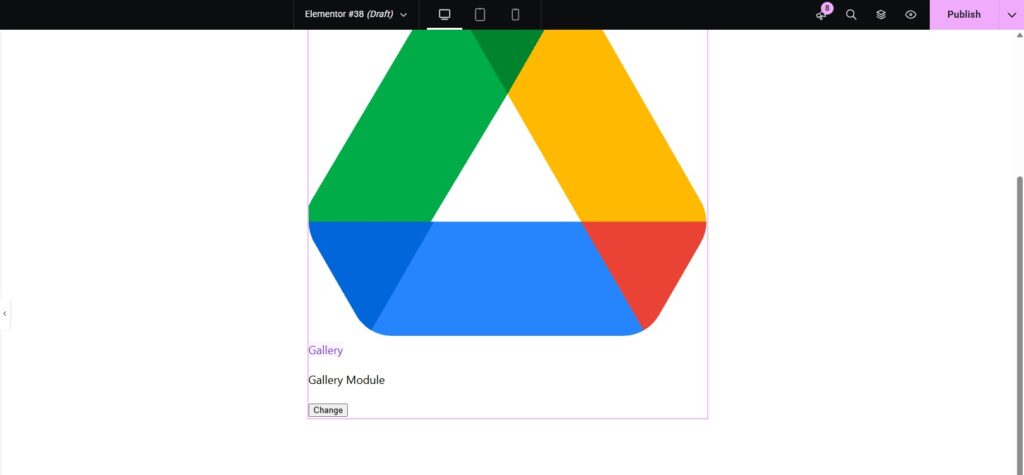
Once you’re happy with all the changes make sure to publish the page. And that’s it. Your Google Drive files are now live inside your Elementor website.
Benefits of Using Google Drive Files in Elementor #
Using Google Drive files in Elementor can make your WordPress workflow simpler and more flexible. Some key benefits include:
- Save WordPress storage: Keep your files in Google Drive instead of uploading everything to your WordPress Media Library.
- Easy file management: Manage and organize your images, videos, PDFs, and documents directly from Google Drive.
- Display different file types: Showcase galleries, videos, documents, PDFs, and more using DriveHub modules.
- Reduce file duplication: Use files already stored in Google Drive without maintaining unnecessary copies on your website.
- More control: Configure how files are displayed, including layouts, sorting, permissions, downloads, and access settings.
With DriveHub and Elementor, you can bring your Google Drive content directly into your WordPress pages without complicating your workflow.


