- Step 1: Install DriveHub and Connect Google Drive
- Step 2: Open the Private Folders Settings
- Step 3: Create Folders for New Users Automatically
- Step 4: Choose the Folder Name and Location
- Step 5: Decide on Sharing and Cleanup
- Step 6: Save Your Changes
- Step 7: Link Folders to Existing Users (Members' Files Tab)
- Step 8: Show Each User Their Own Folder on Your Site
- Benefits of Private Folders
Do you want every client, student or team member to have their own Google Drive folder that only they can see on your website? You can easily do this with DriveHub.
With Private Folders, DriveHub links a Google Drive folder to each WordPress user. It can create the folders for you when people sign up, or you can link folders by hand. Then one module on one page shows every logged-in user their own files, and nobody else’s.
Note: This needs DriveHub Pro.
Here is an easy, step-by-step guide to help you set it all up!
Step 1: Install DriveHub and Connect Google Drive #
First, make sure DriveHub and DriveHub Pro are installed and your Google account is connected:
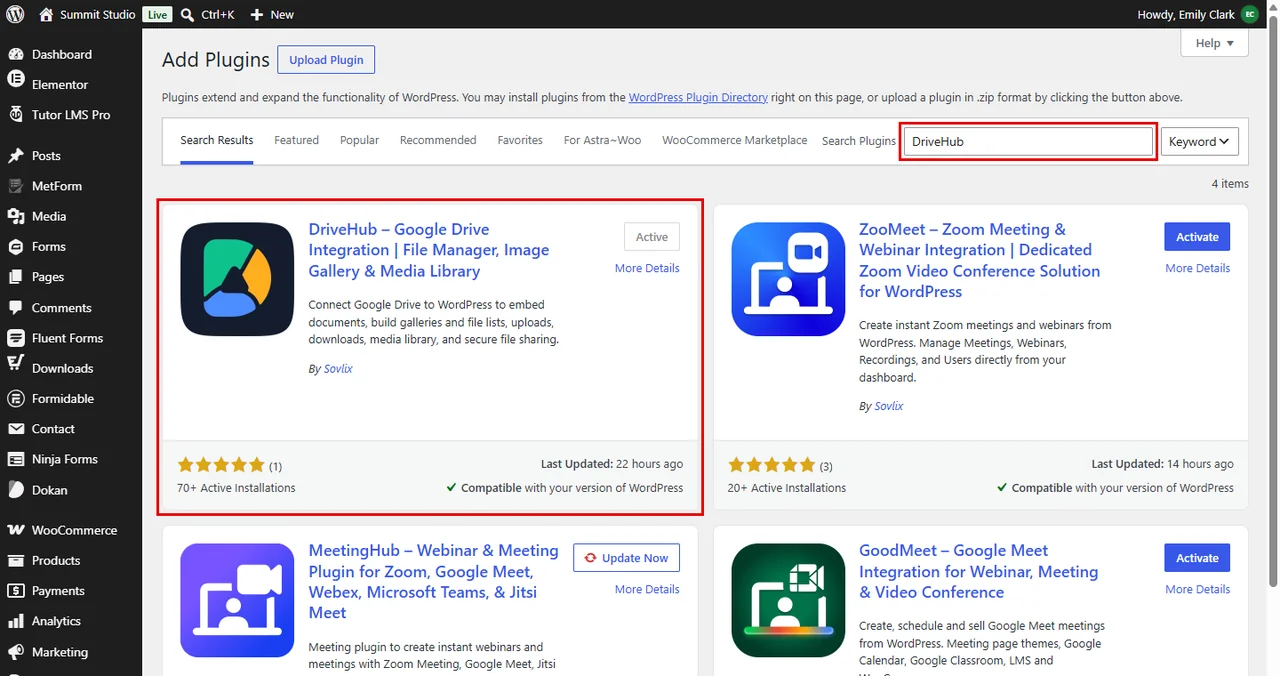
- From your WordPress admin, click on Plugins > Add New.
- Search for DriveHub, click Install and then Activate.
- Install and activate DriveHub Pro as well. Our guide on how to install and activate DriveHub Pro shows each step.
- Follow the setup screen to add your Google account.
Read our step by step setup guide to avoid any confusion.
Step 2: Open the Private Folders Settings #
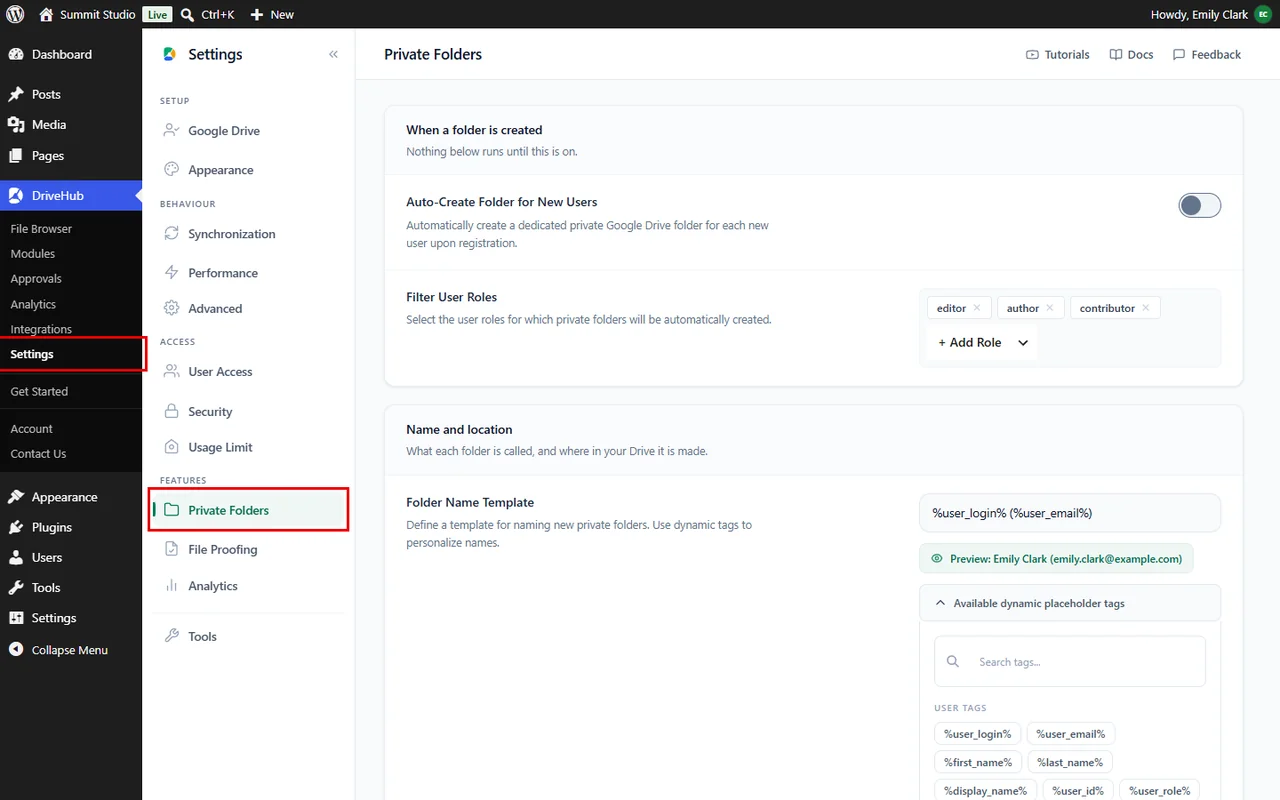
- Go to DriveHub > Settings from your WP-Admin.
- Click on Private Folders under Features in the settings menu.
Step 3: Create Folders for New Users Automatically #
If you want DriveHub to make a folder for each person who registers on your site:
- Turn on Auto-Create Folder for New Users.
- Under Filter User Roles, click + Add Role and pick the roles that should get a folder, for example Subscriber. Click the small × on a role to take it off.
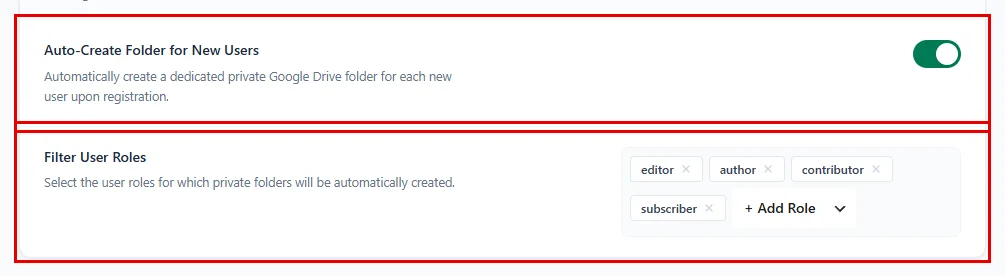
Nothing else on this screen runs until Auto-Create Folder for New Users is on. Leave Filter User Roles empty to give a folder to every new user.
Step 4: Choose the Folder Name and Location #
In the Name and location section, you decide what each folder is called and where it lives in your Drive:
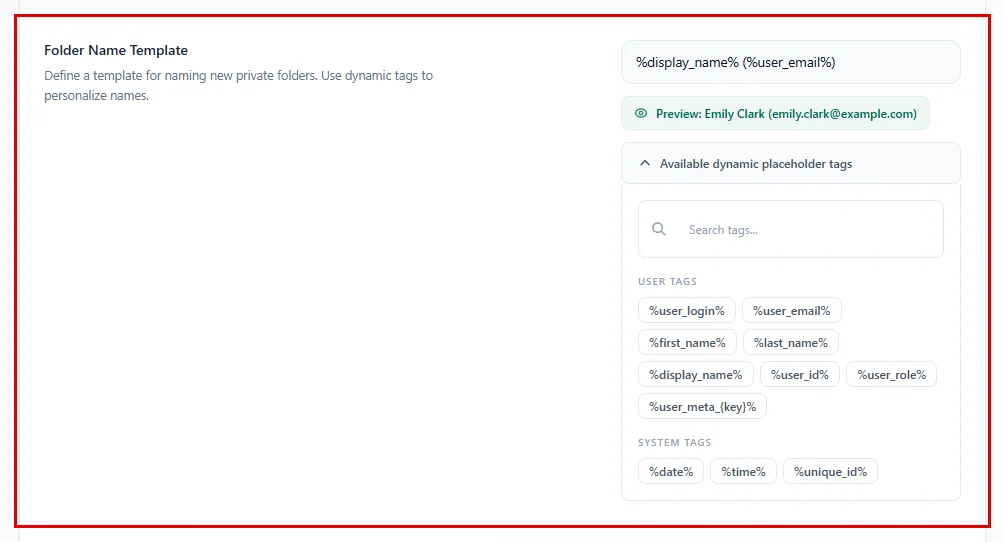
- Folder Name Template: Type how each folder should be named. Click any tag under Available dynamic placeholder tags to add it, for example
%display_name% (%user_email%). The Preview line shows what a real folder name will look like. - User Tags:
%user_login%,%user_email%,%first_name%,%last_name%,%display_name%,%user_id%,%user_role%and%user_meta_{key}%. - System Tags:
%date%,%time%and%unique_id%.
- Parent Folder: Click Select Parent Folder, pick a folder such as Client Uploads in the window and click Confirm Selection. Every new private folder is created inside it.
- Template Folder: Click Select Template Folder and pick a folder that holds your welcome files, like Onboarding Pack.pdf. Its files and subfolders are copied into each new private folder, so everyone starts with the same welcome files.
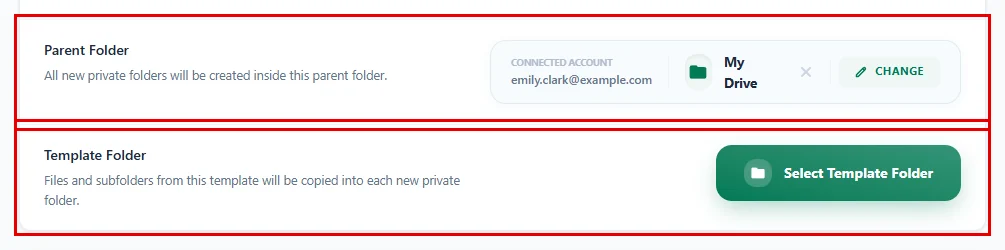
Tip: Use a parent folder. Without one, every private folder lands in the top level of your Drive.
Step 5: Decide on Sharing and Cleanup #
Here, you set a few last options:
- Share Folder with User: Turn this on to share each folder with the user’s email in Google Drive, so they can open it in their own Drive too.
- Merge Folders: Keep this on to reuse a folder that already has the same name, instead of making a duplicate.
- Private Folders in Admin Dashboard: Turn this on to manage private folders from the dashboard. It also adds the Members’ Files tab you’ll use in Step 7.
- Delete Private Folders on User Delete: Turn this on to delete a user’s private Google Drive folder when you delete their WordPress account. Leave it off if you want to keep their files.
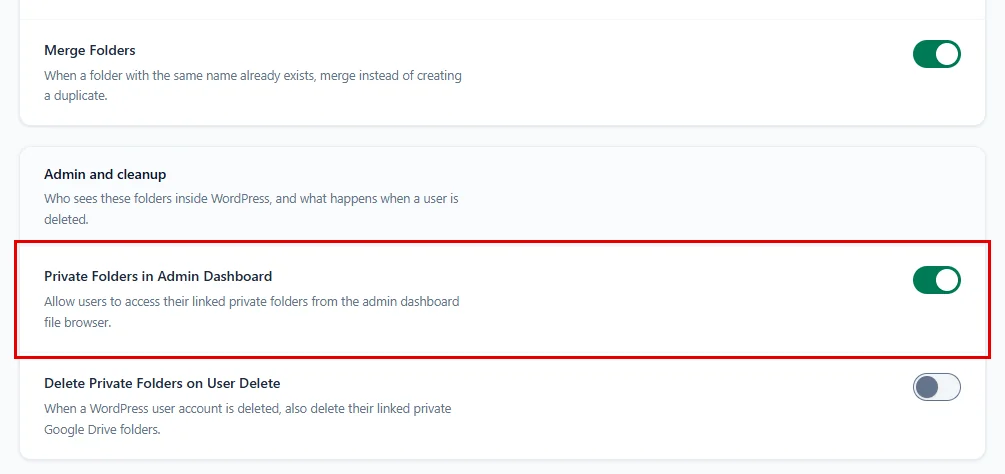
Step 6: Save Your Changes #
- Click on Save changes in the bar at the bottom of the screen.

Don’t forget to save; the new settings only apply after you click Save changes.
Step 7: Link Folders to Existing Users (Members’ Files Tab) #
Users who signed up before you turned this on don’t have a folder yet. You can link one by hand:
- Go to DriveHub > File Browser.
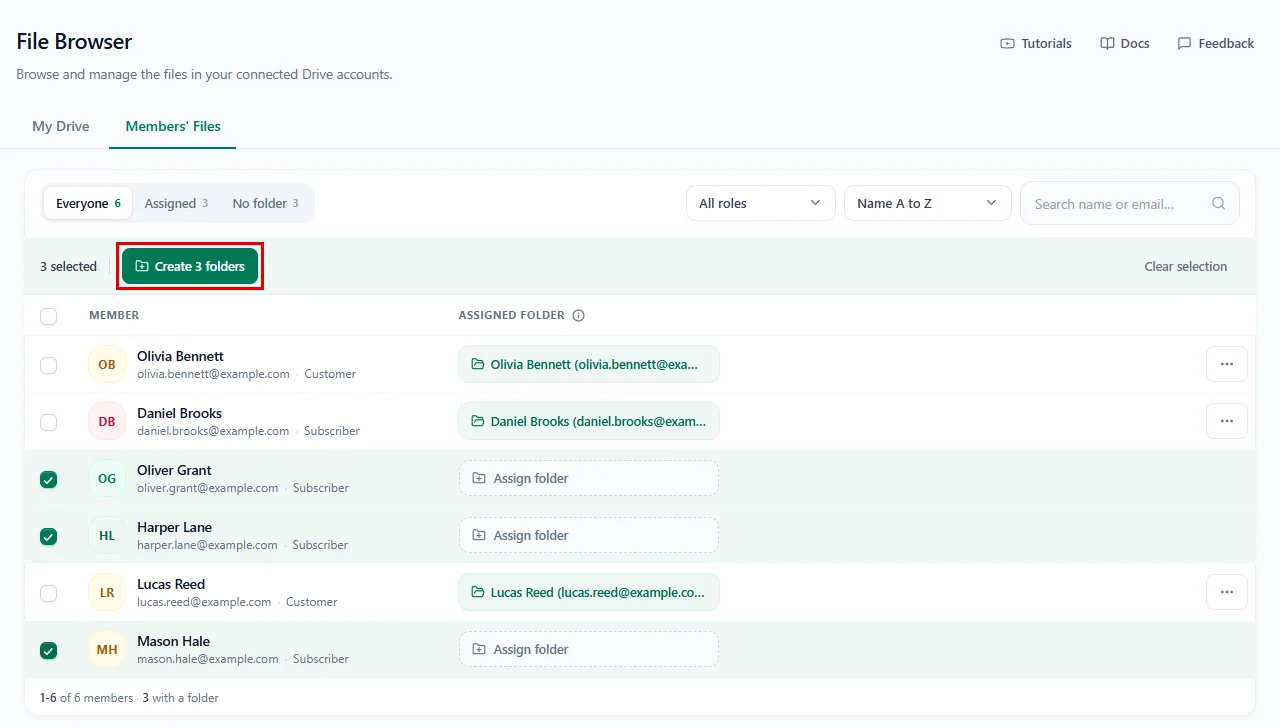
- Click on the Members’ Files tab.
- Find the person with the Search name or email… box. You can also filter the list by folder status (Everyone, Assigned, No folder) or by role, and sort it.
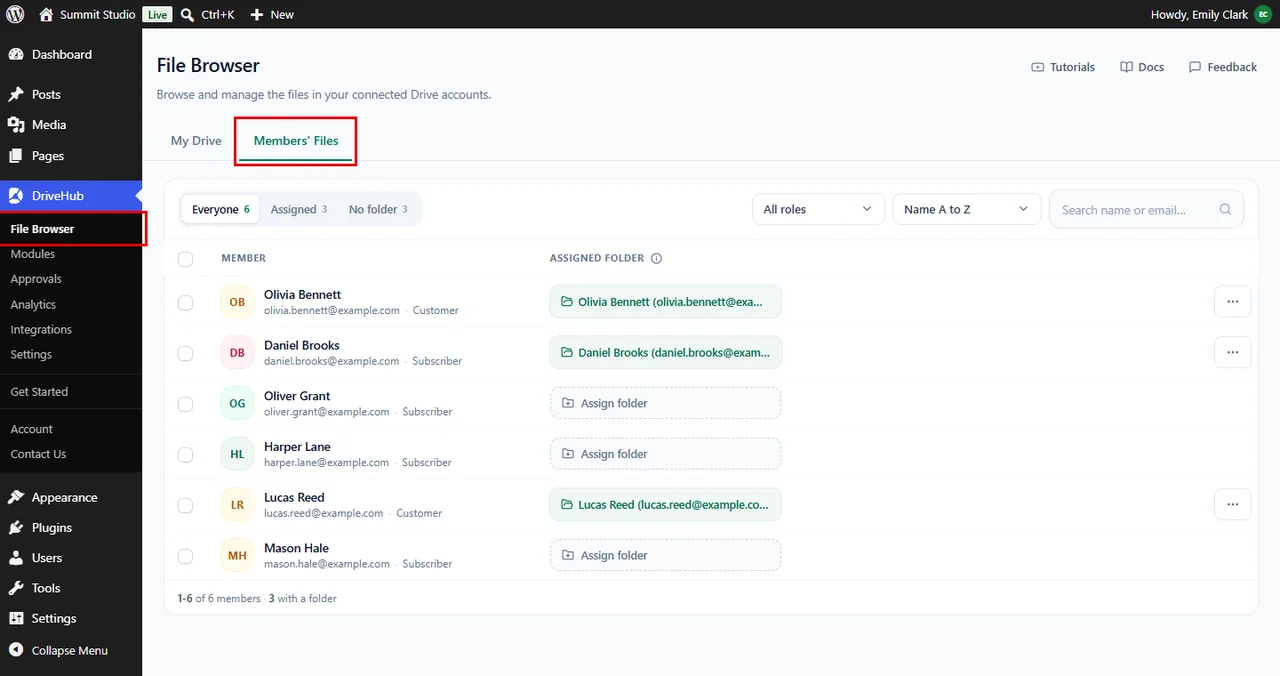
- Click on Assign folder next to their name.
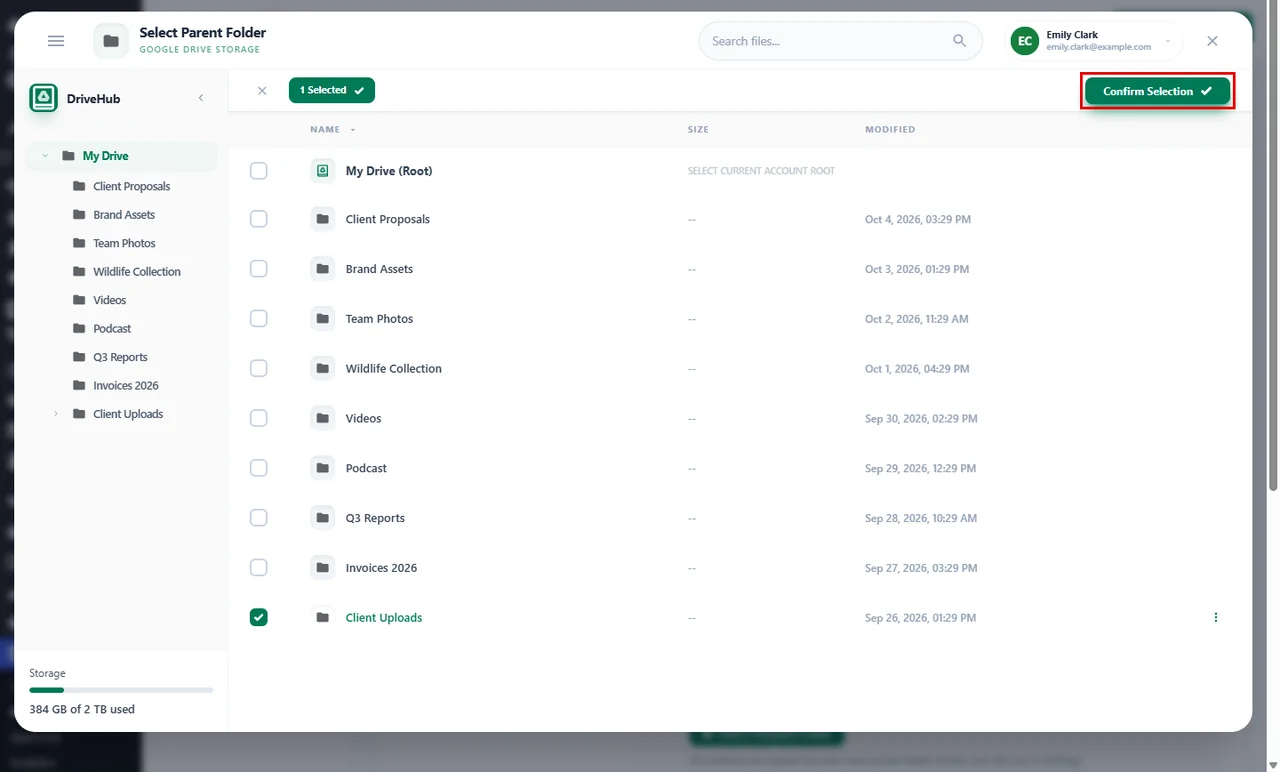
- Tick their folder in the Select folder window and click Confirm Selection.
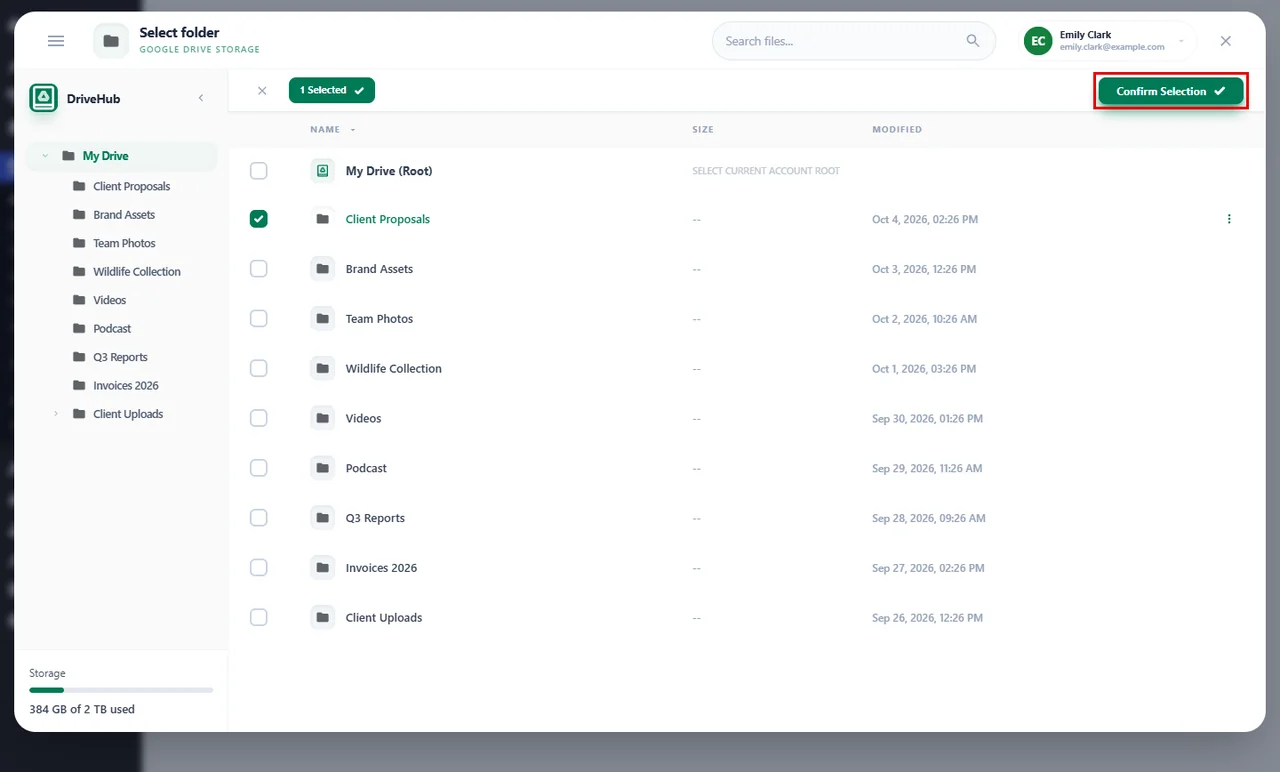
The folder name now shows in the Assigned folder column. To change it later, click the three-dot menu at the end of the row and choose Open in Drive, Change folder or Remove folder. Removing only unlinks the folder; nothing is deleted from Google Drive.
Many users at once? Tick the boxes next to their names and click Create N folders in the bar that appears. DriveHub makes a folder for each of them using your settings from Step 4. With a mix of people selected, you’ll also see Remove N folders.
Note: If someone else should link folders for you, give them the Members’ Files tab in Settings > User Access. Our guide on how to let other users use DriveHub in the dashboard shows how.
Step 8: Show Each User Their Own Folder on Your Site #
Now let’s put the private folders on a page. Any module type works, for example a File Browser, a List or a File Uploader:
- Go to DriveHub > Modules and open your module, or click on Add module to make a new one.
- On the Source step, turn on Use Private Files.
- Turn on Create Private Folder if you want DriveHub to make a folder for anyone who opens the page and doesn’t have one yet.
You can give this module its own folder settings, or leave them empty to use the ones from Step 4:
- Folder Name Template: type a name such as
%user_login% (%user_email%), or leave it empty. - Parent Folder: click Select Parent Folder. Your Google Drive opens in a window. Tick a folder, for example Client Uploads, and click Confirm Selection.
- Template Folder: click Select Template Folder and pick a folder with your welcome files the same way.
The folder you picked now shows next to the button, which changes to Change Parent Folder. Click the small x on the folder to clear it again.
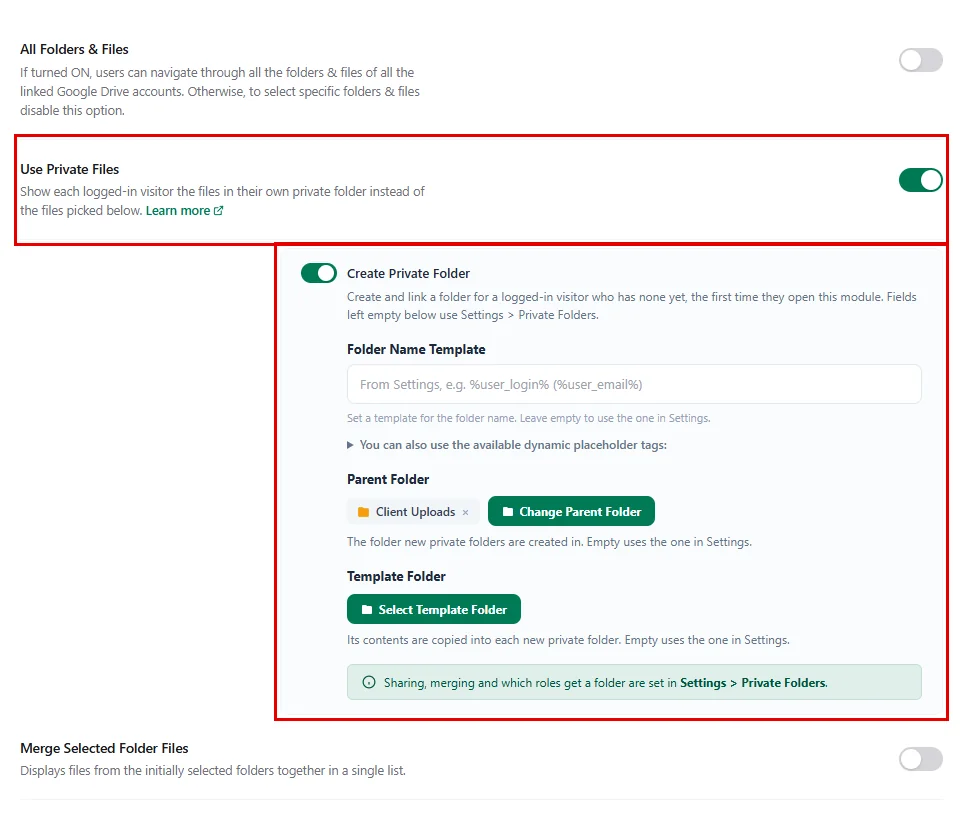
Sharing, merging and which roles get a folder still come from your settings in Steps 3 and 5.
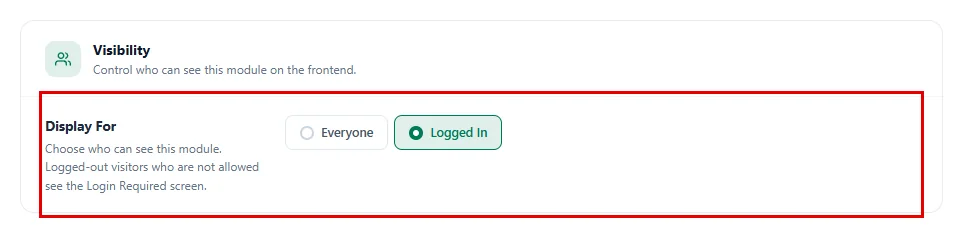
- Click on Permissions on the left and set Display For to Logged In, so visitors who aren’t signed in see a login screen instead of an empty module.
- Click on Save module (or Save changes), then add the module to a page with Embed > Copy shortcode.
And that’s it! When a user logs in and opens the page, they see only the files in their own private folder:
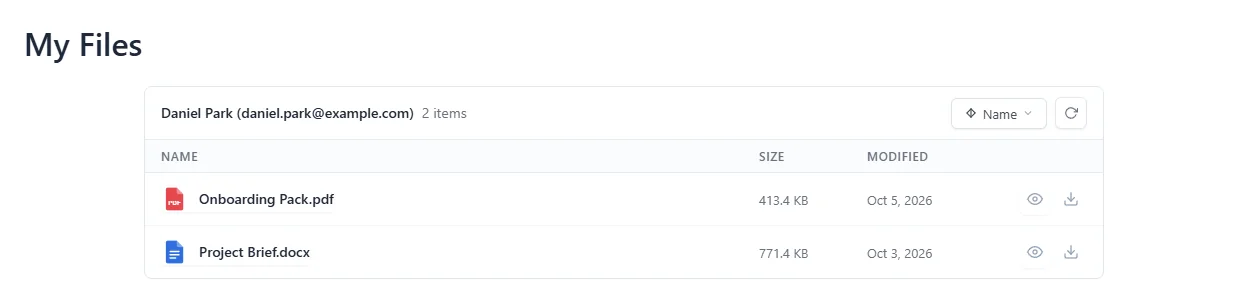
If a brand-new folder doesn’t show its files right away, refreshing the page shows them.
Benefits of Private Folders #
- One page for everyone: A single module shows each user their own files.
- Hands-free setup: Folders are made and named for new users when they register.
- Same start for all: A template folder gives everyone the same welcome files.
- Safe by design: Users never see each other’s folders.
- Easy to manage: Link, change or remove folders from the Members’ Files tab.
With DriveHub, giving every user their own private Google Drive space takes just a few minutes.


