- Step 1: Install WooCommerce and Dokan
- Step 2: Install DriveHub and DriveHub Pro
- Step 3: Connect Your Google Account
- Step 4: Enable the Dokan Integration
- Step 5: The Vendor Connects Their Google Drive
- Step 6: Create a Downloadable Product
- Step 7: Pick Files from Google Drive
- Step 8: Choose How Buyers Get the Files
- Step 9: Save the Product
- Step 10: What the Buyer Sees
- Benefits of Dokan Vendor Downloads with DriveHub
Do you run a Dokan marketplace and want your vendors to sell digital files straight from their own Google Drive? You’re in the right place.
You can easily do this with DriveHub. Each vendor attaches files from their own Drive to a downloadable product, so your server stores nothing and buyers download the files like any other WooCommerce purchase.
Here is an easy, step-by-step guide to help you set it all up!
Step 1: Install WooCommerce and Dokan #
First, make sure your marketplace plugins are in place:
- From your WordPress admin, click on Plugins > Add New.
- Search for WooCommerce, then click Install and Activate.
- Search for Dokan, then click Install and Activate.
- Finish the WooCommerce and Dokan setup wizards.
Step 2: Install DriveHub and DriveHub Pro #
Next, add DriveHub to your site:
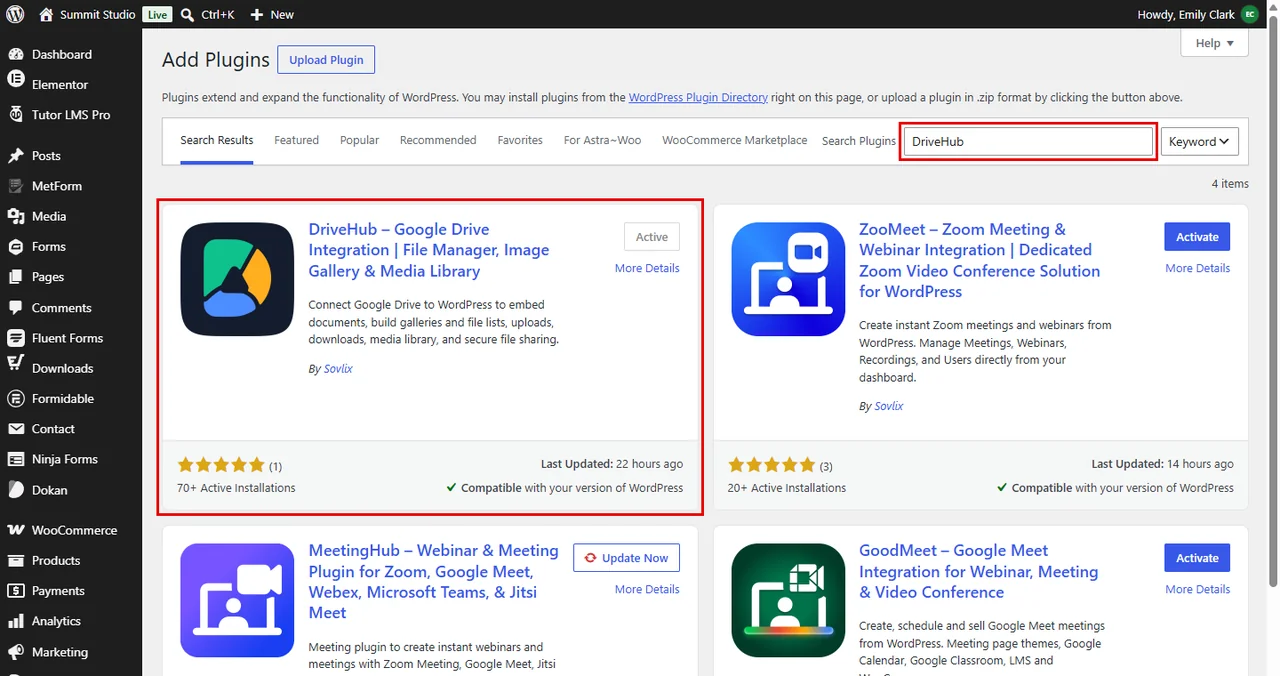
- Go to Plugins > Add New and search for DriveHub.
- Click Install and then Activate.
- Install and activate DriveHub Pro as well.
Note: This needs DriveHub Pro.
Step 3: Connect Your Google Account #
As the store admin, connect your own Google account first. Vendors sign in through the same app later:
- Go to DriveHub and follow the setup screen to add your Google account.
Read our step by step setup guide to avoid any confusion.
Step 4: Enable the Dokan Integration #
In this step, you switch on vendor downloads for the whole marketplace:
- Go to DriveHub > Integrations.
- Find the Dokan card under Stores and courses.
- Turn on the switch. The card now says Active.
- Click on the settings icon next to the switch.
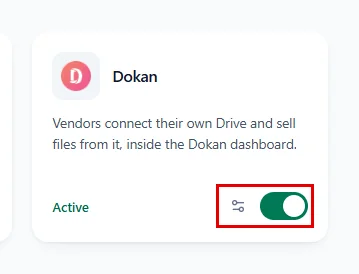
The Dokan settings window opens:
- Turn on Vendor downloads.
- Click Done.
- Click Save changes in the bar at the bottom of the screen.
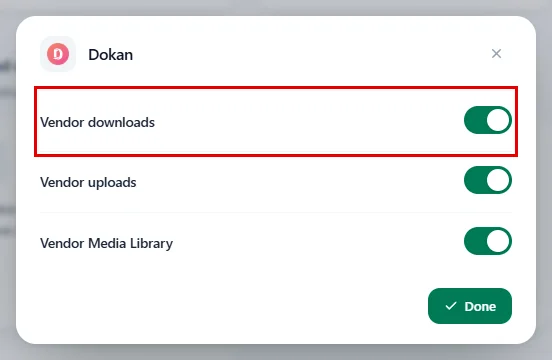
Don’t forget to click Save changes. Done only closes the window.
Step 5: The Vendor Connects Their Google Drive #
From here on, the steps happen in the vendor’s dashboard. Each vendor uses their own Google Drive, so they connect it once:
- The vendor goes to Vendor Dashboard > Settings > Google Drive.
- They click Sign in with Google and allow access.
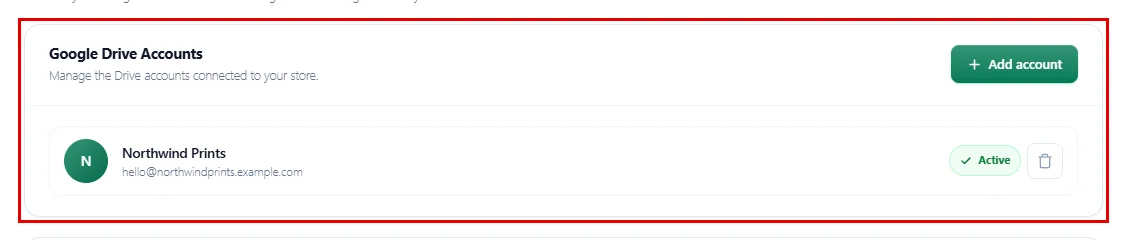
See How to Connect Google Accounts for Dokan Vendors for every detail.
Step 6: Create a Downloadable Product #
Now the vendor, Northwind Prints in our example, adds a product:
- Go to Vendor Dashboard > Products and click Add New Product.
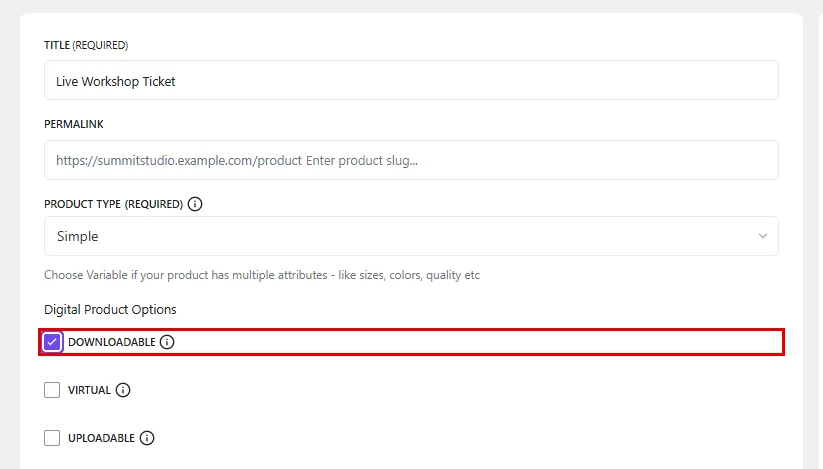
- Enter the product name (for example, Live Workshop Ticket), the price ($49), a description, category and tags.
- Add a Feature Image.
- Tick Downloadable.
Step 7: Pick Files from Google Drive #
Next, attach the files buyers will get:
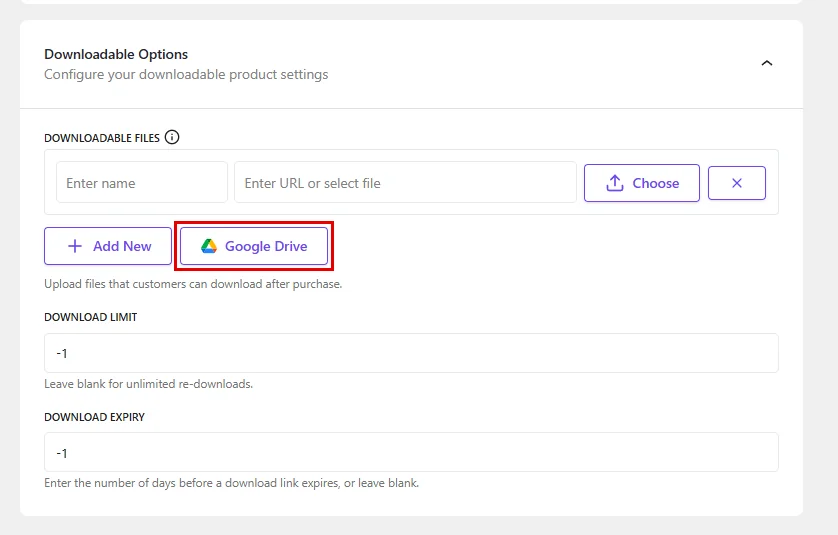
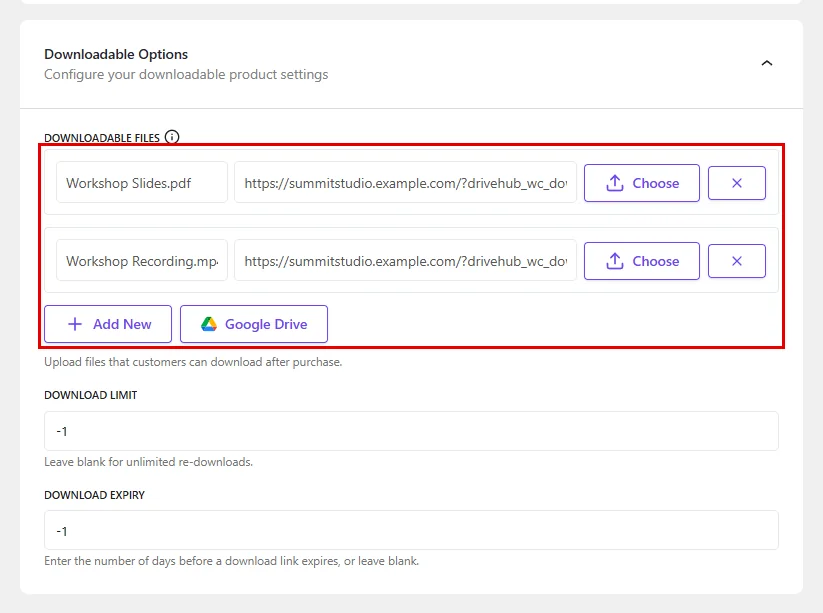
- Scroll to Downloadable Options.
- Under Downloadable Files, click the Google Drive button next to Add New.
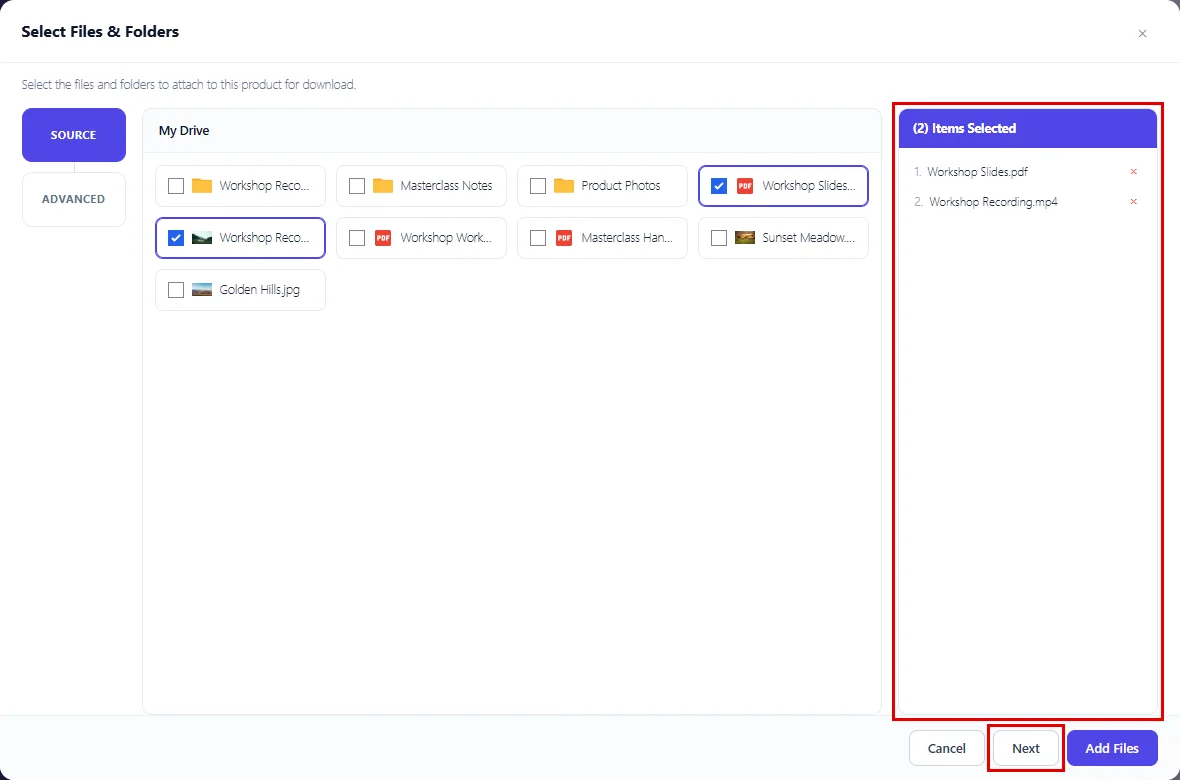
The Select Files & Folders window opens on the vendor’s My Drive:
- Click a folder name to open it.
- Tick the files you want to sell (for example, Workshop Slides.pdf and Workshop Recording.mp4).
- Click Next.
Step 8: Choose How Buyers Get the Files #
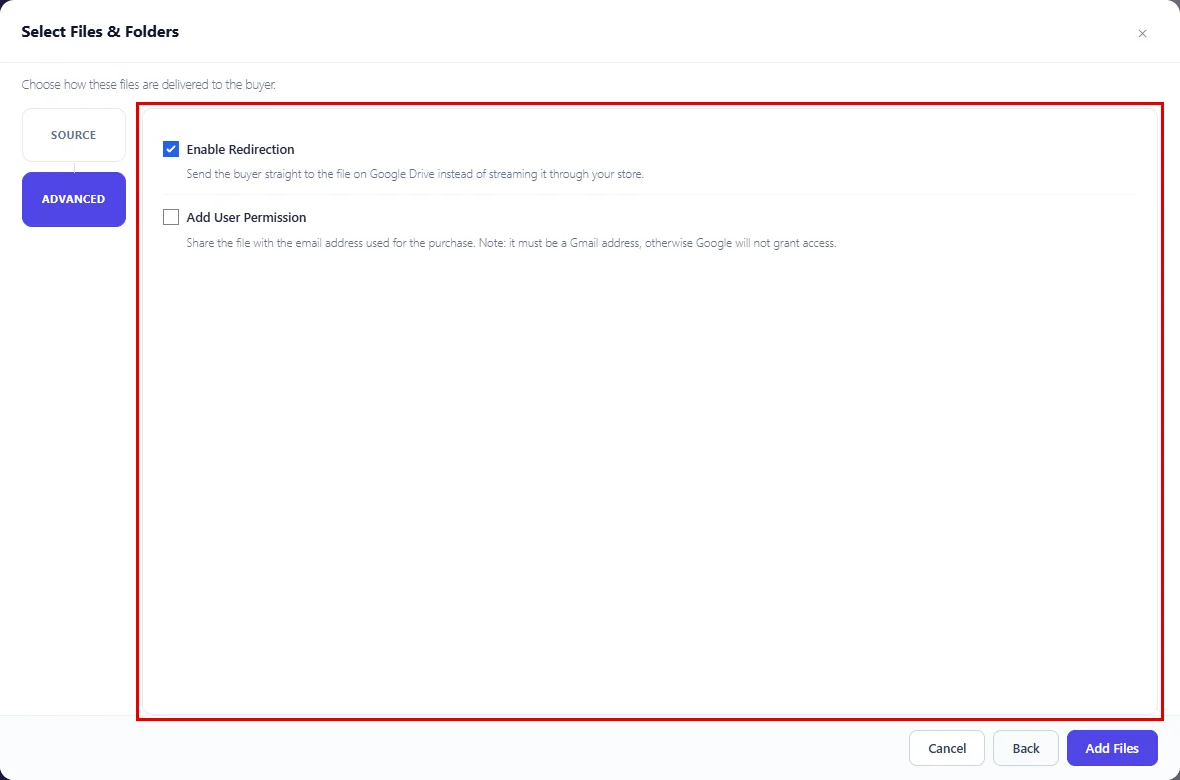
The second screen asks how the files are delivered:
- Leave both options off to let buyers download the file through your store.
- Turn on Enable Redirection to send buyers straight to the file in Google Drive instead.
- With redirection on, you can also turn on Add User Permission to share the file with the buyer’s email address. It must belong to a Google account (Gmail or Google Workspace), otherwise Google won’t grant access.
- Click Add Files.
Each file is added as its own row under Downloadable Files, with the name and file URL filled in for you.
Step 9: Save the Product #
Almost done:
- Set a Download Limit and Download Expiry if you need them, or leave them blank for unlimited.
- Click Save Changes at the top of the page.
If your marketplace reviews new vendor products, the product goes live once the store admin approves it.
Step 10: What the Buyer Sees #
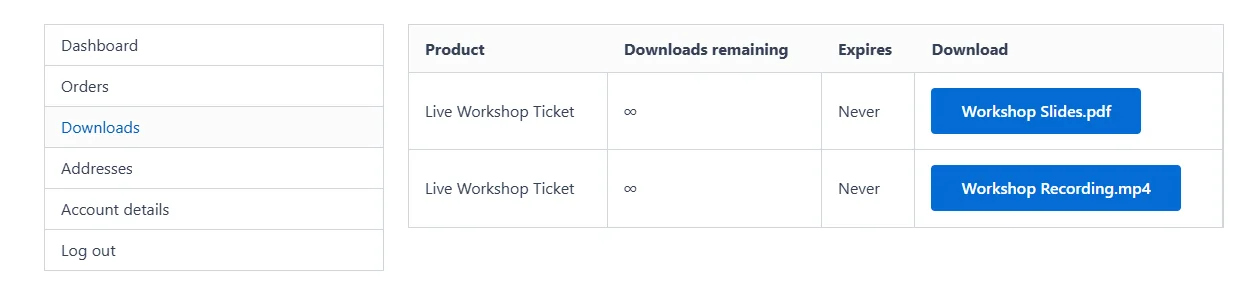
That’s it! When the order is Processing or Completed, the buyer finds the files under My Account > Downloads and in the order email. One click and the file comes straight from the vendor’s Google Drive.
Tip: If the vendor sees Connect a Google Drive account first from Settings → Google Drive. when clicking the Google Drive button, they haven’t connected an account yet. Send them to Step 5.
Benefits of Dokan Vendor Downloads with DriveHub #
- No storage on your server: Every vendor’s files live in their own Google Drive.
- Vendors stay in charge: Each vendor picks their files without asking the admin.
- Flexible delivery: Download through the store, or open the file in Google Drive.
- Familiar for buyers: Downloads show up in My Account like any WooCommerce purchase.
- Easy updates: Edit a file in Google Drive and buyers always get the latest version.
With DriveHub and Dokan, every vendor can sell their Google Drive files in just a few clicks.
Related guides:


