- Step 1: Install DriveHub and Connect Google Drive
- Step 2: Open the Modules Page
- Step 3: Choose a Module Type
- Step 4: Give Your Module a Name
- Step 5: Pick Your Google Drive Files (Source)
- Step 6: Get to Know the Setup Steps
- Step 7: Save Your Module
- Step 8: Copy the Shortcode
- Step 9: Or Add the Module to a Page in One Click
- Step 10: Find Your Module in the List
- Step 11: See It Live
- Benefits of Using DriveHub Modules
Do you want to show files from your Google Drive on your website, but not sure where to start? You’re in the right place. You can easily do this with DriveHub.
In DriveHub, everything you show on your site starts as a module. A module is a saved view of your Drive files, like a photo gallery or a file list, that you can place on any page or post with a short shortcode. Build it once, and use it wherever you like.
Here is an easy, step-by-step guide to help you create your first module and put it on a page!
Step 1: Install DriveHub and Connect Google Drive #
First, make sure DriveHub is installed and your Google account is connected:
- From your WordPress admin, click on Plugins > Add New.
- Search for DriveHub.
- Click Install and then Activate.
- Follow the setup screen to add your Google account.
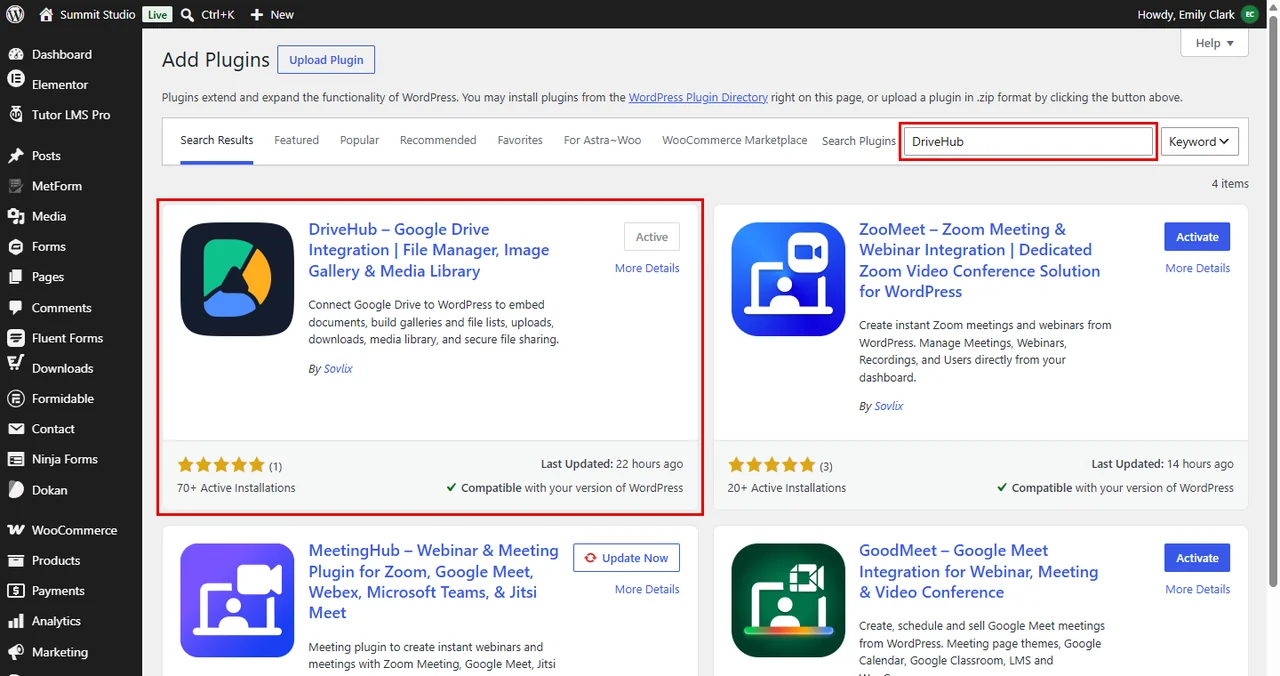
Read our step by step setup guide to avoid any confusion.
Step 2: Open the Modules Page #
All your modules live in one place:
- Go to DriveHub > Modules.
- Click on the Add module button at the top right.
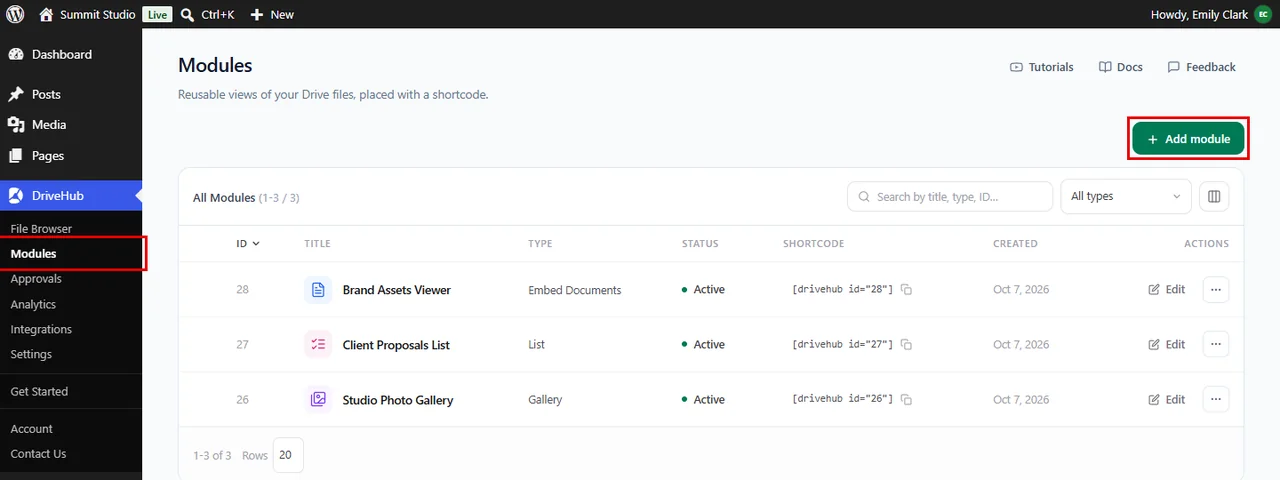
Tip: If you have not created any modules yet, the page shows Create your first module instead of the table. Click on Create module there; it opens the same window.
Step 3: Choose a Module Type #
The Select module type window opens. The module types are grouped by what you want to do: Display files, Browse & search and Embed & collect.
- Click on the type you want. For this guide, we’ll click on Gallery.
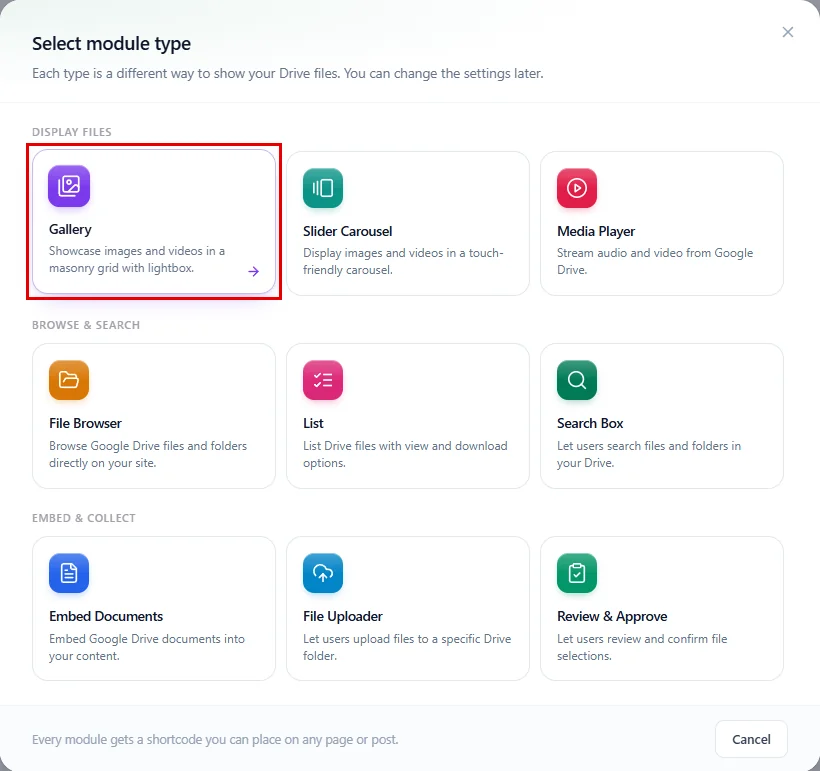
Note: Gallery, List and Embed Documents come with the free version of DriveHub. Slider Carousel, Media Player, File Browser, Search Box, File Uploader and Review & Approve need DriveHub Pro.
Step 4: Give Your Module a Name #
The module editor opens. Start with a name you will recognize later:
- Click on the name at the top of the screen (it says Untitled module until you change it).
- Type a name, for example Studio Photo Gallery 2026.
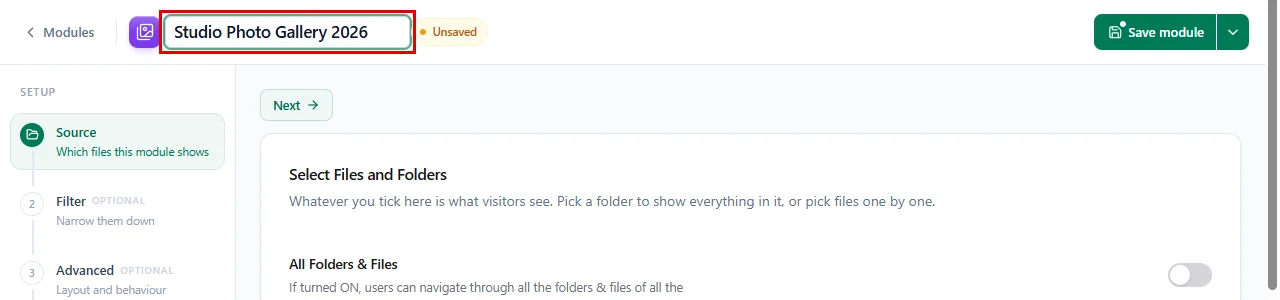
Only you see this name. It helps you find the module later in your list.
Step 5: Pick Your Google Drive Files (Source) #
In this step, you choose which files the module shows. The Source step is open by default:
- Scroll down to Your Drive.
- Find the folder you want to show (we’ll use Team Photos). You can type its name in the search box to find it faster.
- Hover over the folder and tick the small box in its top left corner.
- Check the green panel on the right. It now says (1) Items Selected and lists your folder.
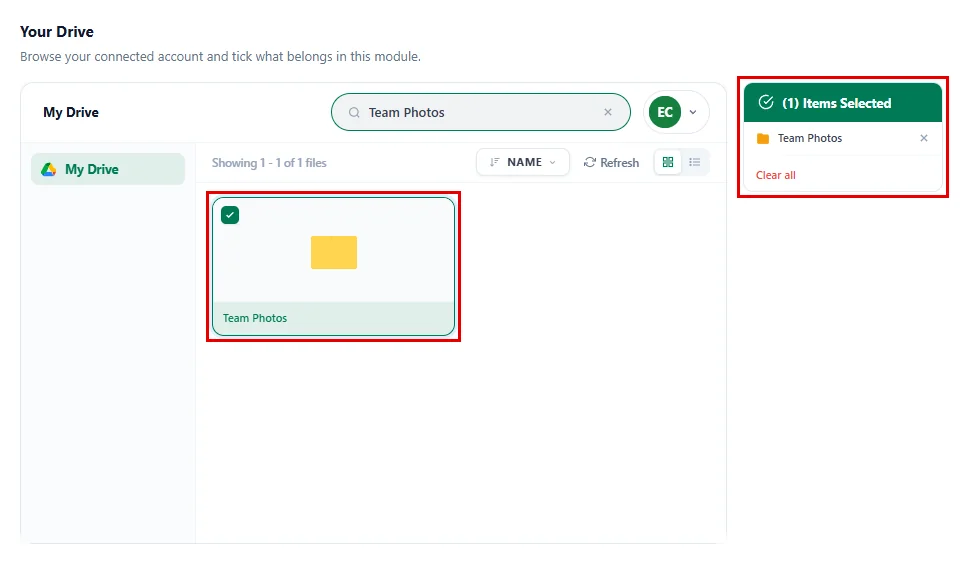
Tip: Clicking a folder opens it. Tick the box instead when you want to show everything inside that folder.
Step 6: Get to Know the Setup Steps #
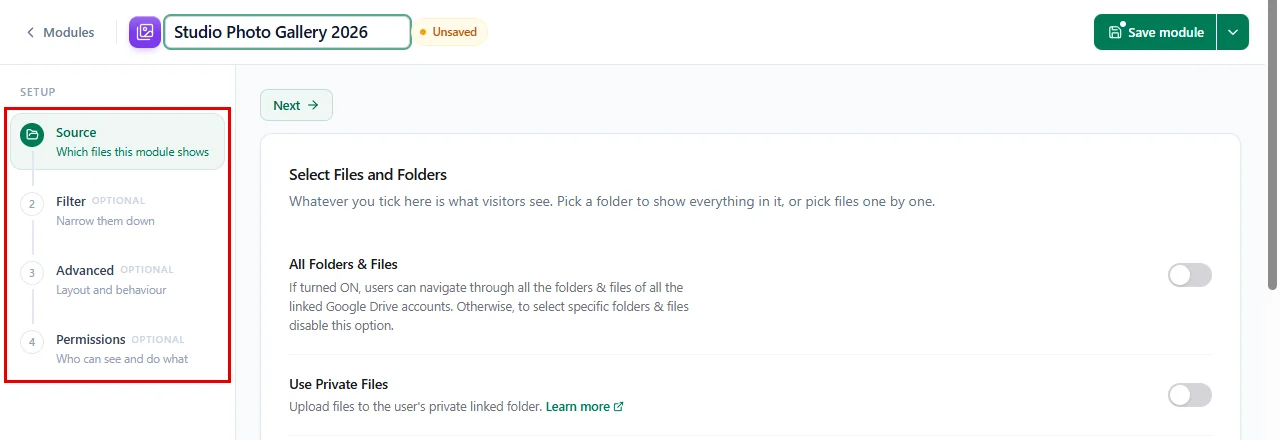
On the left, you’ll see the setup steps of your module. A Gallery has four:
- Source: Which files this module shows. This is the only step you must fill in.
- Filter: Narrow them down, for example by file type or name.
- Advanced: Layout and behaviour, like columns, size and sorting.
- Permissions: Who can see and do what.
The File Uploader also gets a Notifications step for email alerts; other module types do not have it.
Every step after Source is marked OPTIONAL, so you can skip them for now and come back any time. You can click a step on the left, or use the Next button to move through them in order.
Step 7: Save Your Module #
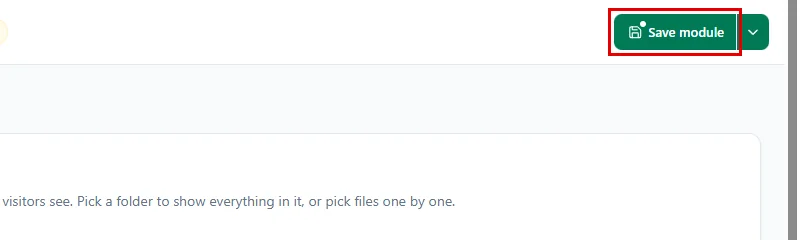
Once you’re happy with your module, save it:
- Click on the Save module button at the top right.
DriveHub shows a Module created message. Next to the name, you’ll now see your module’s shortcode (for example [drivehub id="31"]) and a green Saved badge. Two new buttons also appear: View and Embed.
Step 8: Copy the Shortcode #
The quickest way to use your module is its shortcode:
- Click on the Embed button at the top right.
- Click on Copy shortcode.
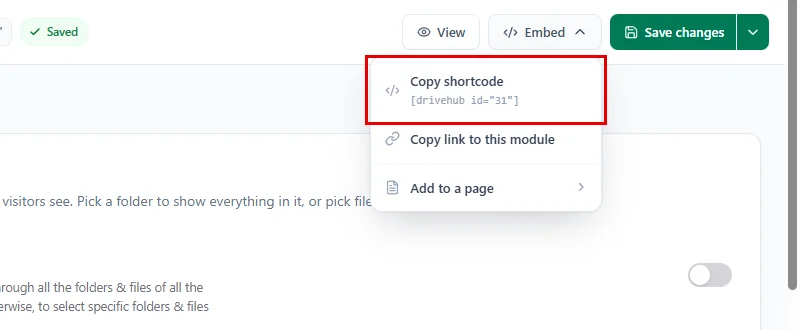
Now paste the shortcode into any page, post or widget, and your Google Drive files appear there. Your shortcode will have its own number. Always copy it from your own module.
Tip: Copy link to this module in the same menu copies a direct link to a page that shows only this module.
Step 9: Or Add the Module to a Page in One Click #
Don’t want to copy and paste? DriveHub can put the module on a page for you:
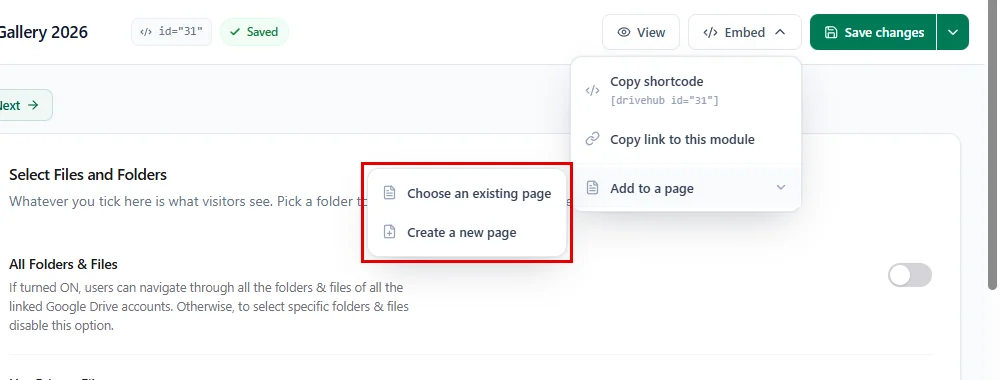
- Click on Embed again, then click on Add to a page.
- Click on Choose an existing page to add it to a page you already have, or Create a new page to start a fresh one.
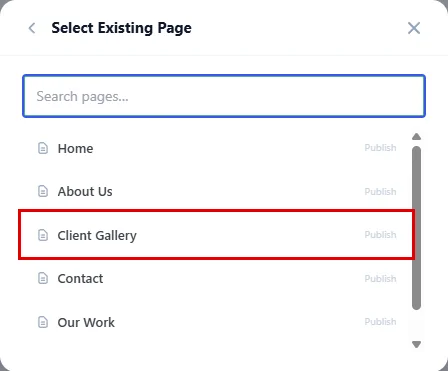
If you chose Choose an existing page, the Select Existing Page window opens with a list of your pages:
- Type in Search pages… to find a page faster.
- Click on the page you want.
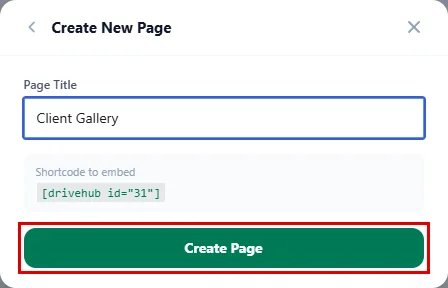
If you chose Create a new page, the Create New Page window opens:
- Type a Page Title, for example Client Gallery.
- Check the Shortcode to embed box. This is the shortcode DriveHub will add.
- Click on Create Page.
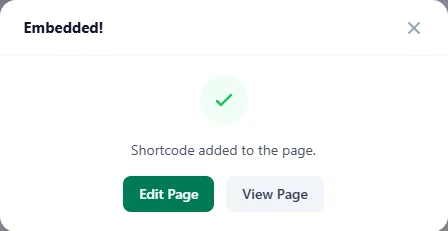
DriveHub creates the page as a draft and shows Embedded! with the message Shortcode added to the page.
- Click on Edit Page to open it in the editor, or View Page to see it.
Note: A new page is saved as a draft. Don’t forget to open it and click Publish when you’re ready for visitors to see it. If you pick an existing page, DriveHub adds the shortcode to the end of that page’s content.
Step 10: Find Your Module in the List #
When you go back to DriveHub > Modules after your very first module, DriveHub says Your first module is ready. From here you can:
- Click on the shortcode box to copy it.
- Click on Add it to a page to put it on an existing or a new page.
- Click on I’ll do it later to close the message.
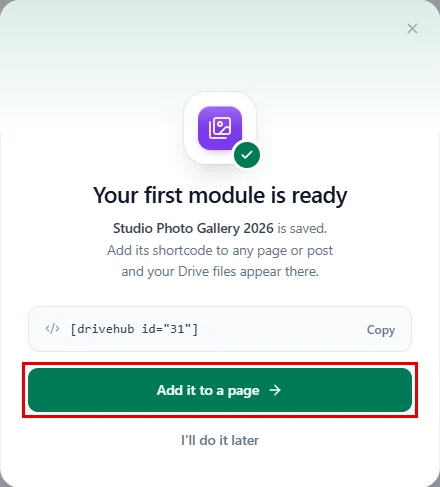
Your new module now sits at the top of the Modules table. The Shortcode column shows its shortcode, so you can copy it again whenever you need it.
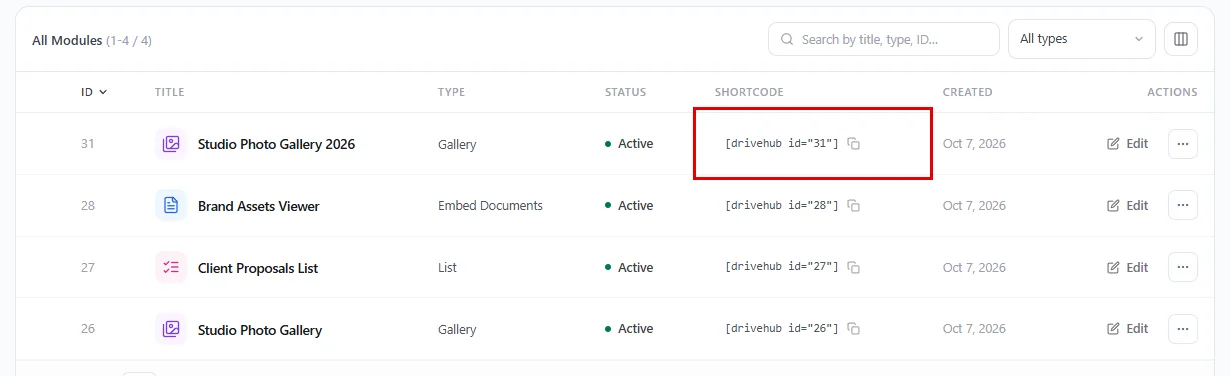
Tip: To change a module later, click on Edit next to it. The … menu also has Copy shortcode, Duplicate, Deactivate and Delete.
Step 11: See It Live #
And that’s it. Open your page and your Google Drive photos are right there, straight from your Drive:
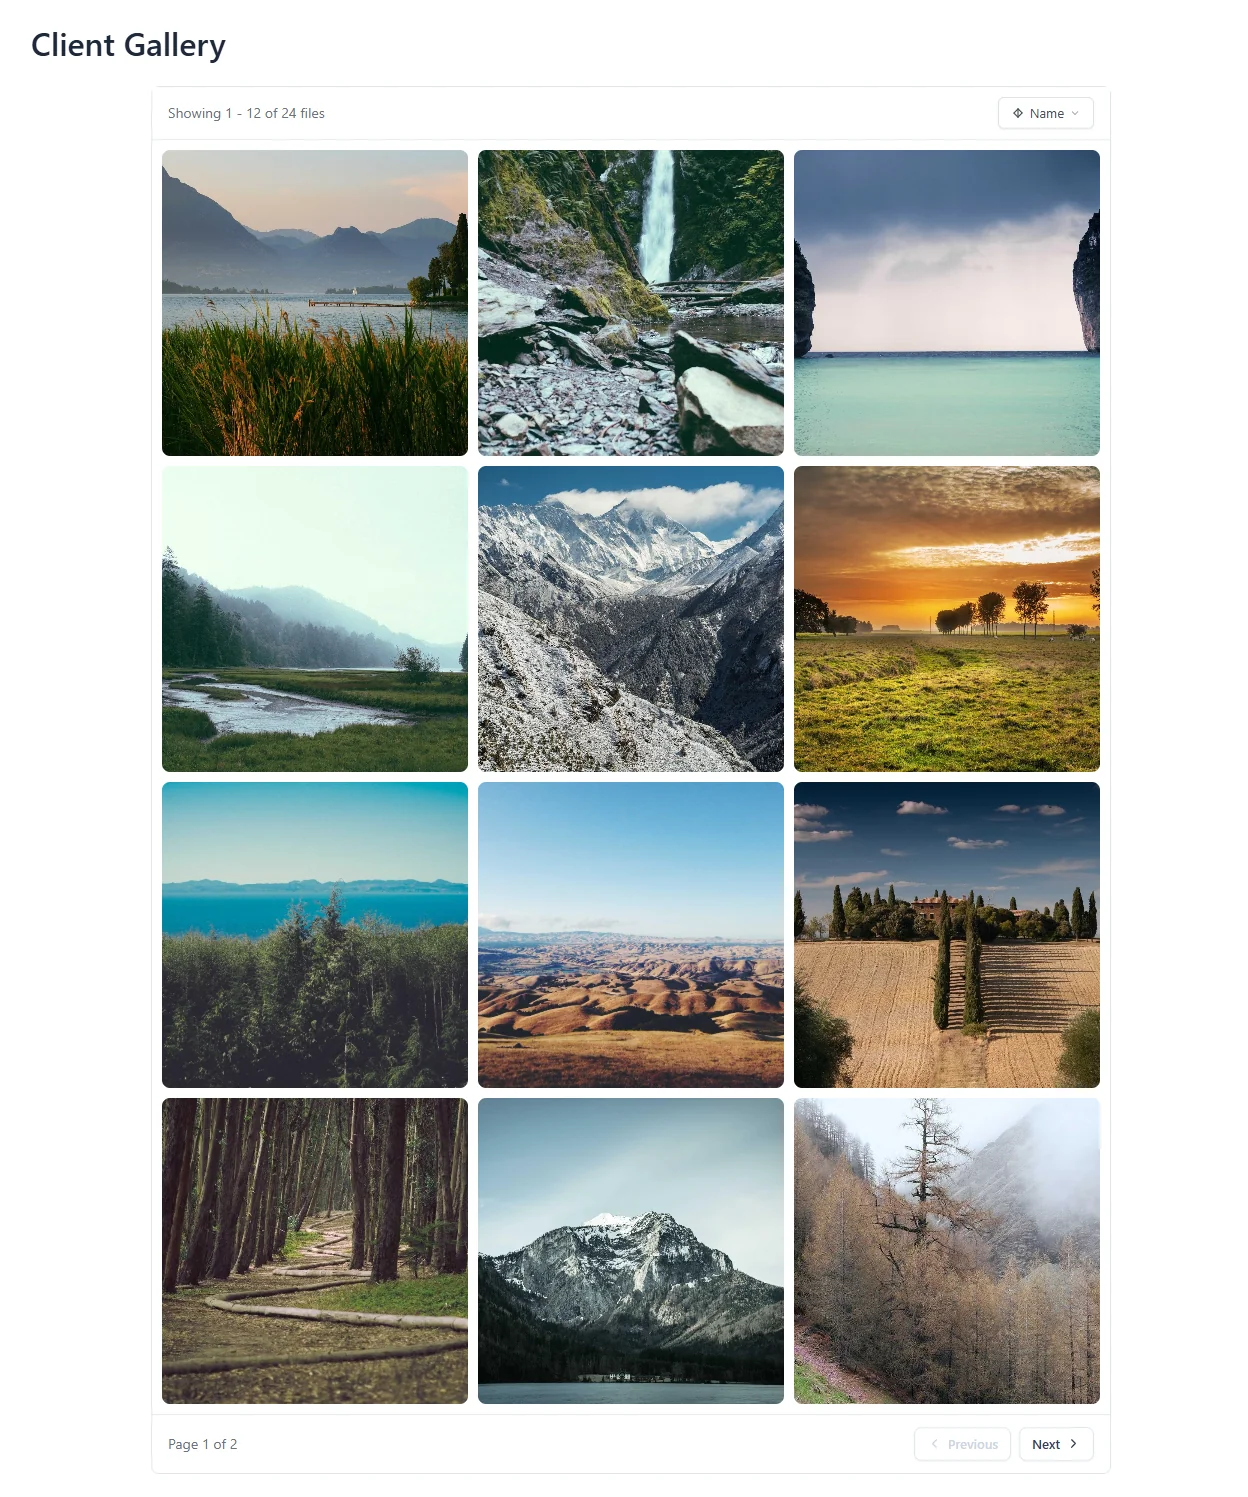
Whenever you add or remove photos in that Google Drive folder, your page follows along. There’s nothing to upload to WordPress.
Want to place modules with your page editor instead? See How to Add Google Drive Files with the Block Editor (Gutenberg) and How to Add Google Drive Files in the Classic Editor. To get the most out of a photo gallery, read How to Show a Google Drive Photo Gallery on Your Website.
Benefits of Using DriveHub Modules #
- Build once, use anywhere: One module can sit on as many pages and posts as you like.
- No uploads: Your files stay in Google Drive, so your WordPress Media Library stays light.
- Always up to date: Change the files in Drive and every page that uses the module updates.
- Easy to find again: Every module has a name, a type and a shortcode in one list.
- One-click pages: Create a page with your module already on it, right from the module editor.
With DriveHub, your first module takes just a few minutes, and every module after that is even quicker.


