- Before you begin
- Step 1: Check that Google is connected
- Step 2: Open All Meetings
- Step 3: Name the meeting (Basics)
- Step 4: Choose the date and time (Date and time)
- Step 5: Decide who can join (Access and controls)
- Step 6: Design the meeting page (Page design)
- Step 7: Create the meeting and check the page
- Manage your meetings
- Benefits of creating meetings with GoodMeet
- Troubleshooting
- All Meetings shows "Connect Google in three steps"
- Create meeting shows "Give the meeting a name before creating it."
- "Google Meet is not connected" or "Google Meet has stopped accepting the connection"
- "The meeting was not created"
- The meeting is longer or shorter than I set
- Delete shows "Could not delete the meeting"
- Frequently asked questions
- You're ready to run your first meeting
With GoodMeet installed, your first Google Meet meeting takes a few minutes. Here you create one in GoodMeet, then find, share, edit and delete it.
For every meeting you add, GoodMeet creates a Google Meet link and a Google Calendar event. It also builds a meeting page on your site with a countdown, a join button and your description. People get one address for everything.
By the end of this guide, you will have:
- A Google Meet meeting with a calendar event and a Meet link
- A meeting page on your site that visitors can open and join from
- The page address copied, ready to share
- A clear idea of how to find, edit and delete meetings in All Meetings
Estimated setup time: 5 minutes. Only the name and start time matter; every other field arrives with a working default.
Before you begin #
Make sure you have:
- GoodMeet installed and activated
- A connected Google account. See How to connect your Google account to GoodMeet.
- An administrator account on your WordPress site
- GoodMeet Pro, if you want a password, registration, recurring meetings, co-hosts or page access rules
Let’s get started.
Step 1: Check that Google is connected #
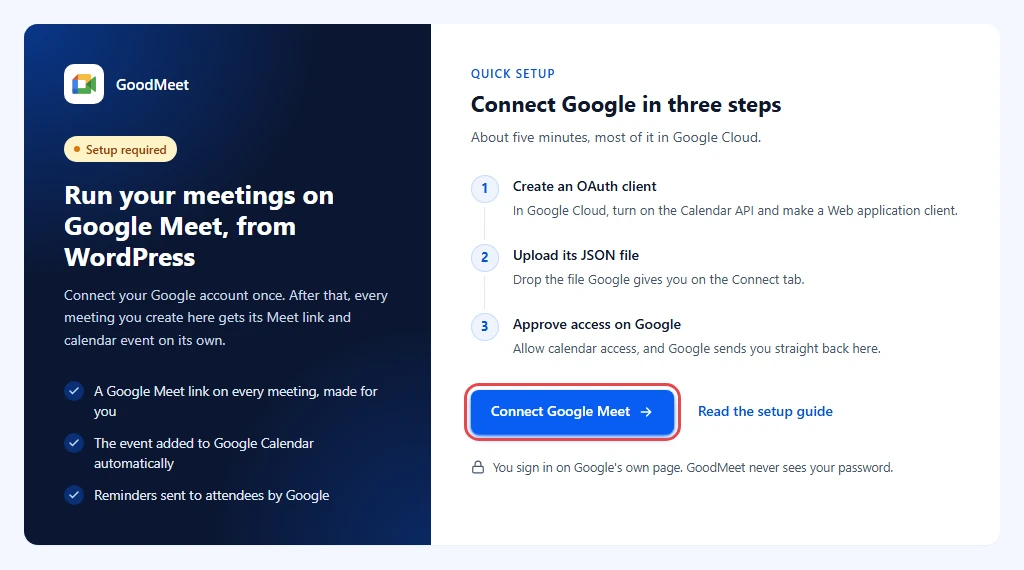
GoodMeet cannot create a Meet link until a Google account is connected. Until then, All Meetings shows a setup screen instead of your meetings.
- In the WordPress admin menu, go to GoodMeet > All Meetings.
- If you see Connect Google in three steps, click Connect Google Meet and finish the connection first.
Step 2: Open All Meetings #
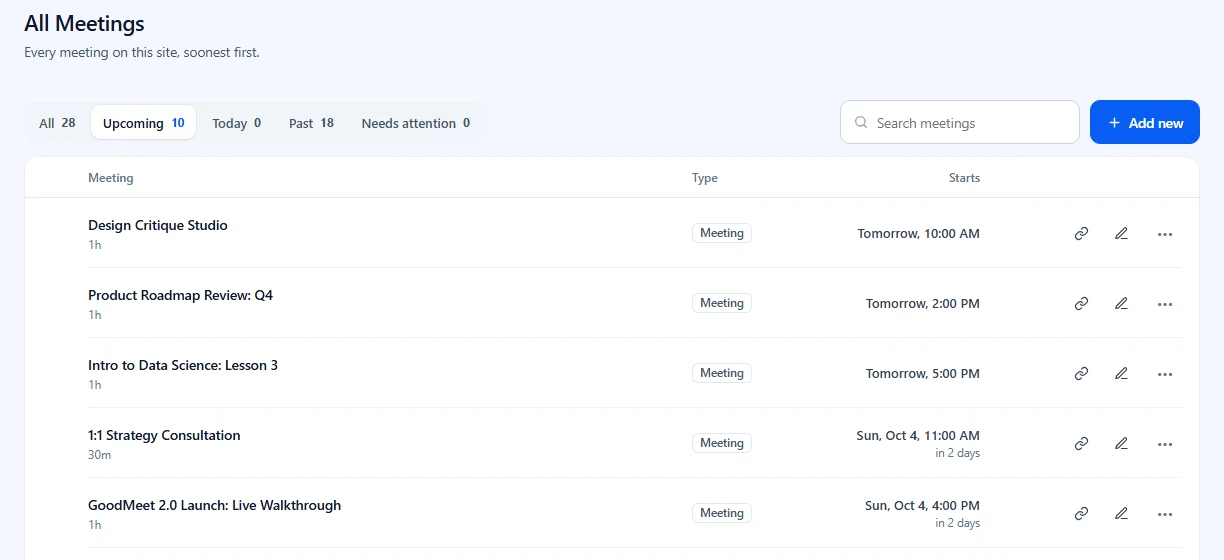
All Meetings is home base for every meeting on the site. It opens on the Upcoming tab, so the next meeting is always at the top.
- Go to GoodMeet > All Meetings.
- Look over the list. Each row shows the meeting name, its length, its Type and when it Starts.
Step 3: Name the meeting (Basics) #
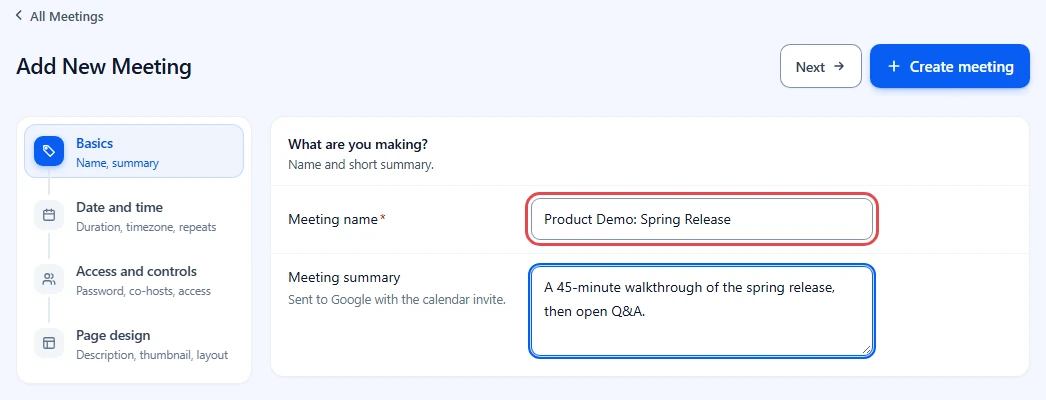
The form walks you through four steps, listed on the left. You can move between them at any time, and your answers stay as you go.
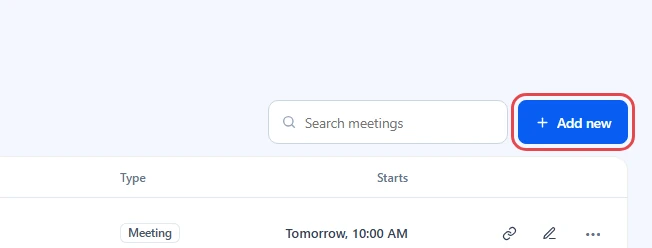
- At the top right of All Meetings, click Add new.
The first step asks What are you making?
- In Meeting name, replace the suggested name with a clear title, for example
Product Demo: Spring Release. It shows on the meeting page and in Google Calendar. - Add a short Meeting summary. Google sends it with the calendar invite.
- Click Next, or click Date and time on the left.
Step 4: Choose the date and time (Date and time) #
The start time decides when the countdown ends and when people can join. This step asks When is it?
- Under Starts, click Today, Tomorrow or Next week, or pick a date and a time in the two fields.
- Under Duration, click 30 min, 45 min or 1 hour, or set Hour and Minutes yourself. A button fills in both fields for you.
- Check Time zone. It defaults to the time zone in GoodMeet settings.
- Pick a Notification, which is when Google reminds attendees, for example 1 minute before.
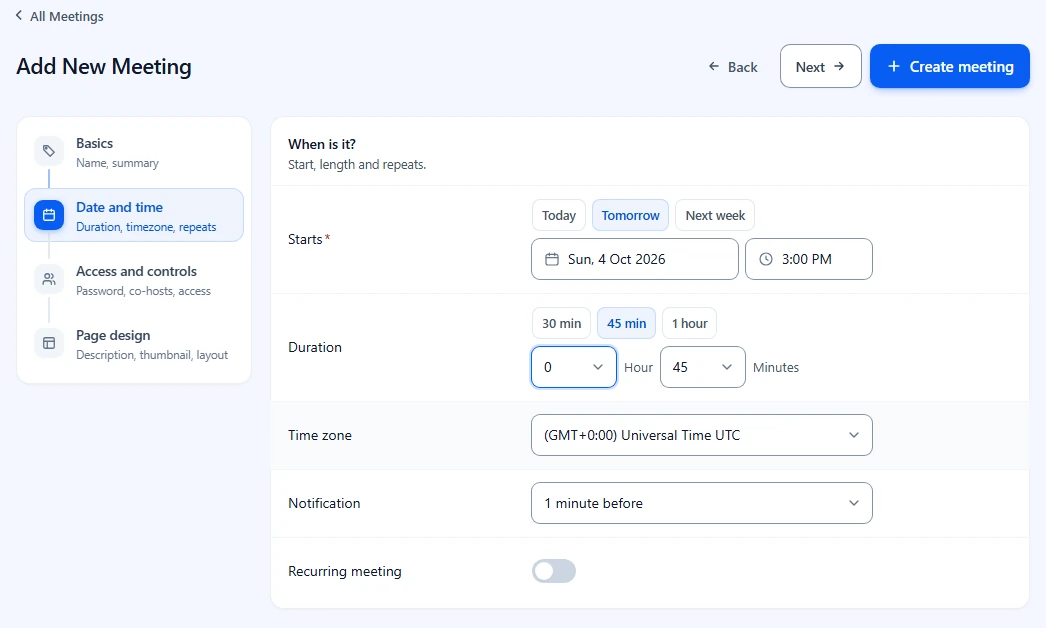
To repeat the meeting, turn on Recurring meeting. See How to set up recurring meetings with GoodMeet. Requires GoodMeet Pro.
Step 5: Decide who can join (Access and controls) #
This step asks Who can join? Every field has a working default, so you can skip it for a first meeting.
- Click Access and controls on the left.
- Leave Should register off, unless attendees should sign up before they get the link.
- Click Send updates and pick who gets an email from Google when the event changes: All guests, Guests outside your organization or Don’t send. Don’t send keeps a first test quiet.
- Check the Password. GoodMeet fills in a random one, up to 10 letters and numbers. It is asked before the join link is shown.
- Leave Co-hosts on Default co-hosts, or pick Defaults plus extra or Only these and add people.
- Leave Page access on Site default, or pick Public, Logged in or By role.
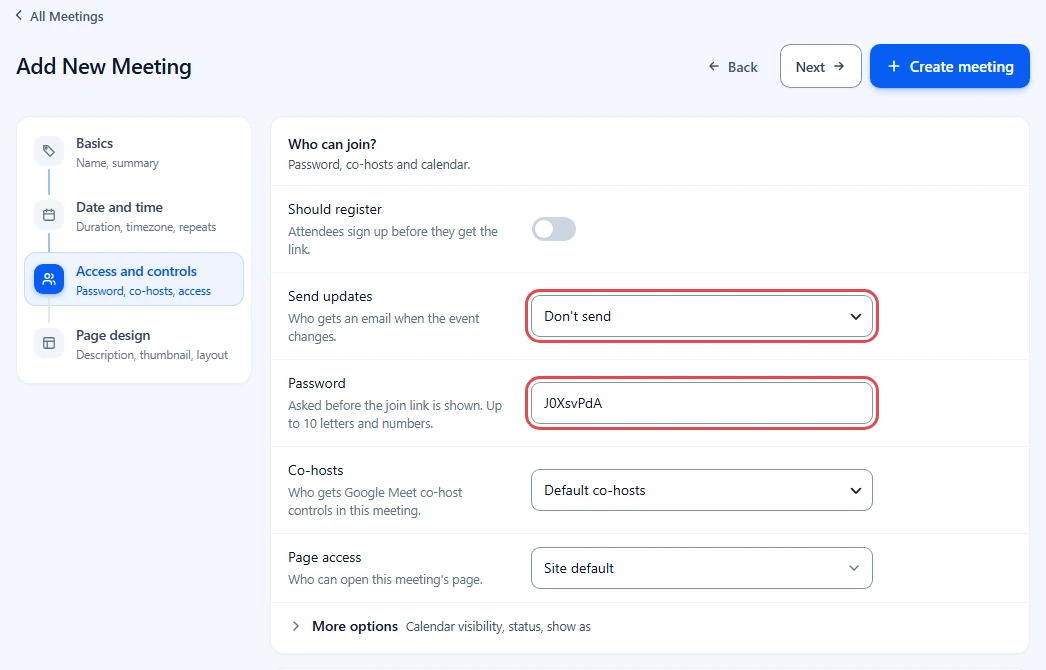
Note: Should register, Send updates, Password, Co-hosts and Page access require GoodMeet Pro.
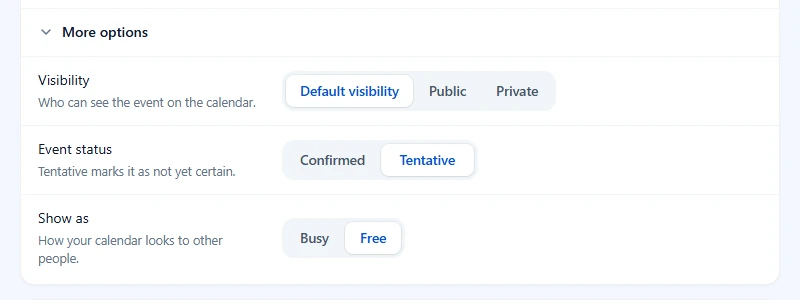
Three more settings only change the Google Calendar event, not the meeting page, so they are folded away.
- At the foot of the card, click More options.
- Pick Visibility: Default visibility, Public or Private.
- Pick Event status: Confirmed or Tentative. Tentative marks the meeting as not yet certain.
- Pick Show as: Busy or Free on your calendar.
Note: If Google Classroom or a course integration is on, this step also shows Google Classroom and Add to a course cards. See the related guides at the end.
Step 6: Design the meeting page (Page design) #
This step asks What do visitors see? Everything here changes the page on your site, not the calendar event.
- Click Page design on the left.
- Open Meeting theme. Leave Site default (Classic) to follow GoodMeet settings, or pick a theme from the list.
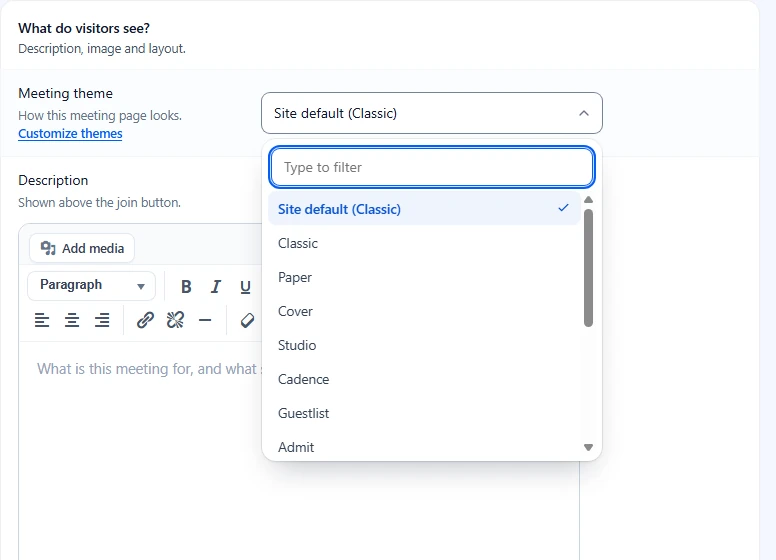
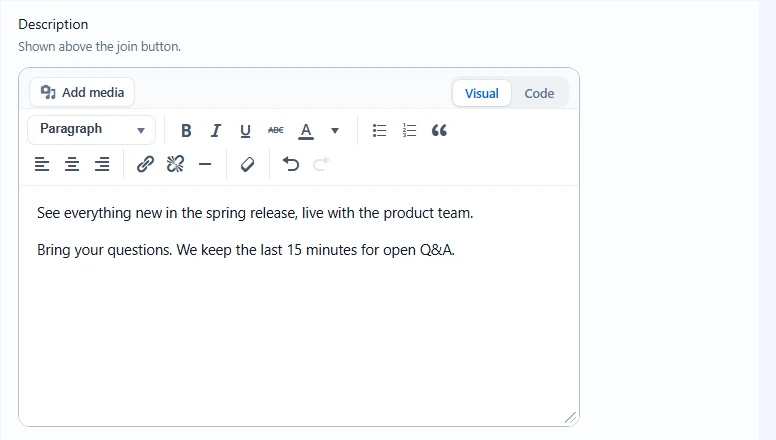
- In Description, write what the meeting is for and what to bring. It shows above the join button.
- Use the toolbar for headings, bold, lists and links. Click Add media to add an image, or switch to Code to edit the HTML.
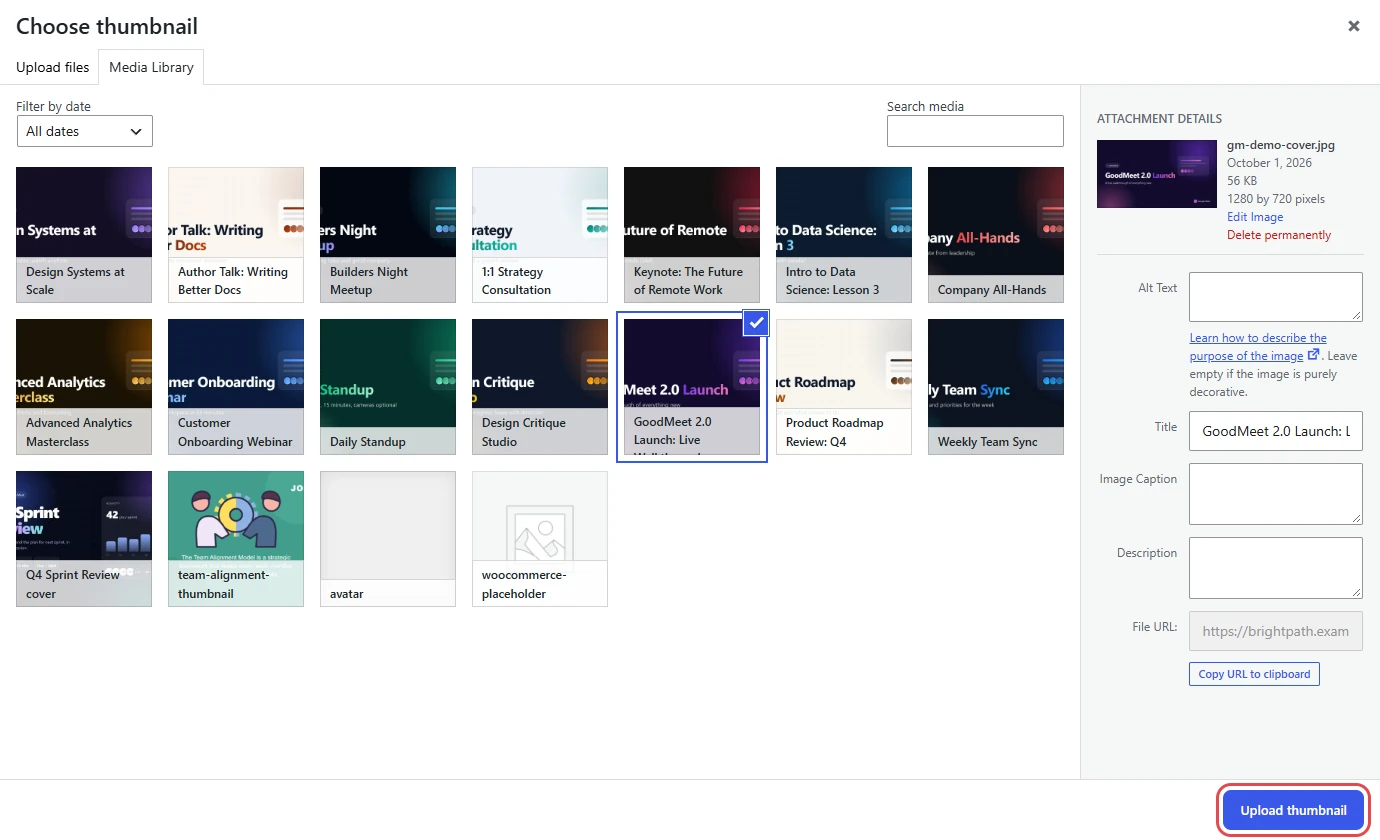
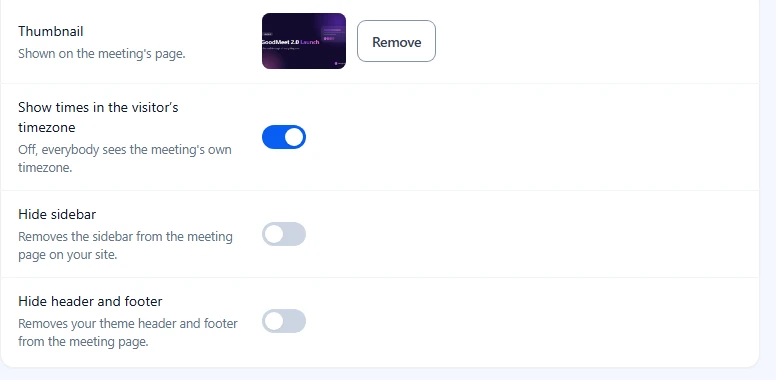
- Next to Thumbnail, click Upload thumbnail.
- In Choose thumbnail, pick an image from the Media Library, or upload one under Upload files.
- Click Upload thumbnail at the bottom right.
- Leave Show times in the visitor’s timezone on, so everyone sees the time in their own zone. Off, everybody sees the meeting’s own time zone.
- Turn on Hide sidebar or Hide header and footer if you want a cleaner page without your theme’s sidebar, header or footer.
Step 7: Create the meeting and check the page #
Creating the meeting sends it to Google first. GoodMeet saves nothing until Google accepts it, so a failed attempt never leaves a half-made meeting behind.
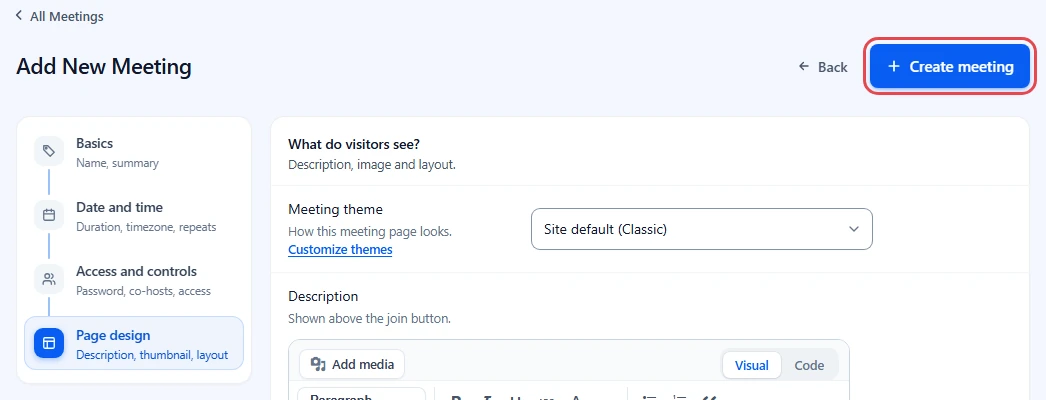
- Click Create meeting at the top right. It is there on every step.
- Wait while the button reads Creating.
- When the Meeting created message appears, you are back on All Meetings, with your new meeting in the list.
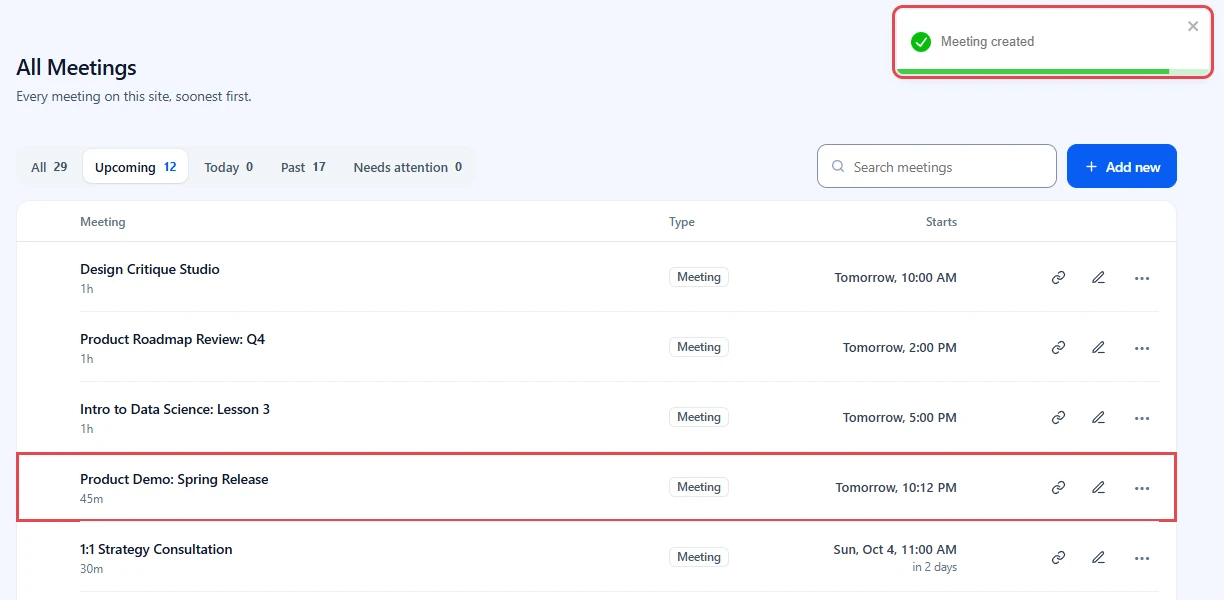
If Google refuses the request, the form stays open with a notice that names the reason, with Google’s own message underneath. When the connection is the problem, the notice has a Connect Google Meet or Reconnect Google Meet button that opens Settings > Connect. Your answers stay on the form, so you can fix the cause and click Create meeting again.
Now look at the page the way a visitor does.
- Hover over the meeting row and click More actions (•••), then View meeting page.
- Open the page in a private browser window to see it logged out.
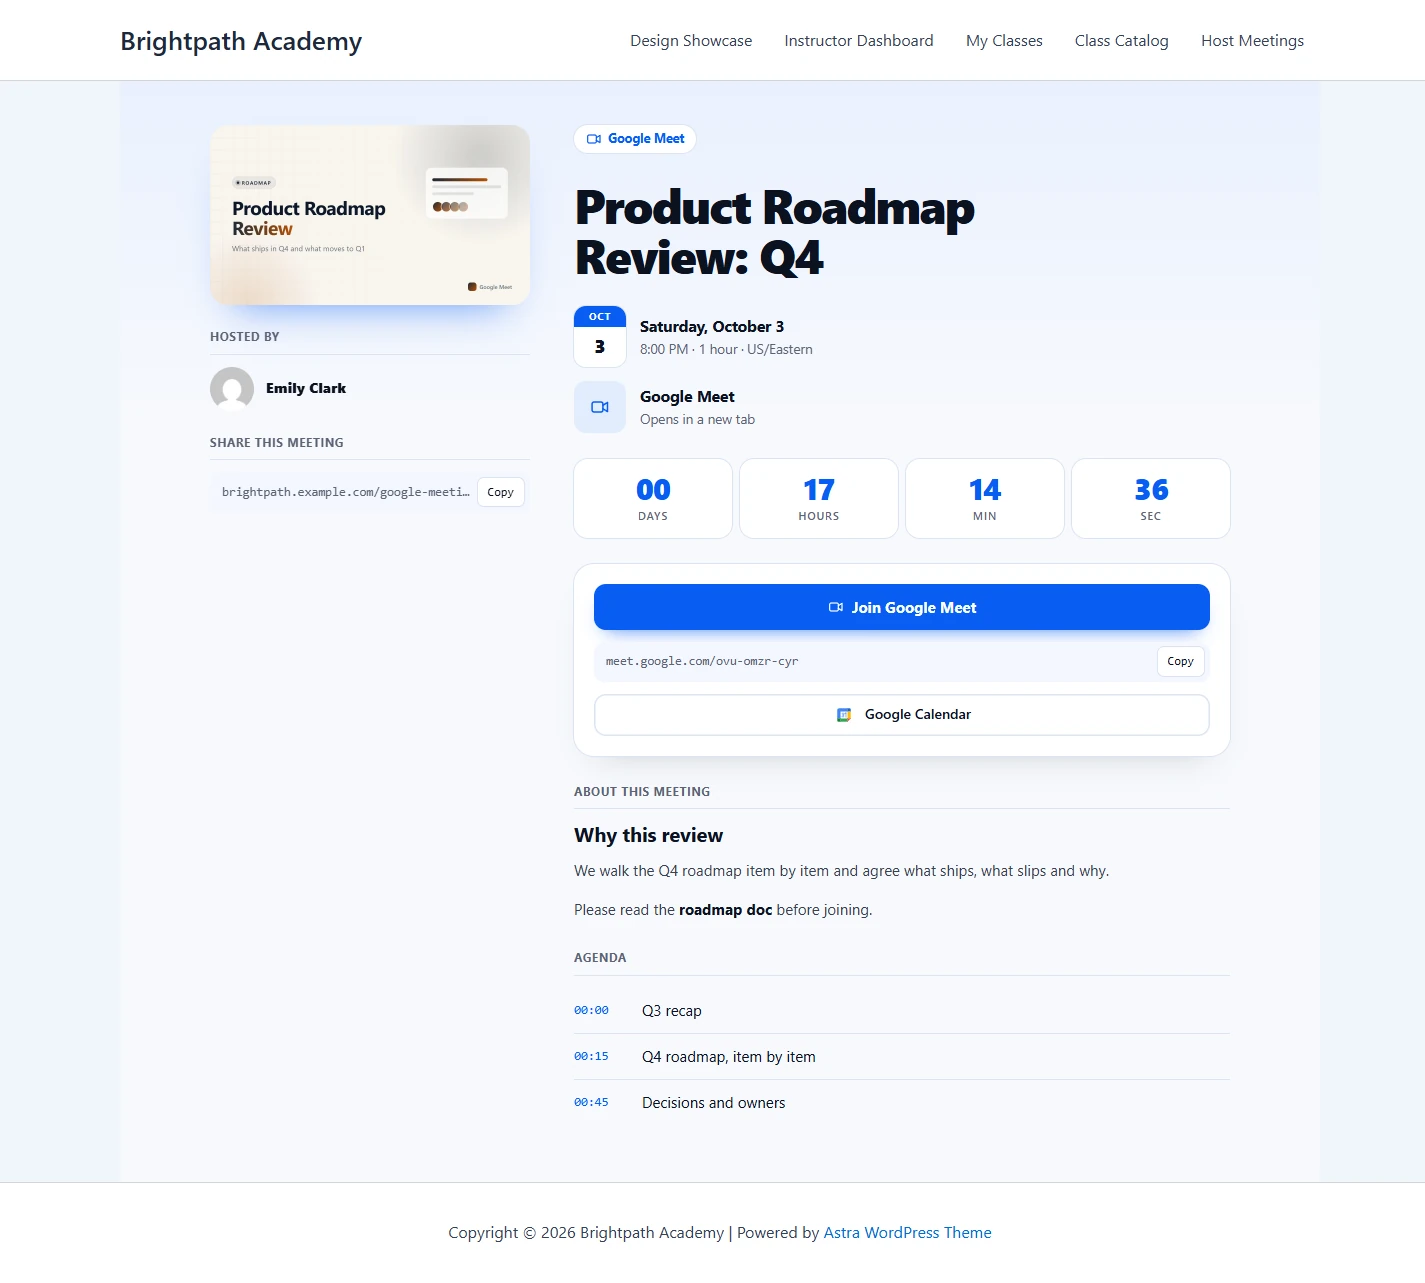
Tip: To put the meeting on a page you already have, use Copy shortcode from the row menu, the GoodMeet block, or the Elementor widget.
Manage your meetings #
Once you have a few meetings, these tools in All Meetings keep them easy to handle.
Find a meeting #
- Click a tab to filter the list: All, Upcoming, Today, Past or Needs attention. Each tab shows a count.
- Type in Search meetings to find a meeting by title. Click the × in the field to clear it.

Use the row actions #
Hover over a meeting row to see its actions.
- Click the chain icon, Copy link, to copy the meeting page address.
- Click the pencil icon, Edit, to open the meeting. Clicking the meeting name does the same.
- Click More actions (•••) for View meeting page, Copy shortcode and Delete.
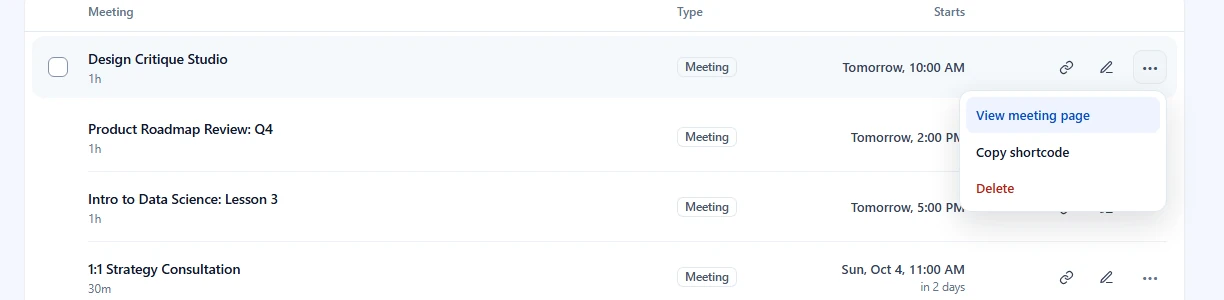
Copy the meeting link #
- Hover over the row and click the chain icon, Copy link.
- Wait for the icon to turn into a green tick. The address is now on your clipboard.

Join a meeting that is live now #
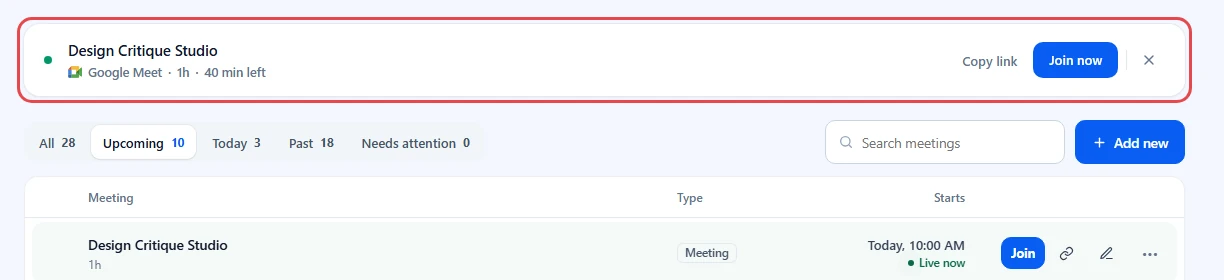
While a meeting is in progress, a strip above the tabs shows its name, Google Meet, its length and the time left.
- Click Join now to open the meeting page in a new tab, then join from there.
- Click Copy link to copy the meeting page address, or × to hide the strip for that meeting.
Edit a meeting #
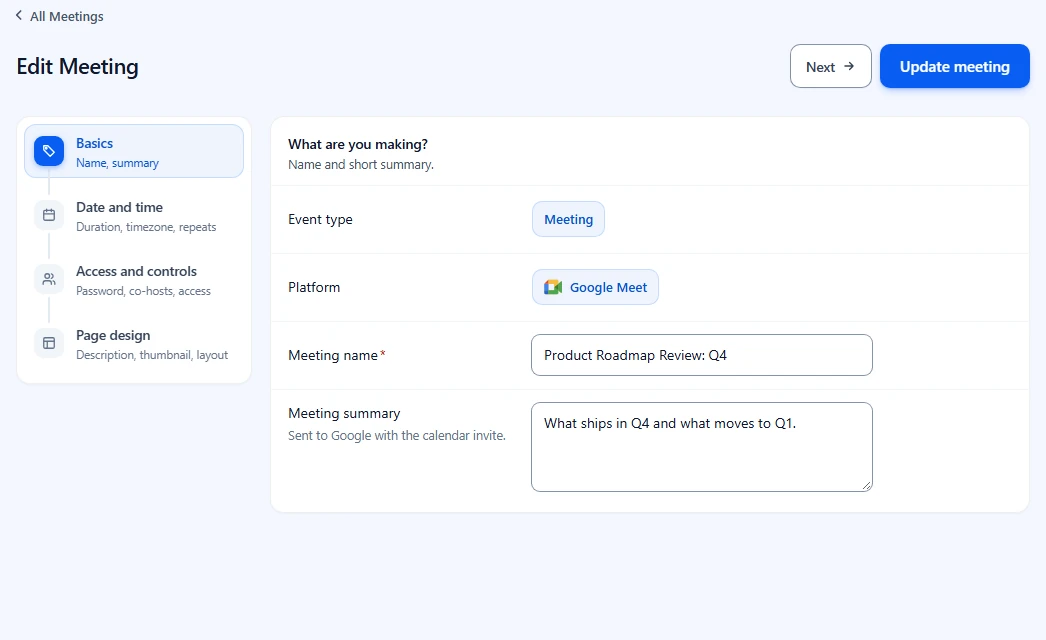
- Hover over the row and click the pencil icon, Edit. You can also click the meeting name.

- Change what you need in the Edit Meeting form. It has the same four steps.
- Click Update meeting.
Delete a meeting #
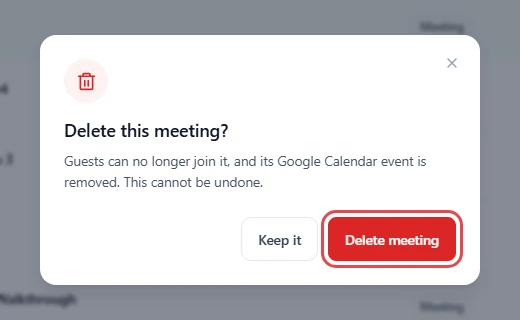
- Hover over the row, click More actions (•••), then Delete.
- Read Delete this meeting? Guests can no longer join it, and its Google Calendar event is removed.
- Click Delete meeting to confirm, or Keep it to cancel.
Tip: To delete several meetings, tick their checkboxes and click Delete selected.
Benefits of creating meetings with GoodMeet #
- Link, event and page from one form: You never create the calendar event or the Meet link by hand.
- An address that does not change: People get a page on your site, not a raw Meet link. You can edit details without resending anything.
- A say in who joins: Passwords, registration and page access decide who sees the join button.
- Clean deletes: Delete a meeting and its calendar event goes with it.
Troubleshooting #
All Meetings shows “Connect Google in three steps” #
No Google account is connected, or the connection was lost.
- Click Connect Google Meet.
- Follow How to connect your Google account.
Create meeting shows “Give the meeting a name before creating it.” #
The Meeting name field is empty.
- Go back to Basics and enter a name.
- Click Create meeting again.
“Google Meet is not connected” or “Google Meet has stopped accepting the connection” #
Google refused the request because the site has no working connection, or the connection expired or was revoked. Nothing was saved, and your answers are still on the form.
- Click Connect Google Meet or Reconnect Google Meet in the notice.
- Finish the connection in Settings > Connect.
- Go back to the form and click Create meeting again.
“The meeting was not created” #
Google refused the request for another reason. The line under the notice is Google’s own message, for example a bad date or a quota.
Check that:
- The start date and time are in the future.
- The Google Calendar API is enabled in your Google Cloud project.
- The card in Settings > Connect shows Connected.
The meeting is longer or shorter than I set #
Google uses the total of Hour and Minutes as the meeting length.
- Open the meeting and go to Date and time.
- Set Hour and Minutes by hand.
- Click Update meeting.
Delete shows “Could not delete the meeting” #
The request failed, or you do not own the meeting.
- Reload All Meetings.
- Try again as an administrator.
Frequently asked questions #
Do my guests get an email when I create a meeting? #
No, not when Send updates is set to Don’t send. Pick All guests if you want Google to email attendees.
Do I have to fill in every step? #
No. Only Meeting name and Starts matter. Every other field arrives with a working default from GoodMeet settings.
Can I change the meeting after it is created? #
Yes. Click Edit, change any field and click Update meeting. Google Calendar updates too.
Does deleting a meeting remove the Google Calendar event? #
Yes. GoodMeet removes the meeting from WordPress and deletes its Google Calendar event, so the join link stops working.
You’re ready to run your first meeting #
Your meeting has a Google Meet link, a calendar event and its own page on your site. Share the link, or place the meeting on a page with the block or a shortcode. Next, make it repeat, give it its own look, or let instructors create meetings themselves.


