- Step 1: Open Your Module
- Step 2: Open the Permissions Tab
- Step 3: Choose Who Can Preview Files
- Step 4: Choose Who Can Download Files
- Step 5: Set the Other File Actions
- Step 6: Choose Who Can See the Module
- Step 7: Save the Module
- Step 8: Check the Page as a Visitor
- Step 9: Change the Messages Visitors See (Optional)
- Benefits of Module Permissions
Do you want only some people to preview or download your Google Drive files, or show a module to logged in members only? You can easily do this with DriveHub.
Every module has its own Permissions tab. There you decide which file actions are allowed, which users and roles can use each one, and who can see the module at all.
Here is an easy, step-by-step guide to help you set it all up!
Step 1: Open Your Module #
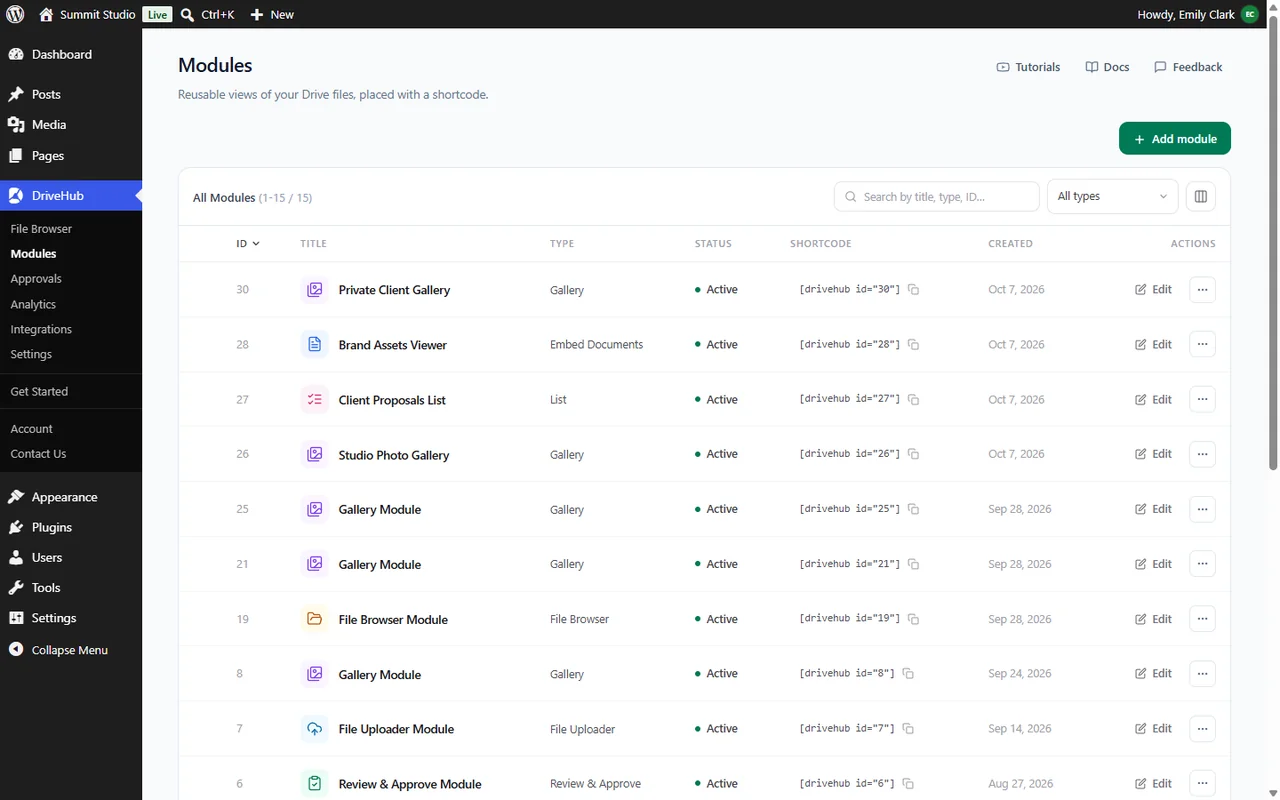
First, open the module you want to control:
- Go to DriveHub > Modules from your WP-Admin.
- Find your module in the list (we’ll use the Private Client Gallery gallery module).
- Click on Edit next to it.
Step 2: Open the Permissions Tab #
- In the left steps of the module builder, click on Permissions.
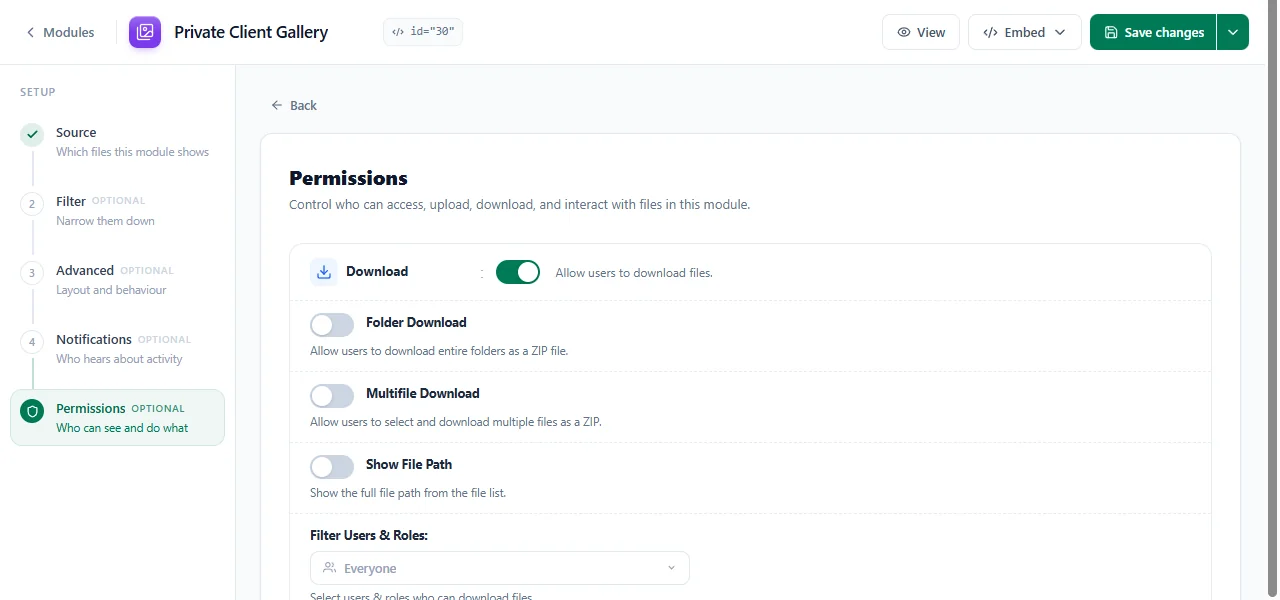
You will see a card for each file action this module type uses, then Usage Limits, Password Protection and Visibility at the bottom. The action cards depend on the module type:
- Gallery and Embed Documents modules: Download only.
- List modules: Preview and Download.
- File Browser and other module types: every action, from Preview to Allow Search.
Step 3: Choose Who Can Preview Files #
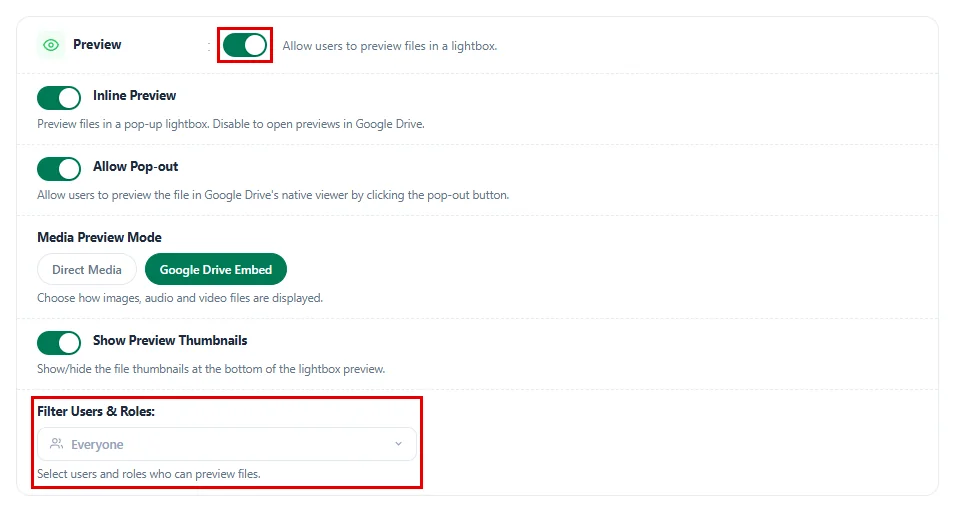
You will find this card in list and file browser modules. The Preview card controls the lightbox that opens when a visitor clicks a file:
- Use the switch next to Preview to allow or block previews. It is on by default.
- Leave Inline Preview on to open files in a pop-up lightbox, or turn it off to open them in Google Drive instead.
- Allow Pop-out adds a button that opens the file in Google Drive’s own viewer.
- Media Preview Mode sets how images, audio and video play: Direct Media or Google Drive Embed.
- Show Preview Thumbnails shows small thumbnails at the bottom of the lightbox.
- Click on the Filter Users & Roles field and pick the roles (like Subscriber or Customer) or the users who may preview files. Leave it on Everyone to allow all visitors.
Step 4: Choose Who Can Download Files #
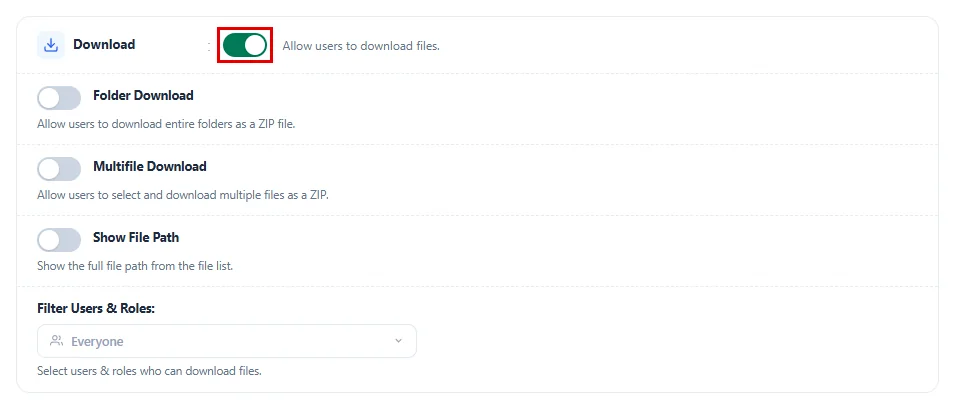
Every module with files to download has the Download card. It works the same way:
- Use the switch next to Download to allow or block downloads. It is on by default.
- Turn on Folder Download to let people download a whole folder as a ZIP file.
- Turn on Multifile Download to let people select several files and download them as one ZIP file.
- Turn on Show File Path to show where each file lives.
- Use Filter Users & Roles to limit downloads to certain roles or users.
Tip: Large ZIP downloads can use a lot of server memory. Keep Multifile Download off for very big folders.
Step 5: Set the Other File Actions #
In a file browser module, below Download you will find a card for each of the other actions: Delete, New Folder, Move & Copy, Rename, Share, Copy Links, View Details, Create Documents, Edit Documents, Account Switching and Allow Search. Each card has its own switch and its own Filter Users & Roles field:
- Turn off any action you don’t want visitors to use.
- For an action you keep on, pick the roles or users who may use it in Filter Users & Roles.
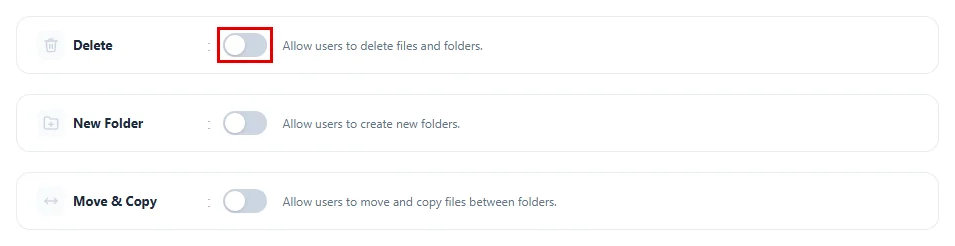
Actions that change your files, like Delete, New Folder, Move & Copy and Rename, are off until you turn them on.
Note: Administrators can always use every action that is switched on, whatever you pick in Filter Users & Roles.
Step 6: Choose Who Can See the Module #
Now decide who can see the module at all. Scroll down to the Visibility card:
- Under Display For, choose Everyone to show the module to all visitors.
- Choose Logged In to show it only to people who are logged in to your website.
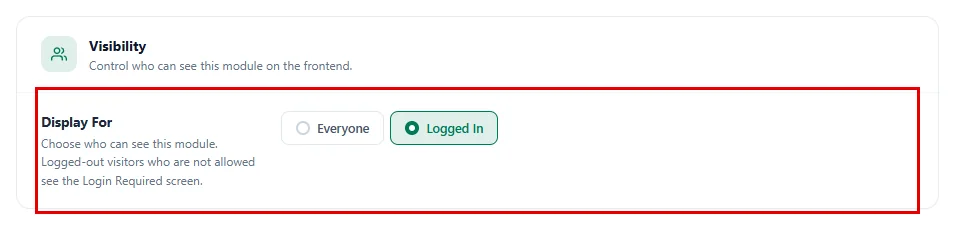
With Logged In selected, visitors who are not logged in get a login screen instead of your files, and only people with an account on your website can open the module.
Note: Display For needs DriveHub Pro.
Step 7: Save the Module #
- Click on Save changes at the top right of the builder.
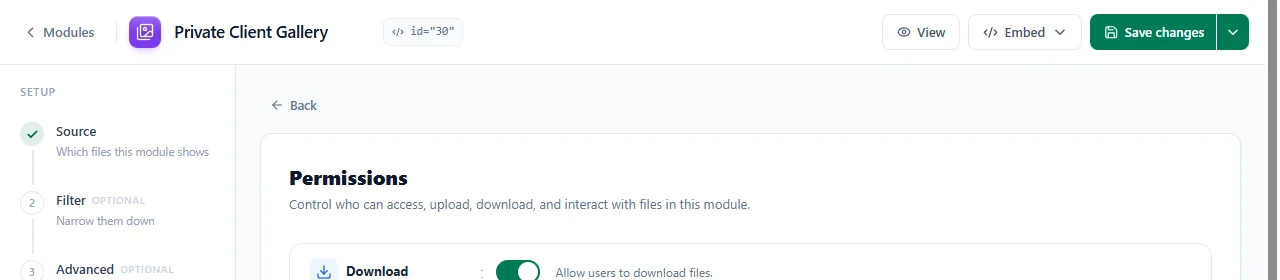
Don’t forget this step; none of your permission changes are active until you save.
Step 8: Check the Page as a Visitor #
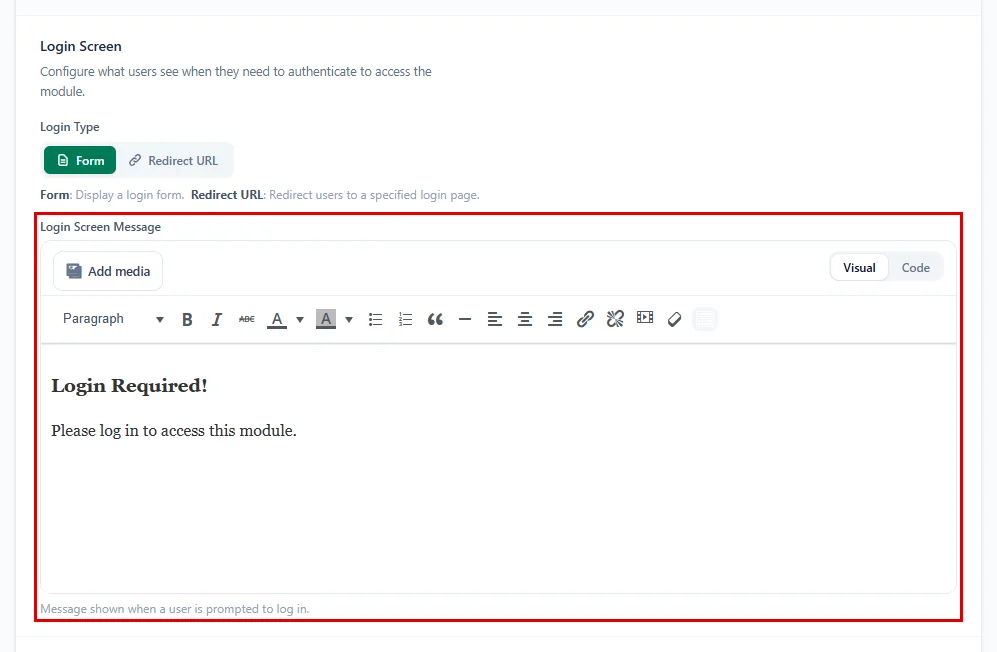
Open the page with this module in a private browser window. When the module is set to Logged In, visitors who are not logged in see Login Required! and Please log in to access this module. with a login form, instead of your files.
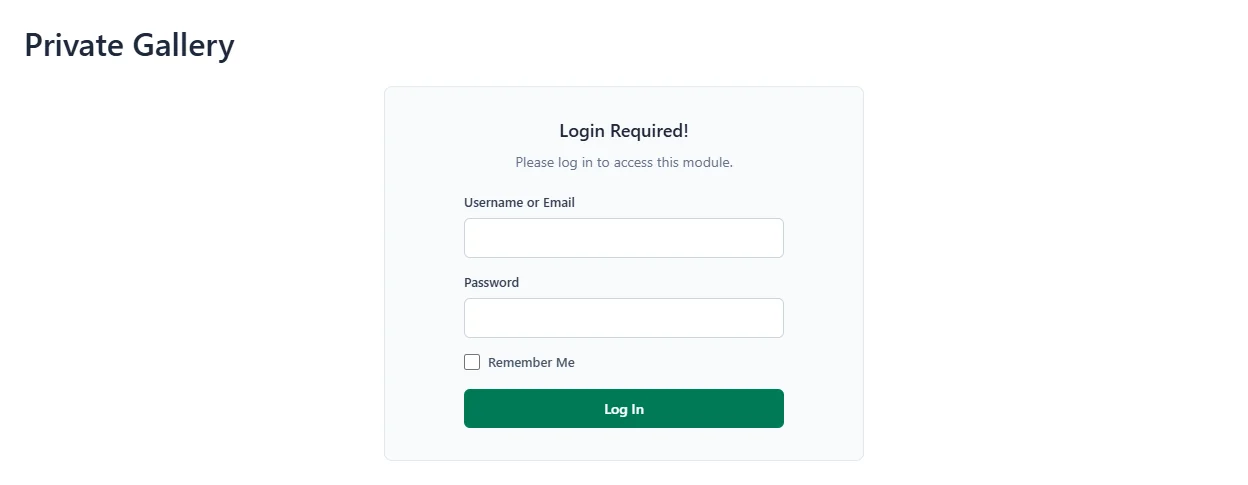
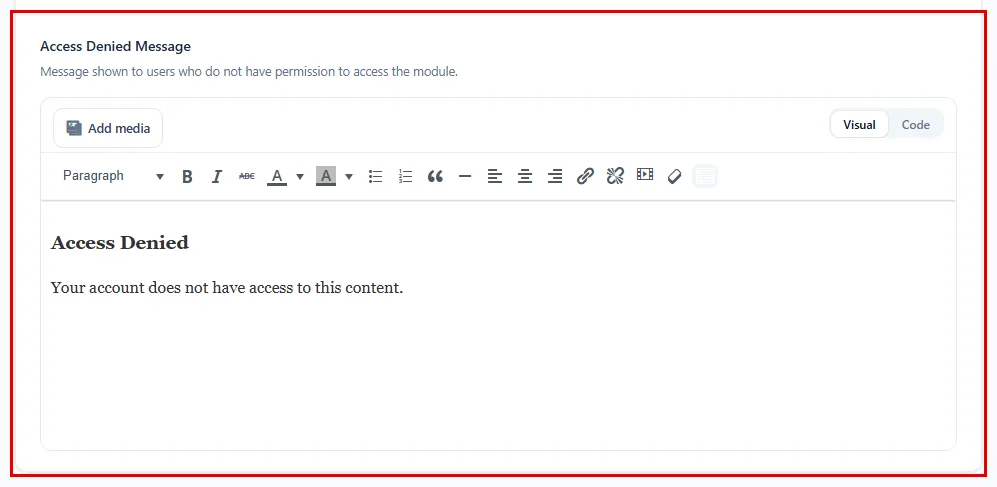
Logged in users who are not allowed to see the module don’t get a login form. They see a short message box in place of the module, with the title Access Denied and the text Your account does not have access to this content. No files, buttons or folder names are shown. You can change this text in Step 9.
Logged in users with the right role see the module as usual, with only the actions you allowed.
Step 9: Change the Messages Visitors See (Optional) #
You can write your own text for these screens. The messages are shared by every module on your site:
- Go to DriveHub > Settings.
- Click on Security in the settings menu.
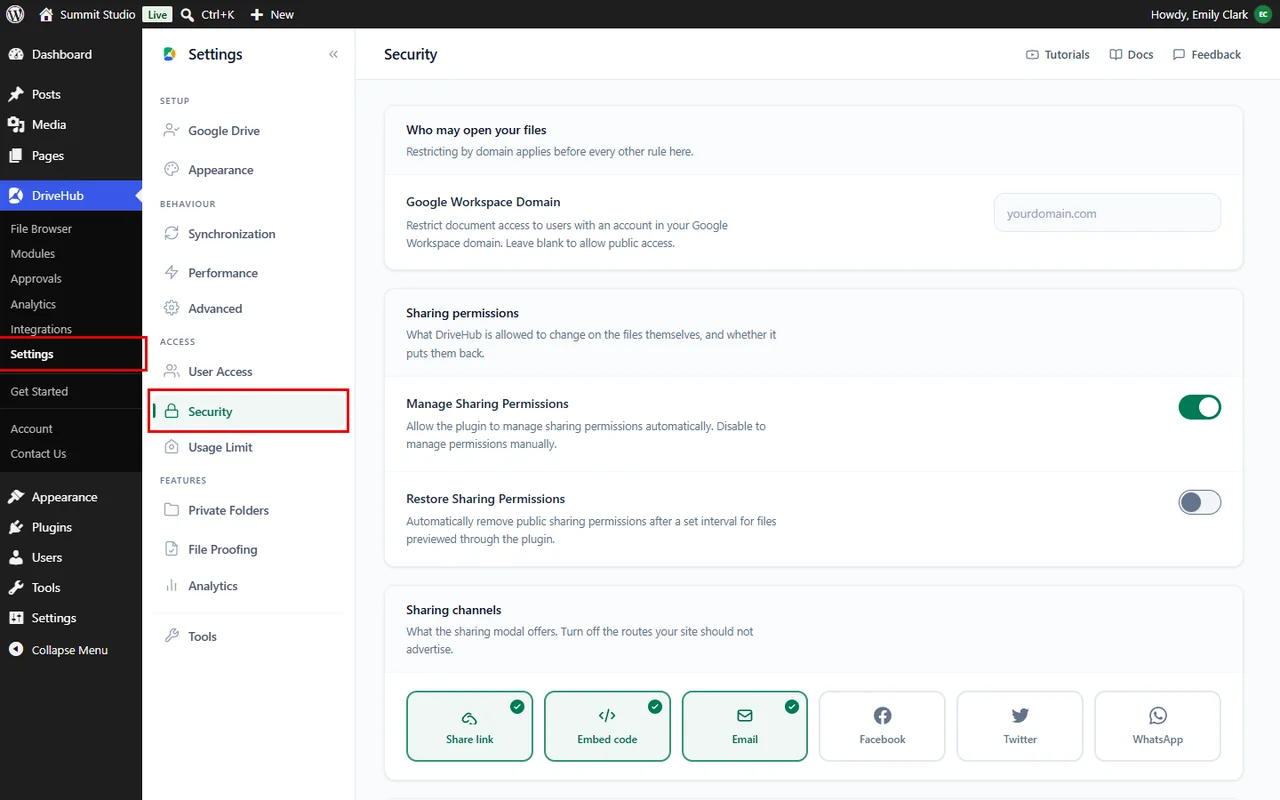
- Scroll down to What a blocked visitor sees.
- Under Login Screen, choose a Login Type: Form shows a login form inside the module, and Redirect URL sends visitors to your own login page (type its address in Login URL).
- Write your text in Login Screen Message.
- Write your text for people without access in Access Denied Message.
- Click Save changes in the bar at the bottom of the screen.
And that’s it. Your module now shows the right files, with the right actions, to the right people.
Benefits of Module Permissions #
- Control each action: Allow previews for everyone but downloads only for clients.
- Roles and users: Pick WordPress roles or single users for every action.
- Members only: Show a module only to people who are logged in.
- Clear messages: Visitors know why they can’t see a module and what to do next.
- Per module: Every module keeps its own rules, so one site can have public and private pages.
With DriveHub permissions, you decide exactly who sees your Google Drive files and what they can do with them.


