- Which marketplaces ZooMeet supports
- Before you begin
- Step 1: Install WooCommerce and MultiVendorX
- Step 2: Install and activate ZooMeet
- Step 3: Connect your Zoom account
- Step 4: Turn on the MultiVendorX integration
- Step 5: Keep vendors on your Zoom account (Events settings)
- Step 6: Let store owners create meetings (Frontend Meetings)
- Step 7: Open Zoom Events in the vendor dashboard
- Step 8: Create a meeting as the vendor
- Step 9: Link the meeting to a product (store dashboard)
- Step 10: See it on the product page
- Benefits of using ZooMeet with a marketplace
- Troubleshooting
- Frequently asked questions
- Security best practices
- You're ready to let marketplace vendors sell meetings
If you run a multi-vendor marketplace and your vendors want to sell live Zoom sessions, such as a coaching call or a group class, you’re in the right place. This guide shows you how ZooMeet works with marketplace plugins, then walks you through MultiVendorX step by step.
ZooMeet supports three marketplace plugins: Dokan, WCFM Marketplace and MultiVendorX. With each one, vendors get a Zoom Events menu in the dashboard they already use, where they create and manage their own meetings. A meeting is then sold as a normal WooCommerce product, so the marketplace keeps paying commissions the way it always does. Running Dokan or WCFM? See the Dokan guide or the WCFM guide.
By the end of this guide, you will have:
- WooCommerce, MultiVendorX, ZooMeet and ZooMeet Pro working together
- The MultiVendorX integration turned on
- Store owners allowed to create Zoom meetings
- A vendor meeting created from the MultiVendorX dashboard
- A product that sells a seat in that meeting, assigned to the vendor’s store
Estimated setup time: 10 minutes. Vendors keep their store, products and orders exactly as they are.
Note: Requires ZooMeet Pro and WooCommerce.
Which marketplaces ZooMeet supports #
| Marketplace | Where vendors manage meetings | Where a product is linked to a meeting |
|---|---|---|
| Dokan | Zoom Events in the Dokan dashboard | Sell a Zoom event with this product on the Dokan product form |
| WCFM Marketplace | Zoom Events in the WCFM menu | Zoom Event tab in the WCFM product manager |
| MultiVendorX | Zoom Events in the store dashboard | Zoom Event card in the store dashboard product editor (this guide, Step 9) |
Every marketplace has its own switch under ZooMeet > Integrations > Marketplaces, and works only while that marketplace plugin is active too.
Before you begin #
Make sure you have:
- An administrator account on your WordPress site, such as Emily Clark’s
- At least one approved MultiVendorX vendor (a store owner)
- A Zoom account connected to ZooMeet
- A ZooMeet Pro license
Let’s get started.
Step 1: Install WooCommerce and MultiVendorX #
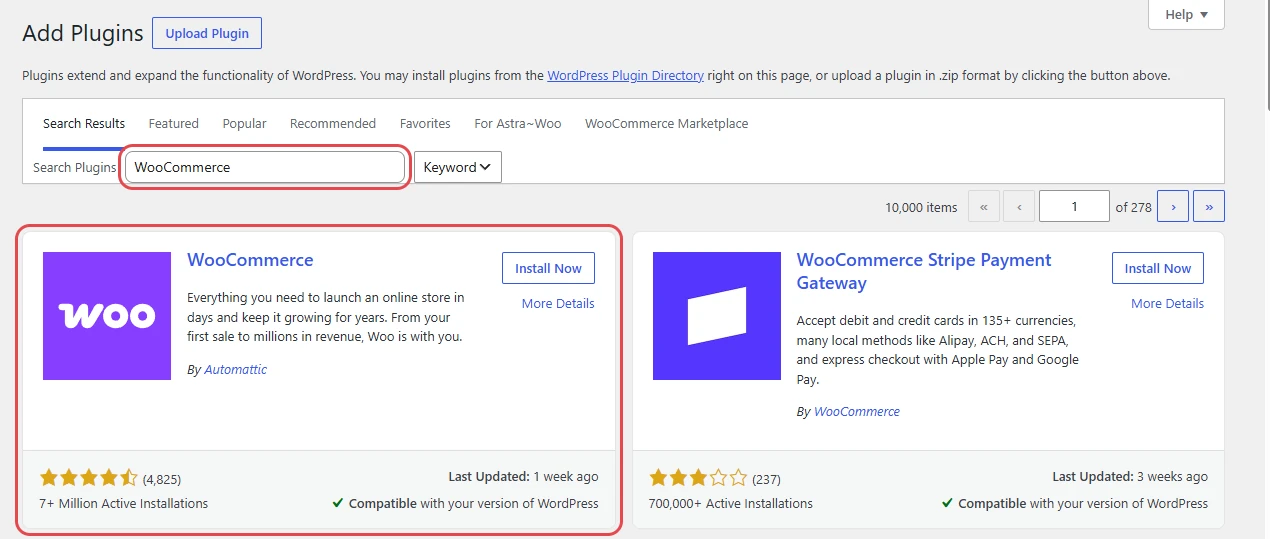
First, make sure WooCommerce and MultiVendorX are installed and activated. WooCommerce handles the products and orders, and MultiVendorX gives each vendor a store dashboard.
- In the WordPress admin menu, go to Plugins > Add New Plugin.
- Search for WooCommerce.
- Click Install Now, then Activate.
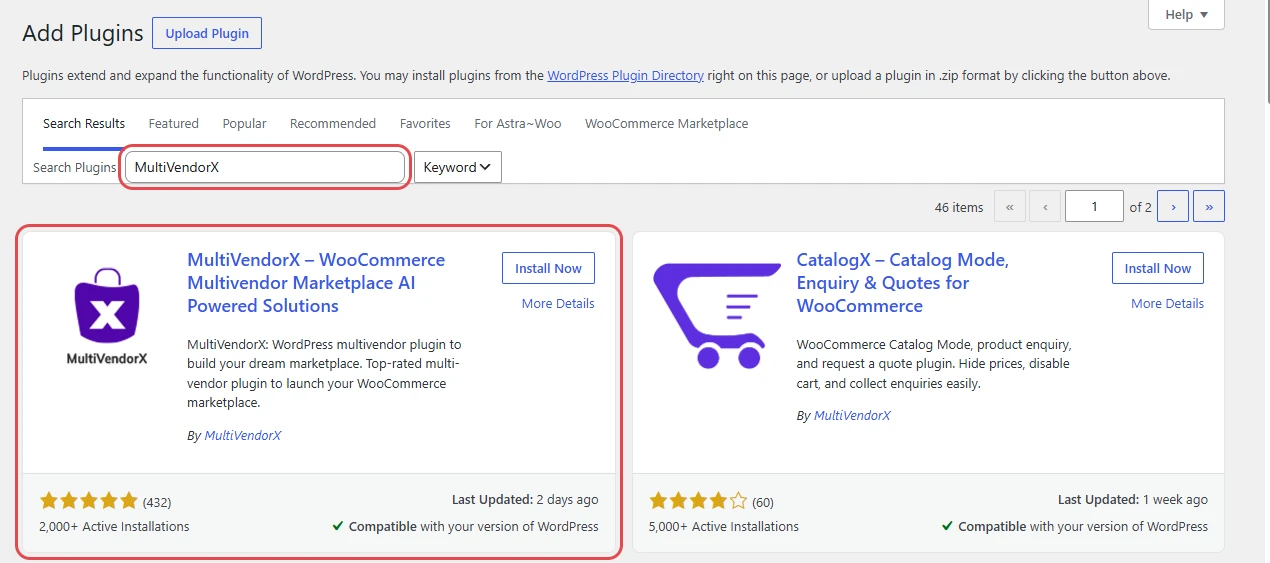
Next, install MultiVendorX.
- Go to Plugins > Add New Plugin again.
- Search for MultiVendorX.
- Click Install Now, then Activate.
Step 2: Install and activate ZooMeet #
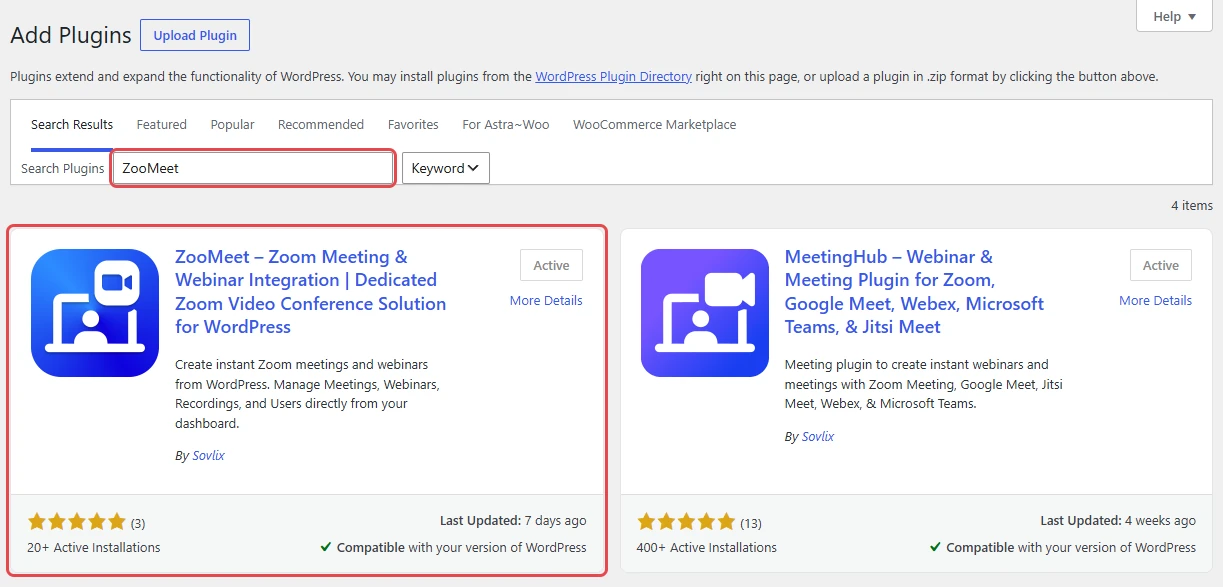
ZooMeet creates the Zoom meetings. ZooMeet Pro adds the marketplace and WooCommerce integrations on top.
- Go to Plugins > Add New Plugin.
- Search for ZooMeet.
- Click Install Now, then Activate.
To use the Pro features in this guide, add ZooMeet Pro from inside ZooMeet. There is nothing to upload.
- In WordPress admin, open ZooMeet and click Upgrade, then complete the checkout.
- Go to ZooMeet > Account. Your license shows there, and ZooMeet offers to install ZooMeet Pro.
- Install ZooMeet Pro, then activate it.
Step 3: Connect your Zoom account #
Vendor meetings are created on the Zoom account you connect here, so this step comes before anything else. If you already did this, skip to Step 4.
- Go to ZooMeet > Settings and click Connect.
- Paste the Account ID, Client ID and Client Secret from your Zoom Server-to-Server OAuth app.
- Save the settings and check that the connection succeeds.
Read our step-by-step Zoom setup guide for the full walkthrough.
Step 4: Turn on the MultiVendorX integration #
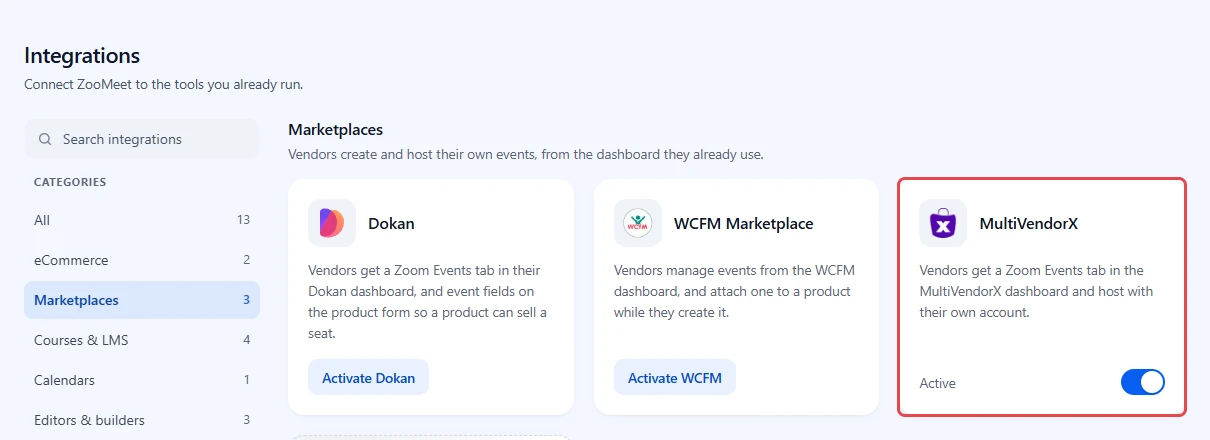
ZooMeet adds its vendor menu only while both its MultiVendorX switch and the MultiVendorX plugin are active. The WooCommerce switch under eCommerce must be on too, because it powers the product link, the Event Details tab and the order email.
- Go to ZooMeet > Integrations.
- In Categories, click eCommerce and check that the WooCommerce card reads Active.
- Click Marketplaces.
- On the MultiVendorX card, switch the toggle on. The card shows Active.
Step 5: Keep vendors on your Zoom account (Events settings) #
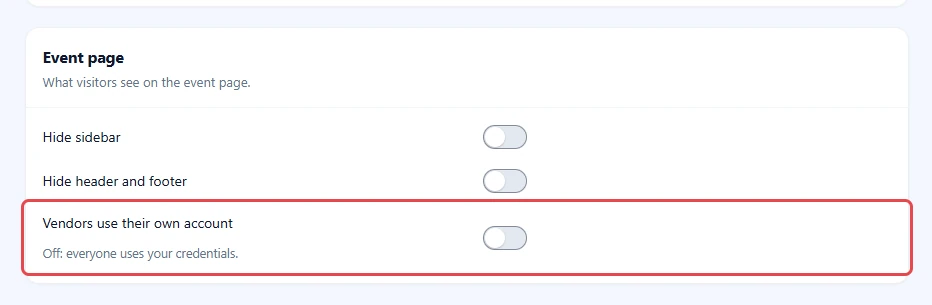
One setting decides whose Zoom credentials vendor meetings use. Leave it off, so every vendor meeting is created on the Zoom account you connected in Step 3 and vendors need no Zoom setup.
- Go to ZooMeet > Settings and click Events.
- Scroll to the Event page group.
- Check that Vendors use their own account is off. Its hint reads Off: everyone uses your credentials.
Step 6: Let store owners create meetings (Frontend Meetings) #
Dokan and WCFM vendors can create meetings straight away. MultiVendorX store owners need your permission first; without it, their All Events screen shows Events could not be loaded.
- Go to ZooMeet > Frontend Meetings.
- If ZooMeet shows Let members create their own events, click Set up the page and finish the short setup.
- In Member access, open Who can create and add Store owner.
Note: Who can create saves on its own and shows Saved. Roles that can already write posts, such as the Dokan Vendor and WCFM Store Vendor roles, can always create meetings.
From here on, the vendor does the work in their MultiVendorX store dashboard.
Step 7: Open Zoom Events in the vendor dashboard #
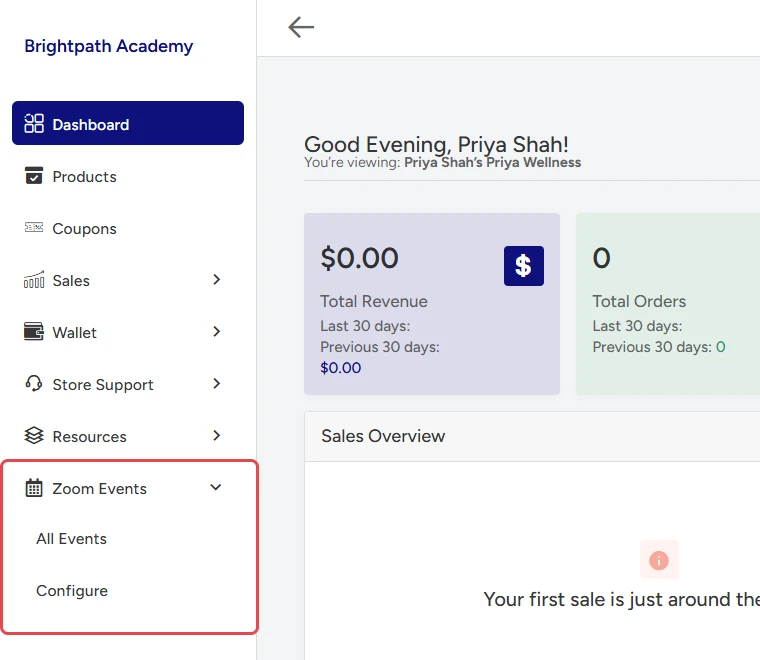
ZooMeet adds a Zoom Events menu to the store dashboard of every store owner.
- The vendor signs in and opens their store dashboard.
- In the sidebar, they click Zoom Events. The menu opens with All Events and Configure.
- They click All Events.
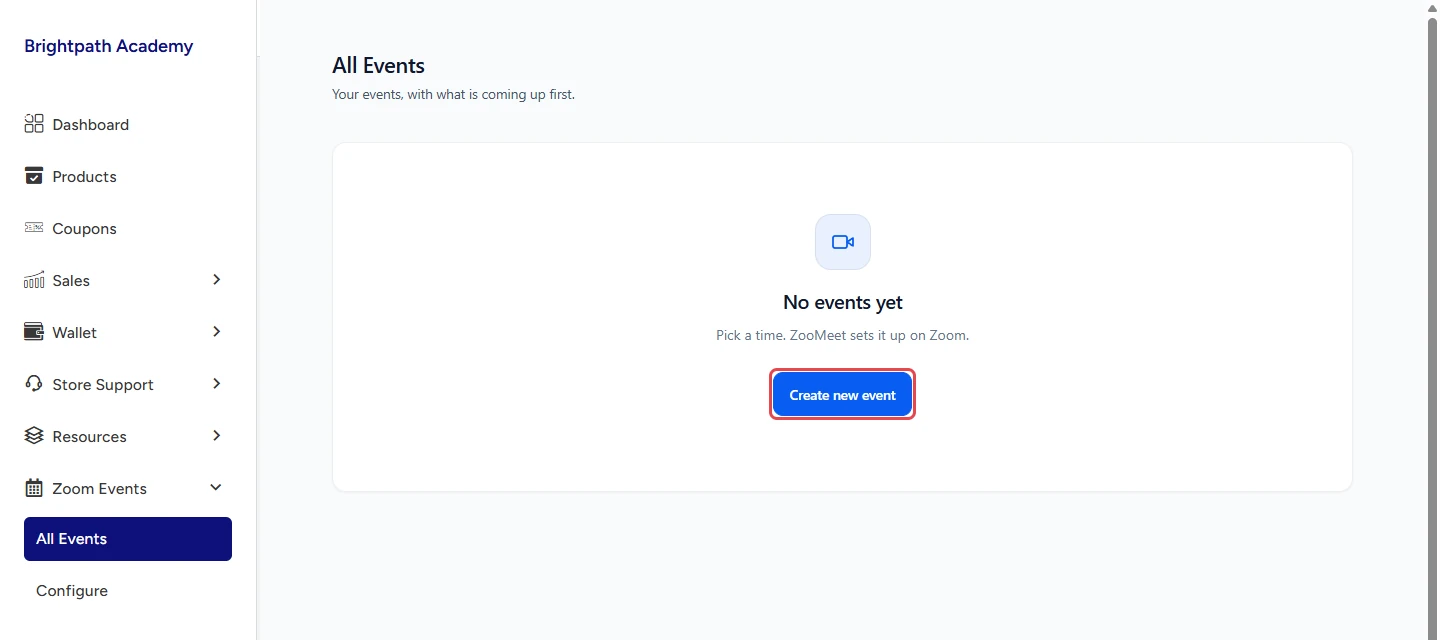
A new vendor starts with an empty list that reads No events yet.
Step 8: Create a meeting as the vendor #
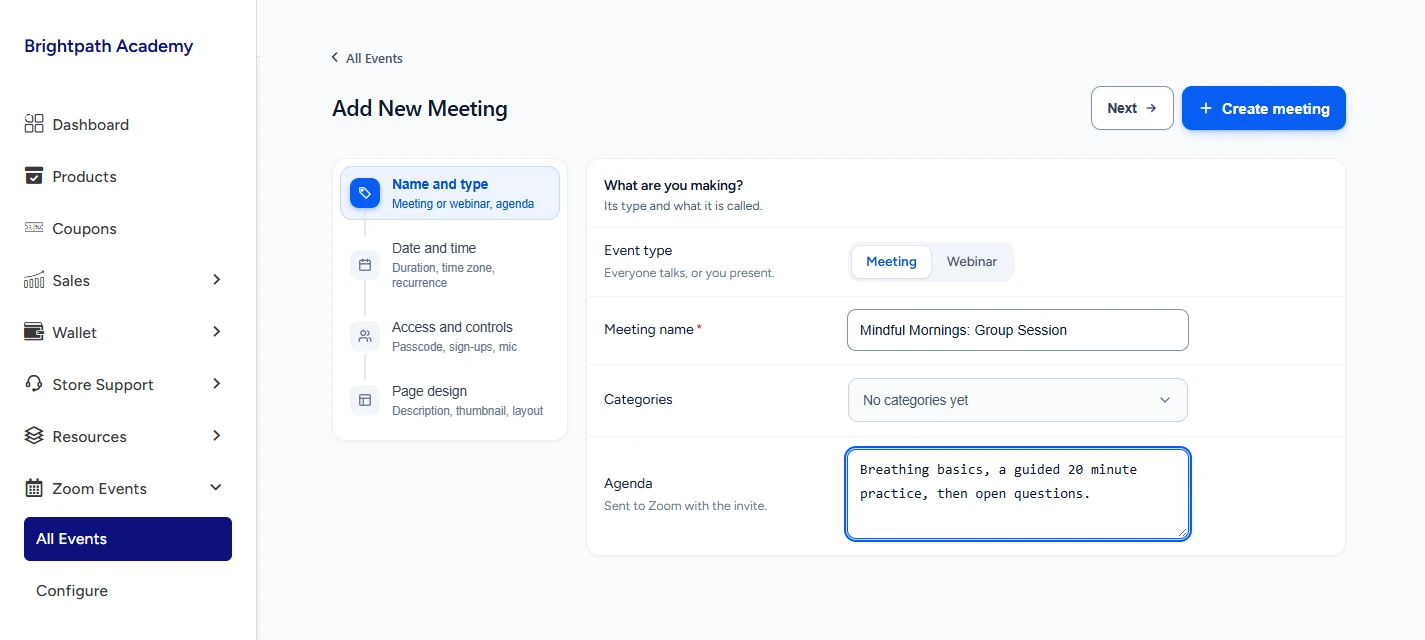
Each product sells a seat in one meeting, so the vendor creates the meeting first. The form is the same step-by-step form you use in WordPress admin.
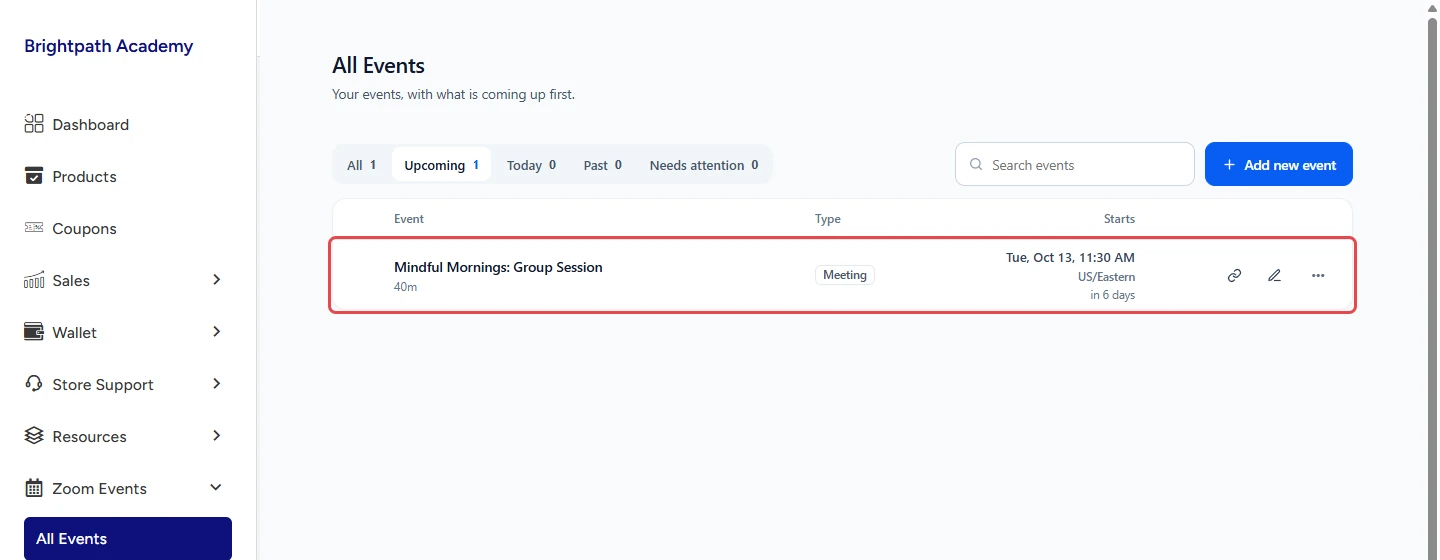
- The vendor clicks Create new event. Once they have events, the button reads Add new event.
- On Name and type, they enter the Meeting name, for example Mindful Mornings: Group Session, and an Agenda.
- They set Date and time, and optionally Access and controls and Page design.
- They click Create meeting.
ZooMeet creates the meeting on Zoom and returns the vendor to All Events, where it is listed under Upcoming.
Tip: For a paid session, the vendor can turn on Registration required in Access and controls, so buyers who checked out as guests sign in on the meeting page. Once a product sells the meeting, only buyers get the join details either way. See How to sell Zoom meetings with WooCommerce.
Step 9: Link the meeting to a product (store dashboard) #
The vendor links their meeting to a product in the MultiVendorX product editor, so the product sells in their own store.
- In the store dashboard, the vendor clicks Products, then Add New, or opens one of their products.
- They fill in the product name and Regular price, and choose Digital service – Delivered online under How will this be delivered?
- In the Zoom Event card on the right, they tick Sell a Zoom event with this product.
- In Choose event, they choose their meeting. The list starts on Select a meeting or webinar, groups the vendor’s own events under Meetings and Webinars, and shows nobody else’s.
- They click Save.
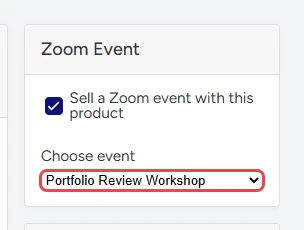
When the product is saved, the meeting is linked and its page shows a Buy now button. If the vendor has no meetings yet, the card reads Create an event first, then choose it here. To stop selling the meeting, they untick Sell a Zoom event with this product and save; ZooMeet unlinks it.
Or link the product from WordPress admin #
Administrators can link any vendor’s meeting from WordPress admin. This is also where you change which store gets the sale.
- Go to Products and open the vendor’s product, or click Add New.
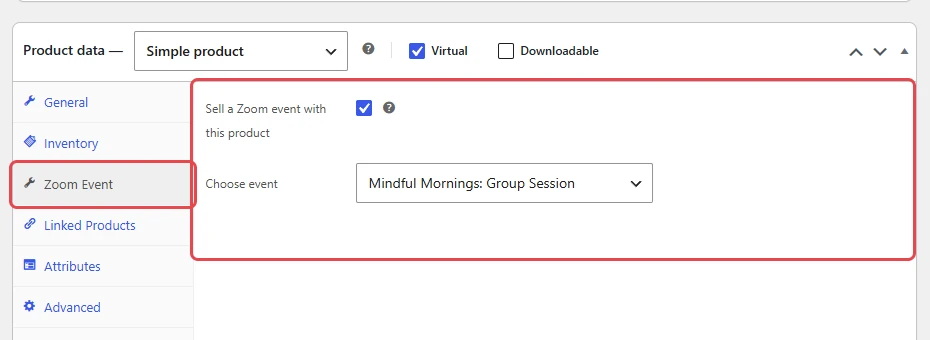
- In Product data, keep Simple product and tick Virtual.
- Click the Zoom Event tab.
- Tick Sell a Zoom event with this product and choose the vendor’s meeting in Choose event. The list starts on Select a meeting or webinar, and webinars show (Webinar) after their name.
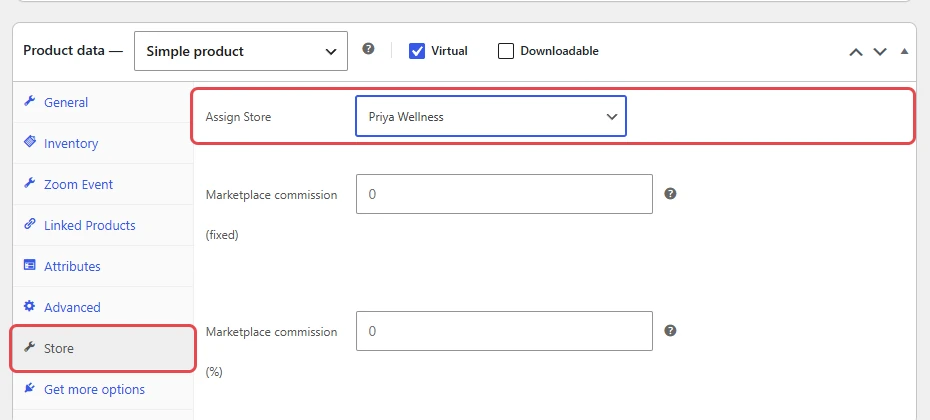
- Click the Store tab.
- In Assign Store, search for the vendor’s store and select it, for example Priya Wellness.
- Click Publish or Update.
Step 10: See it on the product page #
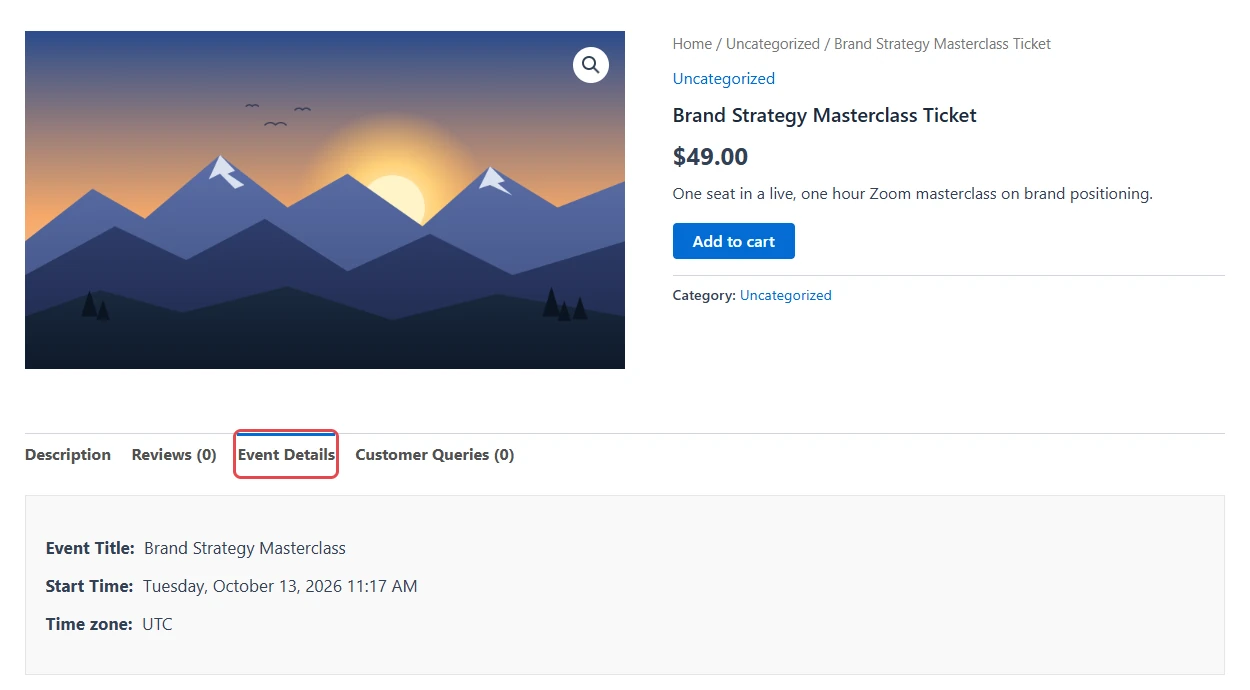
Open the product in a private browser window to check it the way a customer does. Customers buy the meeting like any other product, and an Event Details tab lists the Event Title, Start Time and Time zone.
ZooMeet takes over once the order goes through:
- When the order is Completed, ZooMeet adds the buyer’s billing email to the meeting’s list of attendees.
- The completed order email includes Your Event Information, with the sign-in details and a Join Event link.
- In My Account, the buyer finds the meeting under Zoom Events.
Benefits of using ZooMeet with a marketplace #
- One menu in the dashboard vendors know: Zoom Events sits next to their products and orders.
- No Zoom setup for vendors: with Vendors use their own account off, every meeting runs on your connected Zoom account.
- Commissions as usual: a meeting product is a normal WooCommerce product, so the marketplace pays vendors the usual way.
- Private by design: each vendor sees and edits only their own meetings.
Your vendors sell live sessions with the same tools they use for everything else.
Troubleshooting #
Vendors do not see a Zoom Events menu #
ZooMeet adds the menu only while the integration and the marketplace plugin are both active.
Check that:
- The MultiVendorX card is on in ZooMeet > Integrations > Marketplaces.
- MultiVendorX is active.
- The user is an approved store owner.
All Events says “Events could not be loaded” #
The message continues Sorry, you are not allowed to do that. The vendor’s role may not create meetings yet.
- Go to ZooMeet > Frontend Meetings.
- In Member access, add Store owner to Who can create.
- Ask the vendor to click Try again.
Configure says “Settings could not be loaded” #
Configure opens ZooMeet’s settings screen, which only administrators can load. Vendors do not need it: with Vendors use their own account off, their meetings use your Zoom account and your default settings.
The Zoom Event card says “Create an event first, then choose it here.” #
The vendor has no published meetings yet. They create one under Zoom Events > All Events, then come back to the product.
The customer did not get the meeting details #
ZooMeet adds the buyer and adds the details to the email only when the order status is Completed.
Check that:
- The order is Completed in WooCommerce > Orders.
- The product sells the meeting: Sell a Zoom event with this product is ticked, in the store dashboard or in WordPress admin, with the meeting chosen in Choose event.
Frequently asked questions #
Do vendors need their own Zoom account? #
No. With Vendors use their own account off, every vendor meeting is created on the Zoom account you connected.
Can a vendor see other vendors’ meetings in All Events? #
No. Each vendor sees and edits only the meetings they created.
Can I run two marketplace plugins at once? #
No, it is not recommended. Each marketplace has its own switch, but marketplace plugins compete for the same dashboard pages. Run one marketplace plugin and turn on its card only.
Can a customer buy two seats in one order? #
No. A meeting product is locked to one per order. Each attendee buys their own seat.
Who gets the commission for a meeting product? #
The store chosen in Assign Store. ZooMeet does not change how MultiVendorX calculates commissions.
Security best practices #
- Approve vendors before they can sell, so only trusted people create meetings that customers pay for.
- Add Store owner to Who can create only if your store owners should schedule meetings.
- Ask vendors to turn on Registration required for paid meetings, so guest buyers can sign in on the meeting page.
- Check that each meeting product links to the selling vendor’s own meeting before you publish it.
- Keep WordPress, WooCommerce, MultiVendorX and ZooMeet up to date.
You’re ready to let marketplace vendors sell meetings #
Your MultiVendorX vendors can now create Zoom meetings from their store dashboard, and each meeting sells as a product in their store. A completed order adds the buyer to the meeting and emails their details. Next, see the guides for the other marketplaces and for selling meetings in your own shop.


