- Step 1: Install DriveHub and Connect Google Drive
- Step 2: Create a Search Box Module
- Step 3: Choose Where to Search (Source Tab)
- Step 4: Choose Which Files Can Be Found (Filter Tab)
- Step 5: Set the Width (Advanced Tab)
- Step 6: Choose How the Search Box Works (Advanced Tab)
- Step 7: Choose Who Can Search (Permissions Tab)
- Step 8: Save and Add the Search Box to a Page
- Step 9: Try the Search Box on Your Website
- Benefits of Adding a Google Drive Search Box
Do you have lots of files in Google Drive and want visitors to find the right one by typing its name? You can easily do this with DriveHub.
The Search Box module adds a simple search field to your page. Visitors type a few letters and see the matching files from the folders you choose, then click a file to preview it. It is super useful for price lists, manuals, forms or a big document library where scrolling through folders takes too long.
Note: This needs DriveHub Pro.
Here is an easy, step-by-step guide to help you set it all up!
Step 1: Install DriveHub and Connect Google Drive #
First, make sure DriveHub and DriveHub Pro are installed and your Google account is connected:
- From your WordPress admin, click on Plugins > Add New.
- Search for DriveHub.
- Click Install and then Activate.
- Follow the setup screen to add your Google account.
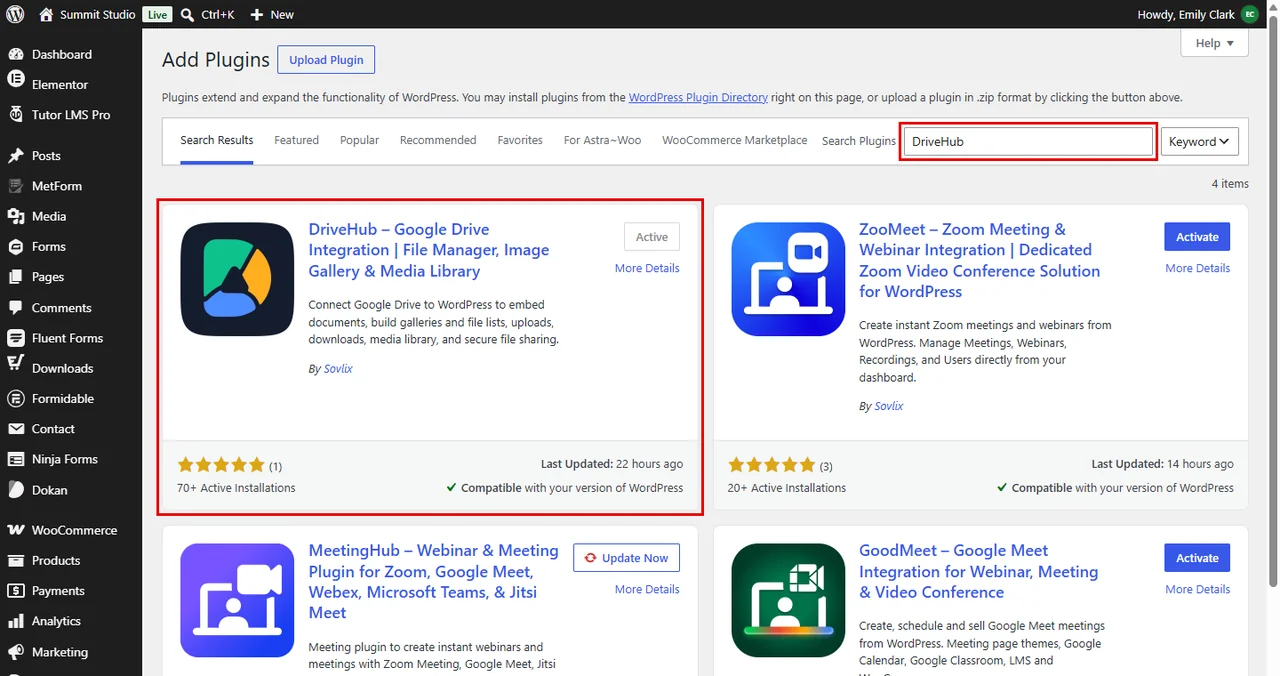
Read our step by step setup guide to avoid any confusion. To add the Pro add-on, follow how to install DriveHub Pro.
Step 2: Create a Search Box Module #
Let’s create the module that holds your search box:
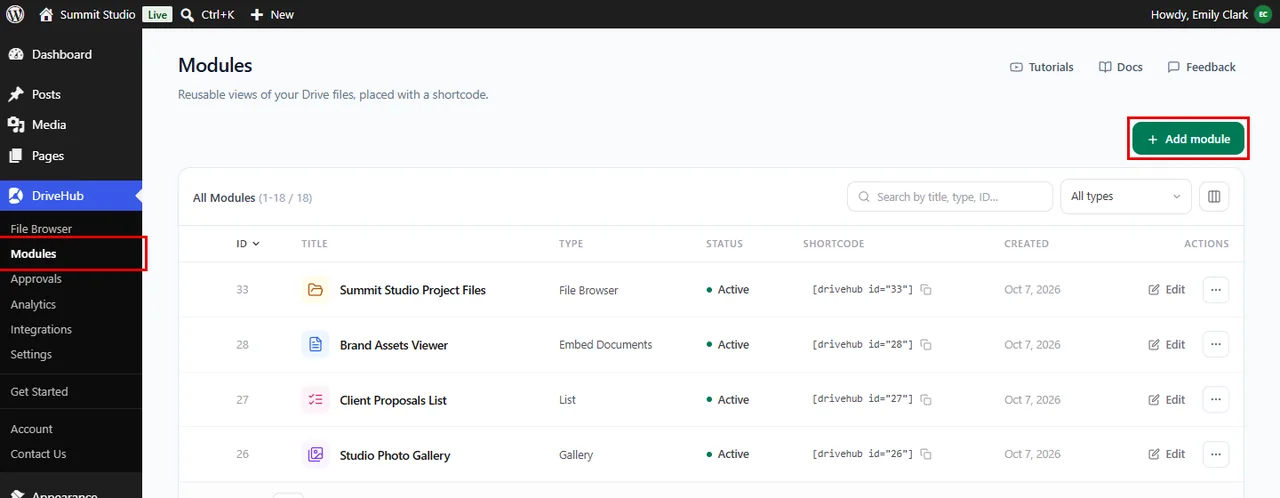
- Go to DriveHub > Modules from your WP-Admin.
- Click on Add module at the top right.
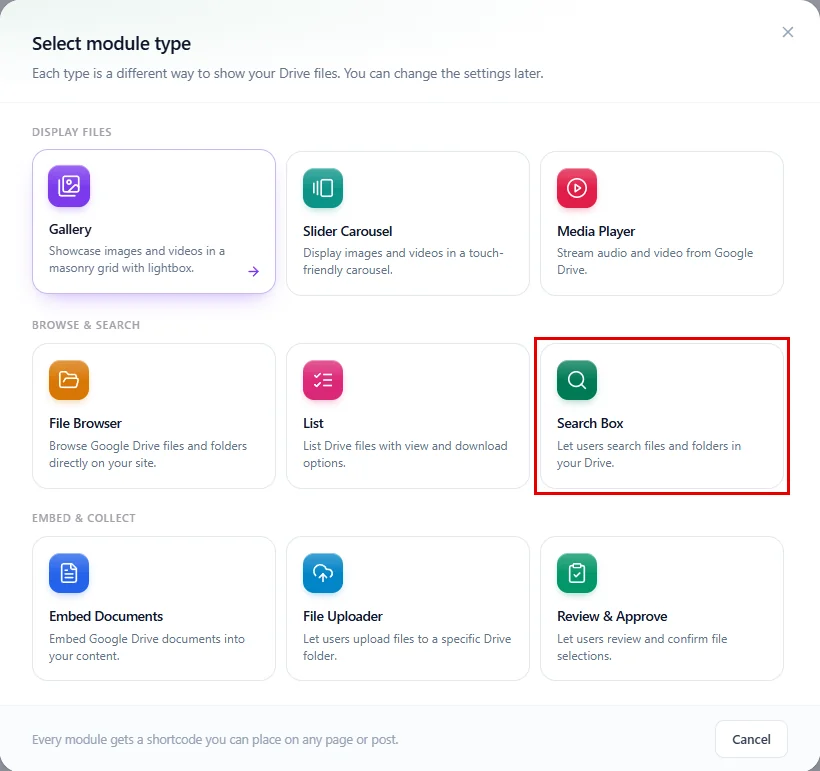
- In the Select module type window, click on Search Box under Browse & search.
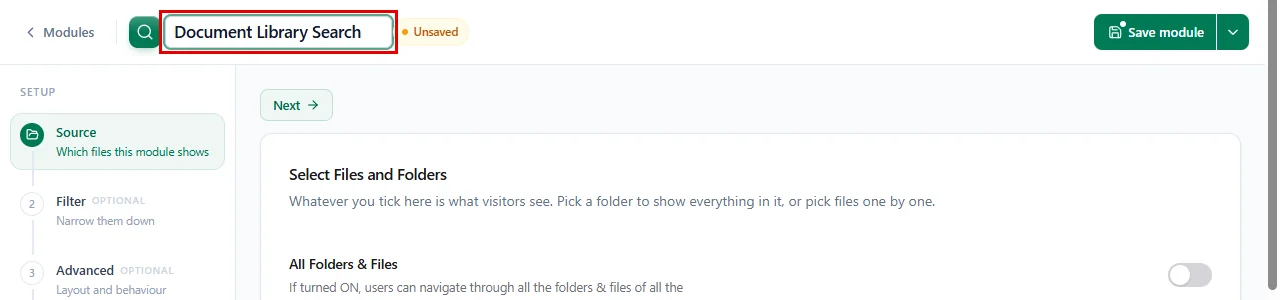
- Click on the name at the top of the editor and give your module a name, for example Document Library Search.
Step 3: Choose Where to Search (Source Tab) #
In this step, you pick the Google Drive folders the search box looks in:
- Stay on the Source step (it opens first).
- Scroll down to Your Drive and tick the folders you want people to search, for example Client Proposals and Q3 Reports.
- Check the Items Selected panel on the right to make sure everything you need is there.
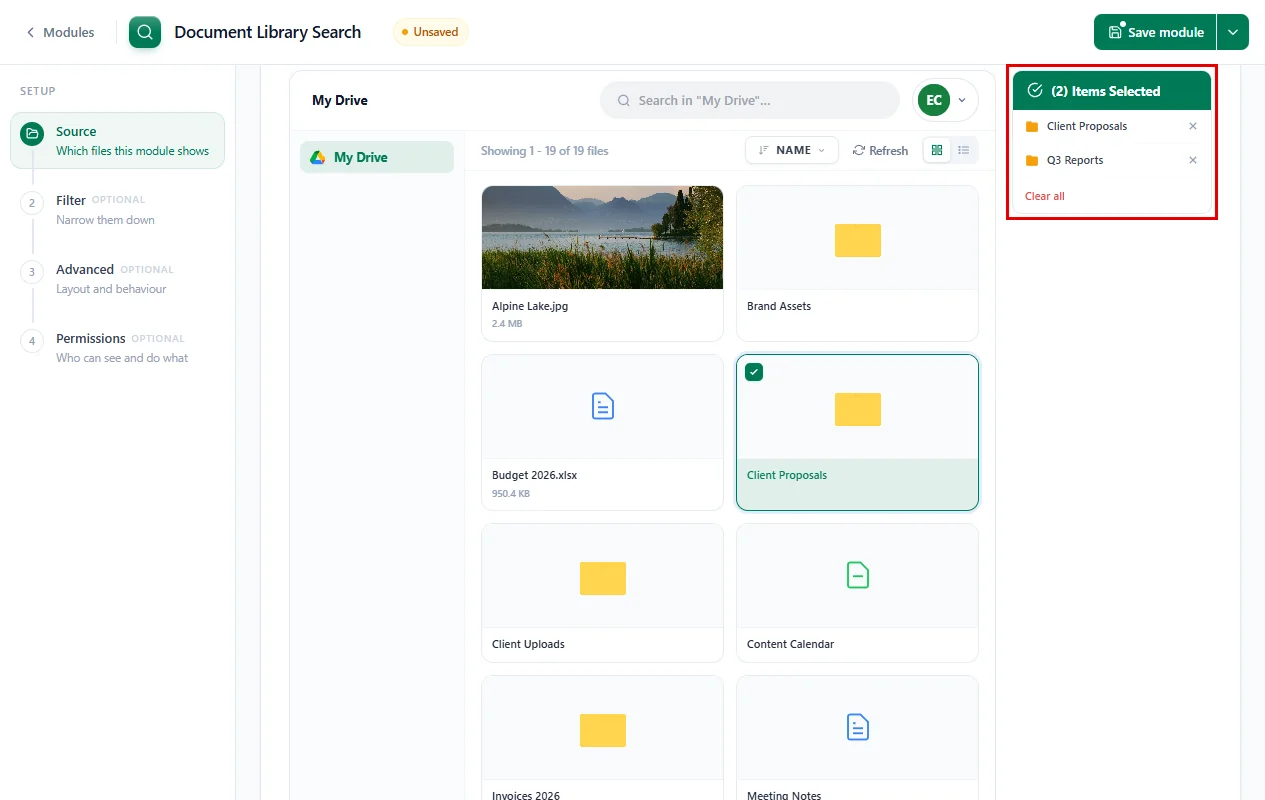
DriveHub searches inside each folder you tick, so visitors only ever find files from these folders. Above Your Drive you will also see these switches:
- All Folders & Files: searches every folder and file of your linked Google Drive accounts. Leave it off to search only what you ticked.
- Use Private Files: searches each logged-in user’s own private folder instead.
- Use ACF field Files: takes the files from an ACF field on the page where the search box is placed.
Step 4: Choose Which Files Can Be Found (Filter Tab) #
This tab is optional, but it is handy for keeping results tidy:
- Click on Filter in the left menu.
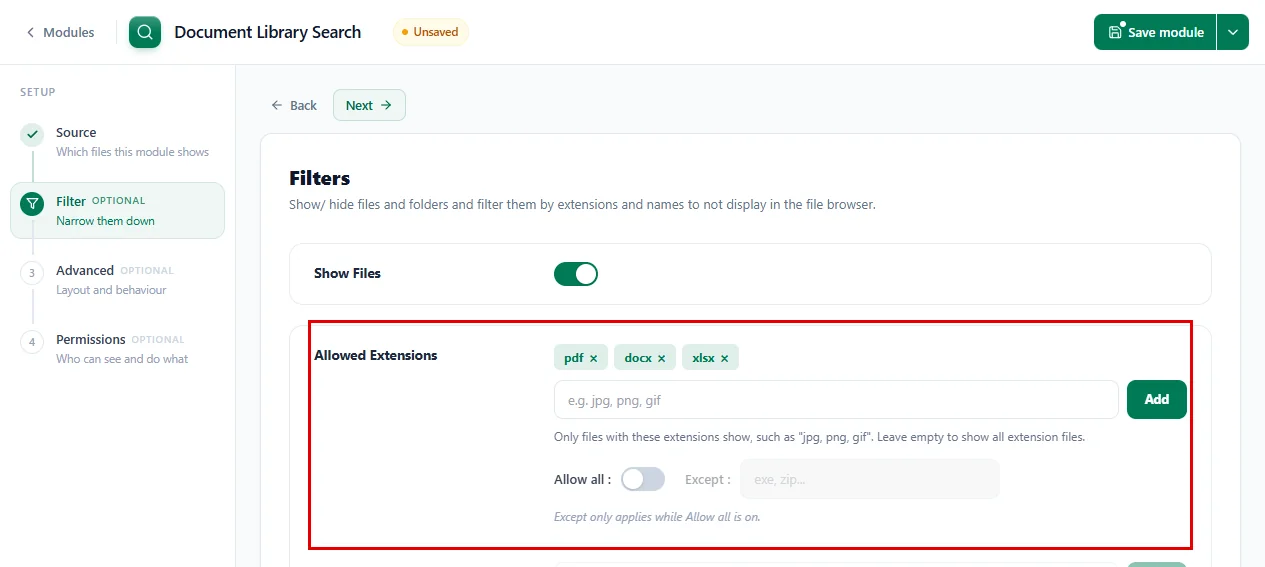
- Allowed Extensions: to let only some file types show up in results, turn off Allow all, type the types (like
pdf, docx, xlsx) and click Add. To hide just a few types, leave Allow all on and list them in Except. - Allowed Names: limits results to certain names (turn off its Allow all first). You can use wildcards, for example
*report*. - Maximum Item Count: limits how many files show. Folders are not counted. Leave it empty to show them all.
Step 5: Set the Width (Advanced Tab) #
- Click on Advanced in the left menu.
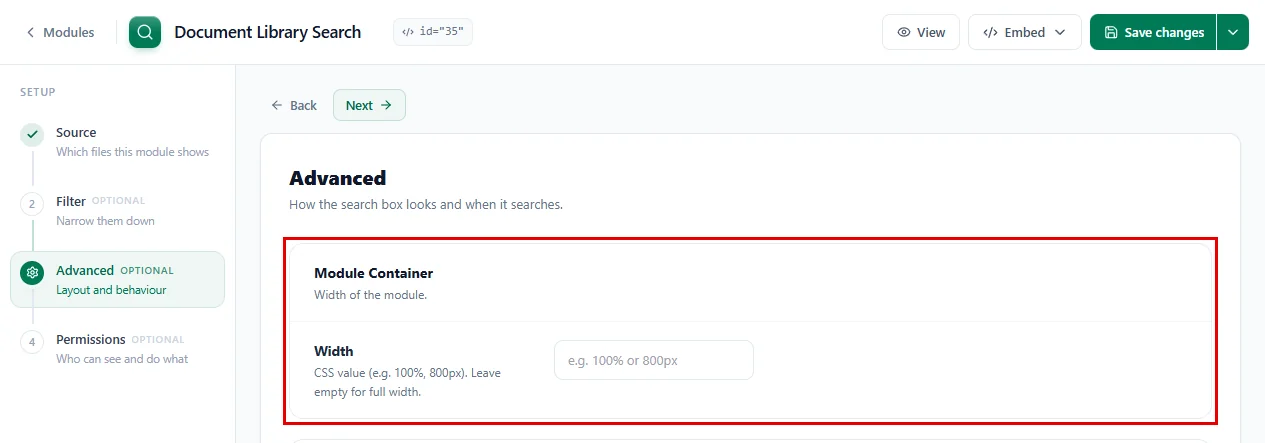
- Under Module Container, set a Width (for example
100%or700px). Leave it empty and the search box fills the width of your page.
Step 6: Choose How the Search Box Works (Advanced Tab) #
Still on the Advanced tab, scroll down to set the text and the search behaviour:
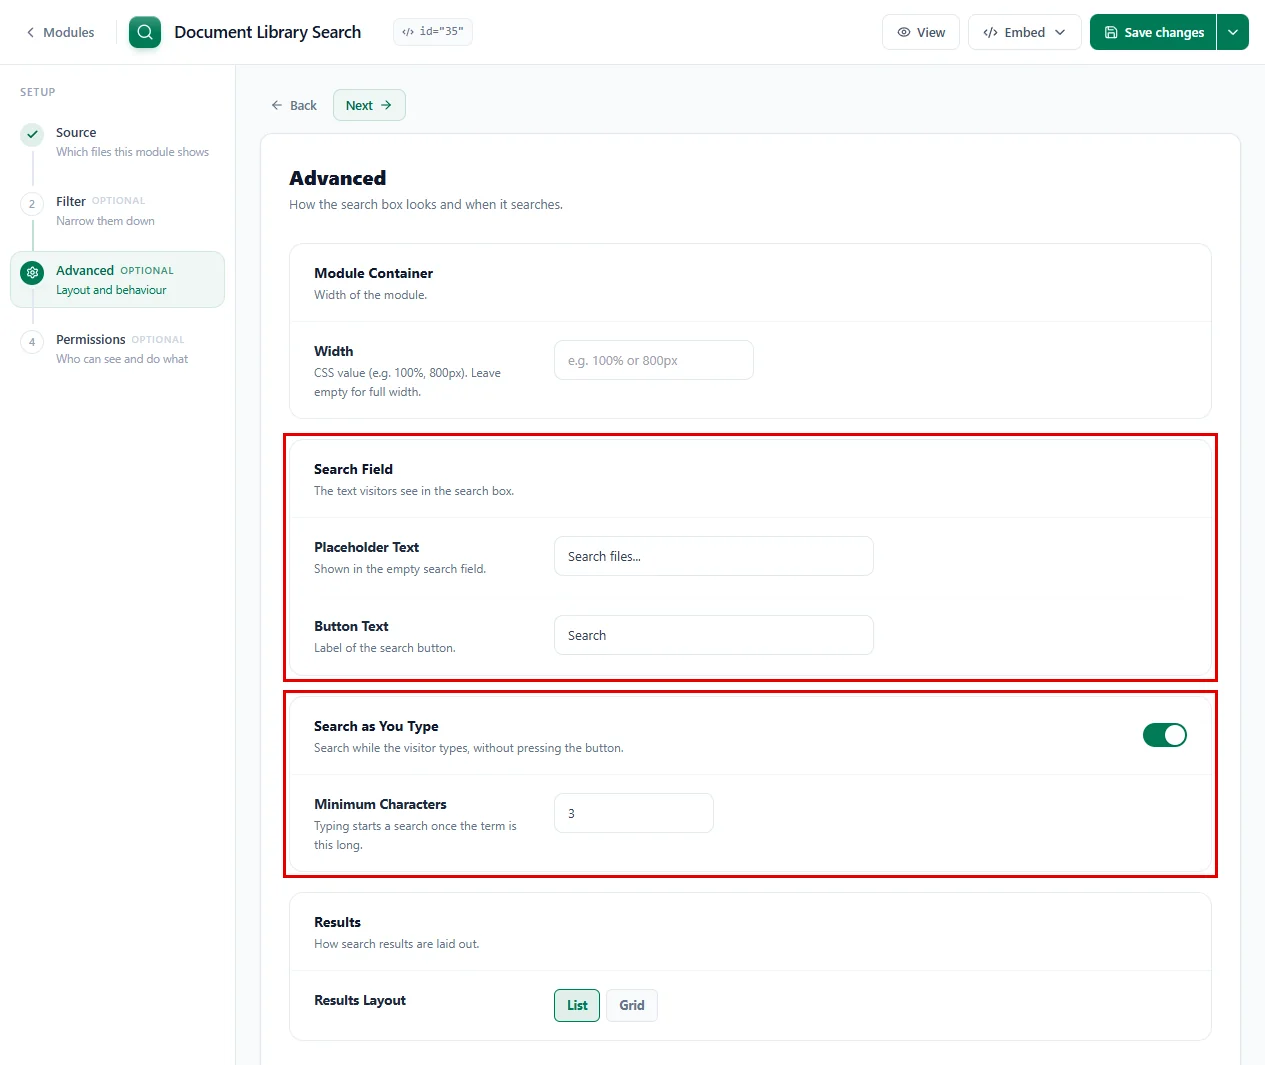
- Placeholder Text: the hint inside the empty search field, for example
Search price lists.... It shows Search files… if you leave it as it is. - Button Text: the label on the search button, for example
Find. - Search as You Type: keep this on to show results while visitors type, without pressing the button. Turn it off if you want results only after they press the button.
- Minimum Characters: how many letters visitors type before the search starts, for example
3. - Results Layout: show the results as a List or as a Grid of cards.
Step 7: Choose Who Can Search (Permissions Tab) #
Here, you decide what visitors can do with the files they find:
- Click on Permissions in the left menu.
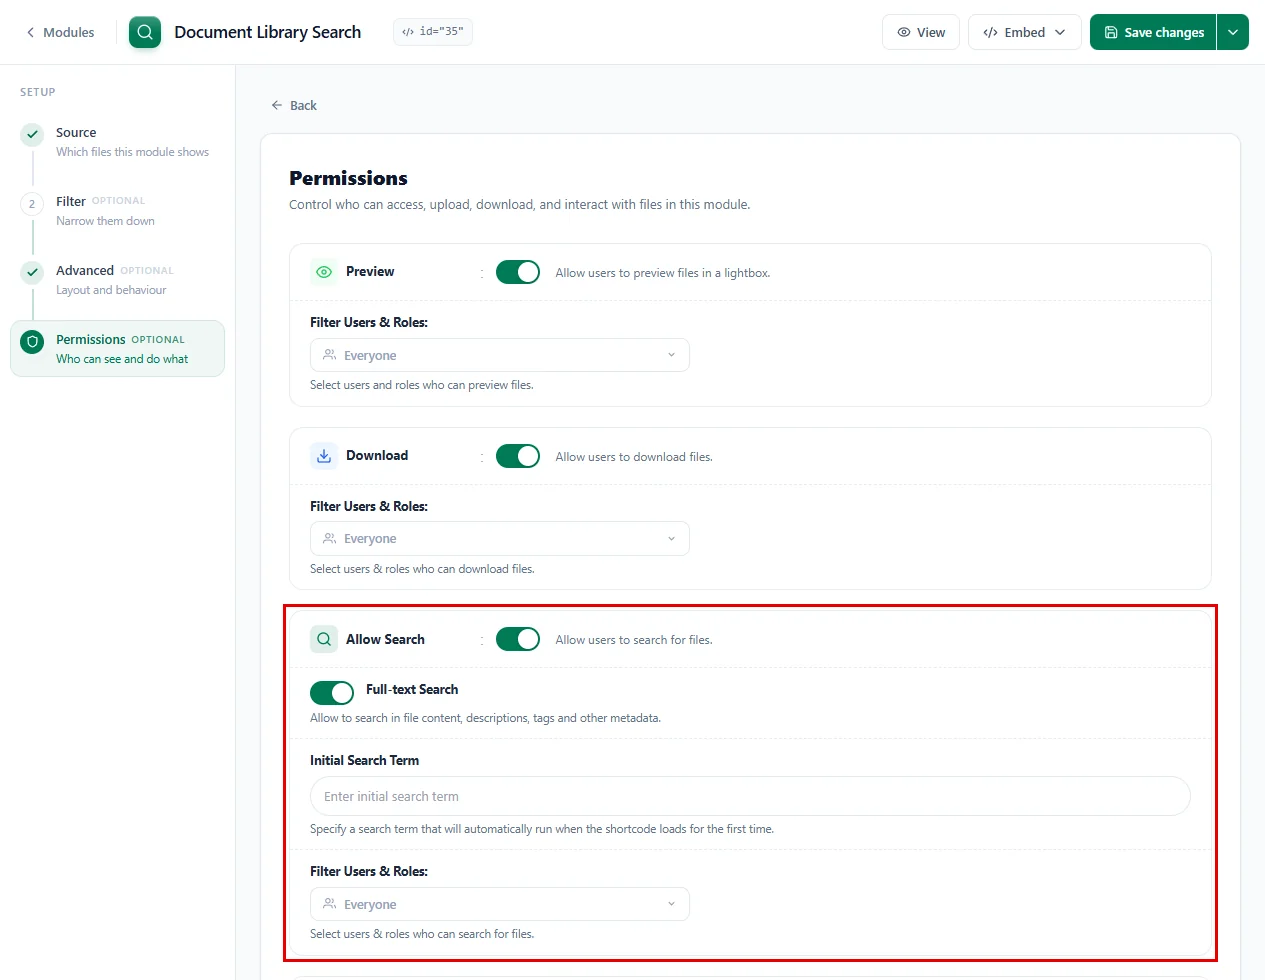
- Keep Preview on so visitors can open a result in a preview window.
- Keep Download on if visitors should be able to save the files they find. Turn it off and the preview window shows no download button.
- Leave Allow Search on. Keep Full-text Search on to look inside the files too (their text, descriptions and tags), not only at their names.
- Initial Search Term: type a word here, like
proposal, and the search box runs that search as soon as the page opens. Leave it empty to start with an empty box. - Each card also has Filter Users & Roles, if only some users should be able to preview, download or search.
Further down, you will find:
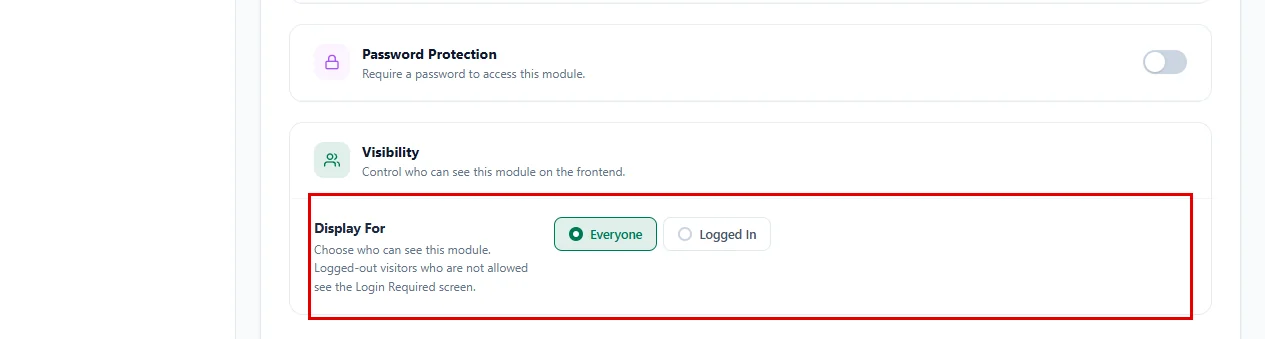
- Password Protection: asks visitors for a password before they can search.
- Visibility: under Display For, choose Everyone or Logged In.
Step 8: Save and Add the Search Box to a Page #
Don’t forget to save your work:
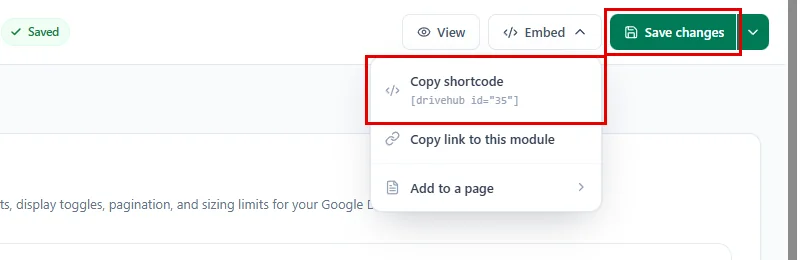
- Click on Save changes at the top right. (On a brand-new module this button says Save module.)
- Click on Embed at the top of the editor.
- Click Copy shortcode and paste it into any page or post, or hover over Add to a page to let DriveHub create the page for you.
The List guide shows the Add to a page window step by step. You can also use the block editor or the classic editor.
Step 9: Try the Search Box on Your Website #
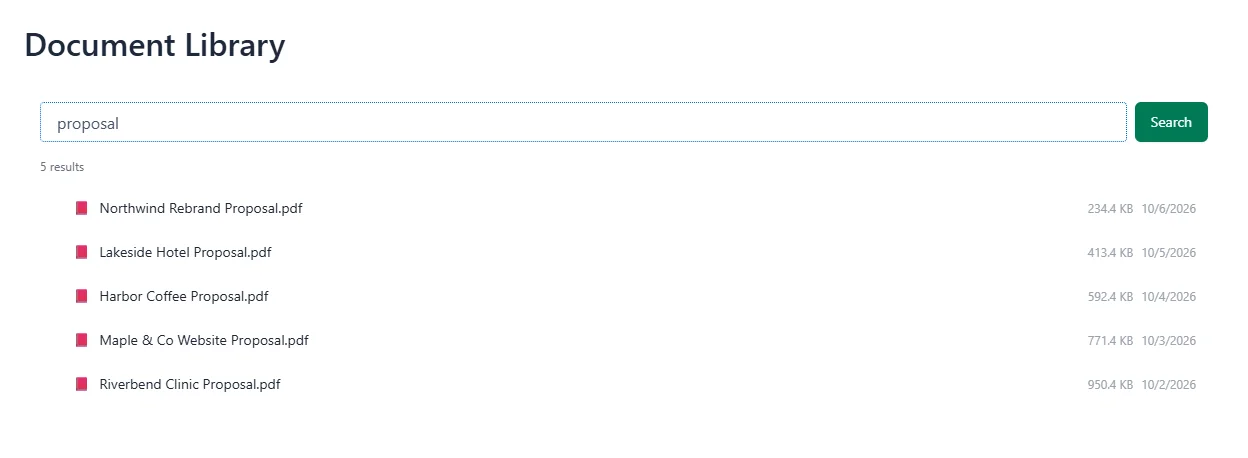
And that’s it. Open your page and you will see a search field with a Search button:

Here’s how visitors use it:
- Type a few letters, for example
proposal. With Search as You Type on, results show up by themselves once the Minimum Characters are reached. Visitors can also press Search at any time. - Each result shows the file name, size and date. The number of results shows above the list.
- Click a file to open it in the preview window.
If nothing matches, the box says No results for followed by the search term, so visitors know to try another word.
Benefits of Adding a Google Drive Search Box #
- Find files fast: Visitors type a word instead of clicking through folders.
- Searches inside files: Full-text search finds documents by their content, not only their names.
- Only what you choose: Results come from the folders you pick, nothing else.
- Always up to date: New files in those folders can be found straight away.
- Save WordPress storage: Your files stay in Google Drive.
With DriveHub, turning a big Google Drive folder into a searchable library takes just a few minutes.
Related guides:


