- Step 1: Install Divi
- Step 2: Install and Activate DriveHub
- Step 3: Connect Your Google Account
- Step 4: Turn On the Divi Integration
- Step 5: Open Your Page in the Divi Builder
- Step 6: Add a Row for Your Files
- Step 7: Add the DriveHub Module
- Step 8: Choose a Module
- Step 9: Publish Your Page
- Benefits of Using DriveHub with Divi
If you’re looking for a simple way to show your Google Drive files on a page built with Divi, you’re in the right place. You can easily do this with DriveHub.
DriveHub adds its own DriveHub Module element to the Divi builder, so you can drop a gallery, a file list or an embedded document into any Divi page without copying shortcodes around.
Here is an easy, step-by-step guide to help you set it all up!
Note: You need the Divi theme or Divi Builder plugin from Elegant Themes for this guide.
Step 1: Install Divi #
First, make sure Divi is installed and active on your site. Divi comes from Elegant Themes, so you upload it yourself:
- If you use the Divi theme, go to Appearance > Themes > Add New Theme > Upload Theme, choose the Divi zip file, then click Install Now and Activate.
- If you use the Divi Builder plugin with another theme, go to Plugins > Add New Plugin > Upload Plugin instead, then click Install Now and Activate Plugin.
Step 2: Install and Activate DriveHub #
Next, install DriveHub on the same site:
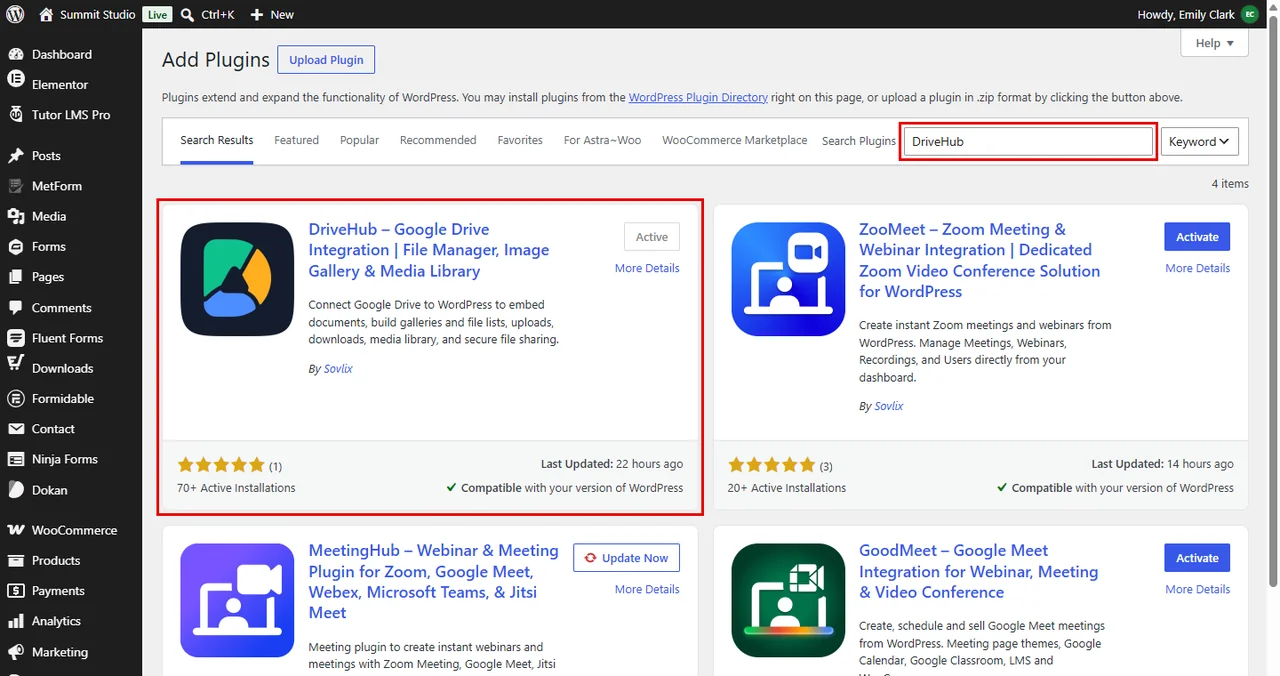
- From your WordPress admin, click on Plugins > Add New Plugin.
- Search for DriveHub.
- Click Install Now and then Activate.
Step 3: Connect Your Google Account #
Once DriveHub is active, you’ll be taken to the setup screen:
- Click on Start setup.
- Choose how DriveHub connects (Whole Drive or Selected folders).
- Sign in with the Google account you want to use and allow the permissions.
Read our step by step setup guide to avoid any confusion.
Step 4: Turn On the Divi Integration #
The Divi integration is off by default, so switch it on first:
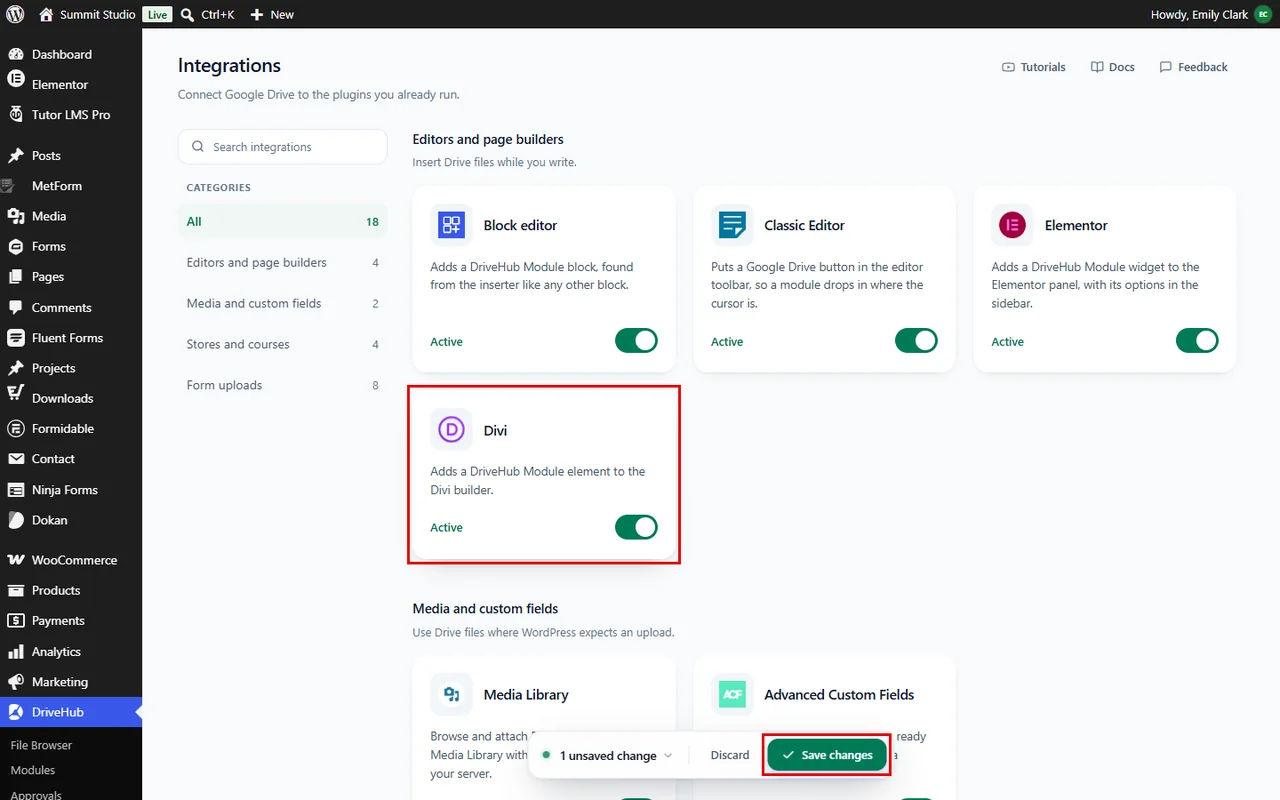
- Go to DriveHub > Integrations.
- Find the Divi card under Editors and page builders.
- Turn on the switch on the Divi card. The label on the card changes from Inactive to Active.
- Click Save changes in the bar at the bottom of the screen.
Tip: If the card says Divi not detected, DriveHub can’t find Divi on your site. Check that the Divi theme or the Divi Builder plugin is active.
Step 5: Open Your Page in the Divi Builder #
- Go to Pages > Add New Page, or open an existing page.
- Give your page a title (for example, Client Gallery).
- Click the purple Use The Divi Builder button.
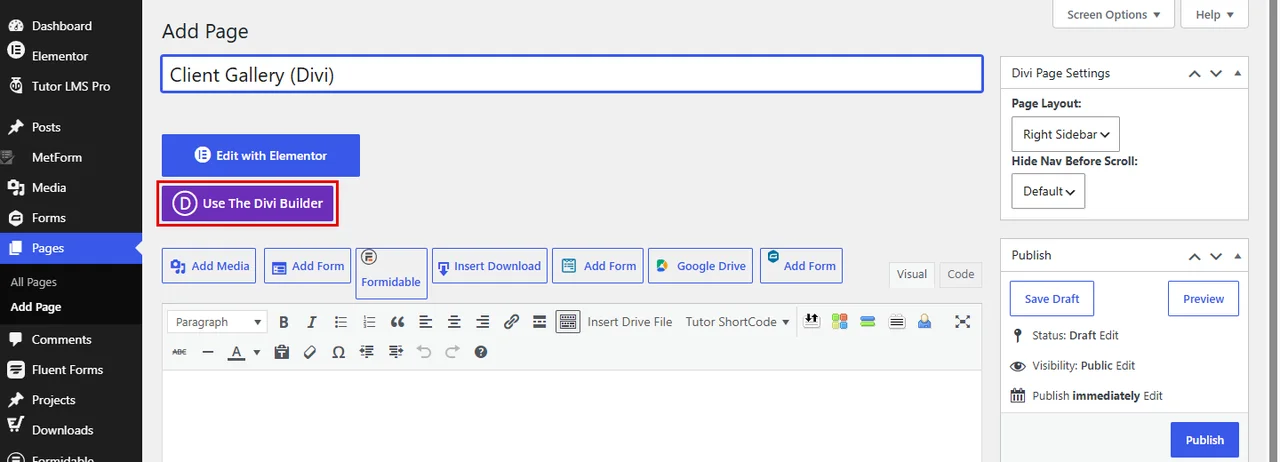
Divi now opens its builder for this page. The first time, Divi shows a short welcome message; click Start Building to close it. To edit right on the page, click Build On The Front End.
Step 6: Add a Row for Your Files #
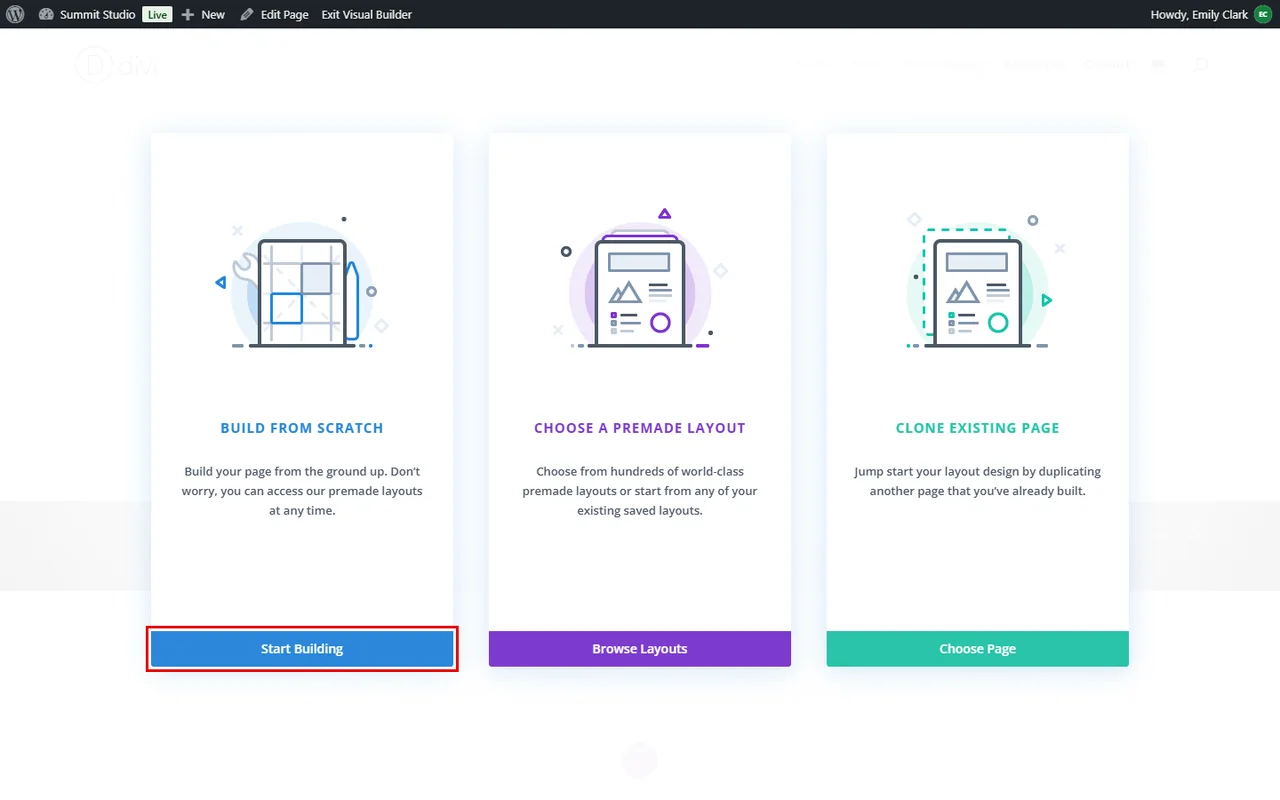
On a new page, Divi asks how you want to start:
- Under Build From Scratch, click Start Building.
- In the Insert Row window, click the one-column row (or any layout you like).
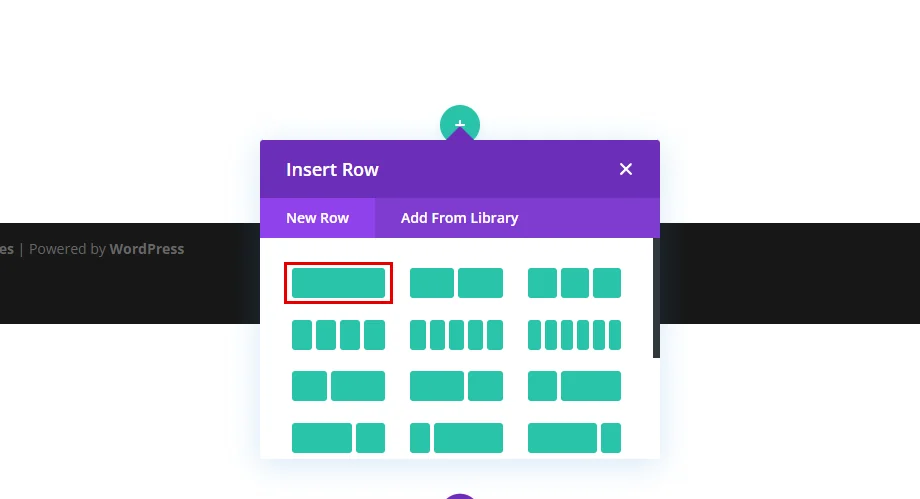
Already have rows on your page? Just hover over the row where you want your files and click the grey + button inside it.
Step 7: Add the DriveHub Module #
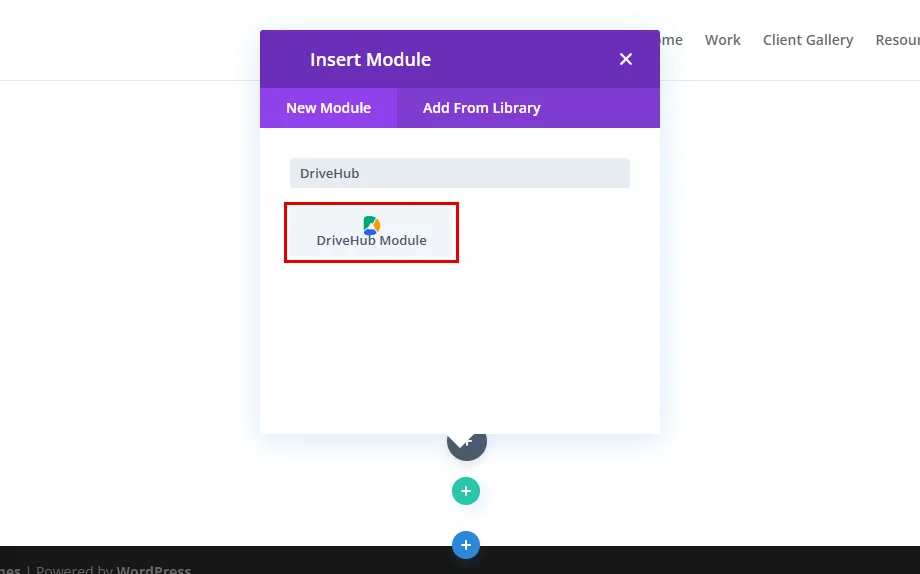
The Insert Module window opens on the New Module tab:
- In the search box, type DriveHub.
- Click on DriveHub Module.
Step 8: Choose a Module #
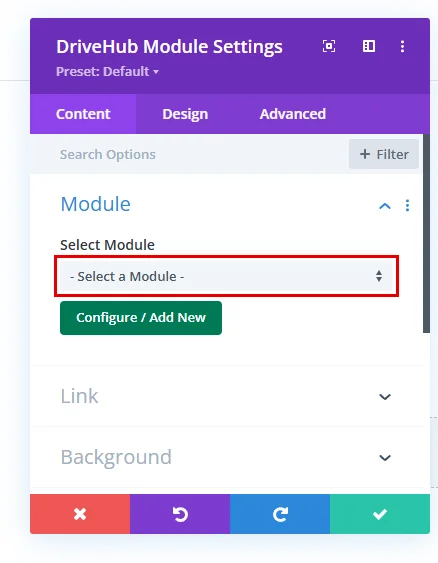
The DriveHub Module Settings window opens on Divi’s Content tab, with the Module section already open.
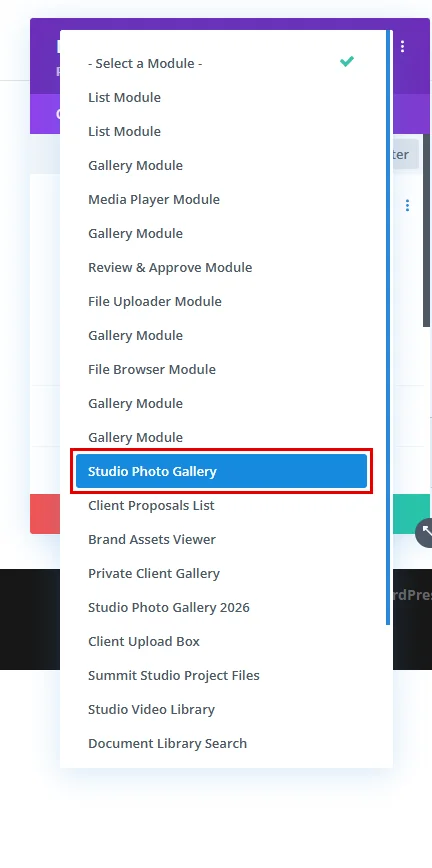
- Click the Select Module dropdown. It starts on – Select a Module – and lists every module you have saved in DriveHub.
- Pick the module you want to show (we’ll use the Studio Photo Gallery gallery module).
- Click the green check mark at the bottom of the settings window to save your choice.
Prefer to pick from the full module list, or need a new module? Click the green Configure / Add New button under Select Module:
- The Insert DriveHub Module window opens with all your modules. Use the search box to find one quickly.
- Click Insert module next to the module you want. DriveHub fills in Select Module for you, and the builder shows a live preview of your files.
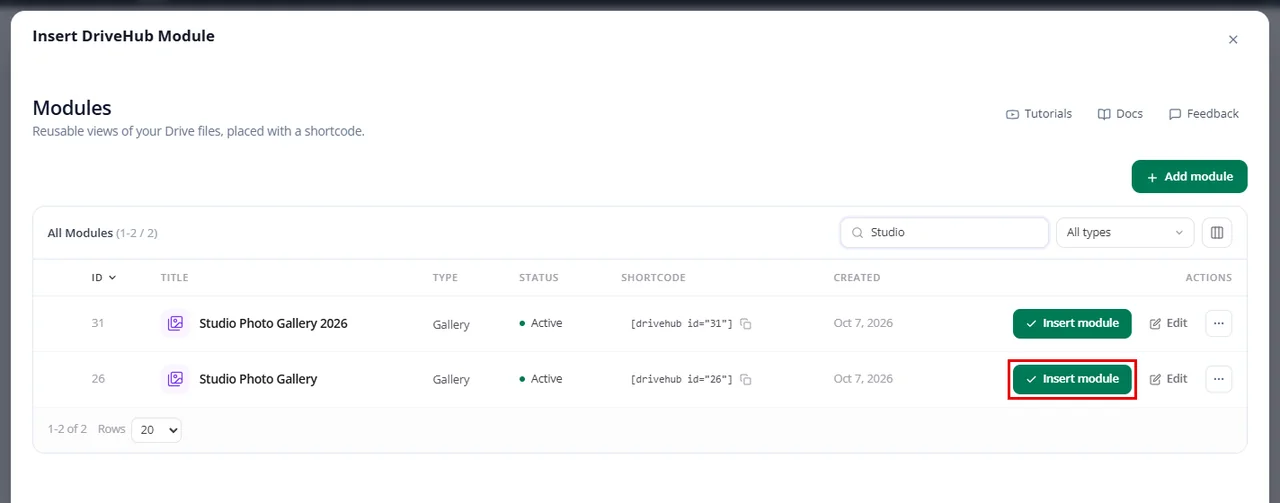
- To build a new module, click Add module, set it up and save it. To change an existing one, click Edit next to it.
Tip: A module you create here shows up in the Select Module list the next time you open the builder. You can also build modules in DriveHub > Modules.
Note: The free version of DriveHub lets you use Gallery, List and Embed Documents modules here.
Step 9: Publish Your Page #
- Click the purple … button at the bottom center of the builder to open the page bar.
- Click Publish at the bottom right (or Save Draft if you are not ready yet). On a page that is already live, the button says Save.

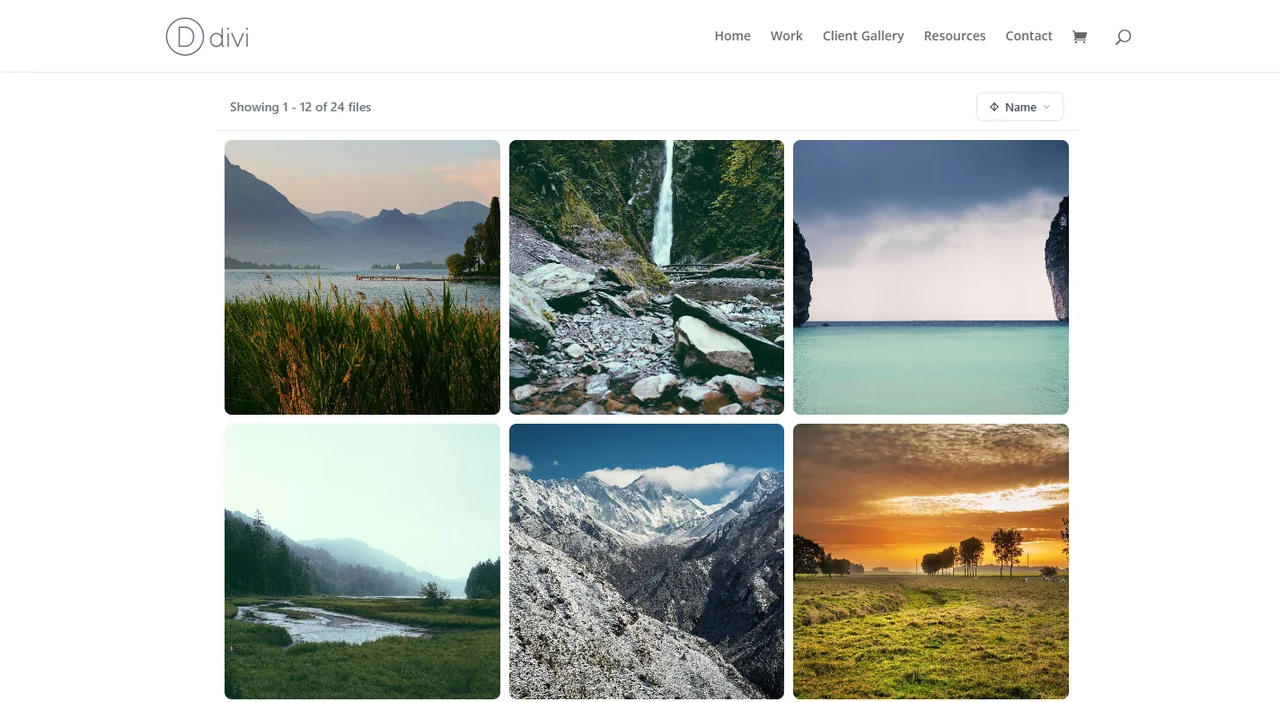
And that’s it. Your Google Drive files are now live on your Divi page. Visitors see the photos straight from your Google Drive, shown with the layout and options you set in the module.
Benefits of Using DriveHub with Divi #
- No shortcodes to copy: Pick your module from a list right inside the Divi builder.
- Fits any layout: Drop the module into any Divi row or column, next to your other content.
- Save WordPress storage: Your files stay in Google Drive instead of your Media Library.
- Always up to date: Change files in Google Drive and your page follows.
With DriveHub and Divi, adding Google Drive files to a page takes just a few clicks.


