MeetingHub lets you create and display Jitsi Meet meetings directly from your WordPress website.
Use this guide to configure Jitsi settings, create a Jitsi meeting, and show it on the frontend.
Before You Start #
Make sure:
- MeetingHub is installed and active
- You have WordPress admin access
- You know which Jitsi hosting option you want to use
MeetingHub supports these Jitsi hosting options:
- Random public domain
- JaaS 8×8
- Your own Jitsi domain
Step 1: Open Jitsi Meet Settings #
Go to:
MeetingHub → Settings → Jitsi Meet
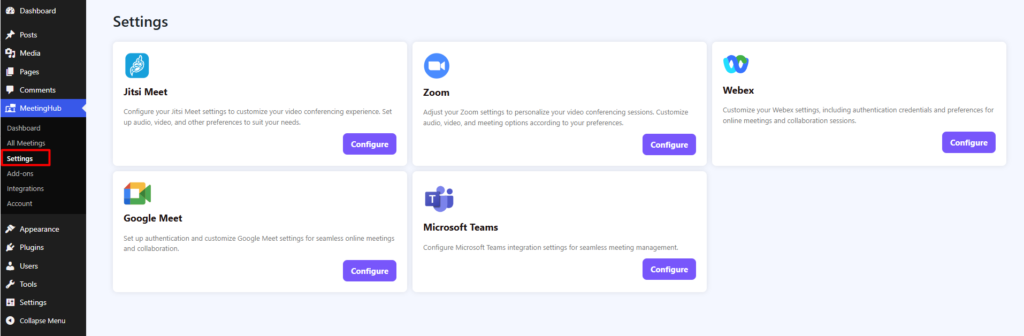
You will see different tabs for Jitsi setup:
- API Settings
- Configurations
- Video Settings
- Audio Settings
- Shortcodes
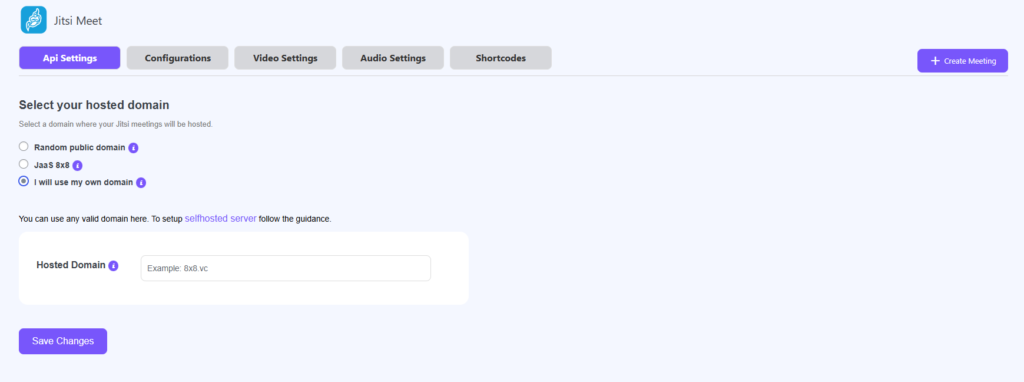
Step 2: Configure API Settings #
Go to the API Settings tab.
Here, you need to select where your Jitsi meetings will be hosted.
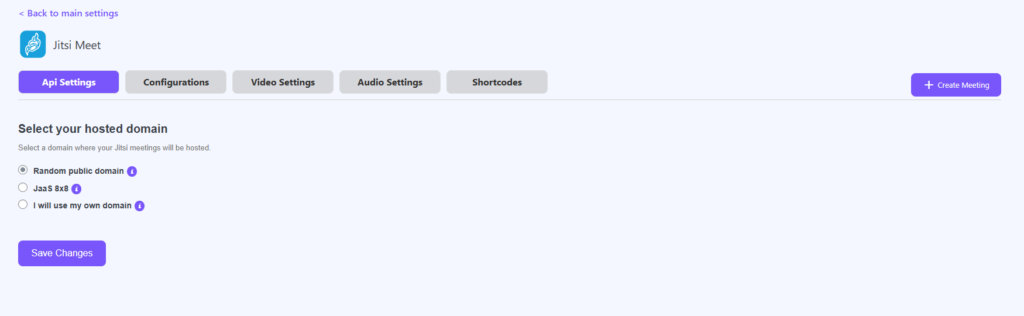
Option 1: Random Public Domain #
Select Random public domain if you want the fastest setup.
This option uses a public Jitsi room and does not require API credentials.
Use this option when:
- You want to test Jitsi quickly
- You do not have a custom Jitsi server
- You do not want to configure JaaS 8×8
Recommended for first test: Start with Random public domain, save settings, then create a test meeting.
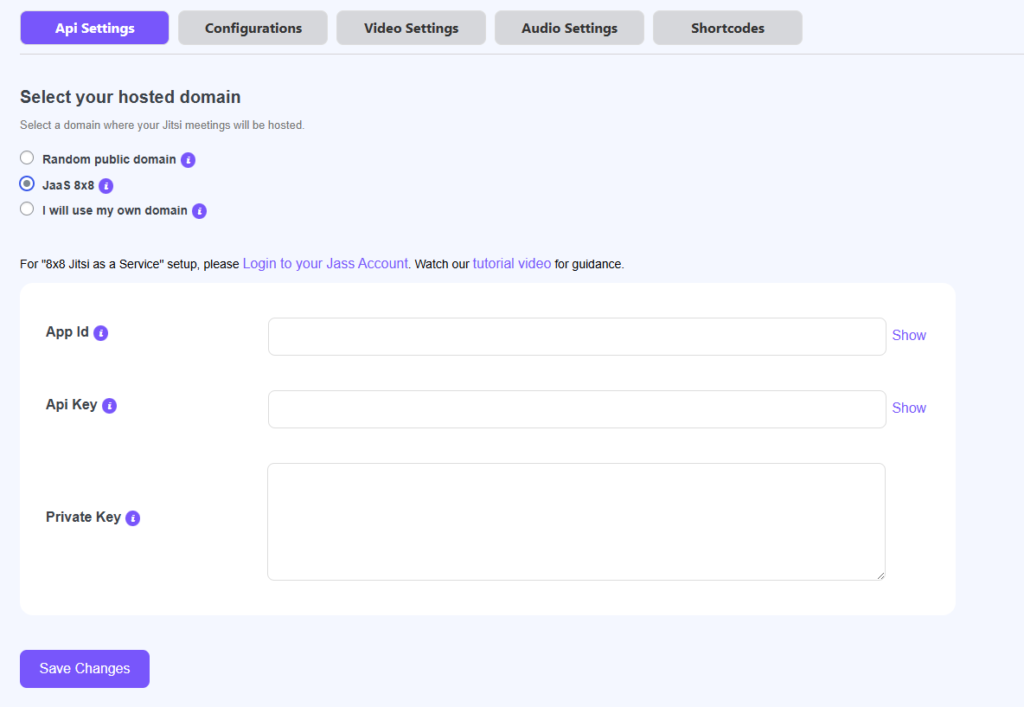
Option 2: JaaS 8×8 #
Select JaaS 8×8 if you want to use Jitsi as a Service.
You need to add:
- App ID
- API Key
- Private Key\
Use this option when:
- You have a JaaS 8×8 account
- You want a more controlled Jitsi meeting setup
- You need JaaS-based authentication
After adding the credentials, click Save Changes.
Option 3: I Will Use My Own Domain #
Select I will use my own domain if you have a self-hosted Jitsi server or another valid Jitsi domain.
You need to add your Hosted Domain.
Example:
meet.yourdomain.com
or
8x8.vc
Use this option when:
- You have your own Jitsi server
- You want meetings to run from a specific domain
- You want a branded or private meeting setup
Tip: Do not add
https://unless the field specifically requires it. Use only the domain format if the input expects a domain.
Step 3: Configure Meeting Options #
Open the Configurations tab.
This section controls the general behavior of your Jitsi meetings.

Meeting Height #
Set the meeting iframe height in pixels. Use a larger height if you want the meeting area to look bigger on the page.
Meeting Width #
Set the meeting iframe width in pixels. Use this to control how wide the meeting area appears on the frontend.
Should Register #
Enable this if users should register before joining the meeting. Use this when you want better attendee control.
Recurring Meeting #
Enable this if you want to create repeating Jitsi meetings.
Available recurrence options may include:
- Daily
- Weekly
- Monthly
- Yearly
Use this for regular classes, weekly calls, or repeated sessions.
Timezone #
Select the timezone used for your Jitsi meetings.
Important: Always match this with your WordPress timezone to avoid wrong meeting times.
You can check WordPress timezone from:
Settings → General → Timezone
Enable Inviting #
Enable this if attendees should be able to invite others to the meeting. Turn it off if you want to keep meetings private.
Hide Inviting Option from Vendor/Instructor #
Enable this if you do not want vendors or instructors to control the invite option. This is useful for marketplace or LMS-based setups.
Enable Recording #
Enable this if you want to allow meeting recording.
Note: Recording availability may depend on your Jitsi hosting setup.
Simulcast #
Enable or disable simulcast.
Simulcast helps improve video delivery by adjusting video quality based on participant connection and layout.
Enable Livestream #
Enable this if your Jitsi setup supports livestreaming.
Use this for webinars, public sessions, or broadcast-style meetings.
Welcome Page #
Enable this if you want users to see the Jitsi welcome screen before joining.
Disable it if you want users to enter the meeting more directly.
Enable Transcription #
Enable this if your Jitsi setup supports meeting transcription.
Use this when you need written meeting records.
Enable Outbound #
Enable this if your meeting setup allows outbound calling or outbound meeting behavior.
Only turn this on if your Jitsi environment supports it.
Hide Sidebar #
Enable this to hide the sidebar from the meeting interface.
Use this when you want a cleaner meeting layout.
Hide Header/Footer #
Enable this to hide the header and footer from the meeting page.
Use this for a more focused meeting experience.
Step 4: Configure Video Settings #
Open the Video Settings tab.
These settings control how video behaves when users join a Jitsi meeting.

Start Video Muted #
Enable this if users should join with their camera turned off.
Use this for:
- Large meetings
- Classes
- Webinars
- Low-bandwidth users
Screen Sharing #
Enable this if users should be able to share their screen during the meeting. Use this for teaching, demos, presentations, or support calls.
Video Resolution #
Choose the preferred video resolution.
Available options include:
- 480p
- 720p
- 1080p
- 1440p
- 2160p
- 4320p
Recommended: Use 720p for a balanced video quality and performance.
Max Full Resolution #
Set how many participants can use full/default resolution. Use a lower number for large meetings to reduce performance issues.
Video Muted After #
Set the participant number after which video will start muted. This means participants after the 10th person will join with video muted. Use this for larger meetings to reduce bandwidth usage.
Step 5: Configure Audio Settings #
Open the Audio Settings tab.
These settings control how audio behaves when users join.
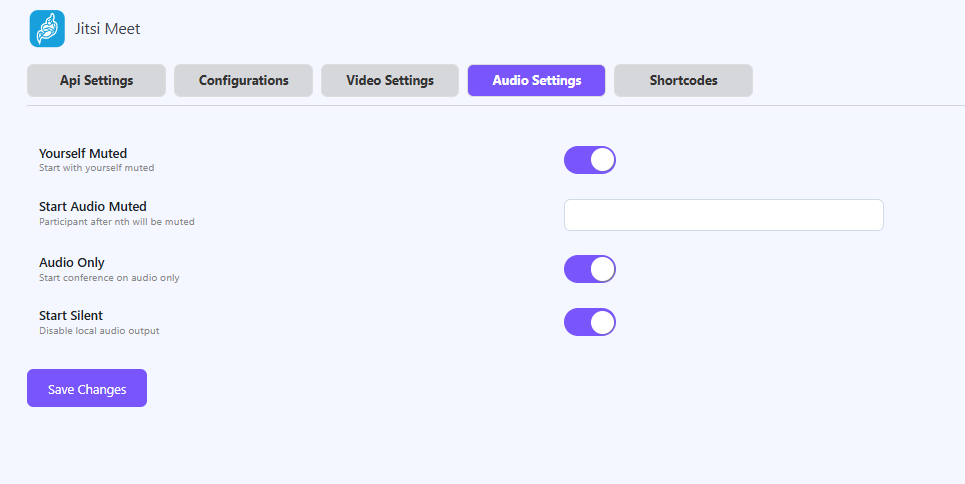
Yourself Muted #
Enable this if the host/admin should start muted.
Start Audio Muted #
Set the participant number after which audio will start muted. This means participants after the 5th person will join muted. Use this for classes, webinars, or larger meetings.
Audio Only #
Enable this if the meeting should start in audio-only mode. Use this for low-bandwidth meetings or voice-only sessions.
Start Silent #
Enable this to disable local audio output when the meeting starts. Use this only when you want a silent join experience.
Step 6: Use Jitsi Shortcode #
Open the Shortcodes tab. MeetingHub provides a shortcode to display upcoming Jitsi meetings.
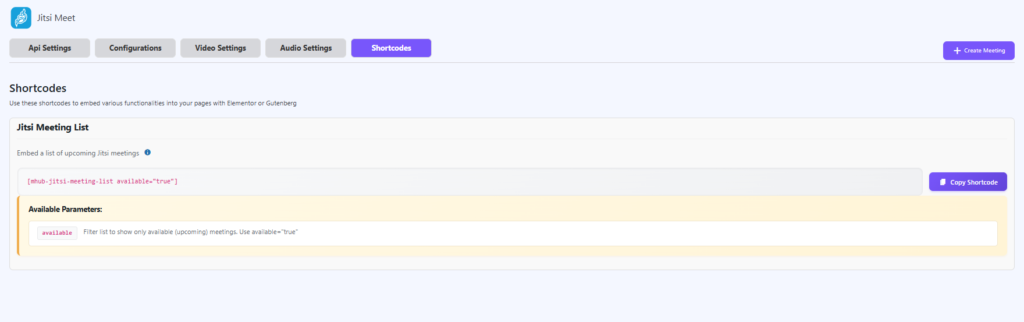
Jitsi Meeting List Shortcode #
Use this shortcode to show upcoming Jitsi meetings:
[mhub-jitsi-meeting-list available="true"]
Shortcode Parameter #
| Parameter | What It Does |
|---|---|
available="true" | Shows only available/upcoming Jitsi meetings |
Paste the shortcode into any WordPress page, post, Elementor section, or Gutenberg block.
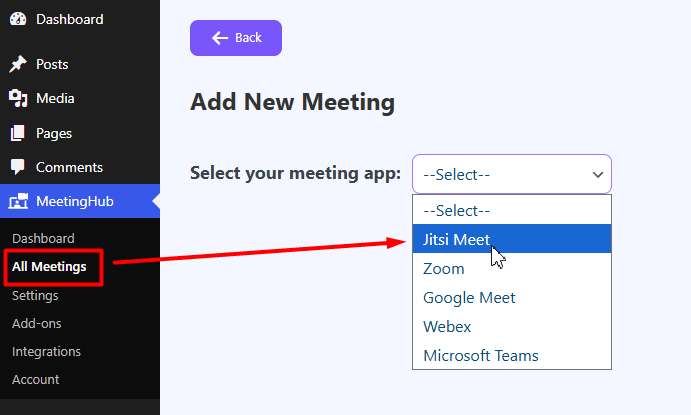
Step 7: Create a Jitsi Meeting #
Go to:
MeetingHub → All Meetings → Add New
Select Jitsi Meet as the meeting platform.
Add the required meeting details:
- Title
- Description
- Date and time
- Timezone
- Meeting settings
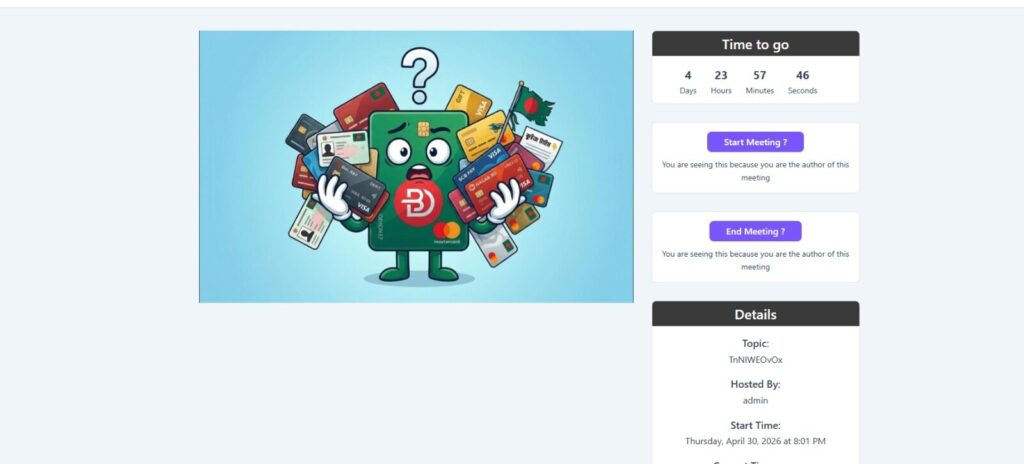
Step 8: Publish the Meeting #
After adding the meeting details, click Publish.
Then copy the meeting shortcode from the meeting screen or meeting list.
Example:
[meetinghub_meeting id="123"]
Use this shortcode when you want to display one specific meeting.
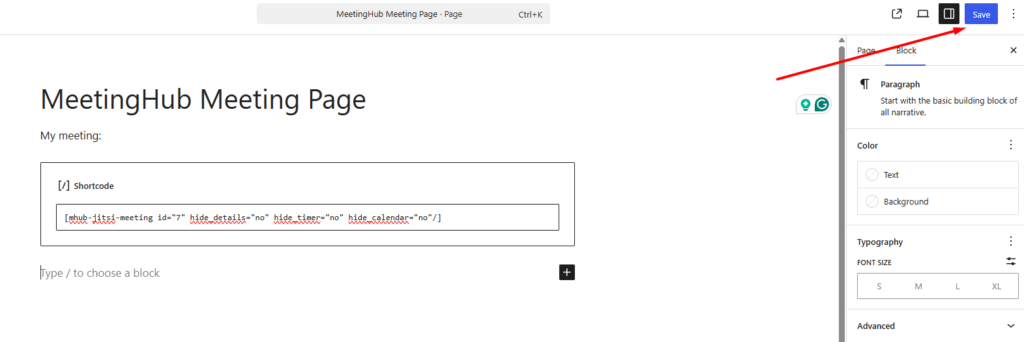
Step 9: Display the Meeting on a Page #
Go to:
Pages → Add New
Paste the meeting shortcode into the content area.
Then click Publish or Update.