- Before you begin
- Step 1: Install WooCommerce and WCFM
- Step 2: Install MeetingHub and MeetingHub Pro
- Step 3: Connect a video platform
- Step 4: Turn on the WCFM Marketplace integration
- Step 5: Decide whose video account vendors use (Front-end hosting)
- Step 6: Open Events in the WCFM menu
- Step 7: Create an event as the vendor
- Step 8: Link the event to a product (Events tab)
- Step 9: See it on the product page
- Benefits of using MeetingHub with WCFM
- Troubleshooting
- Frequently asked questions
- Security best practices
- You're ready to let WCFM vendors sell meetings
To let WCFM Marketplace vendors sell meetings in WordPress, turn on the WooCommerce and WCFM Marketplace cards in MeetingHub > Integrations > eCommerce. Each vendor then gets an Events item in the WCFM menu, creates live sessions there, and sells seats from the Events tab in the WCFM product manager.
If your WCFM vendors sell their time, such as a coaching call or a group class, you’re in the right place. This guide shows you how to set it up and what your vendors do, step by step.
By the end of this guide, you will have:
- WooCommerce, WCFM, MeetingHub and MeetingHub Pro working together
- The WCFM Marketplace integration turned on
- A decision on whose video account vendor events use
- A vendor event created from the WCFM dashboard
- A vendor product that sells a seat in that event
Estimated setup time: 10 minutes. Vendors keep their store, products and orders exactly as they are.
Note: Requires MeetingHub Pro and WooCommerce.
Before you begin #
Make sure you have:
- An administrator account on your WordPress site
- At least one approved WCFM vendor
- A video platform connected to MeetingHub (Jitsi Meet works without any account)
New to vendor events? Read How marketplace vendors sell meetings and bookings with MeetingHub first for the big picture.
Let’s get started.
Step 1: Install WooCommerce and WCFM #
WCFM comes as two plugins: WCFM Marketplace (the marketplace) and WCFM – Frontend Manager (the vendor dashboard). You need both.
- In the WordPress admin menu, go to Plugins > Add Plugin.
- Search for WooCommerce, click Install Now, then Activate.
- Search for WCFM Marketplace. On WCFM Marketplace – Multivendor Marketplace for WooCommerce, click Install Now, then Activate.
- Install and activate WCFM – Frontend Manager for WooCommerce the same way, if the marketplace’s setup did not add it. WCFM Marketplace will not activate without it.

Step 2: Install MeetingHub and MeetingHub Pro #
- Go to Plugins > Add Plugin, search for MeetingHub, click Install Now, then Activate.
- Open MeetingHub, click Upgrade and complete the checkout.
- Download MeetingHub Pro from your account.
- Go to Plugins > Add Plugin, click Upload Plugin, choose the
.zipfile, click Install Now, then Activate Plugin.
The guide How to install MeetingHub and finish the Get Started setup shows each of these screens.
Step 3: Connect a video platform #
Vendor events run on the platforms you connect here, unless vendors use their own accounts (Step 5).
- Go to MeetingHub > Integrations and click Video platforms.
- On the platform you want, click Connect and follow its steps. Jitsi Meet is Ready with no account.
For each platform’s setup, see How to connect Zoom to WordPress with MeetingHub, How to connect Google Meet to WordPress with MeetingHub, How to connect Microsoft Teams to WordPress with MeetingHub or How to connect Webex to WordPress with MeetingHub.
Step 4: Turn on the WCFM Marketplace integration #
The WooCommerce card must be on too, because it powers the product details, the order email and buyer access.
- Go to MeetingHub > Integrations.
- In the categories on the left, click eCommerce.
- On the WooCommerce card, switch the toggle on.
- On the WCFM Marketplace card, switch the toggle on. MeetingHub confirms with WCFM Marketplace is on.

The card reads “Vendors manage meetings from the WCFM dashboard, and attach one to a product while they create it.”
Step 5: Decide whose video account vendors use (Front-end hosting) #
- Go to MeetingHub > Meeting setup and click Front-end hosting.
- Under Marketplace, check that Vendors host meetings reads On.
- Switch Vendors use their own account off to run every vendor event on your accounts, or on to let vendors connect their own.
- Click Save changes in the bar at the bottom.

With the switch on, vendors get an Event Settings item in the WCFM menu. Its Platform Settings page shows a card for each platform they can connect: they click Connect on the card and add their own account on the Connect tab.

Until a vendor connects Zoom, Google Meet, Microsoft Teams or Webex, its card reads Not connected and their event form marks it Connect in Settings. Jitsi Meet reads Ready, with Configure, and works right away.
From here on, the vendor works in the WCFM store manager.
Step 6: Open Events in the WCFM menu #
- The vendor signs in and opens the WCFM store manager.
- In the menu, they click Events. The page is titled All Events.
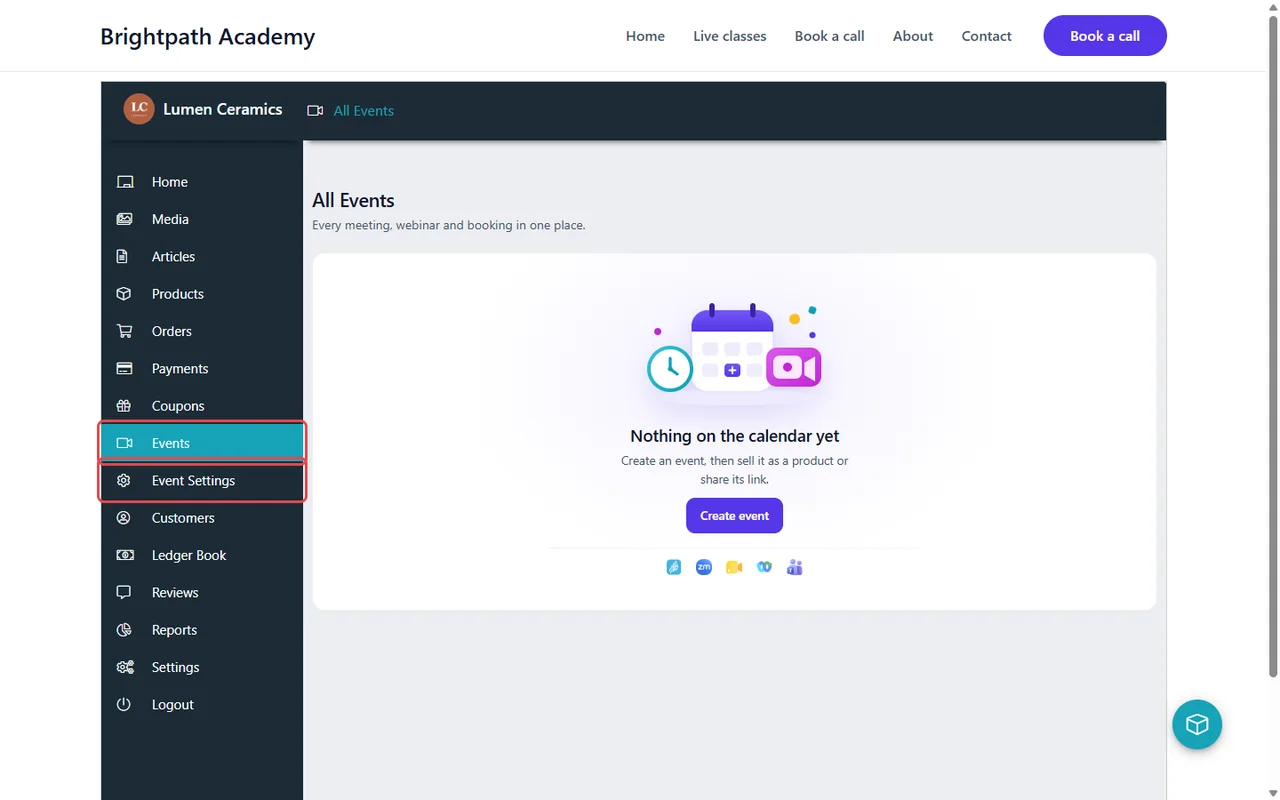
A new vendor sees “Nothing on the calendar yet”, with the hint “Create an event, then sell it as a product or share its link.” and a Create event button. Vendors see and manage only the events they created.
Step 7: Create an event as the vendor #
- The vendor clicks Create event.
- On Name and platform, they enter the Meeting name, for example Wheel Throwing Basics: Live Workshop, and pick the Platform.
- On Date and time, they set when it Starts, plus its Timezone and Duration.
- They click Create meeting.
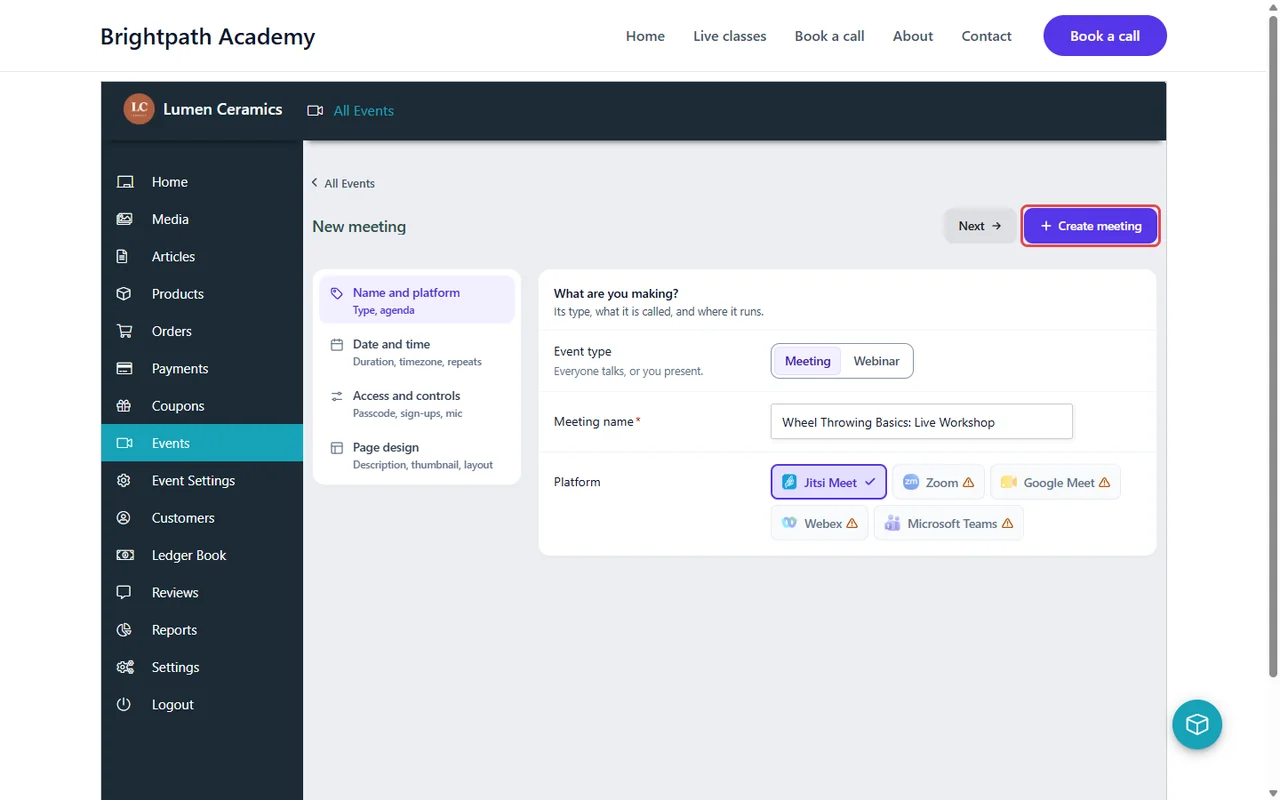
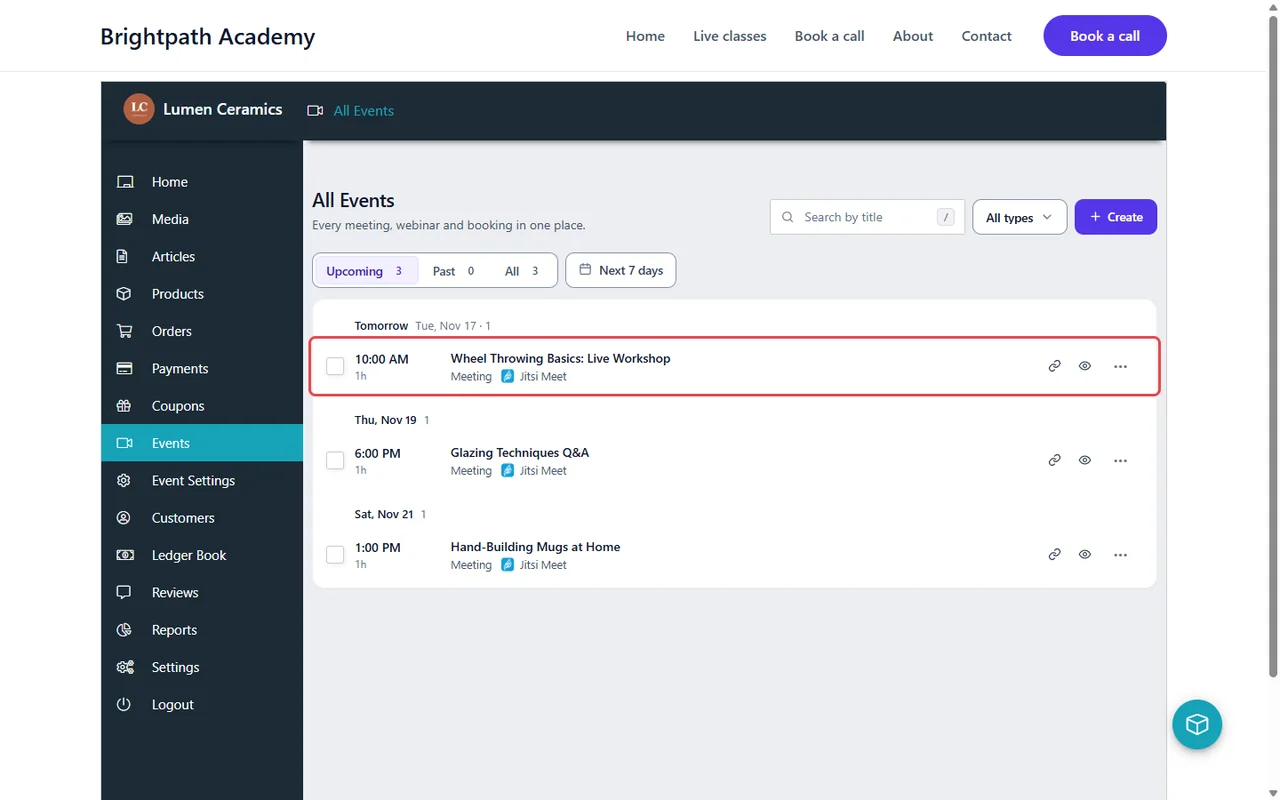
MeetingHub confirms with Meeting created and returns the vendor to All Events, where the event is listed under its date.
Step 8: Link the event to a product (Events tab) #
- In the WCFM menu, the vendor clicks Products, then Add New, or opens one of their products.
- They fill in the Product Title and Price, and tick Virtual.
- Below the description, they click the Events tab.
- They tick Event ticket.
- In Choose Event, which appears once the box is ticked, they pick their event. The list shows only their own events.
- They click Submit to save the product.
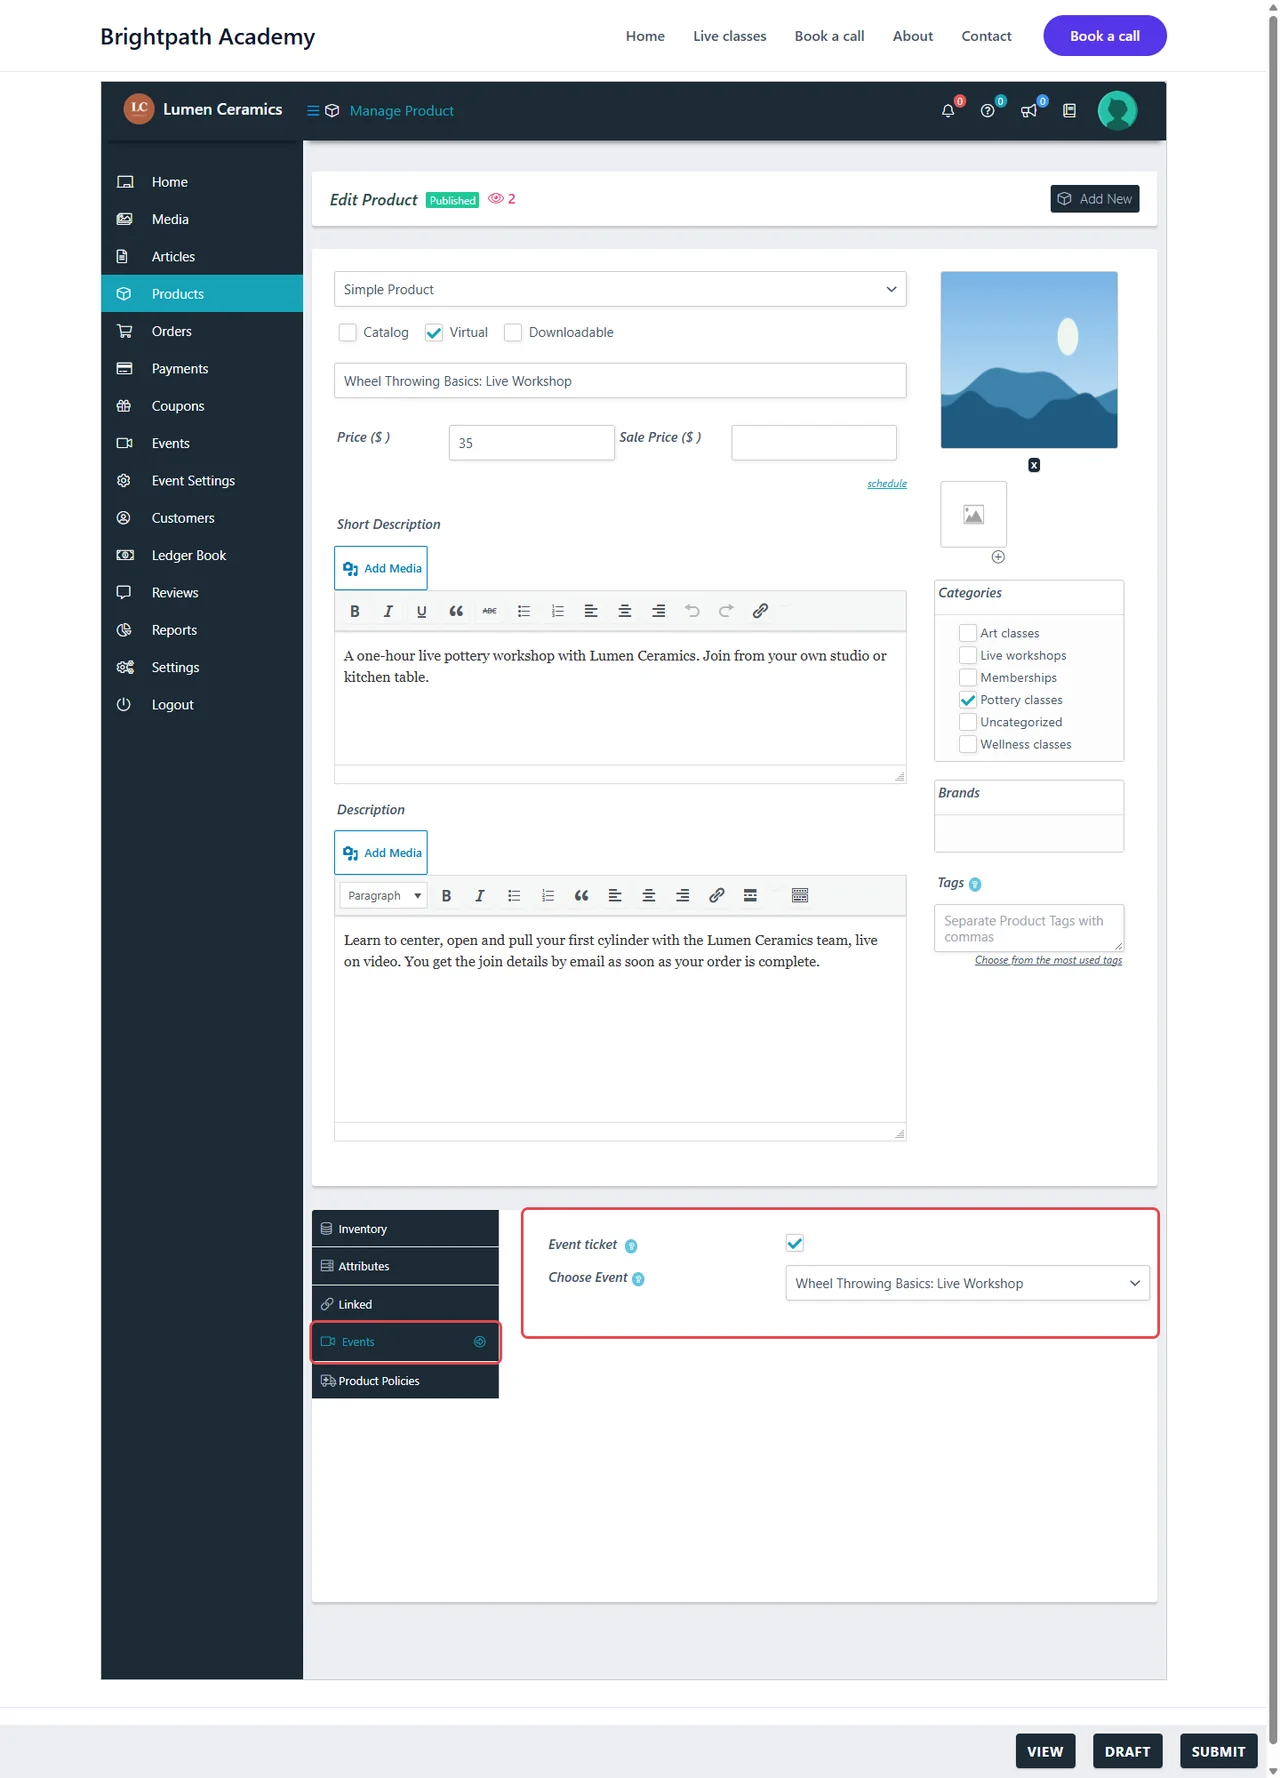
MeetingHub makes a ticket product virtual on save, so there is no shipping step, and it links only an event the vendor owns. Click Draft instead of Submit to save without publishing. To stop selling the event, the vendor unticks Event ticket and saves.
Step 9: See it on the product page #
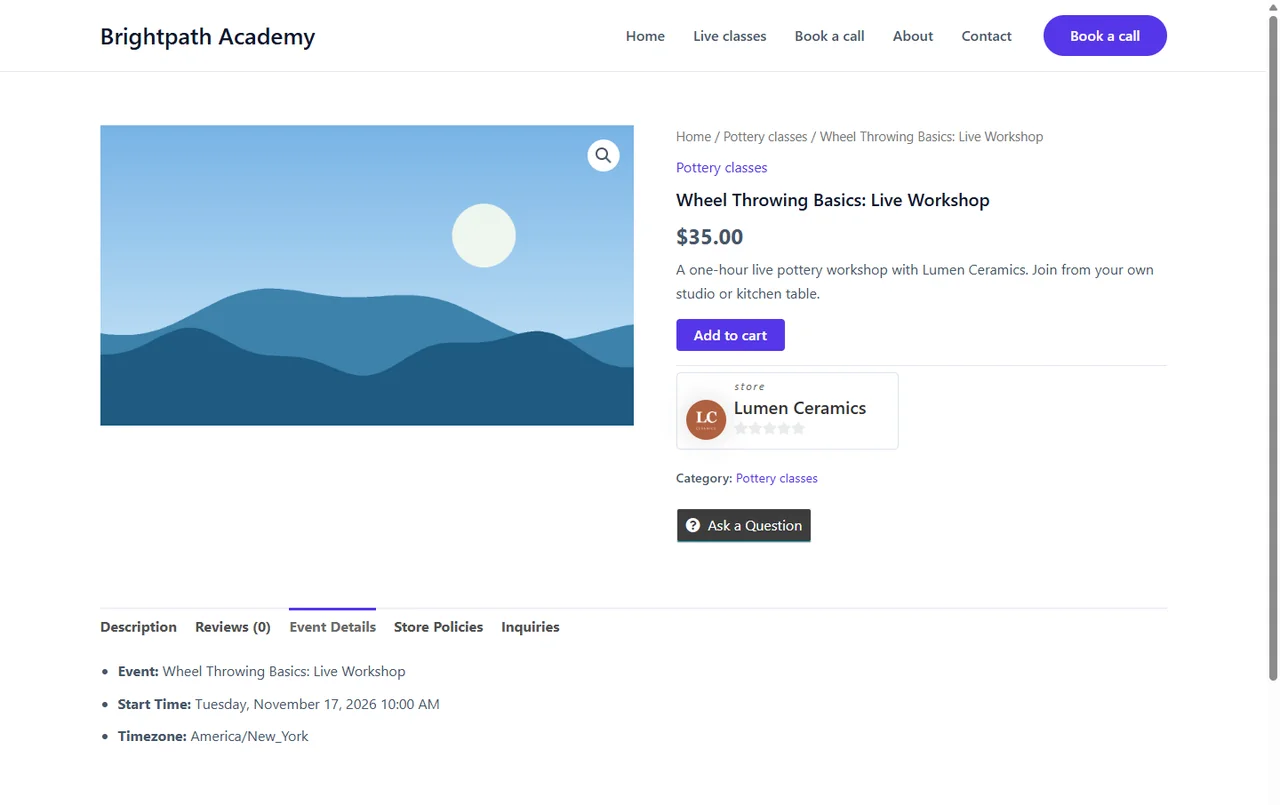
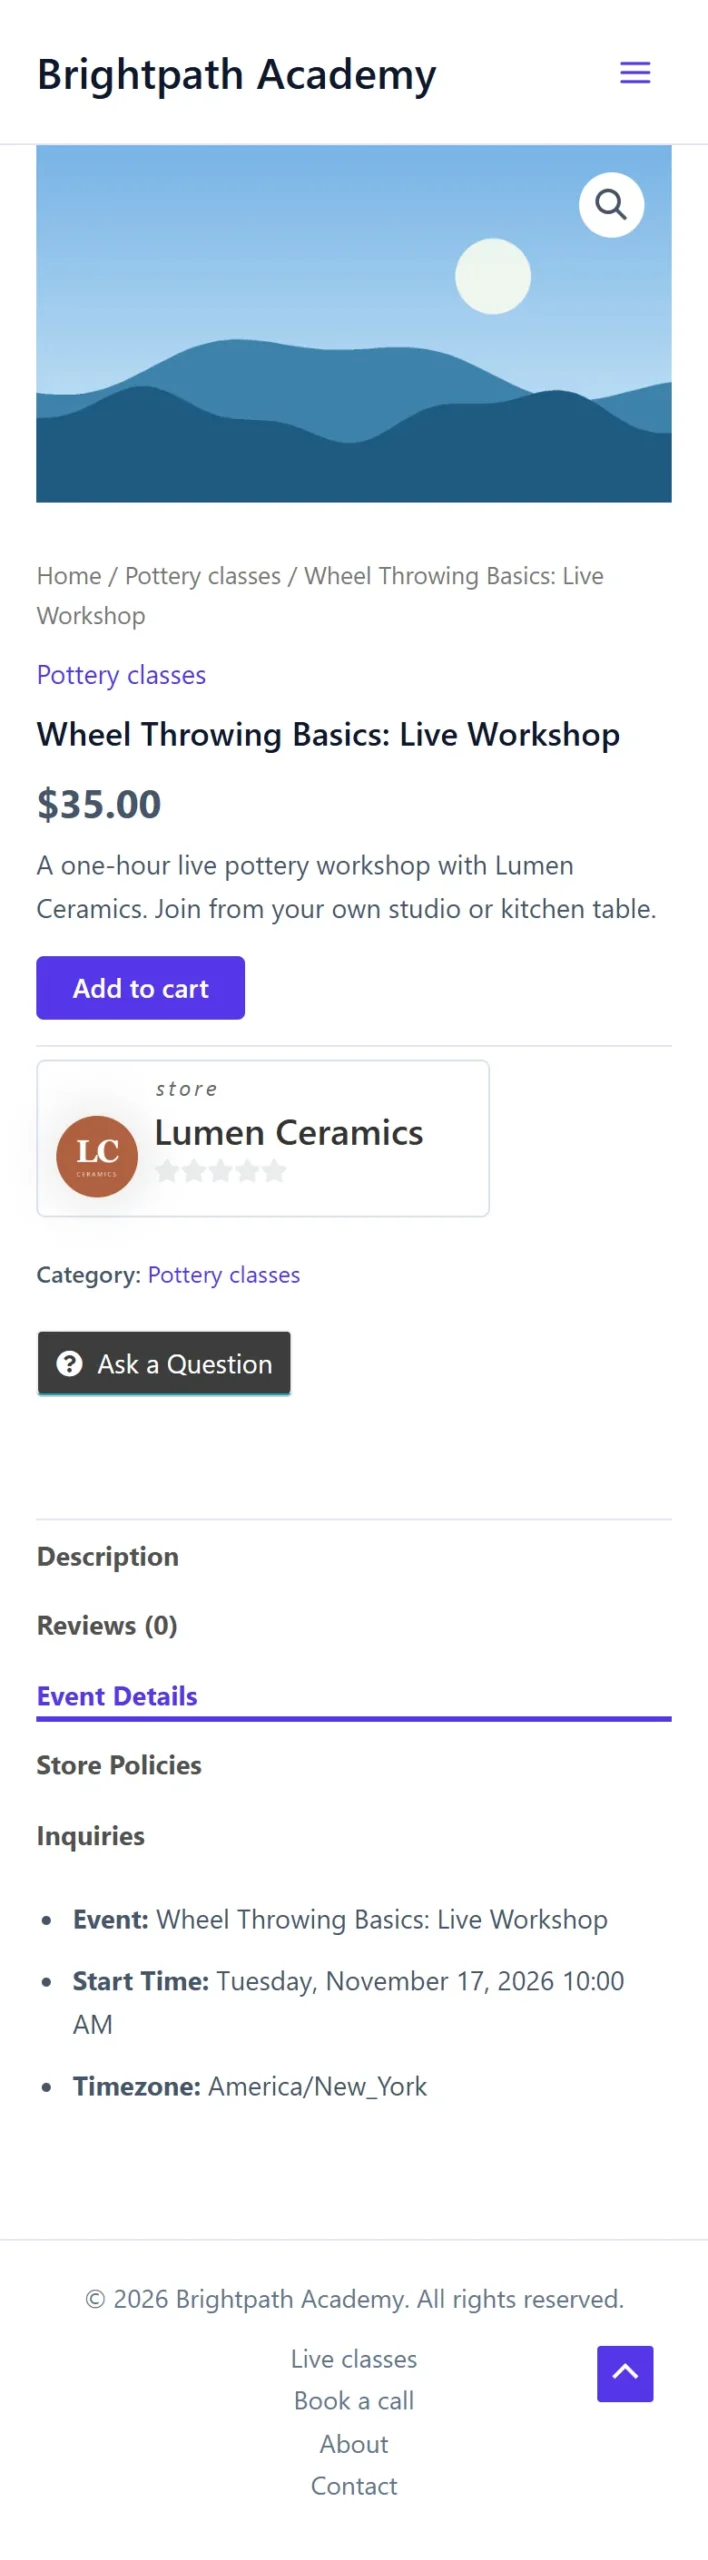
Open the product in a private browser window. WCFM shows the vendor’s store under the price, and the Event Details tab lists the Event, Start Time and Timezone. The quantity is locked to one seat per order.
On a phone, the tabs stack and Event Details opens in place.
When the order is Completed, MeetingHub adds the buyer to the event, adds the event details and the buyer’s personal Access code to the completed order email, and lists the event under Events in My Account. Guests sign in on the event page with their email and that code. Buyers who are logged in with the account they bought with get in as soon as the order is Processing.
Visitors who did not buy see a sign-in box and Buy now on the event page, never the join buttons. You do not need to turn on Require registration, except for a Webex webinar.
Benefits of using MeetingHub with WCFM #
- One menu in the dashboard vendors know: Events sits in the WCFM menu next to Products and Orders.
- No video setup for vendors: With Vendors use their own account off, every event runs on your connected accounts.
- Commissions as usual: An event product is a normal WooCommerce product, so WCFM pays vendors the usual way.
- Private by design: Each vendor sees, edits and sells only their own events.
Your vendors sell live sessions without learning a new screen.
Troubleshooting #
Vendors do not see an Events menu #
Check that:
- The WCFM Marketplace card is on in MeetingHub > Integrations > eCommerce.
- WCFM Marketplace and WCFM – Frontend Manager are both active.
- The user is an approved WCFM vendor.
The Event Settings item is missing #
Event Settings appears only while Vendors use their own account is on in MeetingHub > Meeting setup > Front-end hosting.
The Choose Event list is empty #
The vendor has no published events yet. They create one under Events, then come back to the product.
The customer did not get the event details #
Check that the order is Completed in WooCommerce > Orders, and that the WooCommerce card is on in MeetingHub > Integrations. On a Webex webinar, also check that Require registration is on for the event.
Frequently asked questions #
Do I need both WCFM plugins? #
Yes. WCFM Marketplace runs the marketplace, and WCFM – Frontend Manager draws the vendor dashboard where the Events menu lives.
Do vendors need their own video account? #
No. With Vendors use their own account off, every vendor event runs on the accounts you connected.
Can a vendor see other vendors’ events? #
No. Each vendor sees and edits only the events they created.
Can a customer buy two seats in one order? #
No. An event product is locked to one per order.
Security best practices #
- Approve vendors before they can sell, so only trusted people create events that customers pay for.
- Buyers sign in with their own access code, which works only with their email and only on that event. Ask vendors to keep a passcode on events where the platform has one (Jitsi Meet, Zoom and Webex): it protects the meeting room itself, and buyers never need it.
- Refund or cancel an order to take access away. The buyer’s code stops working and their webinar registration and calendar invitation are removed.
- Keep WordPress, WooCommerce, WCFM and MeetingHub up to date.
You’re ready to let WCFM vendors sell meetings #
Your WCFM vendors can now create events from the WCFM dashboard and sell seats as products. A completed order adds the buyer to the event and emails their details.


