- Before you begin
- Step 1: Open Frontend Meetings
- Step 2: Choose the page members use
- Step 3: Check that the page is live (Member access)
- Step 4: Choose who can create meetings
- Step 5: Open the page as a member
- Step 6: Create a meeting from the front end
- Step 7: Manage meetings from the list
- What visitors see
- Benefits of front-end meetings with ZooMeet
- Troubleshooting
- Frequently asked questions
- You're ready to let members host their own meetings
Your instructors and hosts can schedule Zoom meetings without opening wp-admin. You give them a page on your site where they create, list and edit their own meetings.
ZooMeet sets that page up for you from one screen, Frontend Meetings. You pick the page, choose which roles may create meetings, and ZooMeet adds the meeting form. Every meeting made there is a real Zoom meeting, with the same form you use in wp-admin.
By the end of this guide, you will have:
- A live page where members create their own Zoom meetings
- The roles that may create meetings chosen
- The page linked from your menu, if you want
- A member creating a meeting from the front end
- A clear idea of what logged-out visitors and other members see
Estimated setup time: 5 minutes. You can reuse a page you already have, so nothing else on your site moves.
Note: Requires ZooMeet Pro. Without Pro, the Frontend Meetings screen only describes what Pro adds.
Before you begin #
Make sure you have:
- ZooMeet and ZooMeet Pro installed and activated
- A connected Zoom account. See How to connect Zoom with ZooMeet using Server-to-Server OAuth.
- An administrator account on your WordPress site
- At least one user who will host meetings, for example an instructor
- A page for the form, or let ZooMeet create one
Let’s get started.
Step 1: Open Frontend Meetings #
The Frontend Meetings screen sets up the page and tells you whether it is live.
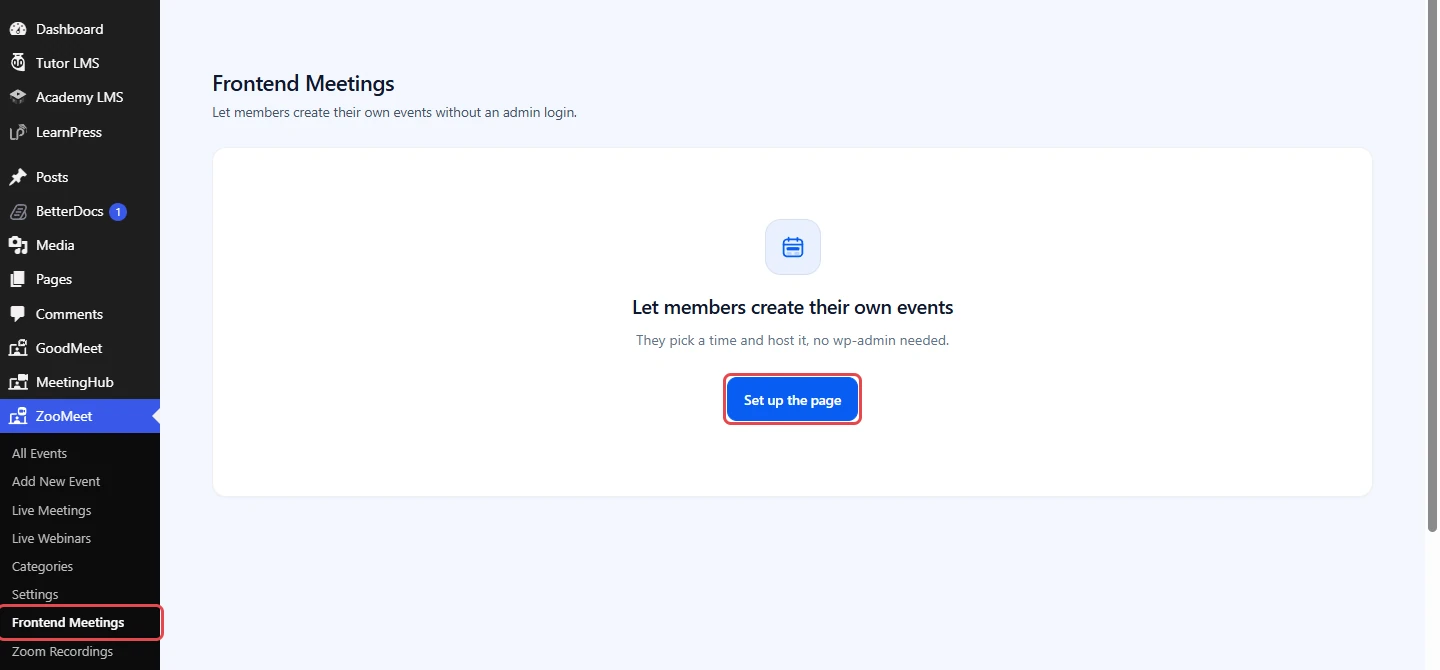
- In the WordPress admin menu, go to ZooMeet > Frontend Meetings.
- The first time, the screen shows Let members create their own events. Click Set up the page.
Step 2: Choose the page members use #
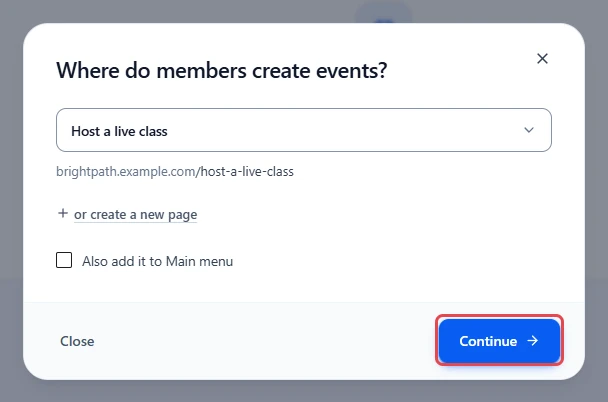
The setup window asks Where do members create events? You can reuse a page you already have or let ZooMeet make one.
- Open the page list and pick an existing page, for example Host a live class. Or click or create a new page.
- If you want a menu link, tick Also add it to and your menu’s name.
- Click Continue.
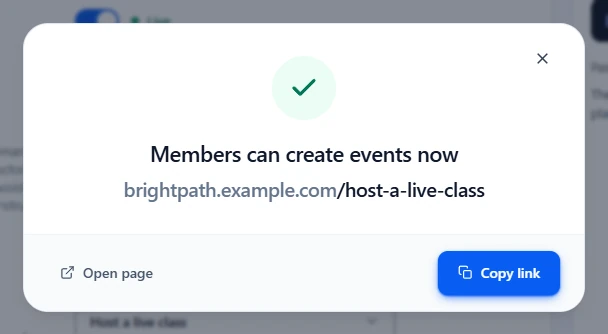
ZooMeet adds the meeting form to the page if it is not there yet. When it is done, you see Members can create events now.
Step 3: Check that the page is live (Member access) #
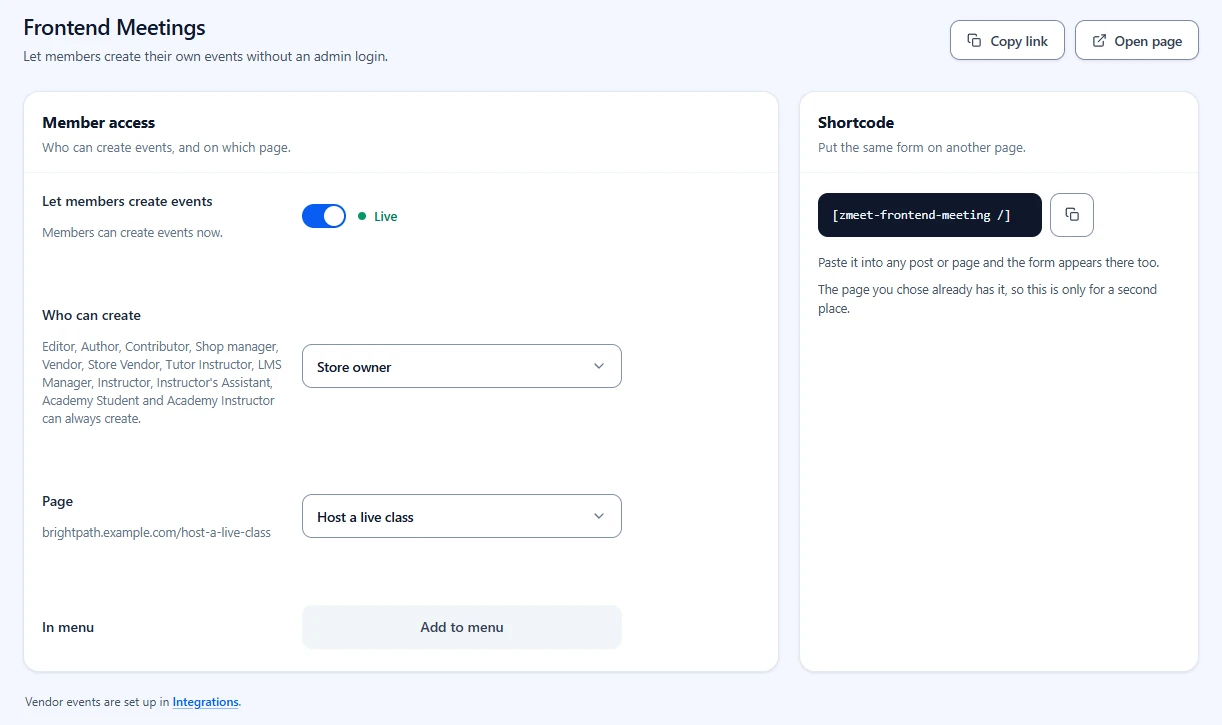
Close the window. The Frontend Meetings screen now shows where things stand, so you can spot a problem at a glance.
- Check that Let members create events is on, with a green Live label.
- Check Page. You can choose another page here at any time.
- Check In menu. Click Add to menu if the page is not linked yet.
Note: Turn Let members create events off to take the form offline. “Members cannot create events while this is off.”
Step 4: Choose who can create meetings #
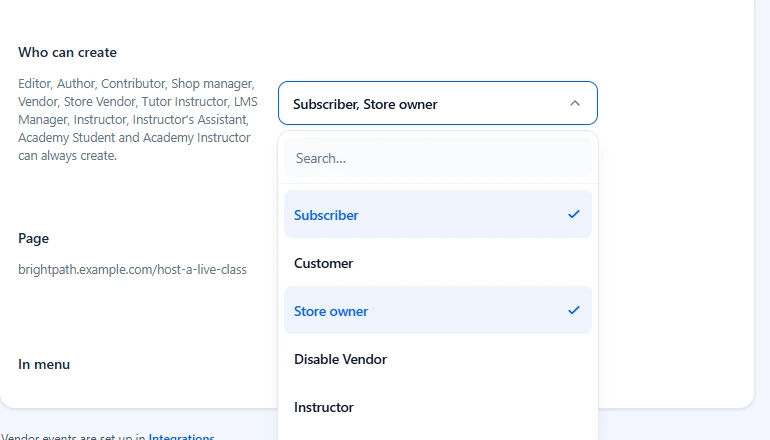
Some roles can always create meetings, because they can already write posts. The Who can create row names them, for example Editor, Author and Contributor. For everyone else, you pick the roles here.
- Click the Who can create field.
- Tick each role that should host meetings, for example Subscriber or Instructor.
- Click outside the list. Your choice saves on its own.
Important: Users with these roles can create real Zoom meetings on your account. Only tick roles you trust to host.
Tip: Tutor LMS instructors also get a Zoom Events item in their Tutor dashboard. See How to add Zoom live classes to Tutor LMS courses with ZooMeet.
Step 5: Open the page as a member #
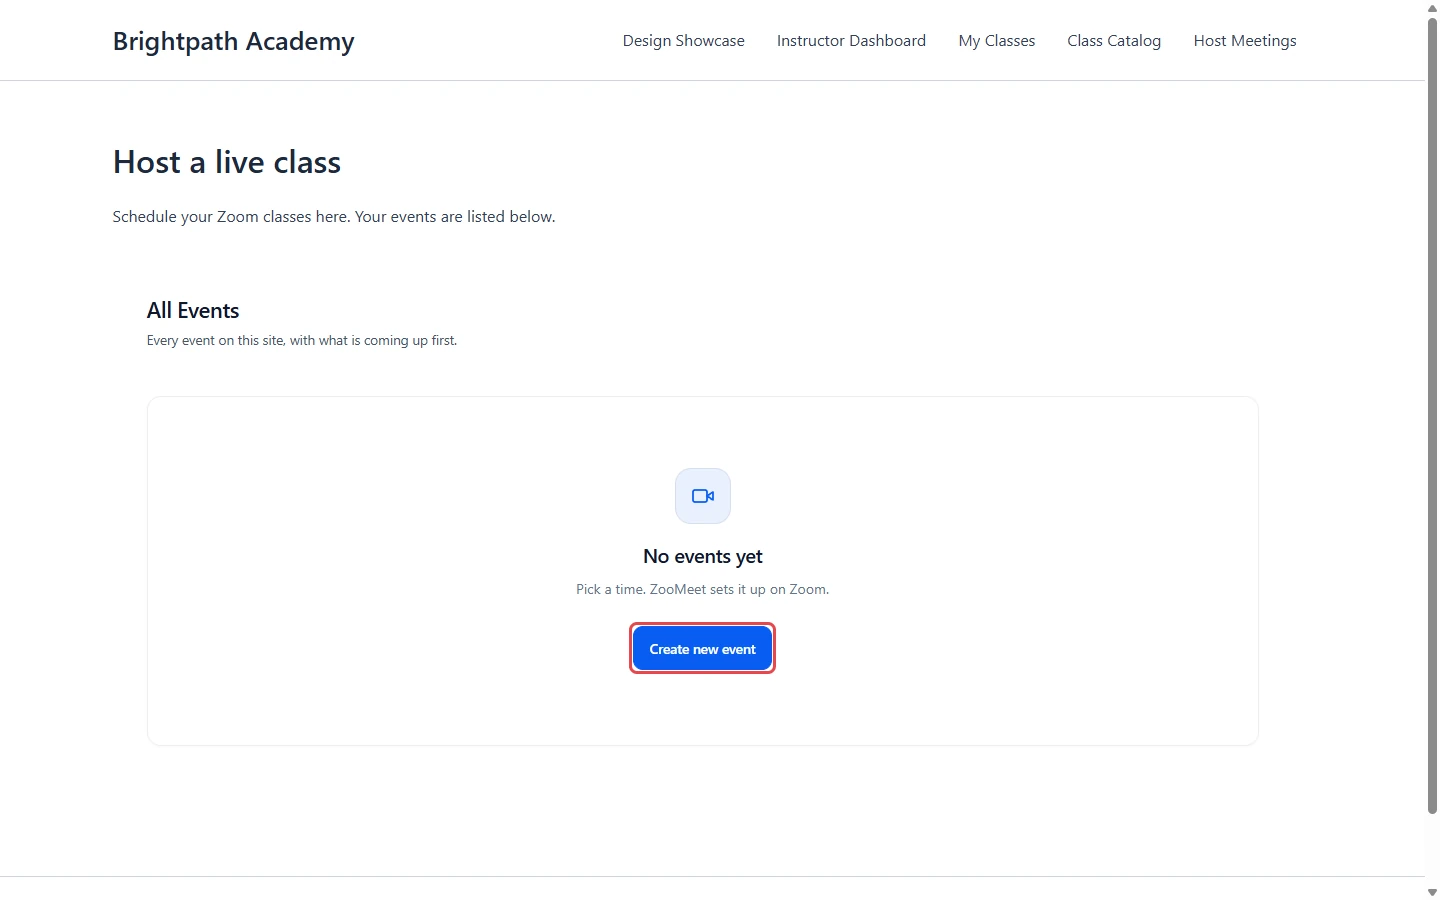
Now look at it the way your hosts will. Log in as a member with one of the roles from Step 4 and open the page.
- Check the All Events list. A new host sees No events yet.
- Click Create new event, or Add new event once the host has meetings.
Step 6: Create a meeting from the front end #
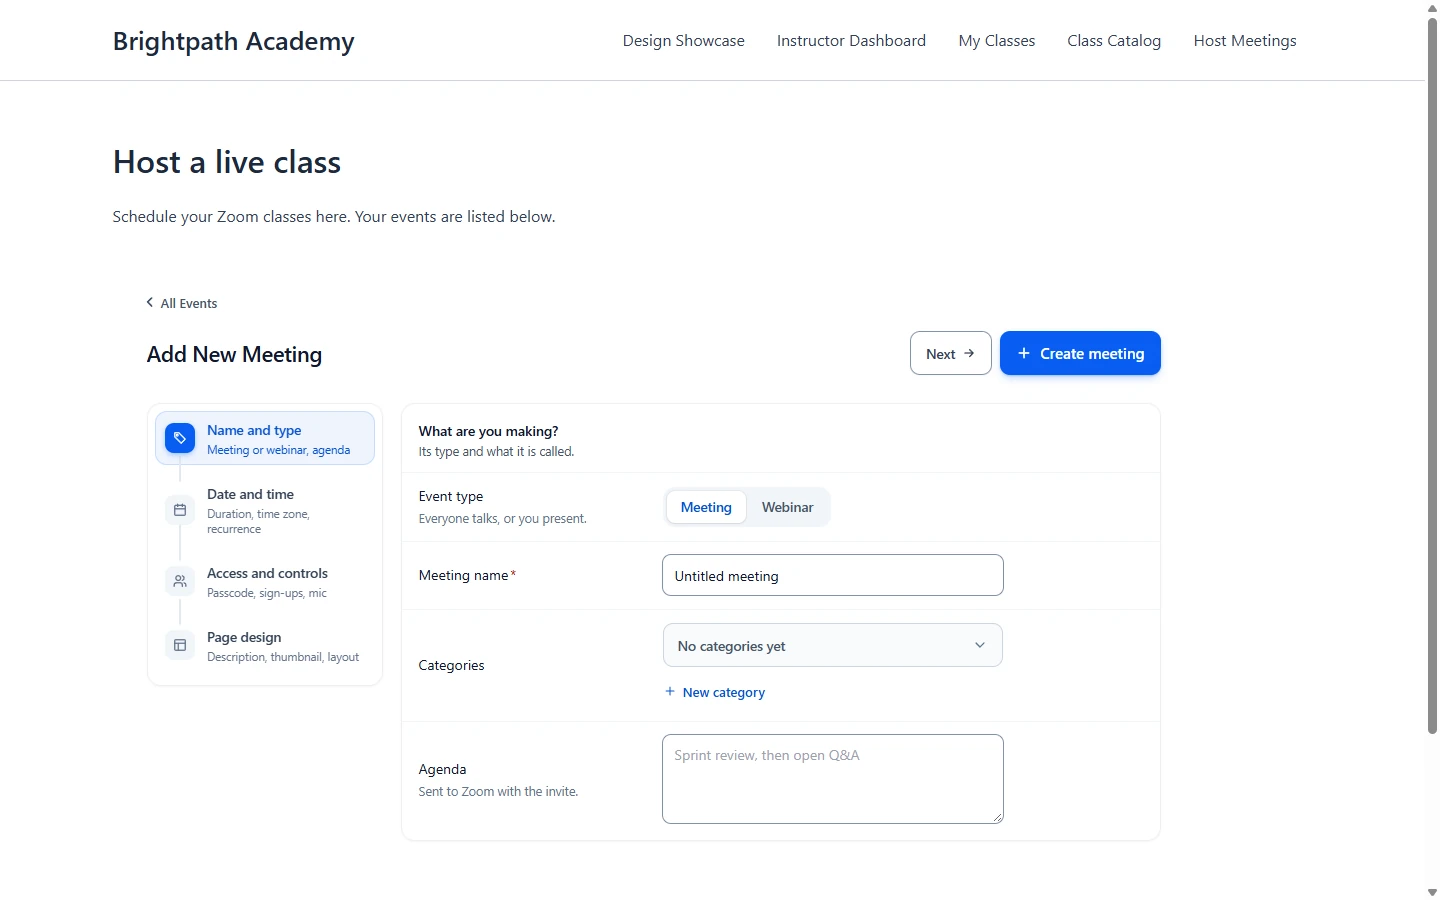
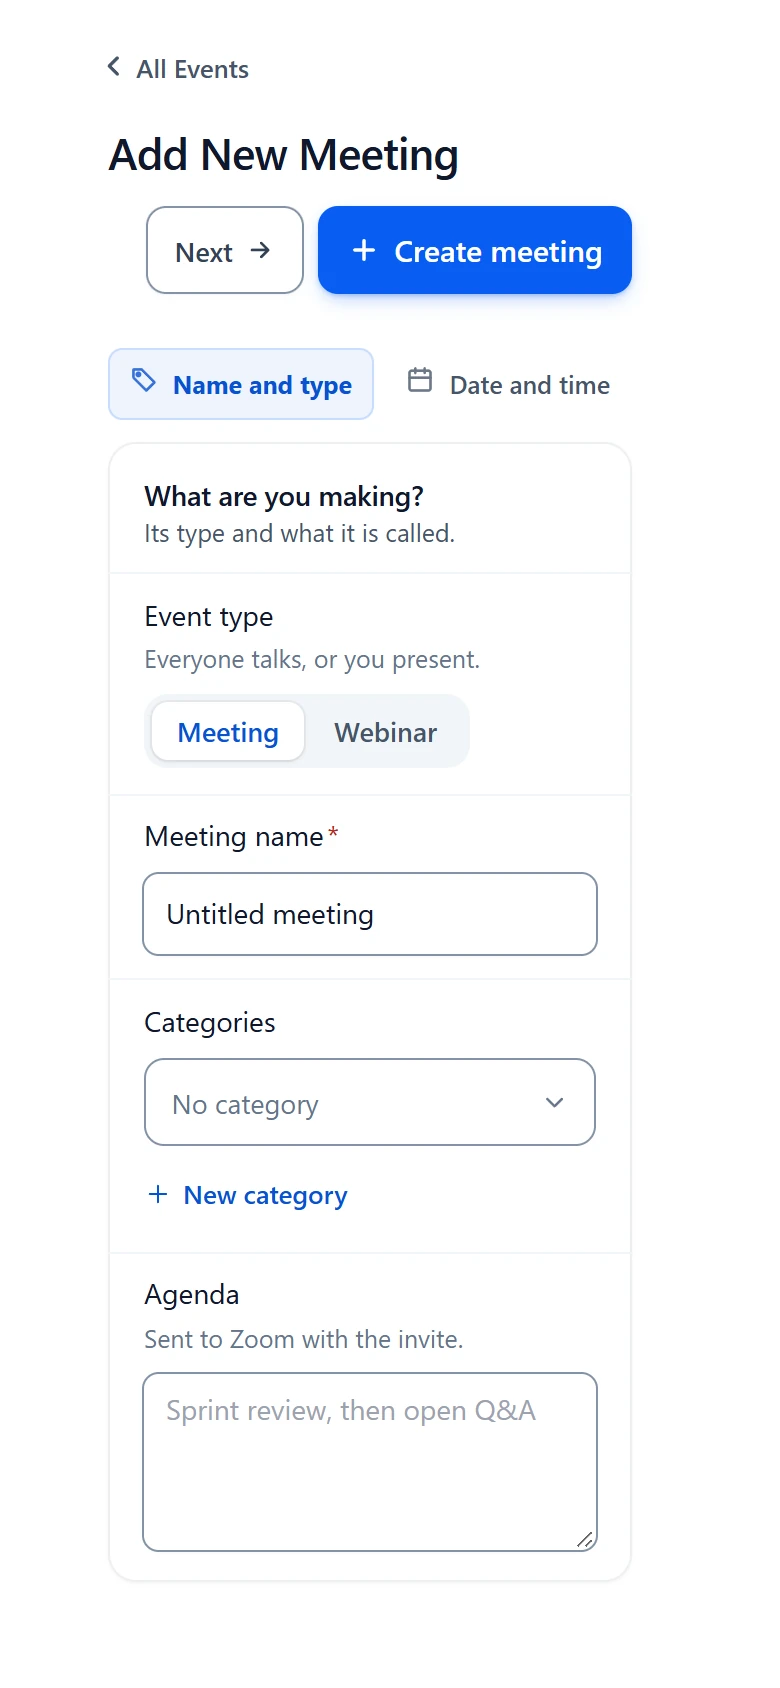
The form is the same one you use in wp-admin, inside your site theme. It has four steps: Name and type, Date and time, Access and controls and Page design.
- Type the Meeting name. Pick Categories and add an Agenda if you like. The Categories list starts on No category.
- Set Starts, Duration and Time zone in Date and time.
- Change Access and controls and Page design if you need to. Both are optional.
- Click Create meeting.
ZooMeet creates the Zoom meeting and returns to the list. For the full walkthrough of each step, see How to create your first Zoom meeting with ZooMeet.
Step 7: Manage meetings from the list #
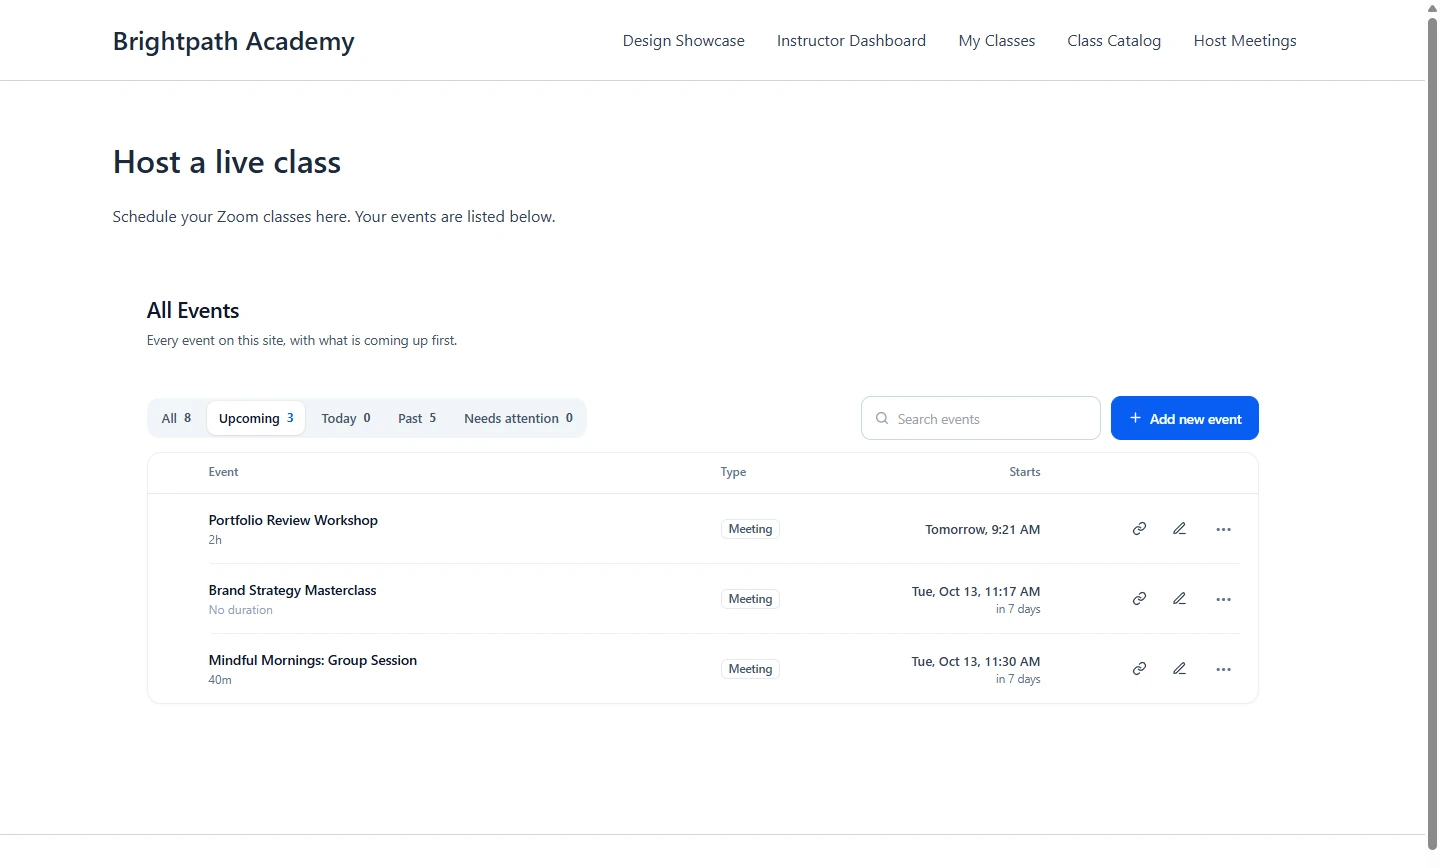
Once a host has meetings, the page lists them with the soonest first.
- Use the tabs All, Upcoming, Today, Past and Needs attention to filter the list, or type in Search events.
- On each row, click the link icon (Copy link) to copy the meeting page address, or the pencil to edit the meeting. A live meeting also gets a Join button.
- Click ••• for View event page, Copy shortcode and Delete.
Note: Members see and edit only the meetings they created. Administrators see every meeting.
On a phone, the form stacks into one column and the steps scroll sideways.
What visitors see #
Visitors who are not logged in never see the form. The page shows “Please log in to create an event.” and a Login button that opens the WordPress login page.
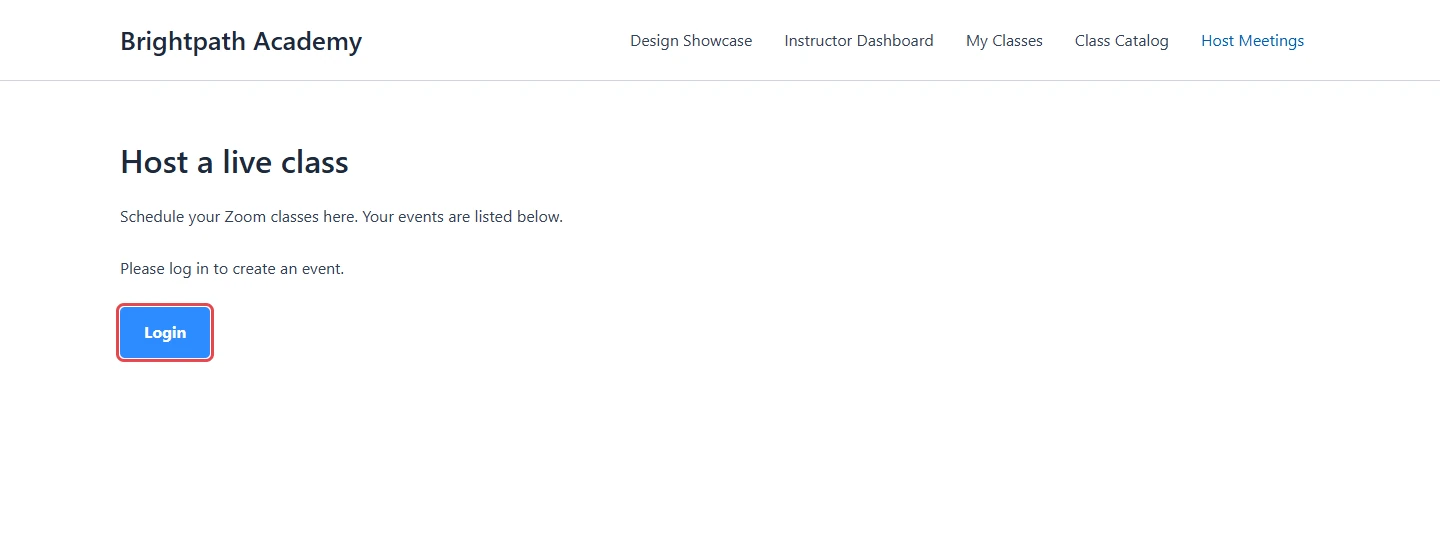
After logging in, visitors land back on the same page, ready to use the form.
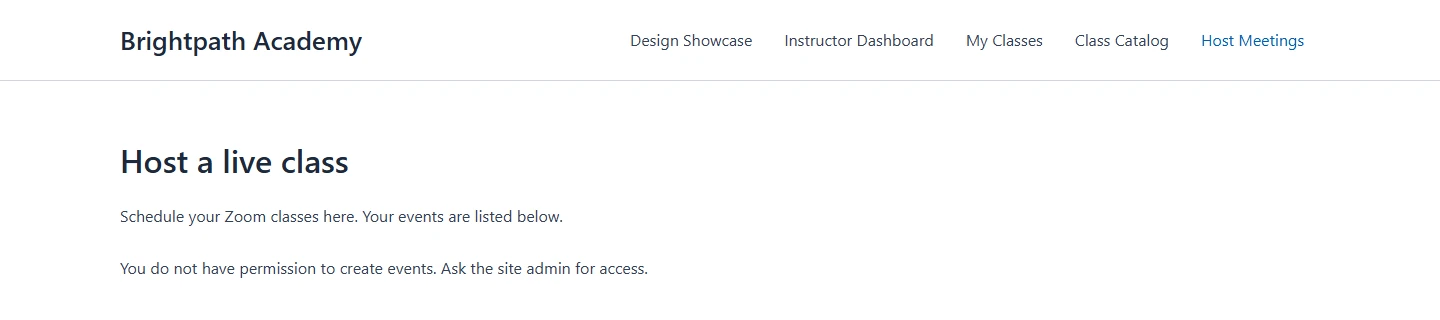
Logged-in members whose role may not create meetings see “You do not have permission to create events. Ask the site admin for access.” instead of the form.
Benefits of front-end meetings with ZooMeet #
- No admin accounts for hosts: Instructors schedule classes from your site, so you never hand out wp-admin access.
- Fewer requests in your inbox: Hosts create and edit their own meetings instead of asking you.
- Real Zoom meetings from the start: Every meeting is created on your Zoom account as soon as the host clicks Create meeting.
- Each host sees their own meetings: Lists stay separate per host.
Set it up once, and your hosts take it from there.
Troubleshooting #
A member sees “You do not have permission to create events. Ask the site admin for access.” #
The member’s role may not create meetings.
- Go to ZooMeet > Frontend Meetings.
- Tick the member’s role in Who can create.
- Ask the member to reload the page.
The Frontend Meetings screen shows “Not live” #
The page is a draft, private, or no longer has the form.
- Publish the page. A draft shows “Draft, so members cannot open it yet.”
- If the screen says “The form is no longer on this page.”, click Put the form back.
“The page is gone” #
The page you chose was deleted, so links to it lead nowhere.
- Click Set up a new page.
- Pick or create another page and click Continue.
The page shows [zmeet-frontend-meeting /] as plain text #
The front-end form is off, or ZooMeet Pro is not active.
Check that:
- Let members create events is on in ZooMeet > Frontend Meetings.
- ZooMeet Pro is active.
“Could not create the page” or “Could not update the page” #
ZooMeet could not save the page. Reload Frontend Meetings and try again, or pick an existing page instead of creating one.
Frequently asked questions #
Do hosts need wp-admin access? #
No. Hosts work entirely from the front-end page.
Can hosts see other hosts’ meetings? #
No. Each host sees only the meetings they created. Administrators see every meeting in All Events.
Can I put the form on more than one page? #
Yes. Copy [zmeet-frontend-meeting /] from the Shortcode card and paste it into any page or post.
Can a role I did not tick still create meetings? #
Yes, if it can already write posts. The Who can create row lists those roles, ending with “can always create.”
Do front-end meetings follow my access rules? #
Yes. Meetings created on the front end follow Page access like every other meeting. See How to control meeting access and alternative hosts with ZooMeet.
You’re ready to let members host their own meetings #
Your hosts now create, find and edit their Zoom meetings on a page of your site, and each meeting is a real Zoom meeting from the start. Next, show those meetings to your visitors and decide who can open them.


