Do you want to share a gallery or a set of files only with the people who have the password? You can easily do this with DriveHub.
Password protection puts a small lock screen in front of any module. Your clients type the password you gave them, and the files open right on the page. Everyone else only sees the lock screen.
Here is an easy, step-by-step guide to help you set it all up!
Step 1: Open Your Module #
First, open the module you want to protect:
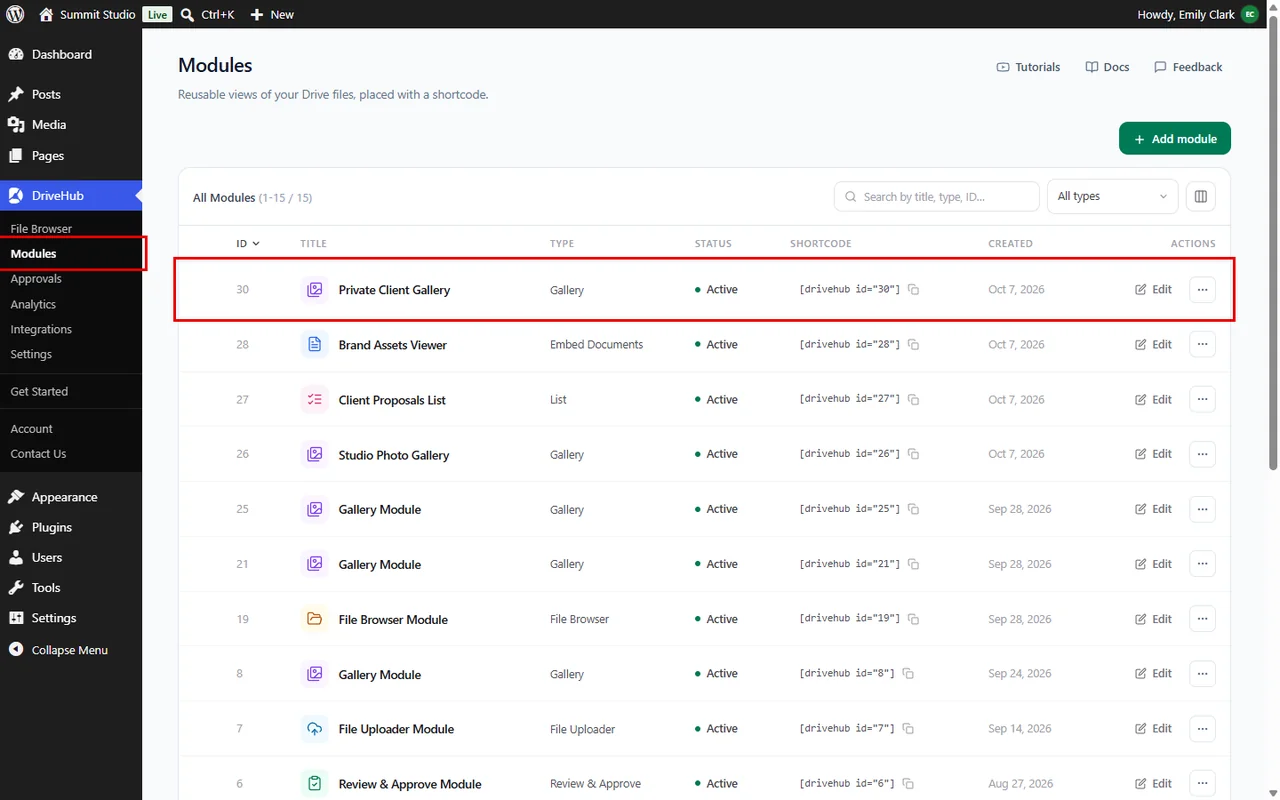
- Go to DriveHub > Modules from your WP-Admin.
- Find your module in the list (we’ll use the Private Client Gallery gallery module).
- Click on Edit next to it.
Step 2: Open the Permissions Tab #
The password setting lives with the other access rules:
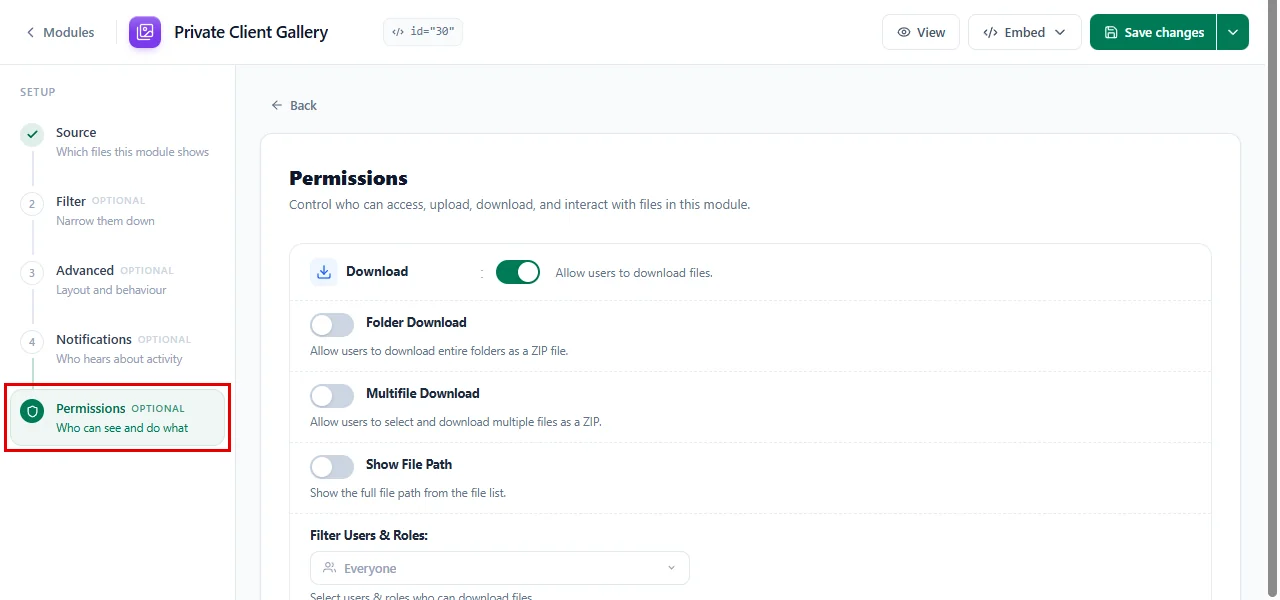
- In the left steps of the module builder, click on Permissions.
Step 3: Turn On Password Protection #
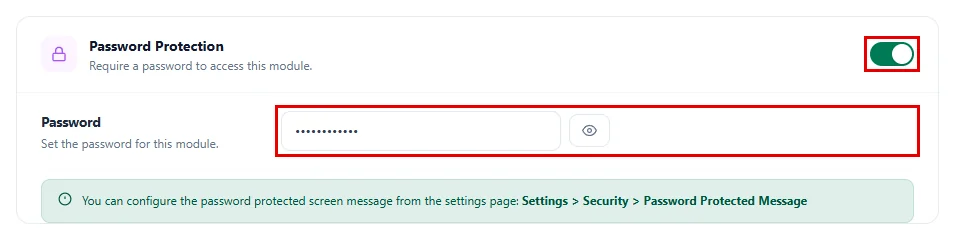
Scroll down to the Password Protection card near the bottom of the tab:
- Turn on the switch at the top right of the Password Protection card. The card opens and shows the Password field.
- In the Password field, type the password you want to share with your visitors.
- Click the eye button next to the field if you want to check what you typed.
Tip: Pick a password that is easy to share but hard to guess, for example a word and a year. You can send it to your clients by email together with the page link.
Step 4: Save the Module #
Your password is not active until you save:
- Click on Save changes at the top right of the builder.
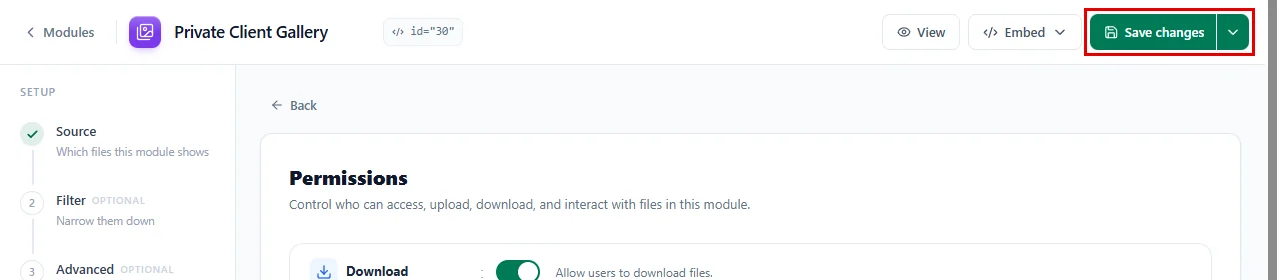
Don’t forget this step. While something is still unsaved, an Unsaved changes label shows next to the module name.
Step 5: Check the Page as a Visitor #
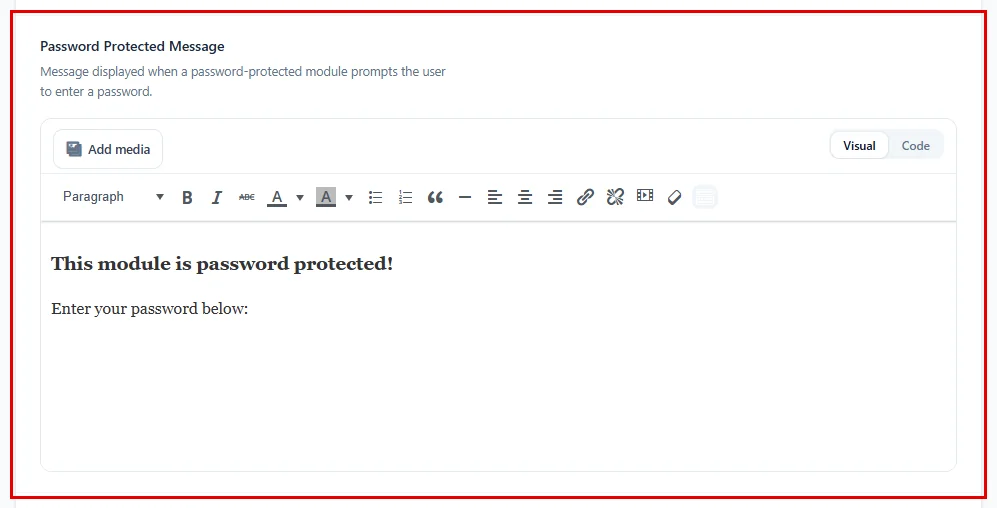
Now open the page that shows this module in a private browser window, so you see it the way a visitor does. Instead of the files, visitors see a lock screen with the message This module is password protected! and Enter your password below:, a password field and an Unlock button.
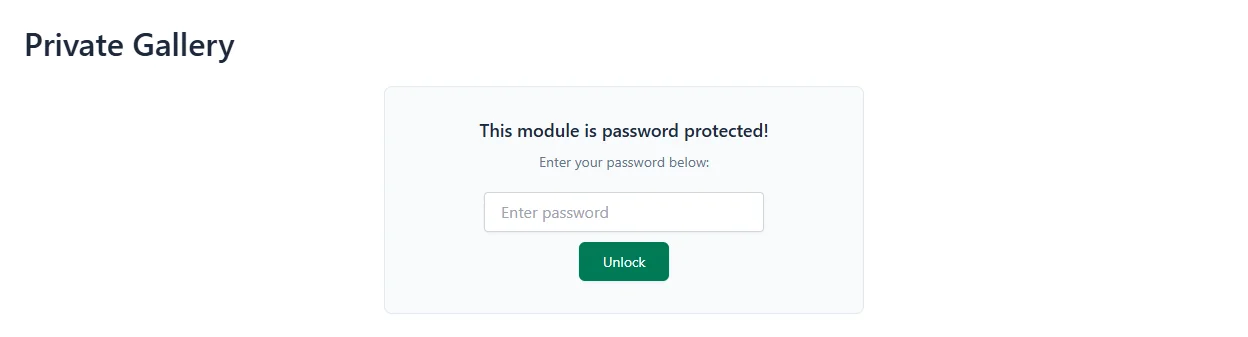
- Type the password into the Enter password field.
- Click on Unlock.
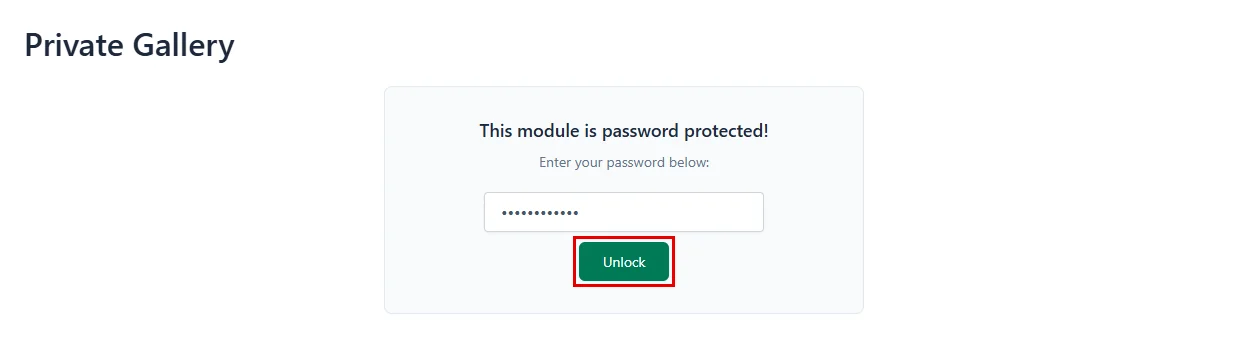
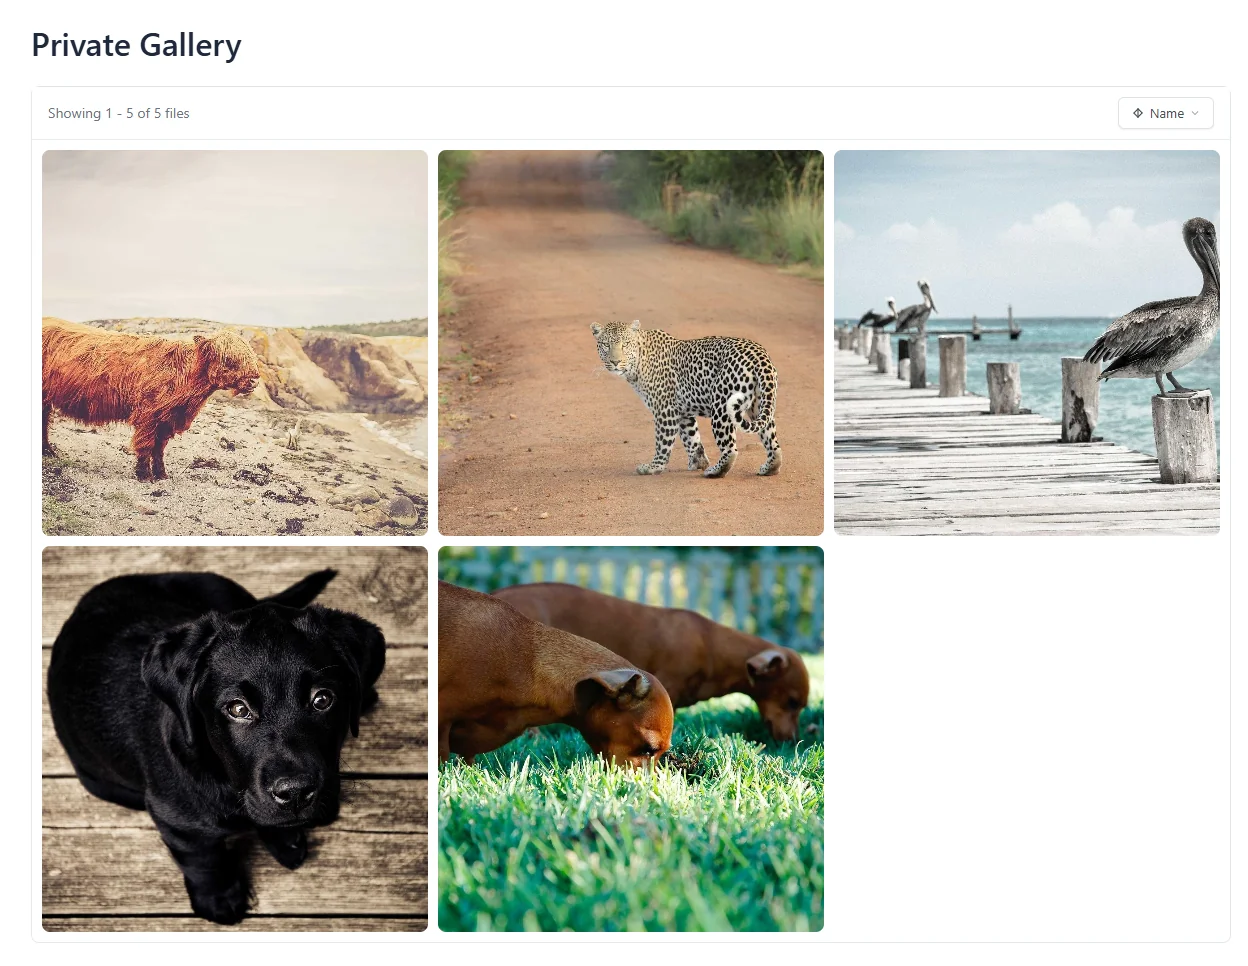
The page reloads and the module opens with all its files. DriveHub remembers the password in that browser for one day, so your visitor does not have to type it again on every visit. If the password is wrong, a short Incorrect password note appears under the field.
Step 6: Change the Lock Screen Message (Optional) #
You can write your own text for the lock screen, for example to tell clients where to find their password. This message is shared by every password protected module on your site:
- Go to DriveHub > Settings.
- Click on Security in the settings menu.
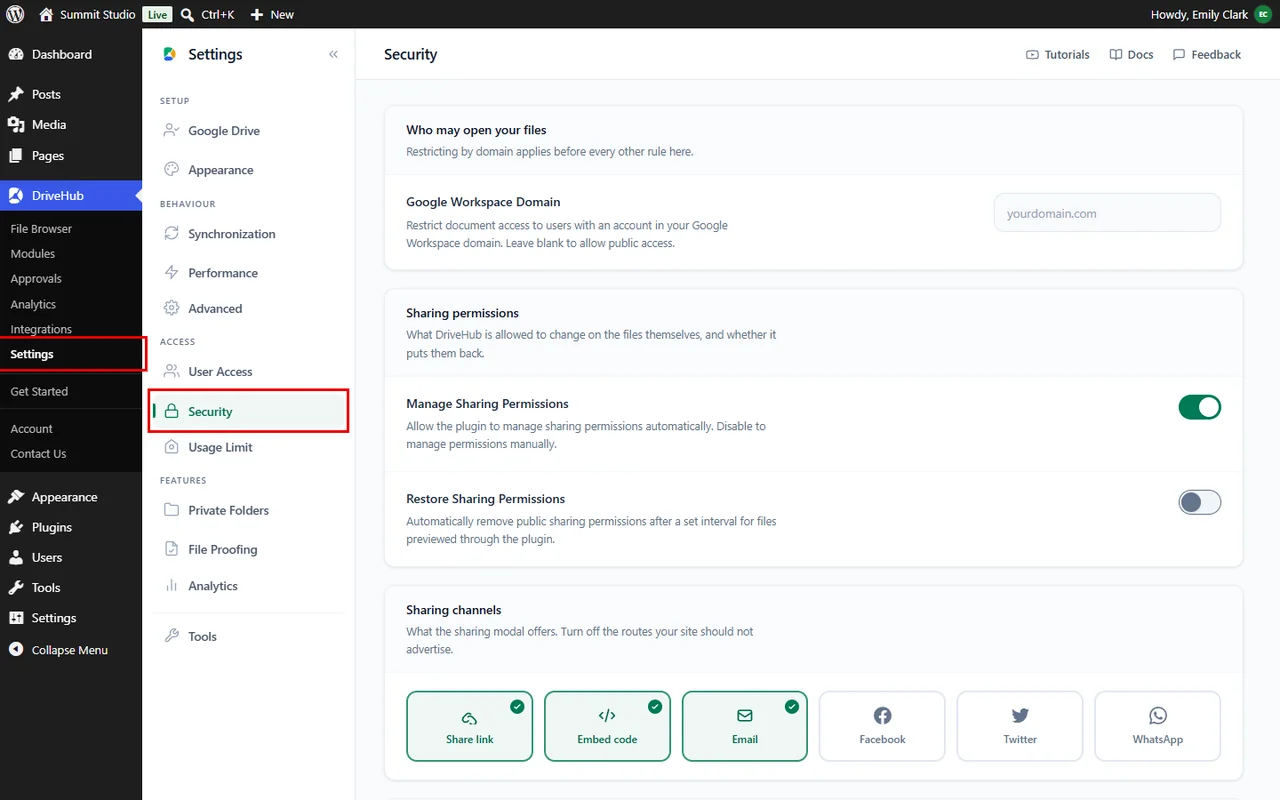
- Scroll down to What a blocked visitor sees and find Password Protected Message.
- Write your message in the editor. You can use headings, bold text and links.
- Click Save changes in the bar at the bottom of the screen.
And that’s it. Your module is now locked, and only people with the password can see your files.
Benefits of Password Protecting a Module #
- Share with the right people: Send one password to a client instead of creating user accounts.
- Works with any module: Lock a gallery, a file list, an embedded document and more.
- Your files stay in Google Drive: Nothing is copied to your Media Library.
- Friendly for visitors: One password, one click, and the files open on the same page.
- Your own words: Change the lock screen message to match your site.
With DriveHub password protection, private files stay private while sharing stays easy.


