- Step 1: Install WooCommerce
- Step 2: Install DriveHub and DriveHub Pro
- Step 3: Connect Your Google Drive Account
- Step 4: Turn On Selling Drive Files
- Step 5: Create a Downloadable Product
- Step 6: Pick the Files
- Step 7: Check the Rows and Publish
- Step 8: See It on Your Site
- Benefits of Using DriveHub with WooCommerce
- Troubleshooting
Do you want to sell eBooks, recordings or design packs in your WooCommerce store while the files stay in Google Drive? You can easily do this with DriveHub.
Each file stays in your Google Drive and is never copied to your server, so big downloads don’t eat up your hosting space. Buyers still get their files the normal WooCommerce way: in My Account > Downloads and in their order email.
Here is an easy, step-by-step guide to help you set it all up!
Note: This needs DriveHub Pro.
Step 1: Install WooCommerce #
DriveHub adds Google Drive files to WooCommerce products, so WooCommerce needs to be there first:
- From your WordPress admin, click on Plugins > Add New Plugin.
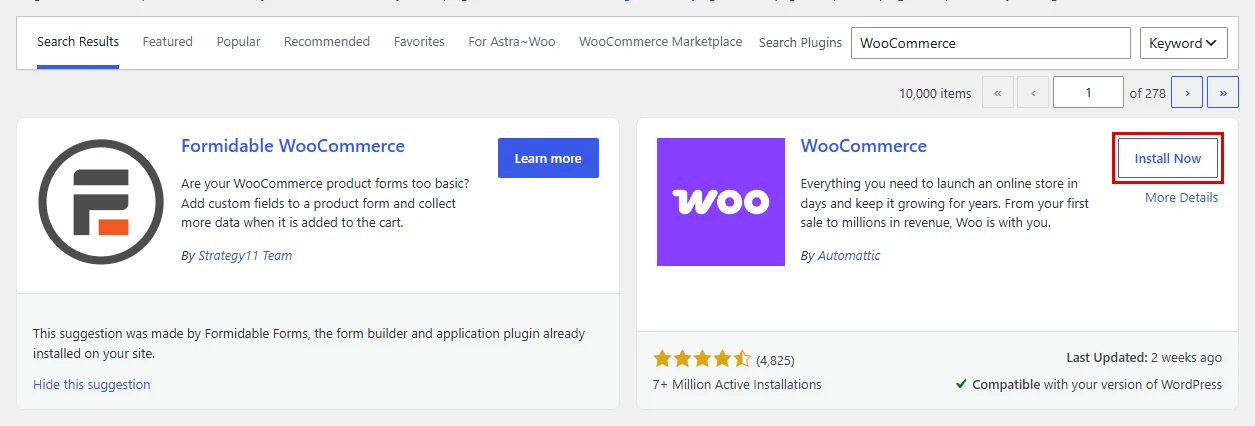
- Search for WooCommerce.
- Click Install Now and then Activate.
If WooCommerce is already active, skip to the next step.
Step 2: Install DriveHub and DriveHub Pro #
Next, install the free DriveHub plugin:
- Go to Plugins > Add New Plugin.
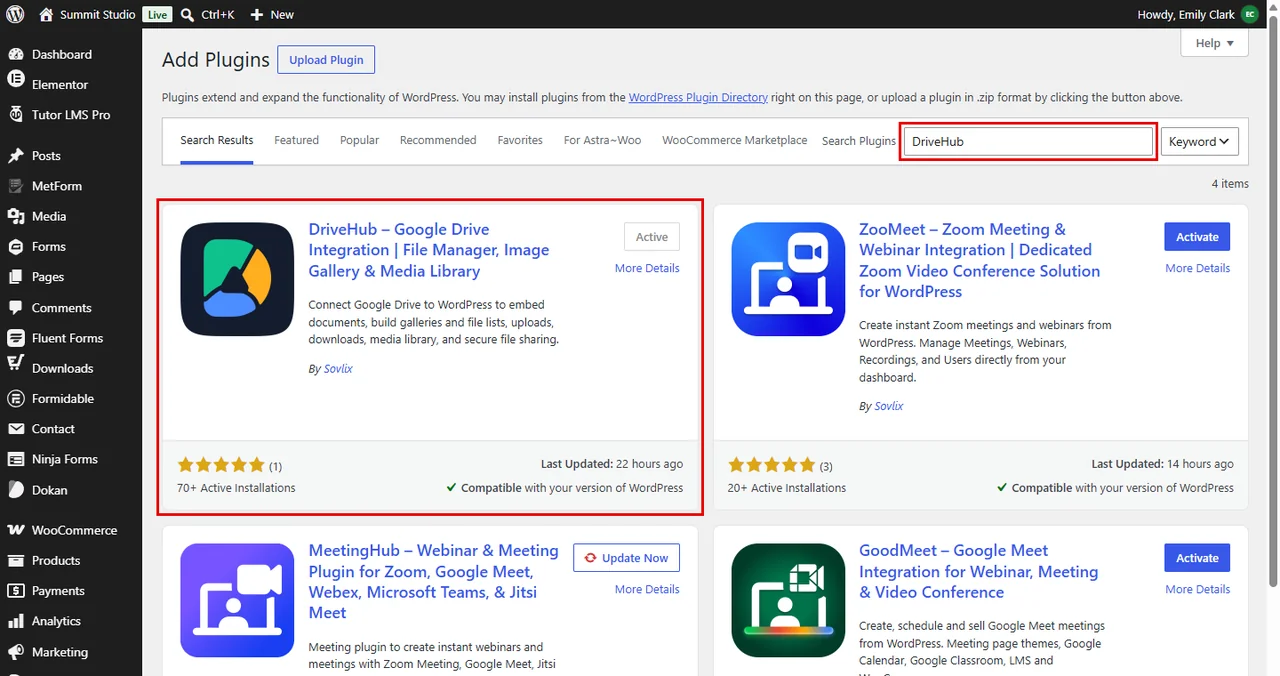
- Search for DriveHub.
- Click Install Now and then Activate.
Selling through WooCommerce is a Pro feature, so add DriveHub Pro on top. Read How to Install and Activate DriveHub Pro if you haven’t done that yet.
Step 3: Connect Your Google Drive Account #
DriveHub can only send files that live in a connected Google account:
- Open DriveHub and click on Start Setup.
- Click on Add Account.
- Choose the Google account that holds your products and allow the permissions.
Read our step by step setup guide to avoid any confusion.
Step 4: Turn On Selling Drive Files #
Now switch on the WooCommerce integration:
- Go to DriveHub > Integrations.
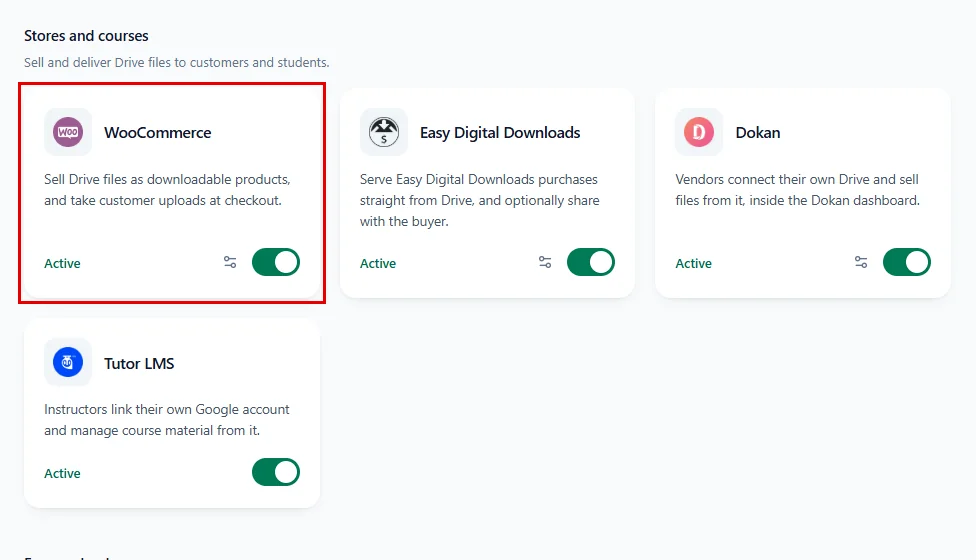
- Find the WooCommerce card under Stores and courses.
- Click on Set up on the card. If the card already shows a switch, turn it on and click the small settings icon next to it instead. The WooCommerce settings window opens.
In the settings window:
- Turn on Sell Drive files as downloads.
- Click on Done.
- Click on Save changes in the bar at the bottom of the screen.
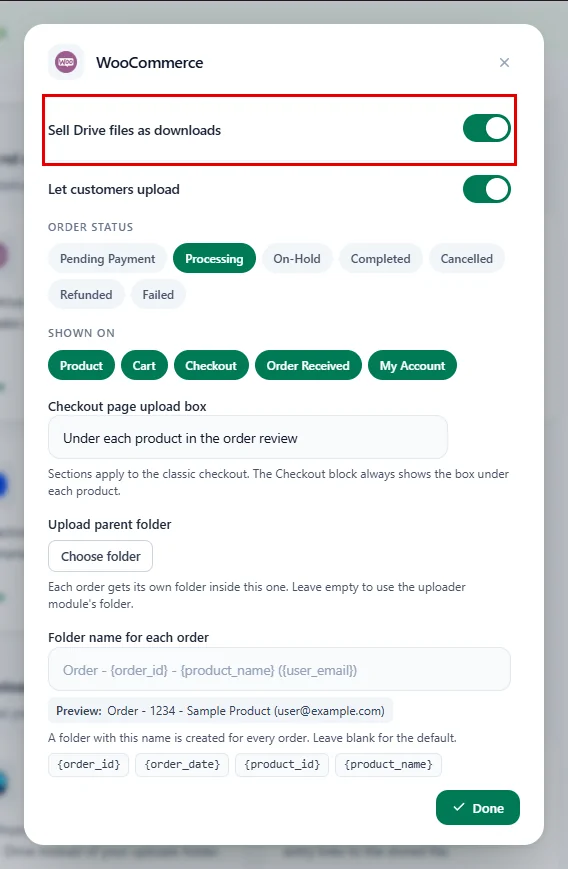
Don’t forget to click Save changes. Done only closes the window, and nothing is saved until you click the bar.
Step 5: Create a Downloadable Product #
Now create the product you want to sell:
- Go to Products > Add New Product (or open an existing product).
- Enter the name, description, price and image as usual. We’ll use Brand Strategy Masterclass at $129.00.
- In the Product data box, tick Downloadable.
- In the Downloadable files table, click on Add Drive Files (the button with the Google Drive icon).
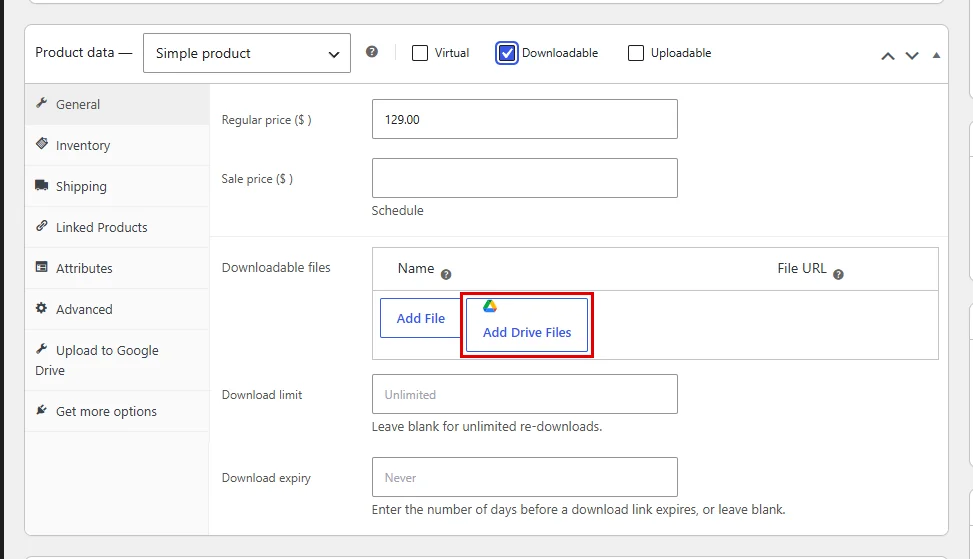
The normal Add File button still works for files on your server, so you can mix both on one product.
Step 6: Pick the Files #
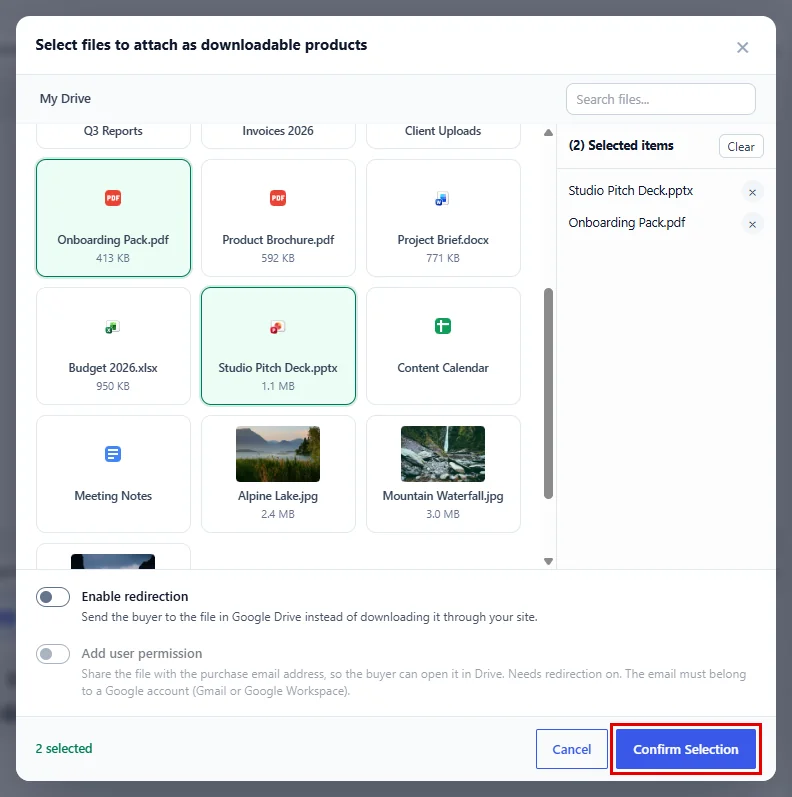
The Select files to attach as downloadable products window opens:
- Browse your Drive, or type in Search files… to find a file.
- Click each file you want (for example Studio Pitch Deck.pptx and Onboarding Pack.pdf). They appear under Selected items on the right.
- To remove one, click the × next to it. To start over, click on Clear.
- Click on Confirm Selection.
Tip: You can add a folder too, with the + on the folder. Buyers then get the whole folder as one ZIP file.
The window also has two switches, Enable redirection and Add user permission. Leave them off for normal downloads. To send buyers to the file in Google Drive instead, read How to Send WooCommerce Buyers to Google Drive Instead of Downloading.
Step 7: Check the Rows and Publish #
DriveHub adds one row to Downloadable files for each item you picked:
- The File name is filled in for you. You can change it if you like.
- The File URL starts with your site address and
/drivehub-wc-download/. Leave it as it is. - Set Download limit and Download expiry if you need them.
- Click on Publish (or Update).
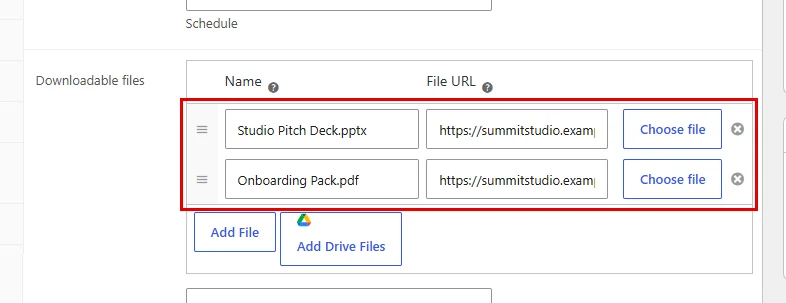
The product saves without WooCommerce’s “approved directory” warning. DriveHub adds its download address to WooCommerce’s approved download directories for you.
Step 8: See It on Your Site #
And that’s it. When a customer buys the Brand Strategy Masterclass and the order is Processing or Completed, the files show up in My Account > Downloads and in the order email.
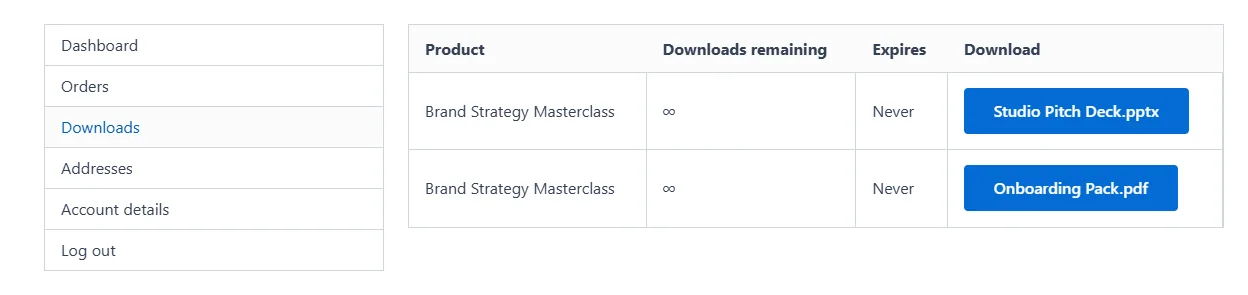
The customer clicks a file and the download starts. The file is served through your site, so the customer never sees your Google Drive.
WooCommerce’s own rules still apply: download limits, expiry dates and Downloads require login.
Benefits of Using DriveHub with WooCommerce #
- Save hosting space: Big files stay in Google Drive, not on your server.
- Nothing new for buyers: Files show up in My Account and the order email, like any WooCommerce download.
- Sell whole folders: Add a folder and buyers get it as a single ZIP.
- Private by default: Files are served through your site, so your Drive stays hidden.
- Update once: Replace a file in Google Drive and every new buyer gets the new version.
With DriveHub and WooCommerce, selling Google Drive files takes just a few clicks.
Troubleshooting #
- The Add Drive Files button is missing: Check that Sell Drive files as downloads is on, that you clicked Save changes, and that Downloadable is ticked on the product.
- The picker says “No Google Drive account connected.”: Connect a Google account in DriveHub first (Step 3).
- The download fails: Make sure the file still exists in Google Drive and that the Google account is still connected.
Related guides:


