- Before you begin
- Step 1: Install Tutor LMS
- Step 2: Install and activate GoodMeet
- Step 3: Connect your Google account
- Step 4: Turn on the Tutor LMS integration
- Step 5: Create a meeting (Basics)
- Step 6: Set the date and time (Date and time)
- Step 7: Add the meeting to a course (Access and controls)
- Step 8: Choose who can join and create the meeting
- Step 9: Add meetings from the Tutor course builder (optional)
- Step 10: Add a live session to a lesson (Curriculum)
- Step 11: Let instructors create meetings from the Tutor dashboard
- Step 12: Link a Google Classroom class (optional)
- Step 13: See it on your course page
- Benefits of using GoodMeet with Tutor LMS
- What your students see
- Troubleshooting
- The Google Meeting tab is missing from the Tutor dashboard
- Students do not see a Join now button
- "For students of this course" appears for someone who should have access
- The Add to a course card says "No courses yet"
- The Live sessions list does not show on the course page
- An old session disappeared from the list
- Frequently asked questions
- Do I need a shortcode to show meetings in a course?
- Does a live session count toward course progress?
- Can I attach one meeting to several courses?
- Do students see the Google Meet link on the course page?
- What happens when I delete a meeting?
- Can instructors attach meetings without WordPress admin?
- Do students ever see Google connection messages?
- You're ready to run live classes in Tutor LMS
Tutor LMS courses can show live Google Meet classes right on the course page or inside a lesson. You connect GoodMeet to Tutor LMS, then attach meetings where your students already study.
Enrolled students join with one click. Everyone else sees the schedule and a way to enroll.
By the end of this guide, you will have:
- The Tutor LMS integration turned on in GoodMeet
- A meeting shown in the Live sessions list on your course page
- A live class card at the top of a lesson
- Only your course students able to open the meeting
- Instructors scheduling their own classes from the Tutor dashboard
Estimated setup time: 10 minutes. You never need a shortcode; everything happens in screens you already use.
Note: Requires GoodMeet Pro.
Before you begin #
Make sure you have:
- An administrator account on your WordPress site
- At least one Tutor LMS course, with a lesson if you want a lesson card
- A Google account you can connect to GoodMeet
- A Tutor LMS instructor account, if you want to try the instructor steps
Let’s get started.
Step 1: Install Tutor LMS #
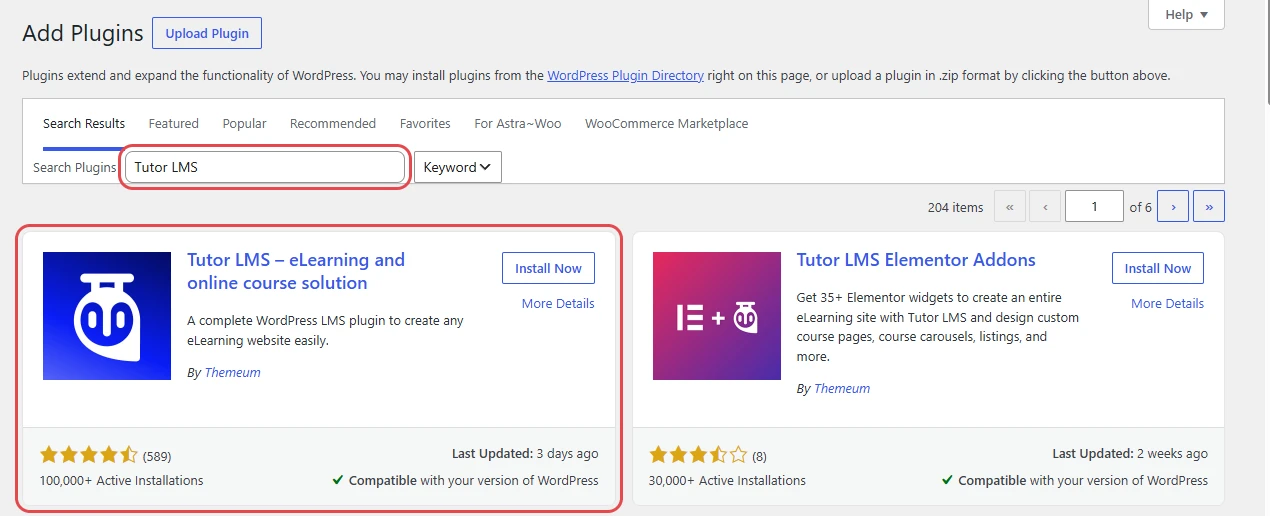
First, make sure Tutor LMS is installed and activated. GoodMeet adds its live sessions to Tutor’s own course and lesson pages.
- In the WordPress admin menu, go to Plugins > Add New Plugin.
- Search for Tutor LMS.
- Click Install Now, then Activate.
Step 2: Install and activate GoodMeet #
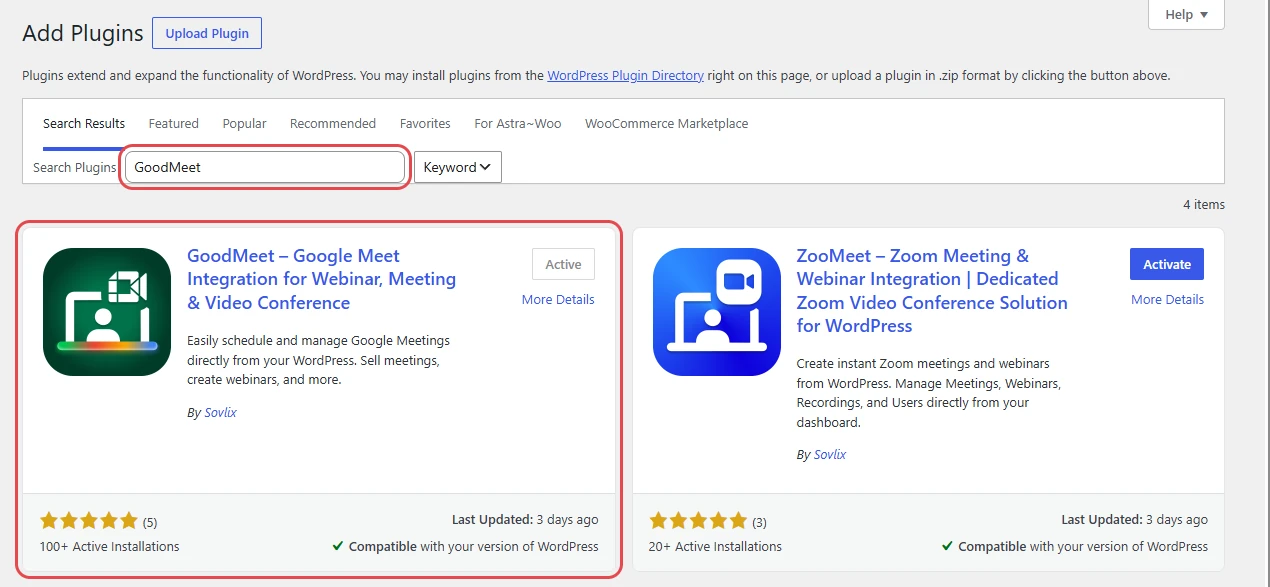
Like Tutor LMS, GoodMeet installs from the plugin directory. The LMS features live in GoodMeet Pro, so you add that next.
- Go to Plugins > Add New Plugin.
- Search for GoodMeet.
- Click Install Now, then Activate.
To use the Pro features in this guide, add GoodMeet Pro from inside GoodMeet. There is nothing to upload.
- In WordPress admin, open GoodMeet and click Upgrade, then complete the checkout.
- Go to GoodMeet > Account. Your license shows there, and GoodMeet offers to install GoodMeet Pro.
- Install GoodMeet Pro, then activate it. If GoodMeet shows Activate Pro, click it.
Note: If you already have a license, open GoodMeet > Account and install Pro from there. GoodMeet shows Download Pro when your license is active but Pro is not installed yet.
Step 3: Connect your Google account #
GoodMeet cannot create Meet links or calendar events until it is connected to Google. If you already did this, skip to Step 4.
- Go to GoodMeet > Settings and click Connect.
- On the Google Cloud Credentials card, upload the JSON file from your Google Cloud project.
- Click Continue to Google.
- Choose your Google account and approve access.
- Check that the card shows Connected.
Read our step-by-step Google setup guide for the full walkthrough, including how to create the JSON file.
Step 4: Turn on the Tutor LMS integration #
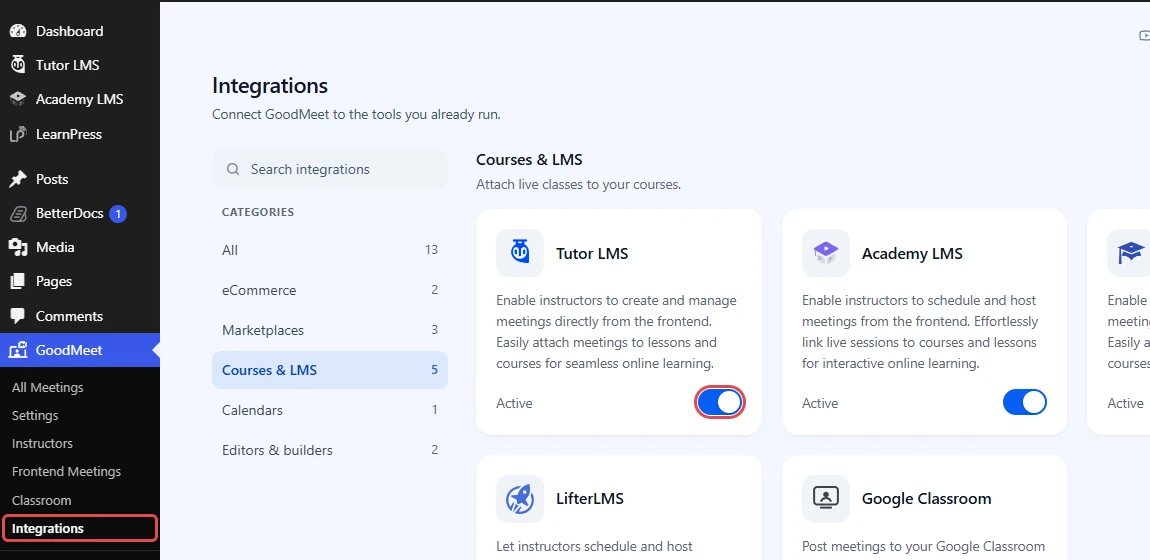
The integration switch controls every Tutor feature in this guide. When it is off, GoodMeet hides the Google Meeting tab, the course and lesson pickers, and the Live sessions list on Tutor pages.
- In the WordPress admin menu, go to GoodMeet > Integrations.
- In Categories, click Courses & LMS.
- On the Tutor LMS card, switch the toggle on. The card shows Active.
Now comes the main part: creating a meeting and adding it to your course.
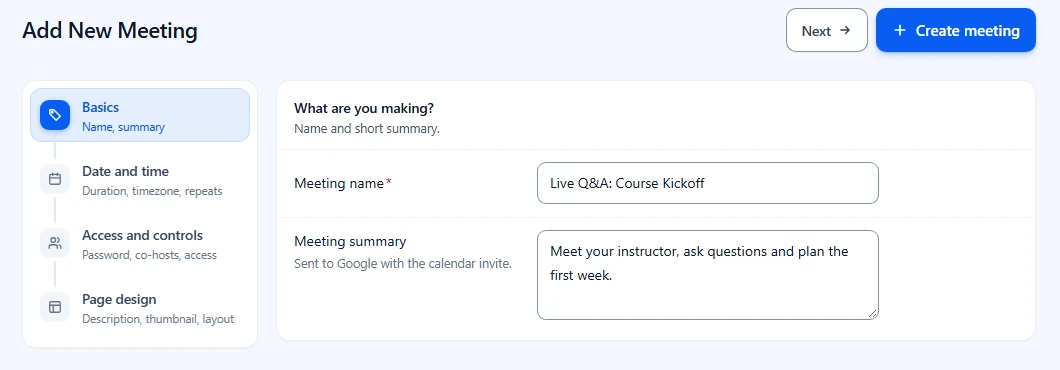
Step 5: Create a meeting (Basics) #
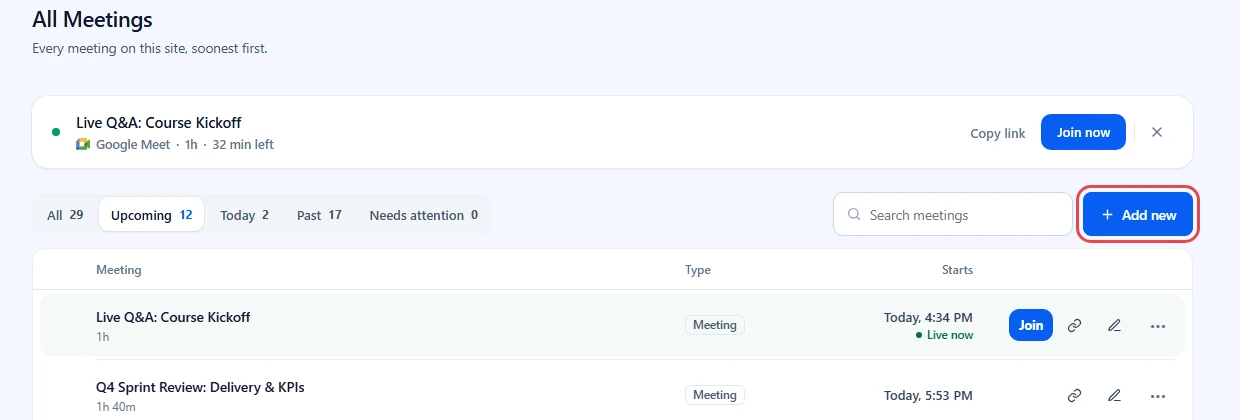
You can attach a new meeting or one you already have. Here you start a new one.
- Go to GoodMeet > All Meetings.
- Click Add new.
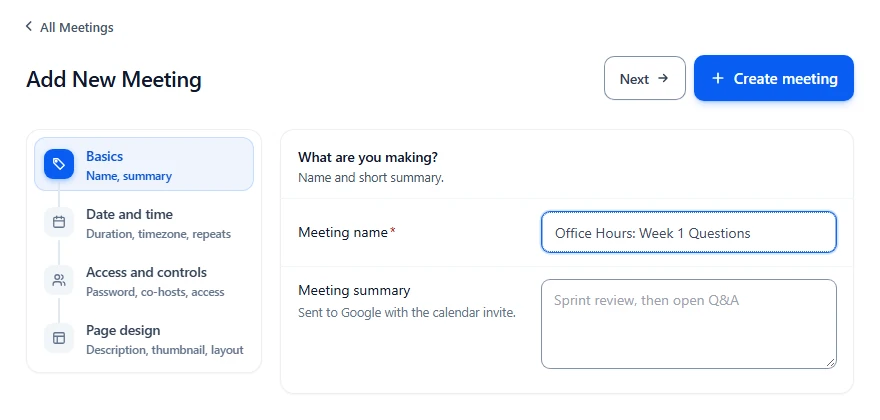
- In Basics, type a Meeting name, for example Live Q&A: Course Kickoff.
- Add a short Meeting summary. Google sends it with the calendar invite.
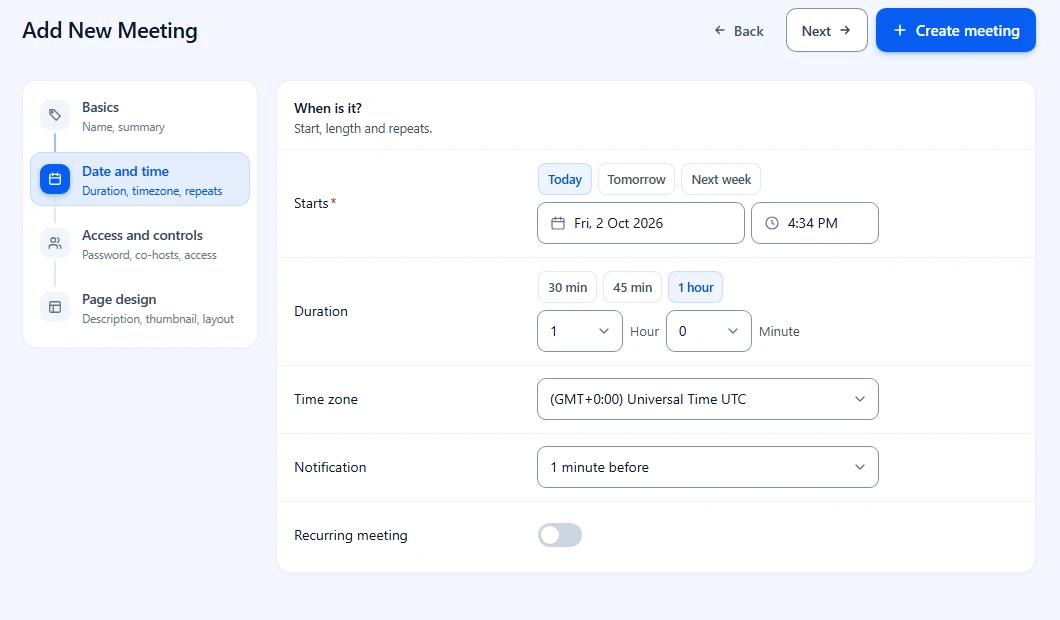
Step 6: Set the date and time (Date and time) #
The start time decides when the session shows Live now on the course page, and when students can join.
- In the steps on the left, click Date and time.
- Pick the Starts date and time.
- Choose the Duration and the Time zone.
Step 7: Add the meeting to a course (Access and controls) #
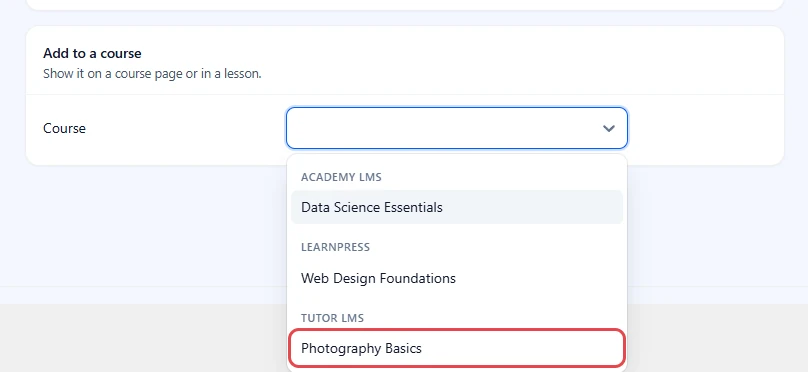
The Add to a course card decides where the meeting appears in Tutor LMS.
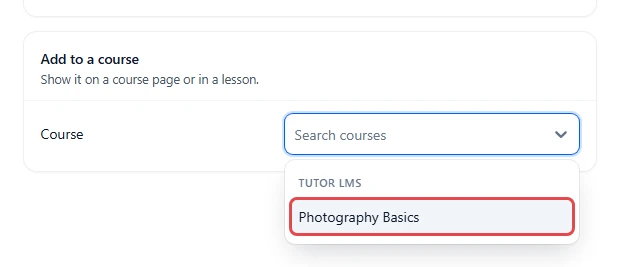
- Click Access and controls and scroll to the Add to a course card.
- Click the Course field and type part of the course name.
- Pick your course under the TUTOR LMS heading, for example Photography Basics.
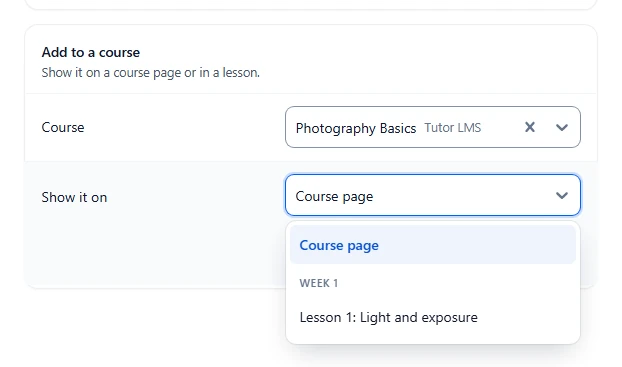
- In Show it on, choose Course page, or pick a lesson from the course.
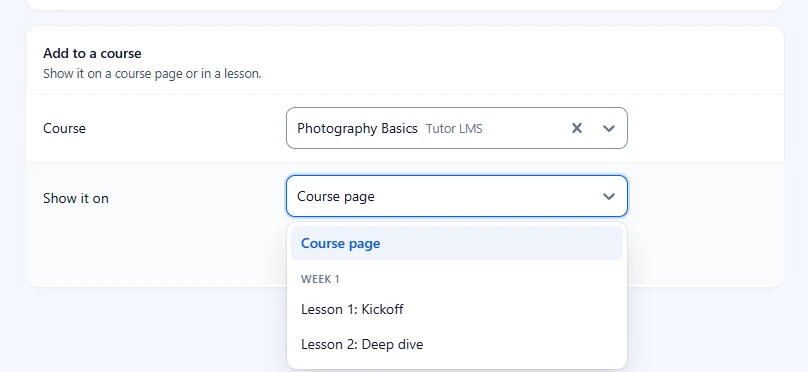
- Click Add to course.
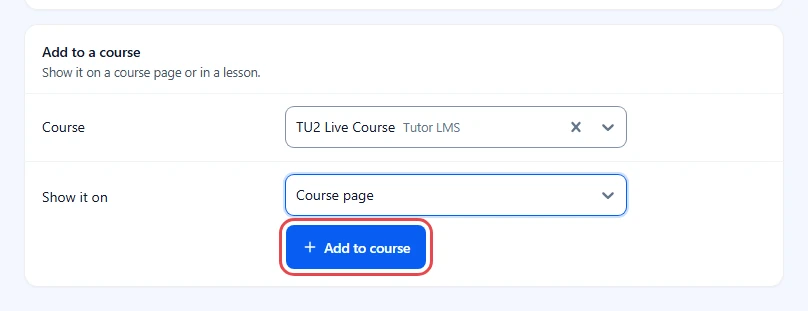
To show the meeting in a second place, use Add another and repeat these actions.
Tip: A lesson holds one meeting. If the lesson already has one, the card says Replaces “…” on this lesson. before you add it.
Step 8: Choose who can join and create the meeting #
Each place you added appears as a row. Below the rows, Who can join keeps the meeting for your students.
- Check the rows. Click the X on a row to remove it.
- Check Who can join. Course students is the default.
- To let anyone with the link join, click Change and pick Anyone with link.
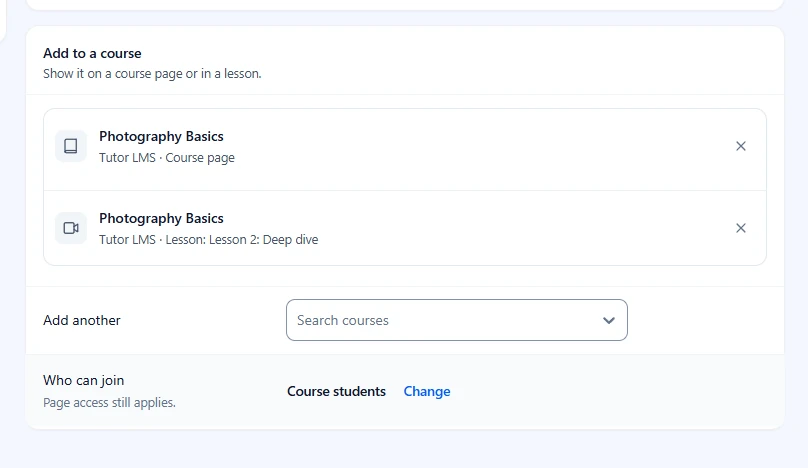
- Click Create meeting at the top of the form.

Important: Page access in the same step still applies. Course students narrows who can open the meeting; it never opens a page that Page access closes.
Step 9: Add meetings from the Tutor course builder (optional) #
You can also attach meetings while you edit the course in Tutor LMS. Both ways save the same links, so use whichever fits your routine.
- Open the course in Tutor’s Course Builder, on the Basics step.
- Scroll below Options to the Live sessions box.
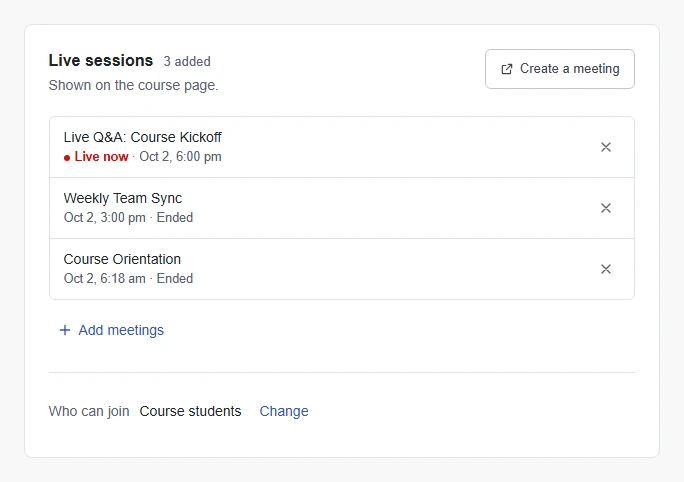
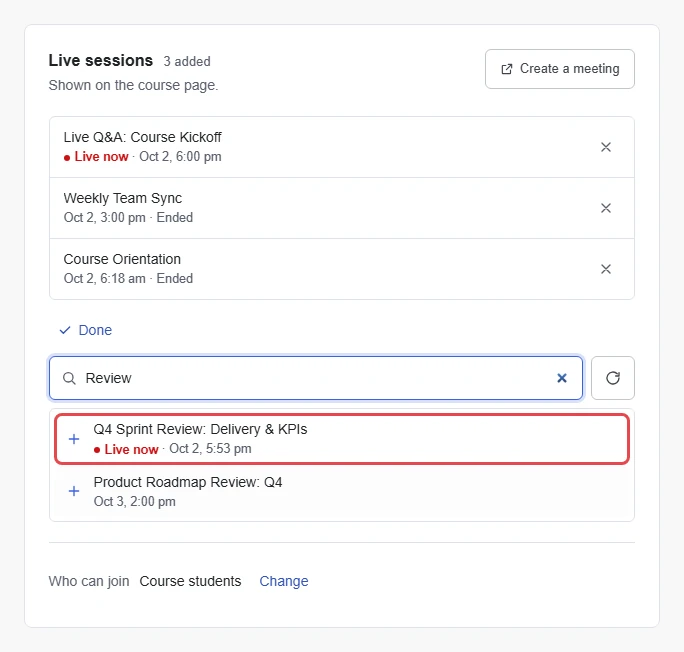
- Click Add meetings, search for a meeting and click it to add it.
- If you need a new meeting, click Create a meeting, then refresh the list.
- Click Done, then Update to save the course.
Note: Tutor LMS runs its course builder in WordPress admin. The front-end course builder needs Tutor LMS Pro.
Step 10: Add a live session to a lesson (Curriculum) #
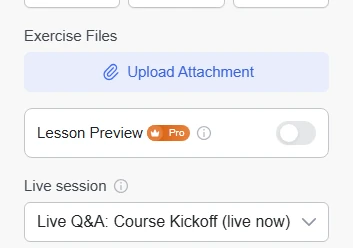
A meeting inside a lesson shows as a card at the top of that lesson. It is a good fit for a class that belongs to one part of the course.
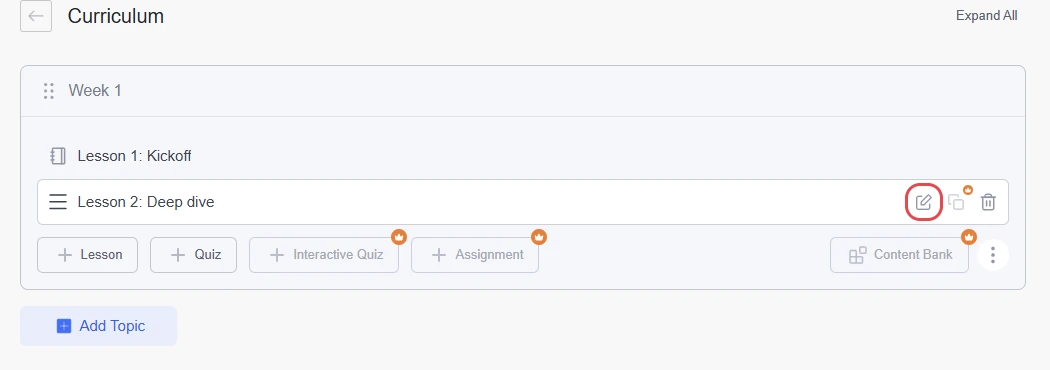
- In the course builder, go to Curriculum.
- Click the edit icon on the lesson.
- In the lesson sidebar, pick a meeting in Live session. Choose None to remove it.
- Save the lesson.
Step 11: Let instructors create meetings from the Tutor dashboard #
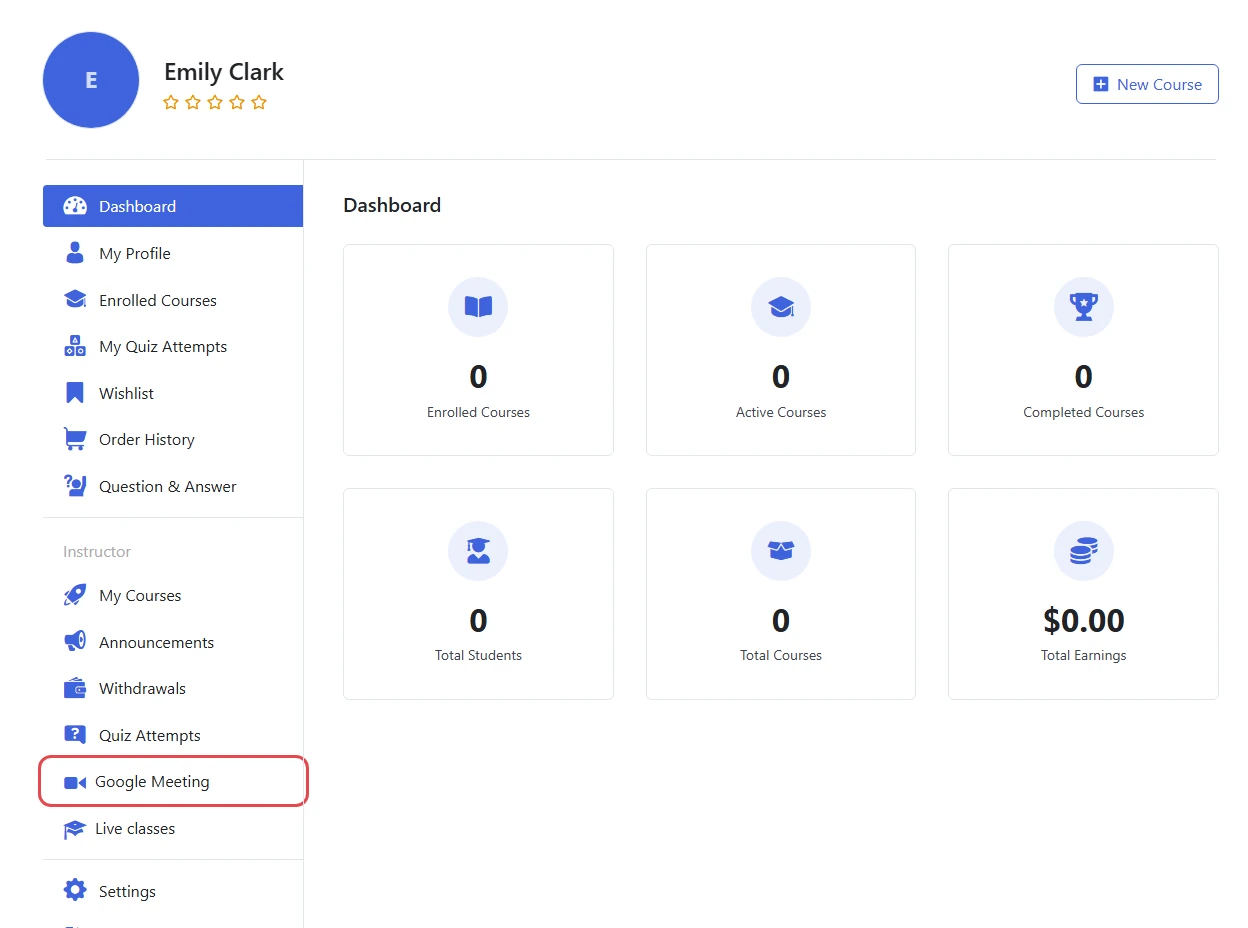
Instructors do not need WordPress admin. They get a Google Meeting tab in the Tutor LMS front-end dashboard, with the same meeting form.
- Log in as an instructor and open the Tutor Dashboard.
- Under Instructor, click Google Meeting.
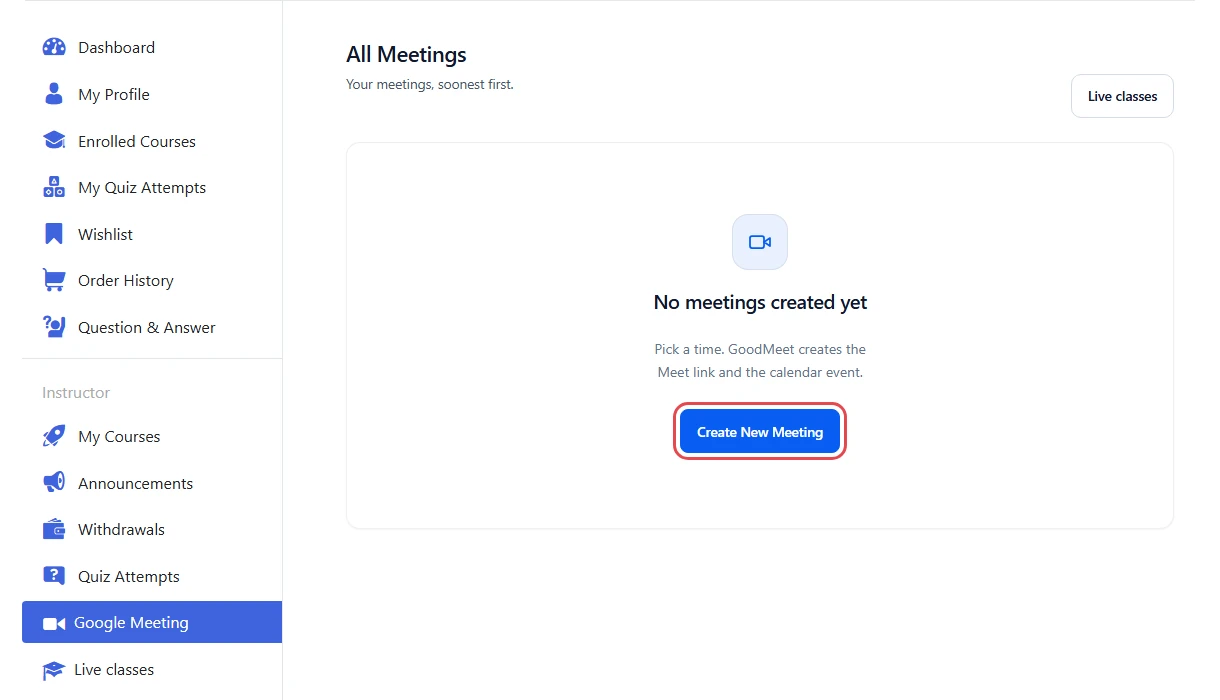
- Click Create New Meeting. Once meetings exist, the tab lists them, soonest first.
- Fill in Basics and Date and time, as in Steps 5 and 6.
- In Access and controls, open Add to a course and pick your course.
- Choose Course page or a lesson in Show it on.
- Click Add to course, then Create meeting.
Step 12: Link a Google Classroom class (optional) #
If you use Google Classroom, you can link a class to a Tutor course. When a student enrolls in the course, GoodMeet sends the Classroom invitation for you.
- Go to GoodMeet > Classroom and open a class.
- Click the Courses tab.
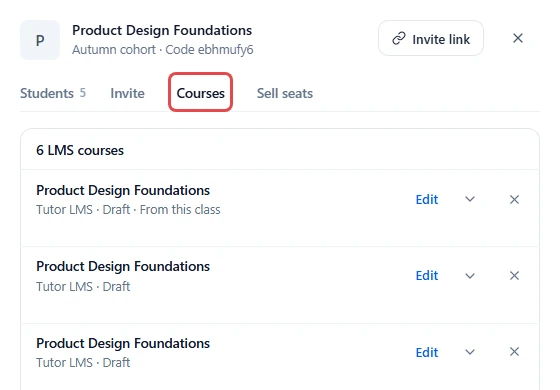
- In Link a course, search for your Tutor course and click it.
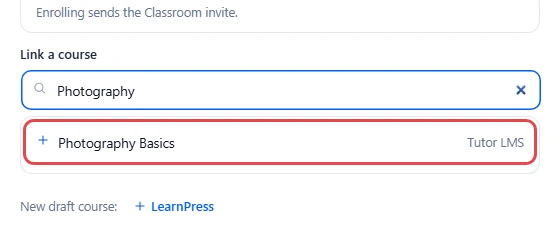
For the full Classroom setup, see How to use Google Classroom with GoodMeet.
Step 13: See it on your course page #
Your meeting is saved and attached, so the course page already shows it. Check it the way a visitor does.
- Open a private browser window, so you are logged out.
- Go to your course page, for example Photography Basics.
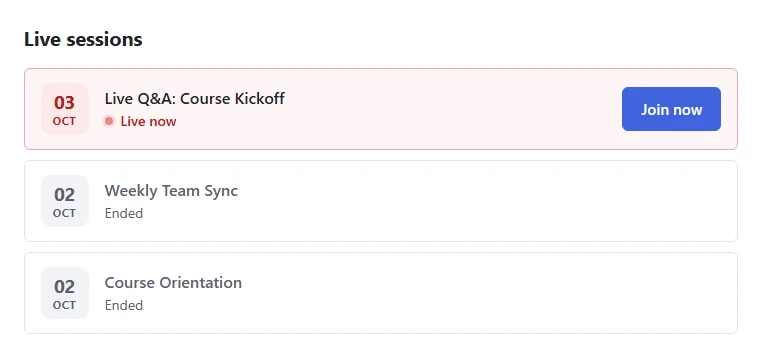
- Scroll to Live sessions, above Course Content.
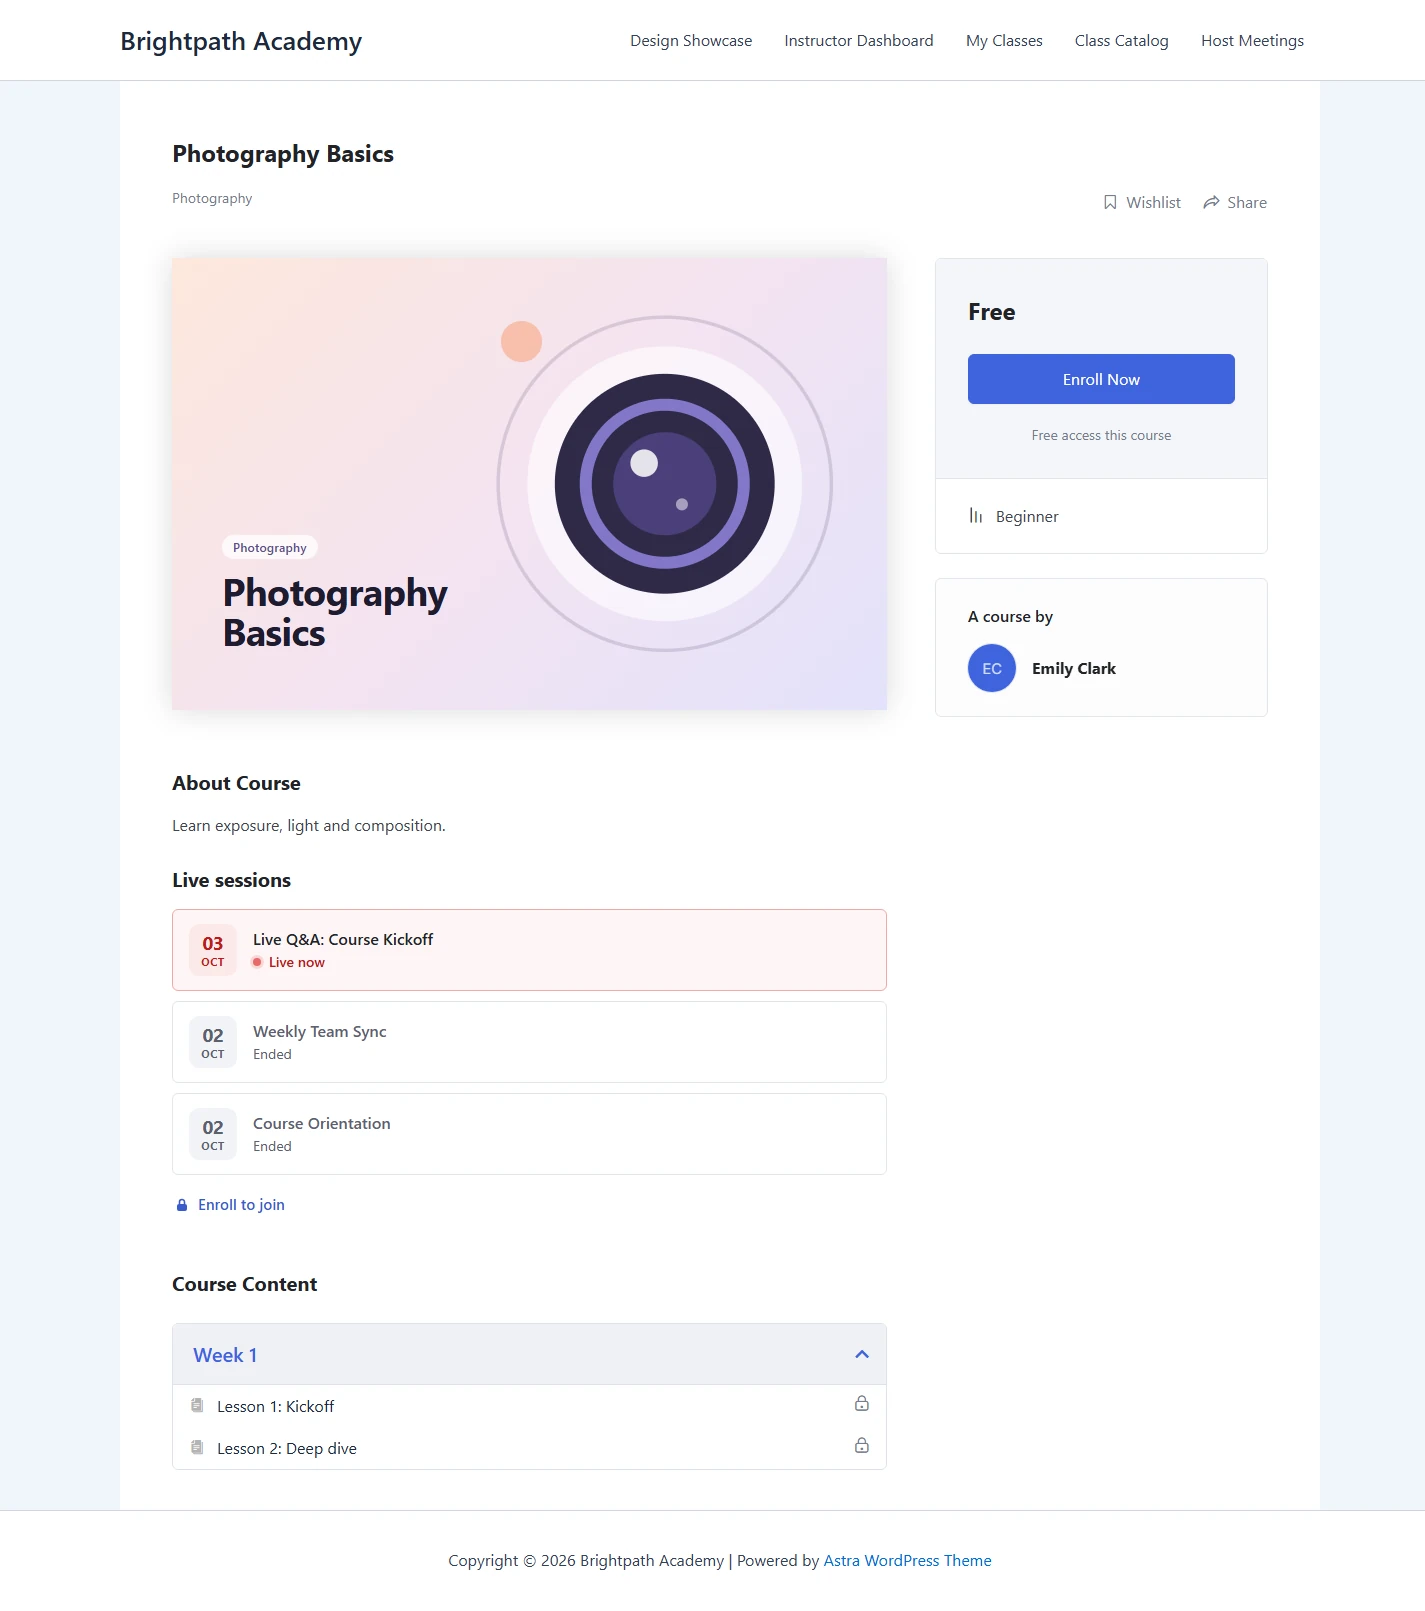
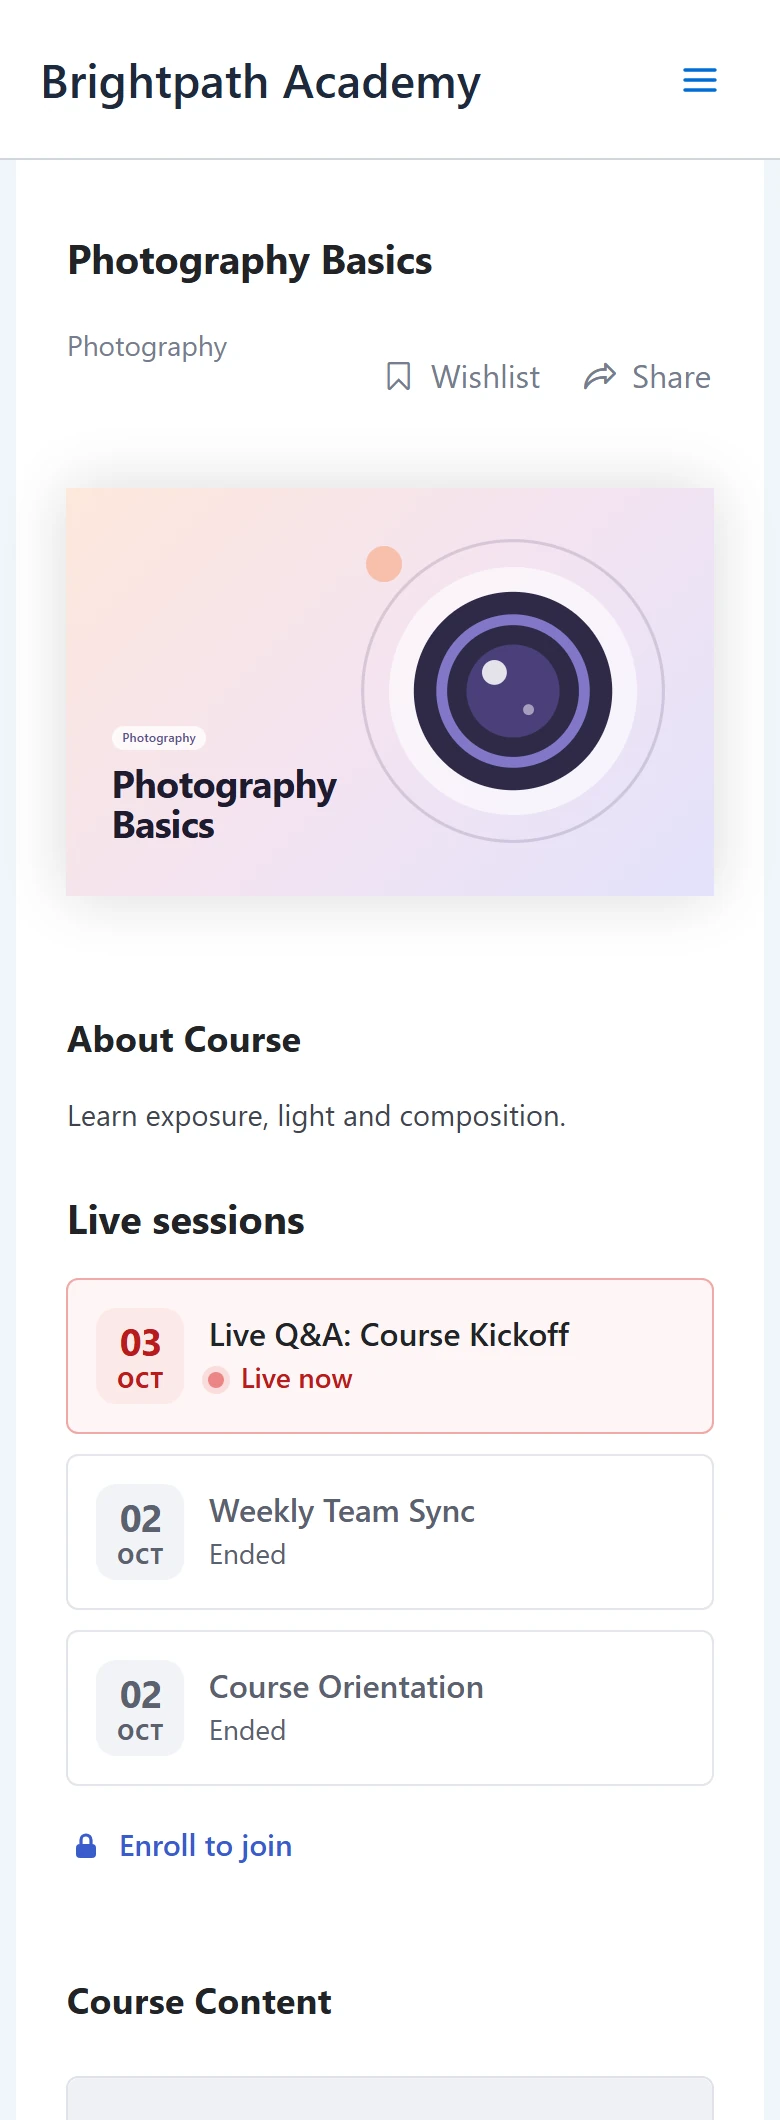
Visitors see the date and state of each session, but no join button. Enroll to join takes them to Tutor’s own enroll button.
Benefits of using GoodMeet with Tutor LMS #
- One form for everything: The Meet link, the calendar event and the course link come from the same form.
- Classes for enrolled students only: With Course students, only enrolled students, course instructors and administrators can open the meeting.
- A reason to enroll: Visitors see the live schedule and an Enroll to join link.
- Instructors work from the Tutor dashboard: They schedule and attach meetings without WordPress admin.
- No broken cards: Delete a meeting and GoodMeet removes it from every course and lesson.
What your students see #
Logged-in users who are not enrolled #
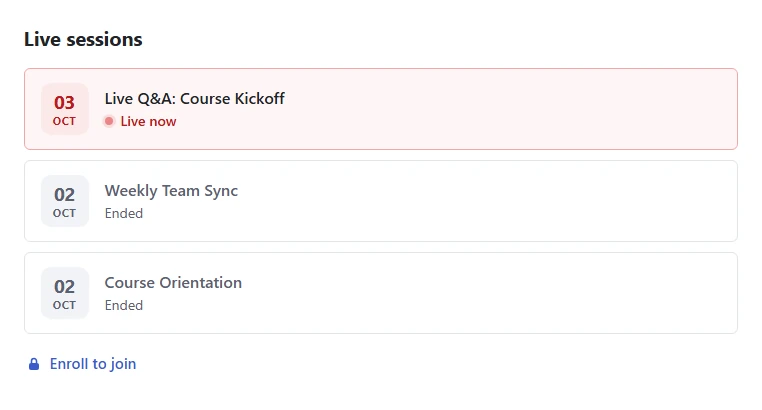
They see the same list as visitors, with no join button until they enroll.
Enrolled students #
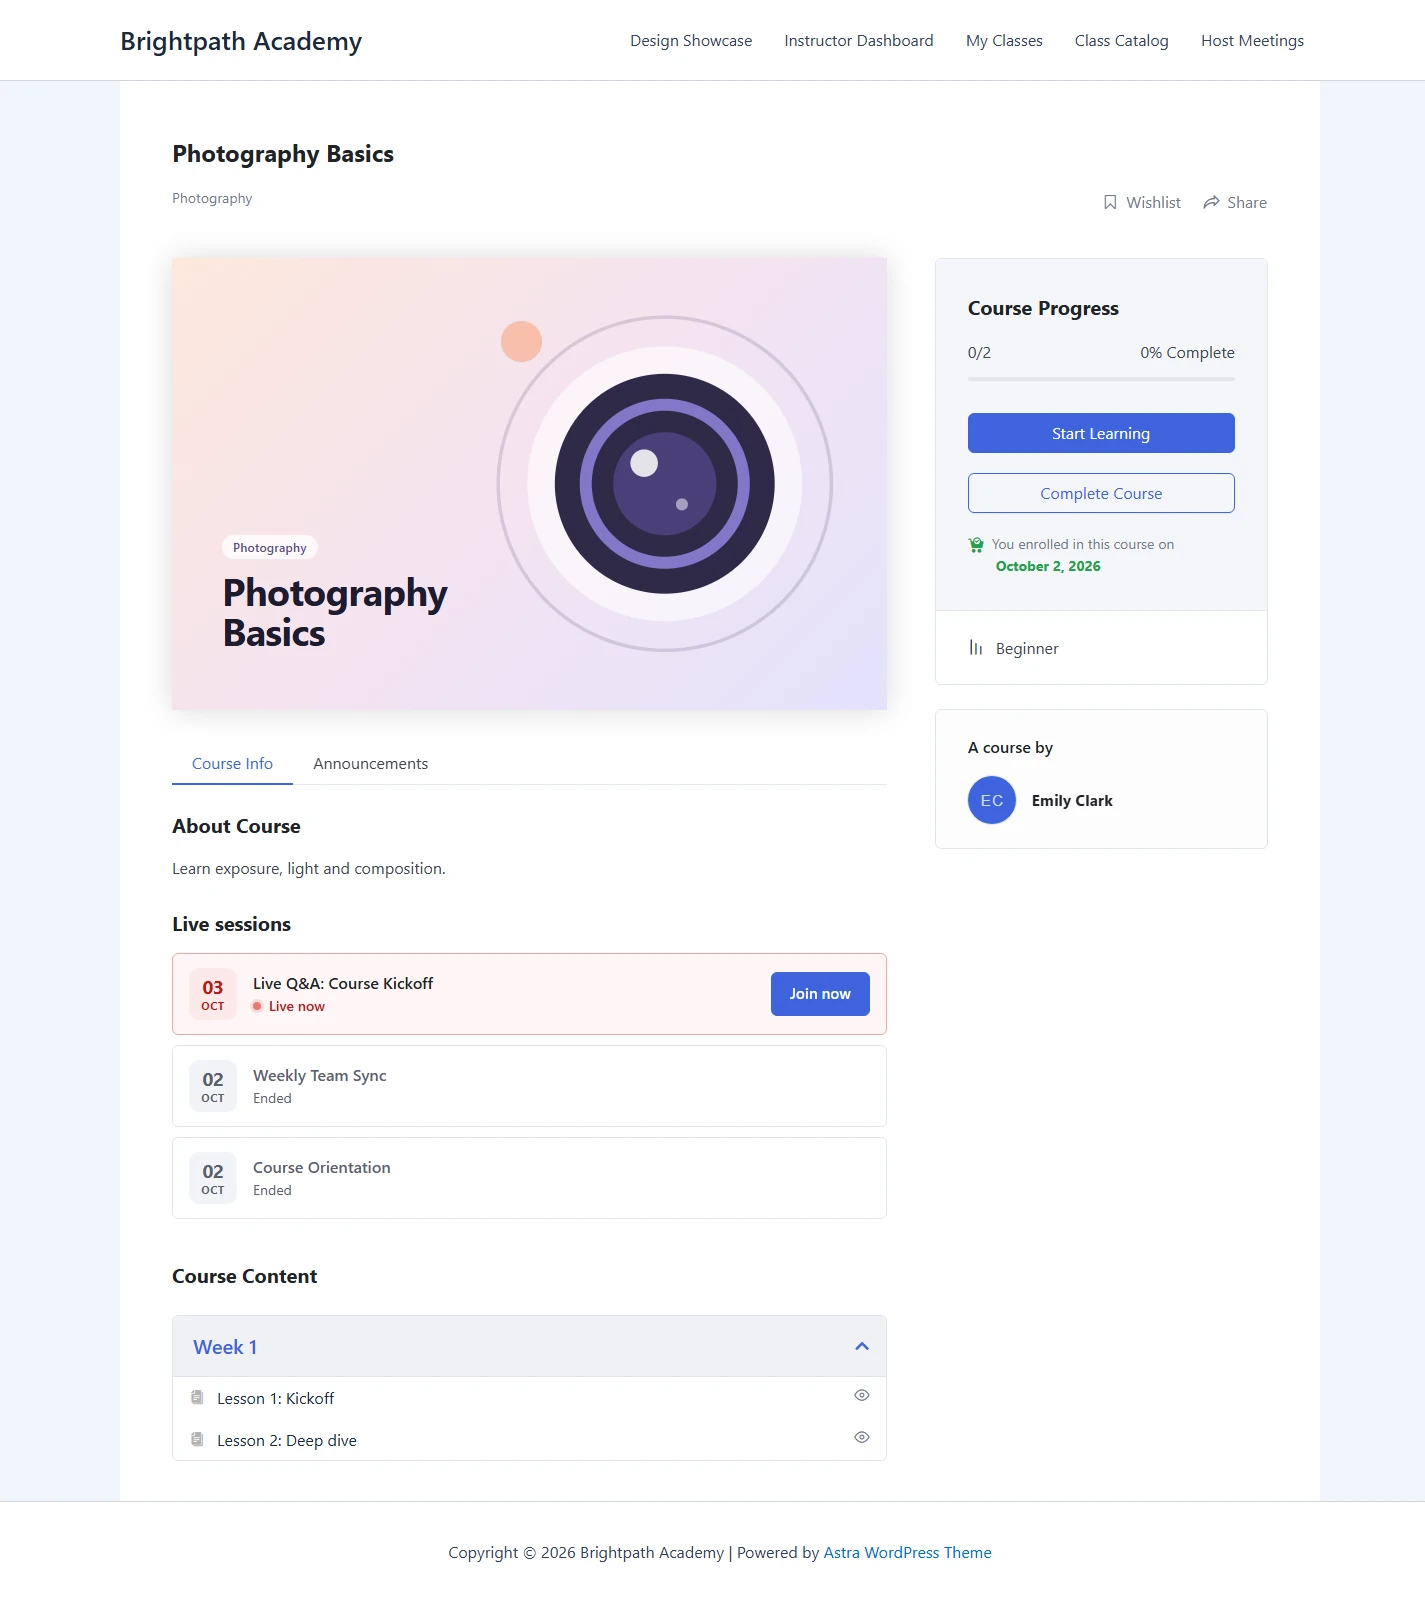
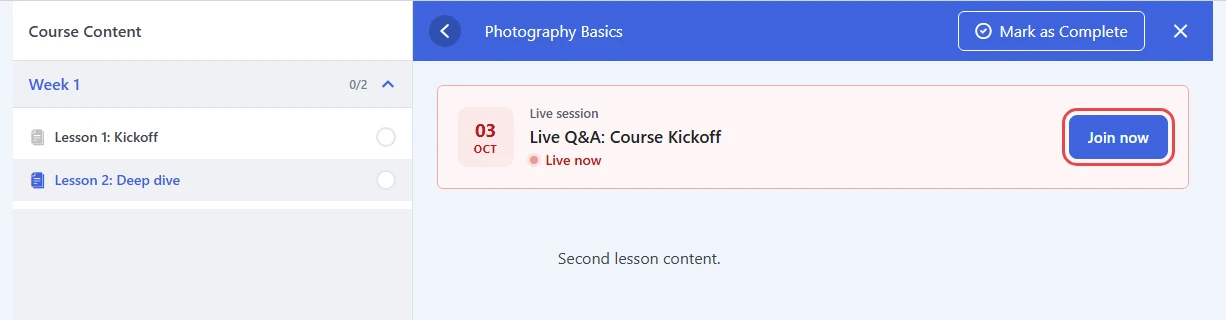
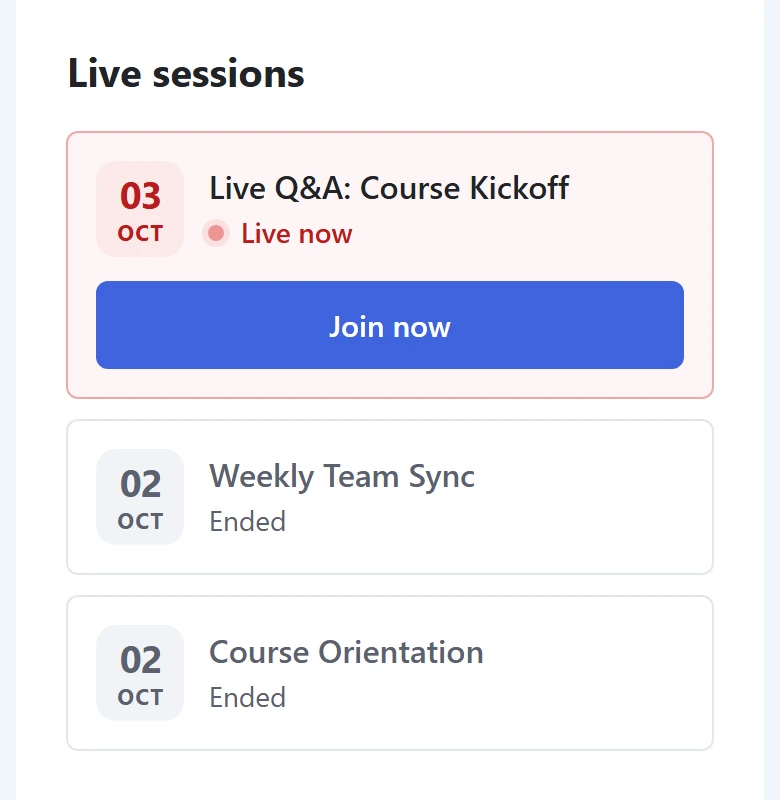
Enrolled students see Join now on the live session. Upcoming sessions show Details, and ended sessions with a recording show Watch recording.
Instructors and administrators #
Course instructors and administrators see Join now too.
Inside a lesson #
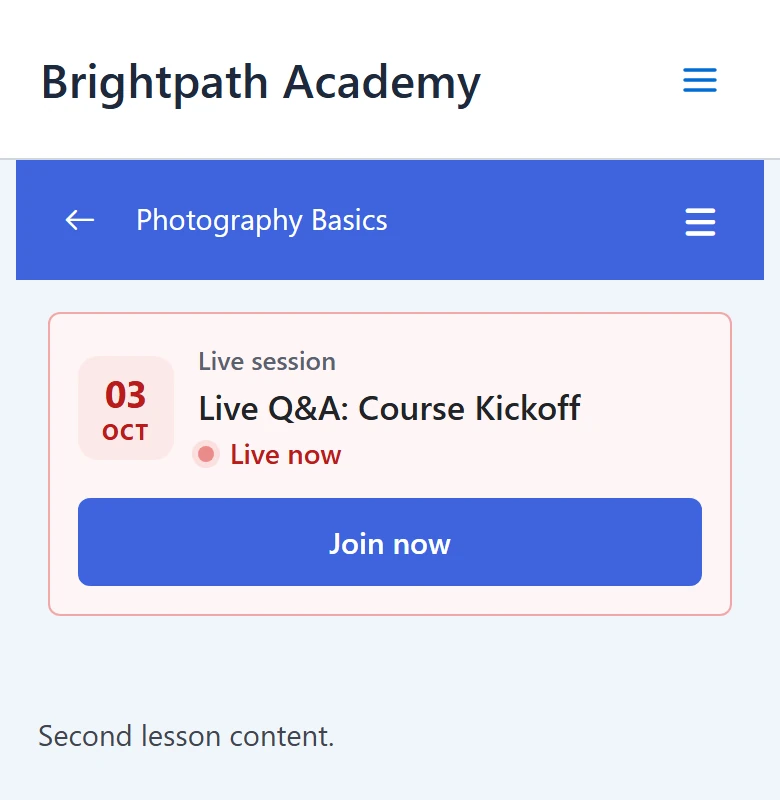
The meeting shows as a Live session card at the top of the lesson.
Before the class starts, the card shows the day, the time and a small time zone label.
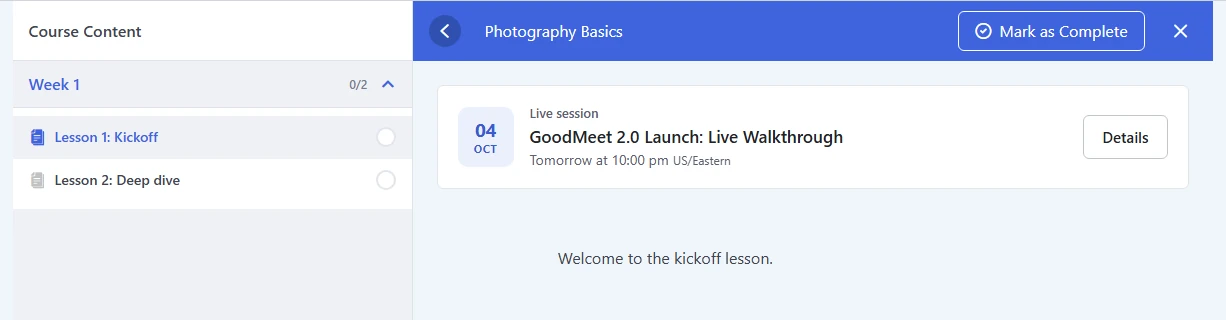
Note: Session times use the meeting’s own time zone, the same one its meeting page shows, and follow your site’s time format. With Show times in the visitor’s timezone on, the browser converts the time and zone label to the visitor’s own time zone.
On the meeting page #
The meeting page has a Back to course link, so students return to the course in one step.
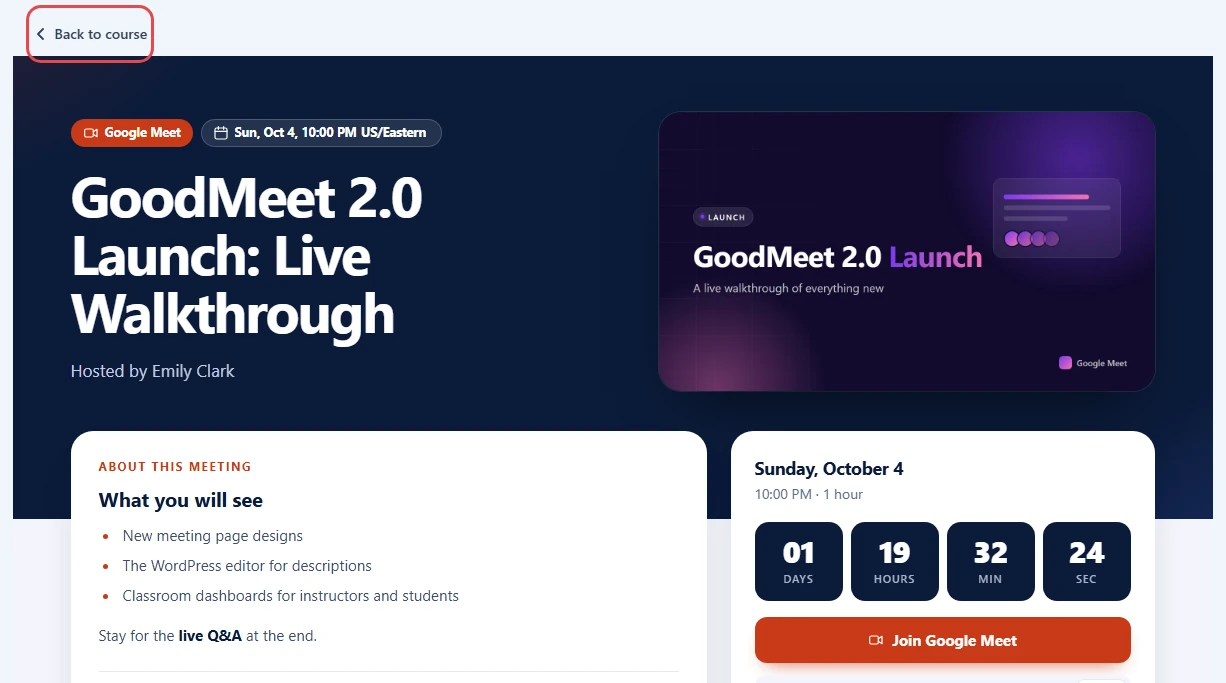
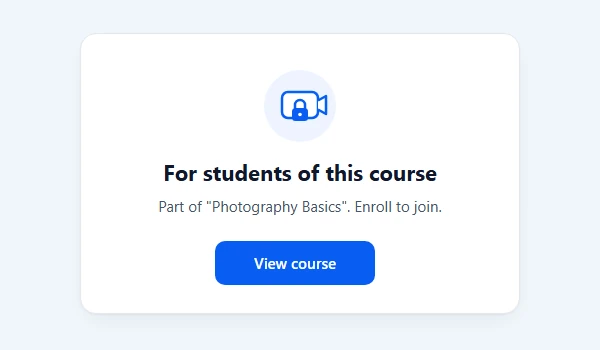
If someone outside the course opens the meeting link, GoodMeet shows For students of this course with a View course button.
On a phone #
The list and the lesson card stack on small screens, and the buttons span the full width.
Troubleshooting #
The Google Meeting tab is missing from the Tutor dashboard #
The tab needs the integration and the Tutor instructor role. Users without the role who open the tab address go back to the dashboard home.
Check that:
- Tutor LMS is switched on in GoodMeet > Integrations.
- The user is approved as a Tutor LMS instructor.
Students do not see a Join now button #
Join now appears only while the session is live, and only for people who may join.
Check that:
- The student is enrolled. Look in Tutor LMS > Students.
- The session has started. Before the start time, students see Details.
- The student is enrolled in a course that holds this meeting, if Who can join is Course students.
To let anyone join, set Who can join to Anyone with link.
“For students of this course” appears for someone who should have access #
The meeting is set to Course students, and this person is not enrolled in any course that holds it. Administrators and the meeting host always get in.
- Enroll the person in the course, or
- Change Who can join to Anyone with link and click Update meeting.
The Add to a course card says “No courses yet” #
Instructors see only the courses they teach: courses they created, or courses that list them as a co-instructor in Tutor LMS. Administrators see every course.
Check that:
- The instructor is the course author or a co-instructor in Tutor LMS.
- Or ask an administrator to attach the meeting.
The Live sessions list does not show on the course page #
The list only appears when a meeting is attached to the course page itself.
Check that:
- A meeting is attached with Show it on set to Course page. Meetings attached only to a lesson show in that lesson, not in the course list.
- Tutor LMS is switched on in GoodMeet > Integrations.
An old session disappeared from the list #
This is expected. The list shows live sessions first, then upcoming ones, then only the two most recent ended sessions. Long lists show four sessions and fold the rest under “N more sessions”.
Frequently asked questions #
Do I need a shortcode to show meetings in a course? #
No. GoodMeet adds the Live sessions list and the lesson card to Tutor pages for you.
Does a live session count toward course progress? #
No. The meeting sits inside a lesson or on the course page. Students still complete the lesson as usual.
Can I attach one meeting to several courses? #
Yes. Use Add another in the Add to a course card. A course can hold many meetings; a lesson holds one.
Do students see the Google Meet link on the course page? #
No. Join now opens the GoodMeet meeting page, which checks access first. The Google Meet link stays behind that check.
What happens when I delete a meeting? #
GoodMeet removes it from every course and lesson it was attached to, so no broken cards remain.
Can instructors attach meetings without WordPress admin? #
Yes. They use the Google Meeting tab in the Tutor dashboard. Editing the course in the front-end course builder needs Tutor LMS Pro.
Do students ever see Google connection messages? #
No. Only administrators and instructors see Google setup prompts. Students see a neutral message if something is unavailable.
You’re ready to run live classes in Tutor LMS #
Your Tutor courses now list their live sessions, and lessons show a live class card. Only your students can join. Instructors schedule from their own dashboard without WordPress admin. Next, connect your classes to Google Classroom or set up the same flow for another LMS.


