- Step 1: Open the Security Tab
- Step 2: Limit Access to Your Google Workspace Domain (optional)
- Step 3: Let DriveHub Manage Sharing Permissions
- Step 4: Restore Sharing Permissions Automatically (optional)
- Step 5: Choose Your Sharing Channels
- Step 6: Keep the Request Checks On
- Step 7: Protect Your Videos (optional)
- Step 8: Set Up the Login Screen
- Step 9: Write the Password Protected Message
- Step 10: Write the Access Denied Message
- Step 11: Save Your Changes
- Benefits of DriveHub's Security Settings
Do you want to make sure only the right people can open the Google Drive files you show on your website? You can easily do this with DriveHub.
The Security tab decides who may open your files, how DriveHub shares them in Google Drive, which extra checks run on every request, and what a blocked visitor sees instead.
Here is an easy, step-by-step guide to help you set it all up!
Step 1: Open the Security Tab #
- Go to DriveHub > Settings from your WP-Admin.
- Click on Security in the settings menu.
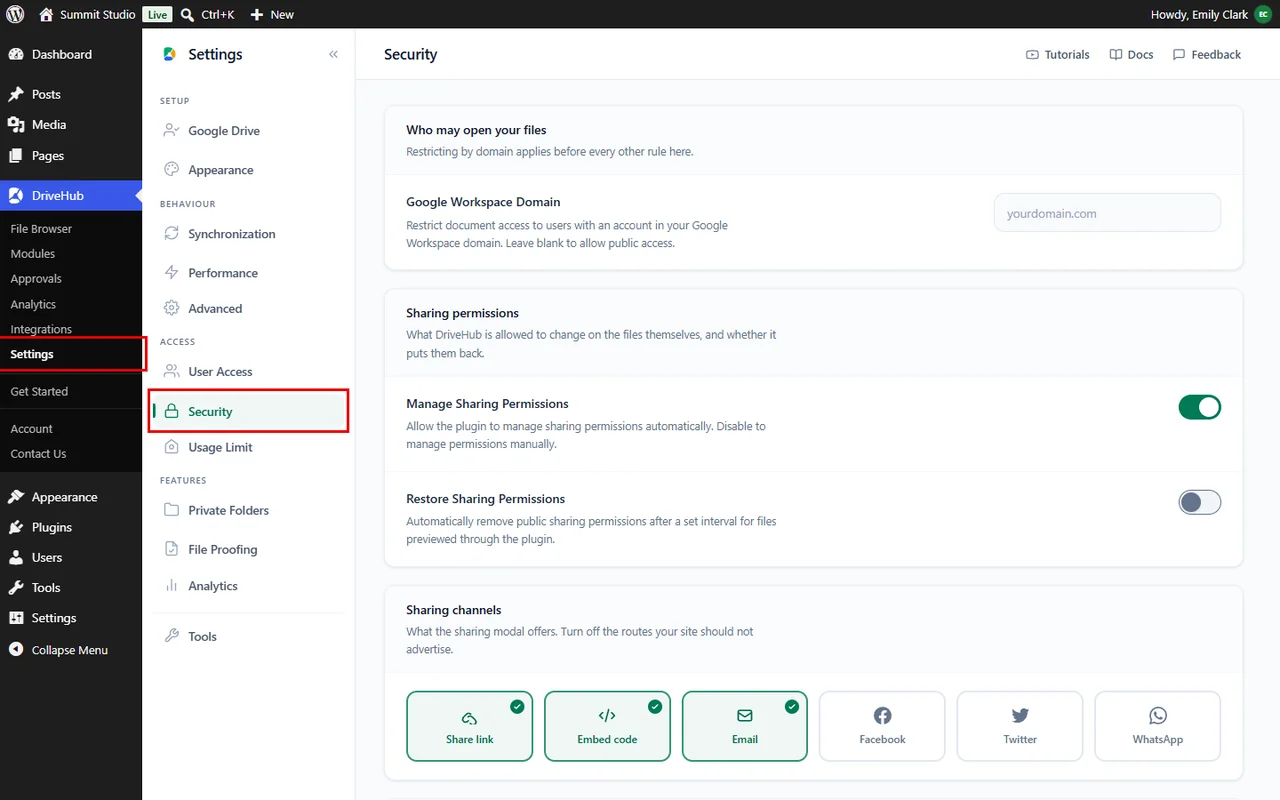
The settings are grouped into Who may open your files, Sharing permissions, Sharing channels, Request verification and What a blocked visitor sees.
Step 2: Limit Access to Your Google Workspace Domain (optional) #
If your company uses Google Workspace and your files are only meant for your own team:
- In Google Workspace Domain, type your domain, for example
summitstudio.example.com. - Leave the field empty if your files should be open to everyone who can see the module.
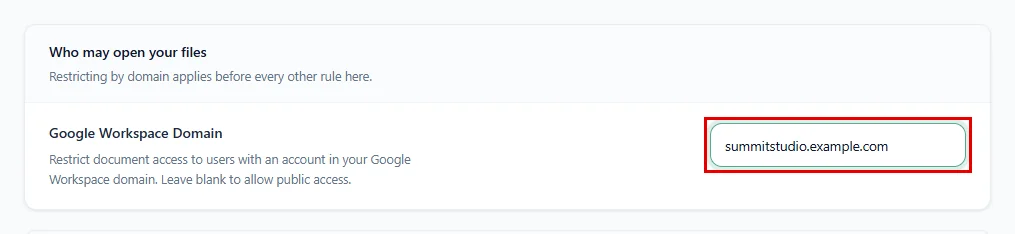
With a domain set, DriveHub shares files only with accounts on that domain instead of “anyone with the link”, and logged-in users whose email address is on another domain are shown the access denied message.
Step 3: Let DriveHub Manage Sharing Permissions #
For visitors to preview a file, Google Drive must allow it to be viewed. DriveHub can handle this for you:
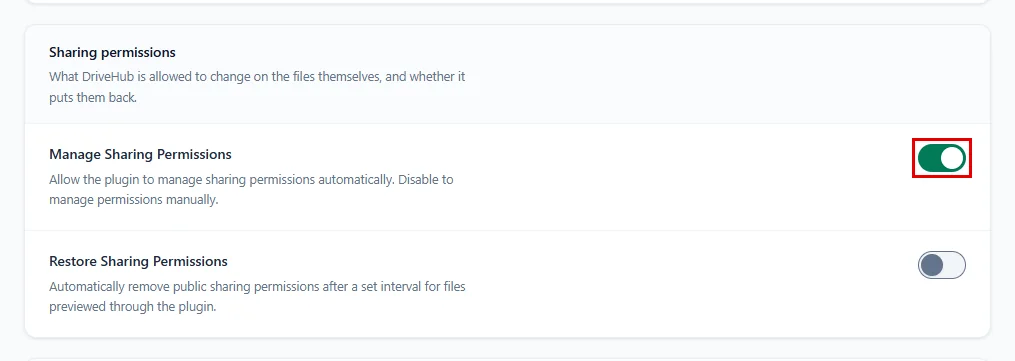
- Keep Manage Sharing Permissions switched on (it is on by default) so DriveHub sets a file to view-only sharing when it is shown through the plugin.
- Switch it off only if you prefer to set sharing yourself in Google Drive. Files that are not shared there may then fail to preview for your visitors.
Step 4: Restore Sharing Permissions Automatically (optional) #
Don’t want files to stay publicly shared forever? DriveHub can remove the public sharing again after a while:
- Turn on Restore Sharing Permissions.
- In Restore Sharing Permissions Interval, choose how long the sharing stays open: from 1 Hour up to 72 Hours.
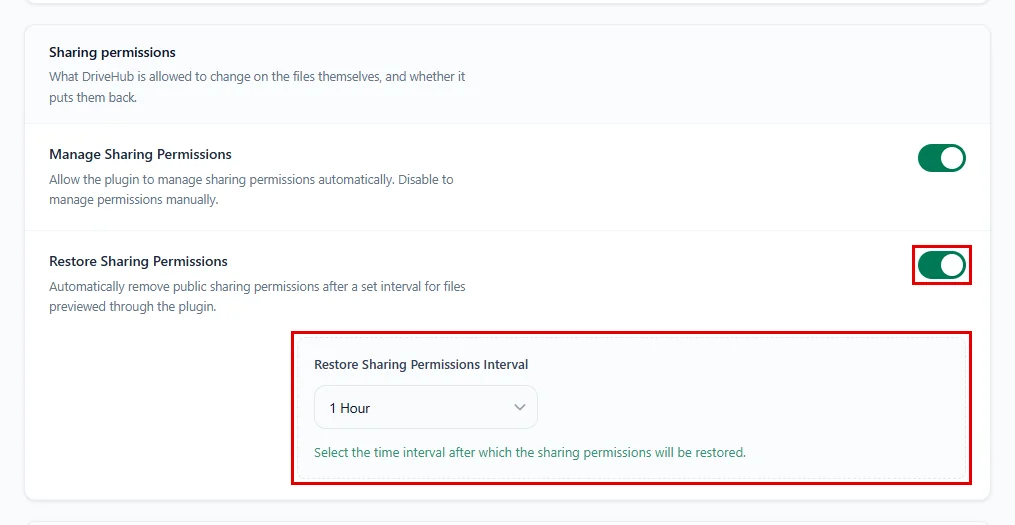
After the interval, DriveHub removes the public sharing from the files it shared, and adds it again the next time someone previews them through your site.
Step 5: Choose Your Sharing Channels #
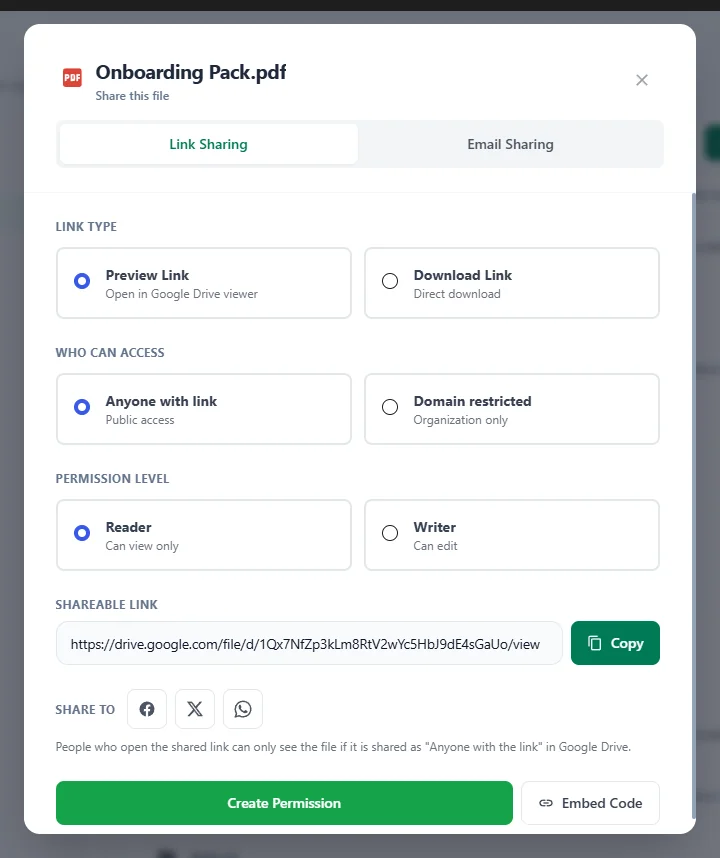
This group decides what the Share and Direct Link windows offer when you share a file from the File Browser:
- Click on a channel to turn it on or off: Share link, Embed code, Email, Facebook, Twitter and WhatsApp.
- A green tick shows the channel is on. By default, Share link, Embed code and Email are turned on.
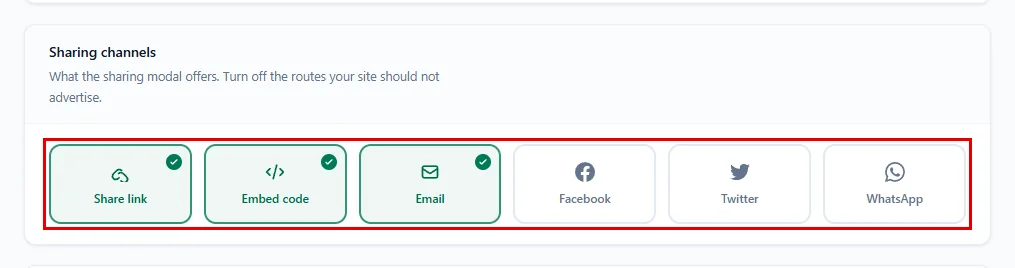
Here is what each one does:
- Share link: shows the link box and its Copy button. Turn it off and nobody can copy a file link from these windows.
- Embed code: shows the Embed Code button.
- Email: shows the Email Sharing tab in the Share window.
- Facebook, Twitter and WhatsApp: add a Share to row with a button for each network. A click opens that network in a new tab with the file’s link ready to post.
Step 6: Keep the Request Checks On #
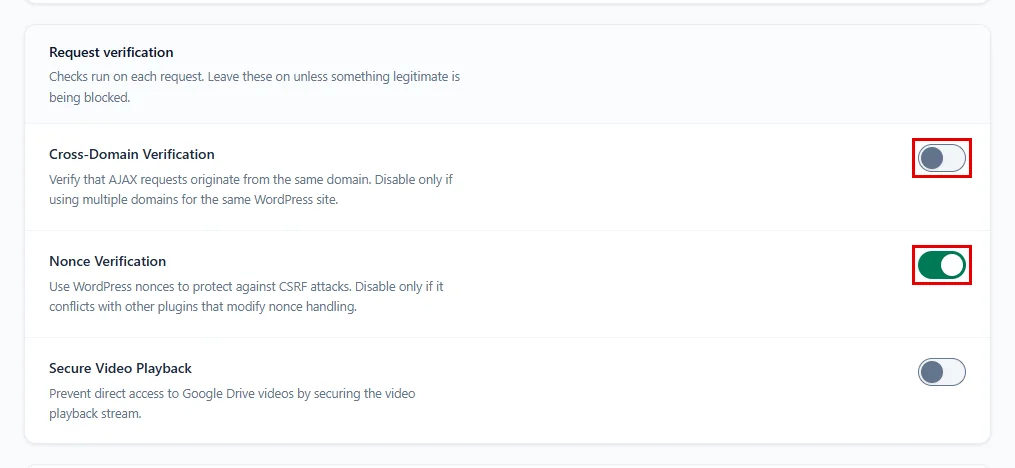
These two checks protect your download and preview links:
- Cross-Domain Verification blocks file requests that come from another website. Turn it on to stop other sites from linking straight to your files; leave it off if the same WordPress site runs on more than one domain.
- Nonce Verification adds a WordPress security token to every file link. Keep it on; switch it off only if another plugin (often a page cache) causes “Security check failed.” errors.
Step 7: Protect Your Videos (optional) #
- Turn on Secure Video Playback to stop people from opening or downloading your Google Drive videos through a copied direct link. Videos still play normally on your pages.

With the switch on, DriveHub only streams a video when the request comes from a page on your own website. If someone copies the video address and opens it in a new tab or on another site, the stream is refused.
Note: Secure Video Playback needs DriveHub Pro.
Step 8: Set Up the Login Screen #
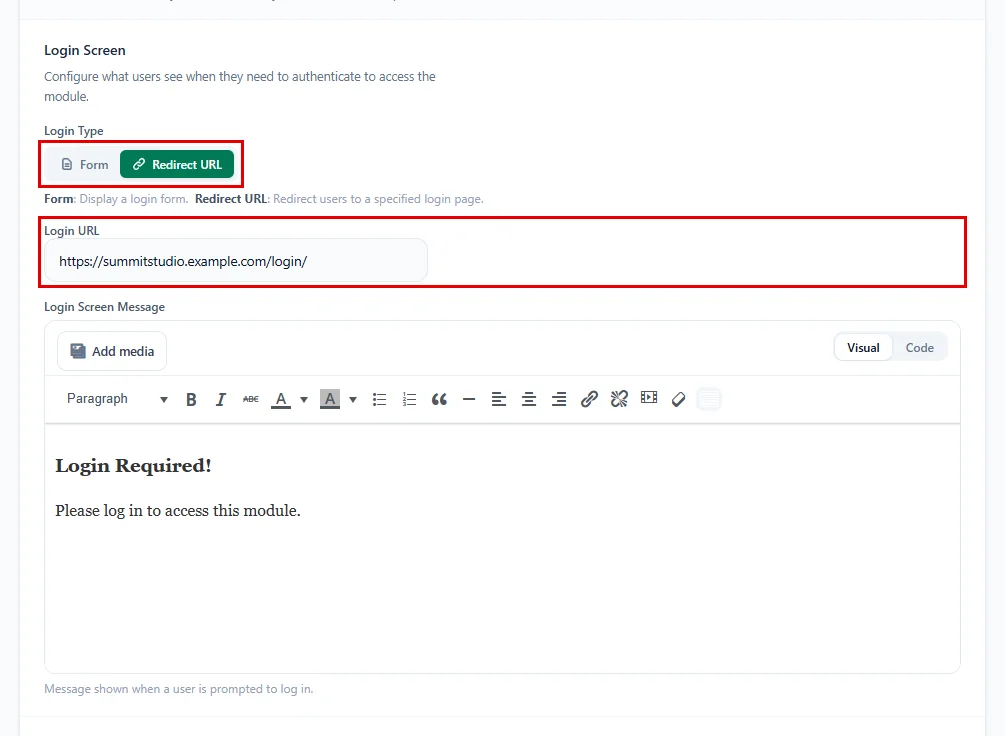
When a module only allows logged-in users, visitors who are not logged in see a login screen. You can choose how it works:
- Under Login Type, choose Form to show a login form inside the module, or Redirect URL to send people to your own login page.
- If you picked Redirect URL, type the address of your login page in Login URL, for example
https://summitstudio.example.com/login/. - Edit the text in Login Screen Message to say what you like, such as “Please log in to see your project files.”
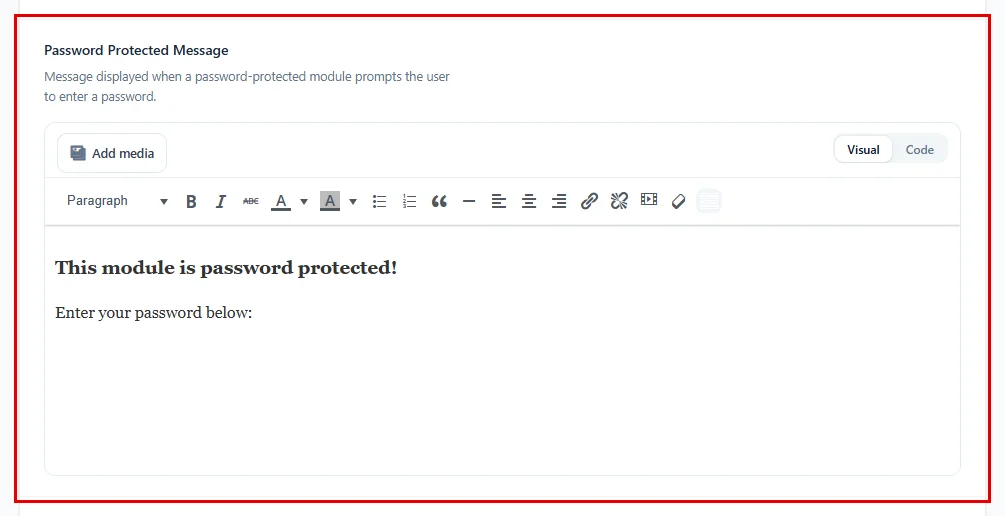
Step 9: Write the Password Protected Message #
- In Password Protected Message, edit the text people see above the password box on a password-protected module.
Step 10: Write the Access Denied Message #
- In Access Denied Message, edit the text people see when their account is not allowed to open a module, for example because of their user role or email domain.
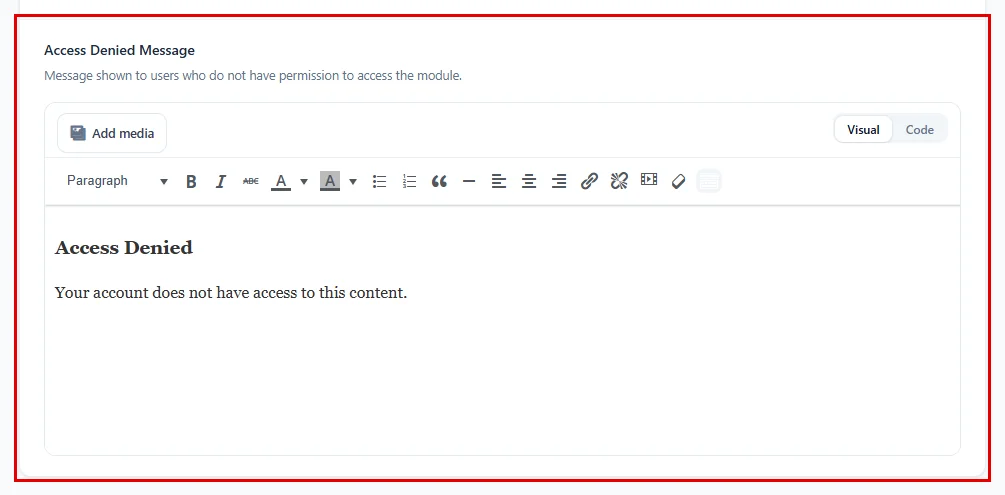
A friendly message with a contact link saves your visitors a lot of guessing.
Step 11: Save Your Changes #
- Click on Save changes in the bar at the bottom of the screen.

Don’t forget to save; your new security rules only apply after you click Save changes.
And that’s it! Your Google Drive files are now shared only as much as you want, and anyone who is blocked sees your own clear message.
Benefits of DriveHub’s Security Settings #
- Team-only files: Keep documents inside your Google Workspace domain.
- No forgotten public links: Sharing can switch itself off again after a set time.
- Safer links: Request checks stop other websites and forged requests from using your file links.
- Clear messages: Visitors always know why they cannot open something and what to do next.
With DriveHub, sharing Google Drive files on your website stays simple and safe.


