- Before You Start
- Step 1: Open the Approvals Page
- Step 2: Find the Submission You Need
- Step 3: Look at a Submission
- Step 4: Tag Single Files (Optional)
- Step 5: Approve or Reject the Selection
- Step 6: Download a Submission as CSV
- Step 7: Handle Many Submissions at Once
- Benefits of Managing Approvals in DriveHub
Has a client just sent you their photo picks through your proofing page, and now you want to see what they chose and give them an answer? You can easily do this with DriveHub.
Every selection a client sends from a Review & Approve module lands on one page, DriveHub > Approvals. There you can read their message, see each file they picked, tag the files and approve or reject the whole selection. DriveHub then emails the client your answer, so nobody is left waiting.
Note: This needs DriveHub Pro.
Here is an easy, step-by-step guide to help you through it!
Before You Start #
Submissions only arrive once a client has used a Review & Approve module on your site. If you have not set one up yet, follow our guide on how to let clients review and approve photos first.
Step 1: Open the Approvals Page #
- From your WP-Admin, go to DriveHub > Approvals.
When clients are waiting on you, a small number shows next to Approvals in the menu. That is the count of pending submissions.
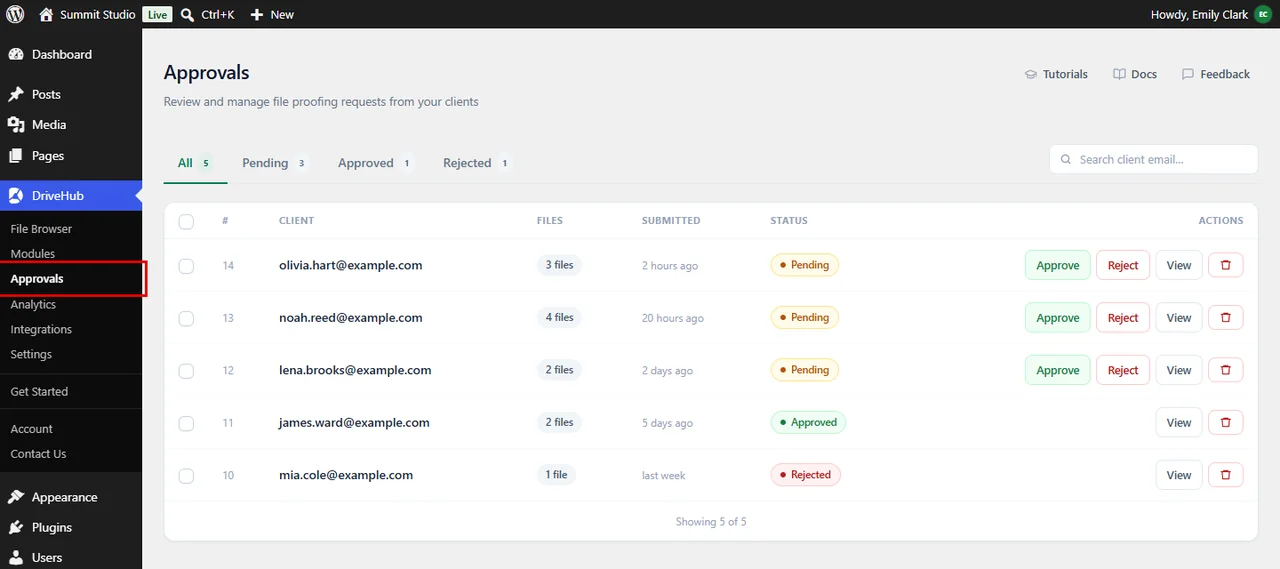
The page lists every submission with the client’s email, the number of Files, when it was Submitted and its Status.
Step 2: Find the Submission You Need #
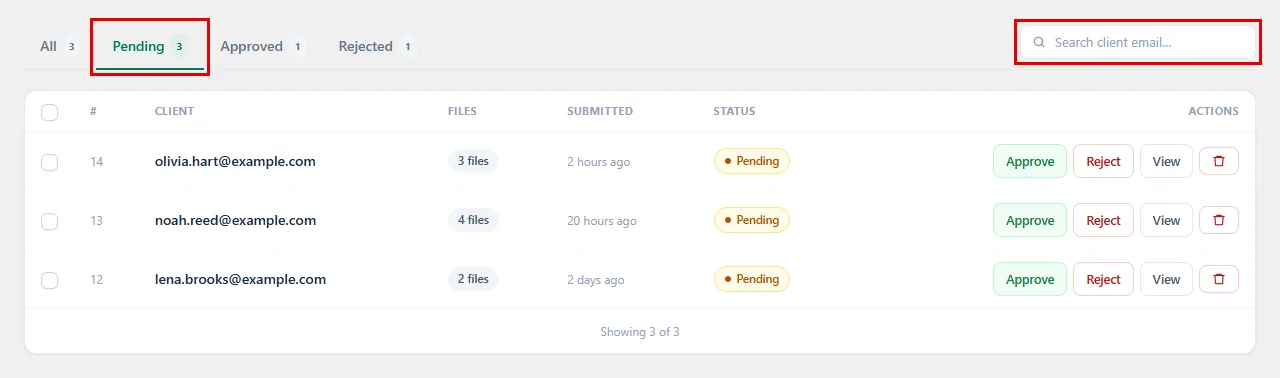
The tabs at the top help you sort through your queue:
- Click on Pending to see only the selections that still need an answer. All, Approved and Rejected show the others. Each tab shows how many submissions it holds.
- Type part of an email address in the Search client email… box to find one client fast, for example
emily.
Step 3: Look at a Submission #
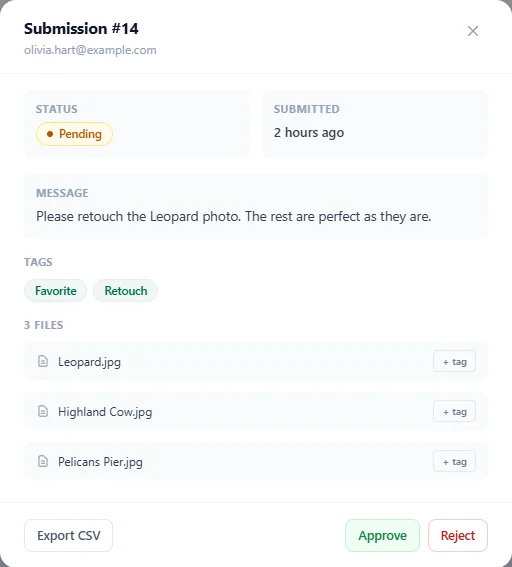
- Click on View in the row of the submission.

A window opens with everything the client sent:
- Status and Submitted (hover over the time to see the exact date).
- The client’s Message, for example “Please retouch the Leopard photo”.
- The Tags the client chose, if you turned tags on.
- The list of files they picked, by name.
Step 4: Tag Single Files (Optional) #
You can mark each file in the selection, which is handy when you plan your edits:
- Click on + tag next to a file.
- Pick Approved, Rejected, Pending, Favorite, Retouch or Final.
- To clear it again, click the tag and choose Remove tag.
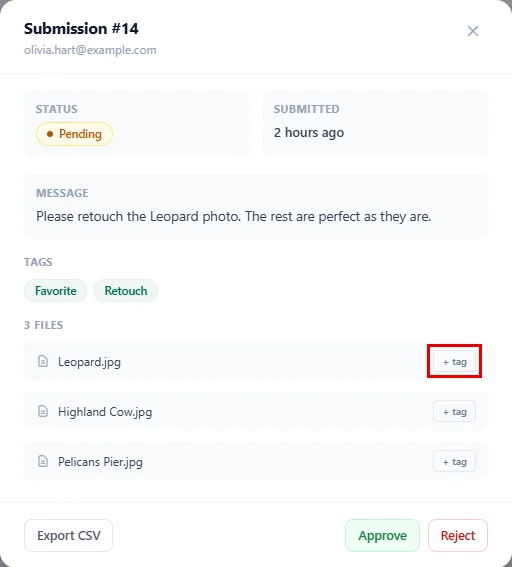
Note: File tags only save when Enable Tags is on in DriveHub > Settings > File Proofing.
Step 5: Approve or Reject the Selection #
Now give your client an answer:
- Click on Approve if the selection is good to go.
- Click on Reject if something needs to change. Tell your client what in a reply, because the rejection email asks them to get in touch.
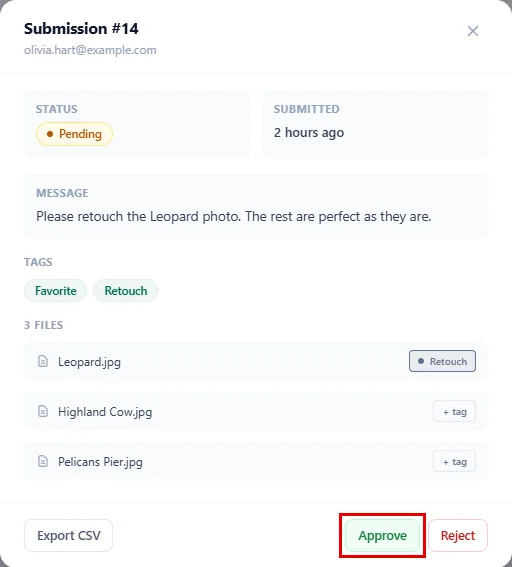
You can do the same straight from the table: pending rows have their own Approve and Reject buttons. Changed your mind? Open the submission and click Reset to put it back to pending.
DriveHub emails the client as soon as you click:
- Approve sends “Your submission has been approved”.
- Reject sends “Your submission needs revision”.
Step 6: Download a Submission as CSV #
Need the list of picked files for your editing software or a spreadsheet?
- Open the submission with View.
- Click on Export CSV at the bottom left.
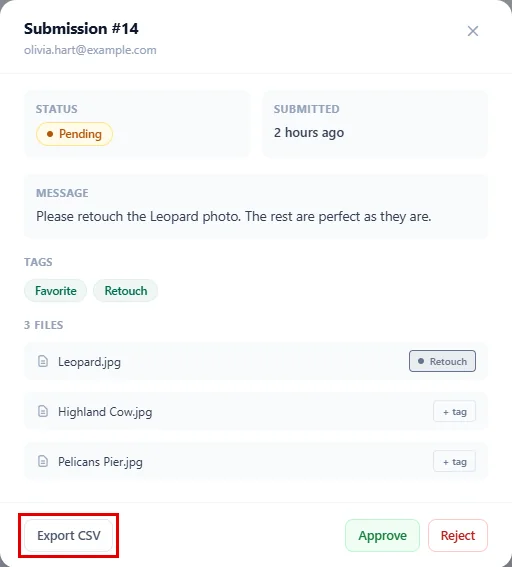
The file has the submission number, the client’s email, their message, the date and one row per file with its name and tag.
Step 7: Handle Many Submissions at Once #
When a busy week leaves you with a long queue, you can work through it in one go:
- Tick the box at the start of each row you want, or the box in the header to pick the whole page.
- A bar appears above the table. Click on Approve, Reject or Delete (each button shows how many you picked).
- Click on Clear to untick everything.
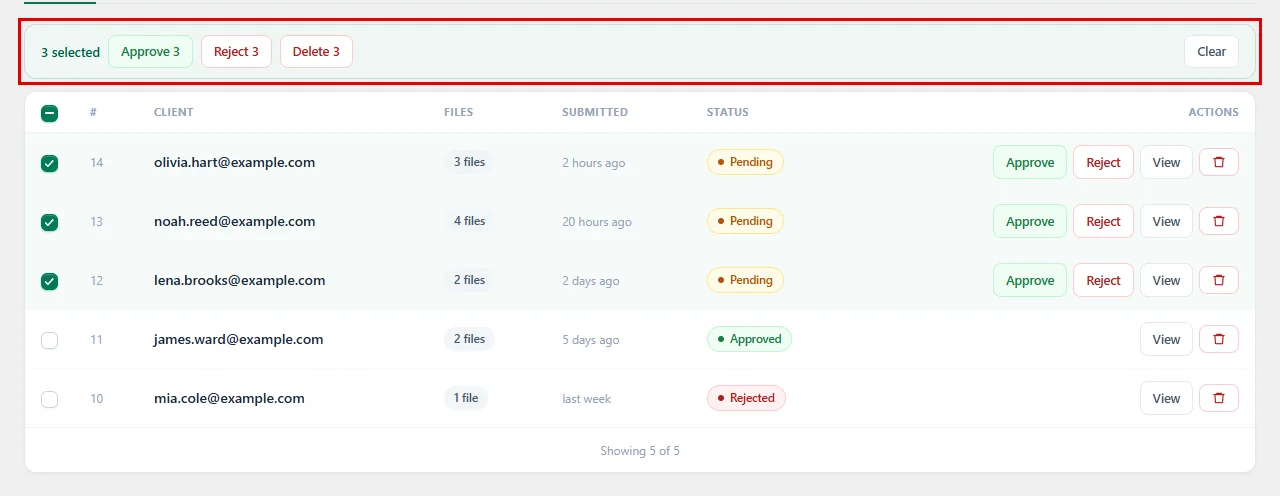
To remove a single submission, click the delete icon at the end of its row and confirm with Delete submission. This removes the client’s selection and every tag on it, and it cannot be undone.
And that’s it. Your queue is clear, and every client knows where their selection stands.
Benefits of Managing Approvals in DriveHub #
- One inbox for every client: All proofing selections from all your modules in one place.
- Never miss a request: The menu badge and the admin email tell you when something new arrives.
- Clear answers: Clients get an email the moment you approve or reject.
- Plan your edits: Tag single files and export the list as CSV.
- Fast when it’s busy: Approve, reject or delete many submissions at once.
With DriveHub, getting client sign-off on your work is quick, clear and fully written down.


