- Step 1: Install DriveHub and Connect Google Drive
- Step 2: Create a Slider Carousel Module
- Step 3: Choose Your Images (Source Tab)
- Step 4: Choose Which Images Show (Filter Tab)
- Step 5: Set the Slider Width (Advanced Tab)
- Step 6: Choose How the Slider Looks and Moves (Advanced Tab)
- Step 7: Choose Who Can See It (Permissions Tab)
- Step 8: Publish the Slider
- Benefits of Using DriveHub for Your Slider
Do you want to show your best photos from Google Drive as a smooth, swipeable slider on your website? You can easily do this with DriveHub.
The Slider Carousel module shows your images one at a time with arrows and dots, which makes it perfect for a homepage banner, a portfolio or a short photo story. Your images stay in Google Drive, so new photos you add to the folder join the slider on their own.
Note: This needs DriveHub Pro.
Here is an easy, step-by-step guide to help you set it all up!
Step 1: Install DriveHub and Connect Google Drive #
First, make sure DriveHub and DriveHub Pro are installed and your Google account is connected:
- From your WordPress admin, click on Plugins > Add New.
- Search for DriveHub, click Install and then Activate.
- Install and activate DriveHub Pro as well. Our guide on how to install and activate DriveHub Pro shows each step.
- Follow the setup screen to add your Google account.
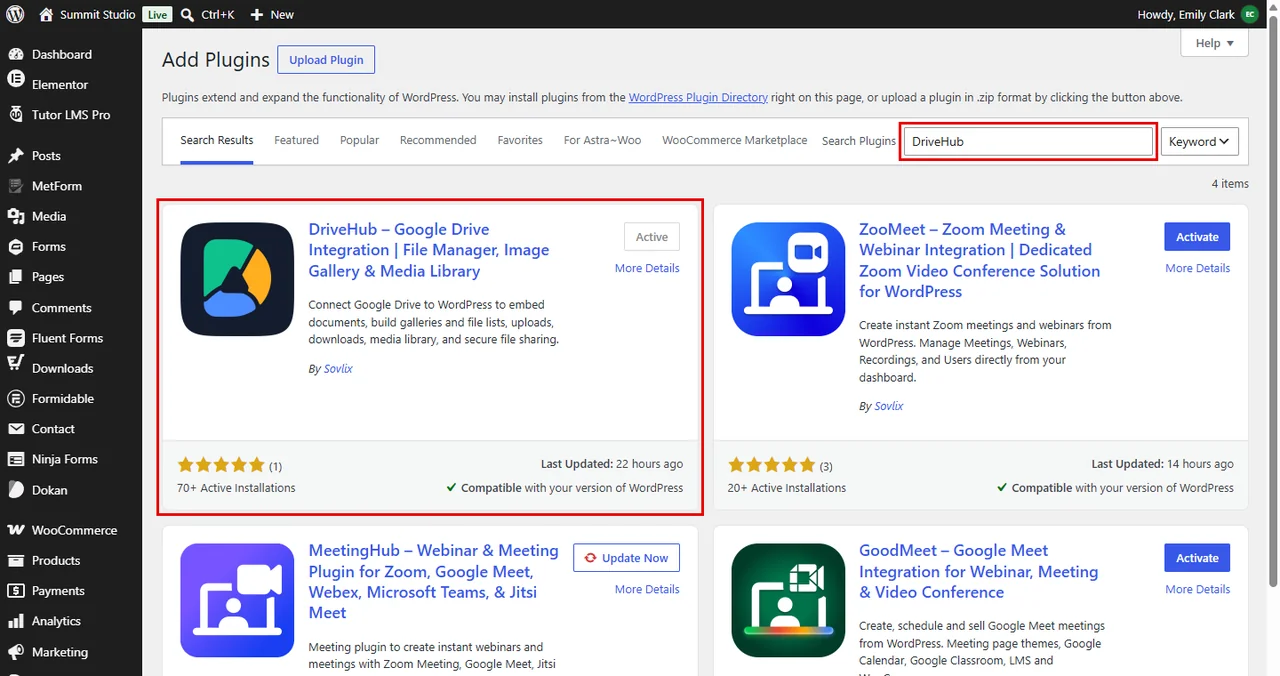
Read our step by step setup guide to avoid any confusion.
Step 2: Create a Slider Carousel Module #
The next step is to create a module for your slider:
- Go to DriveHub > Modules.
- Click on Add module.
- In the Select module type window, click on Slider Carousel under Display files.
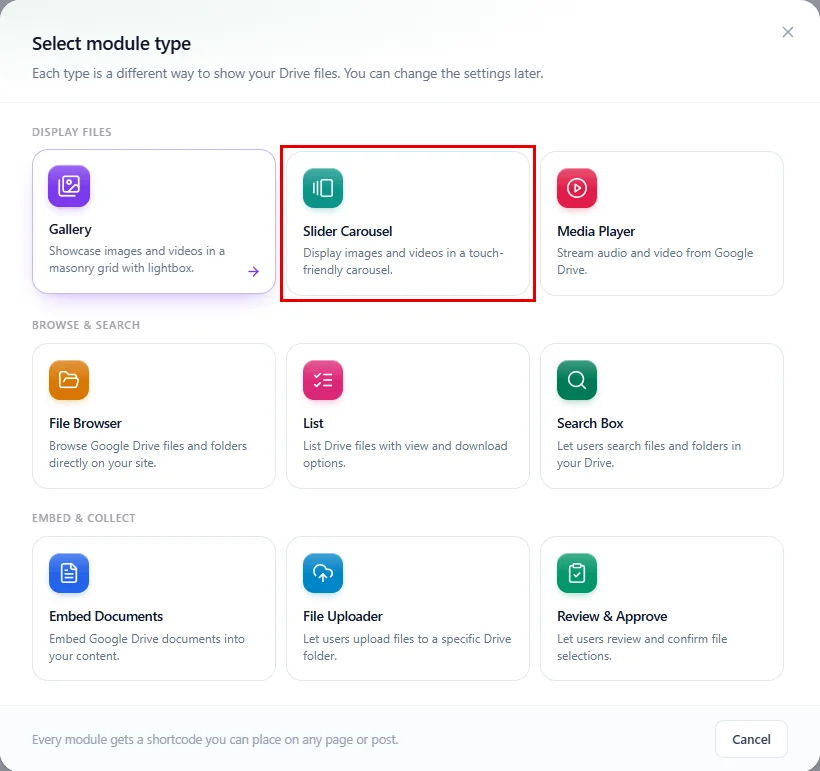
- Click on the name at the top of the editor and give your slider a name, for example Wildlife Slider.
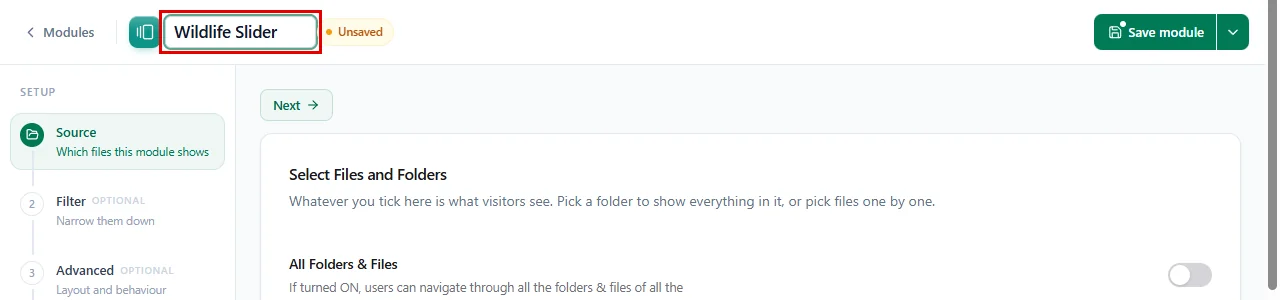
New to modules? Our guide on how to create your first DriveHub module walks through the editor in more detail.
Step 3: Choose Your Images (Source Tab) #
In this step, you pick the Google Drive folder that holds your images:
- Stay on the Source step (it opens first).
- Scroll down to Your Drive and find your photo folder, for example Wildlife Collection or Team Photos. You can type the name in the search box.
- Hover over the folder and tick the box in its top left corner.
- The green panel on the right now shows (1) Items Selected with your folder.
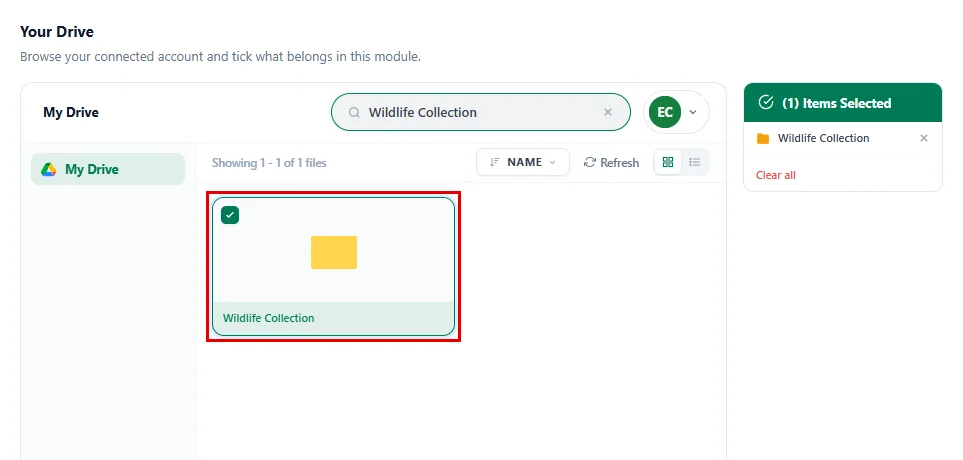
You can tick more than one folder, or pick single images one by one. Above the browser you’ll also find a few extra switches:
- All Folders & Files: Uses all the folders and files of your linked Google Drive accounts. Leave it off to show only what you tick.
- Use Private Files: Shows each logged-in user the images in their own private folder. Our guide on how to give each user a private Google Drive folder explains this.
- Use ACF field Files: Takes the images from an ACF field on the page where the slider is placed. Type the field name in the box that appears.
- Merge Selected Folder Files: Puts the images from all the folders you ticked together in one slider. Turn on Include Subfolder Files to add images from their subfolders too.
The slider only shows image files, so it’s fine to choose a folder that also holds documents or videos.
Step 4: Choose Which Images Show (Filter Tab) #
Here, you can decide which images make it into your slider:
- Click on Filter on the left.
- Allowed Extensions: Switch Allow all off, then type the file types you want, like
jpg, png, and click Add. While Allow all is on, every image type shows. - Allowed Names: Switch its Allow all off, then type file names to show only those. You can use wildcards, for example
fox*shows every image that starts with “fox”. Use Apply to to choose whether the name filter checks Files, Folders or both. - Maximum Item Count: Type the most slides you want, for example
10. Leave it empty to show all of them.

Tip: A slider feels best with 5 to 15 images. Use Maximum Item Count to keep a big folder short.
Step 5: Set the Slider Width (Advanced Tab) #
- Click on Advanced on the left.
- Under Module Container, set a Width (like
100%or1000px). Leave it empty to let the slider fill the width of your page.
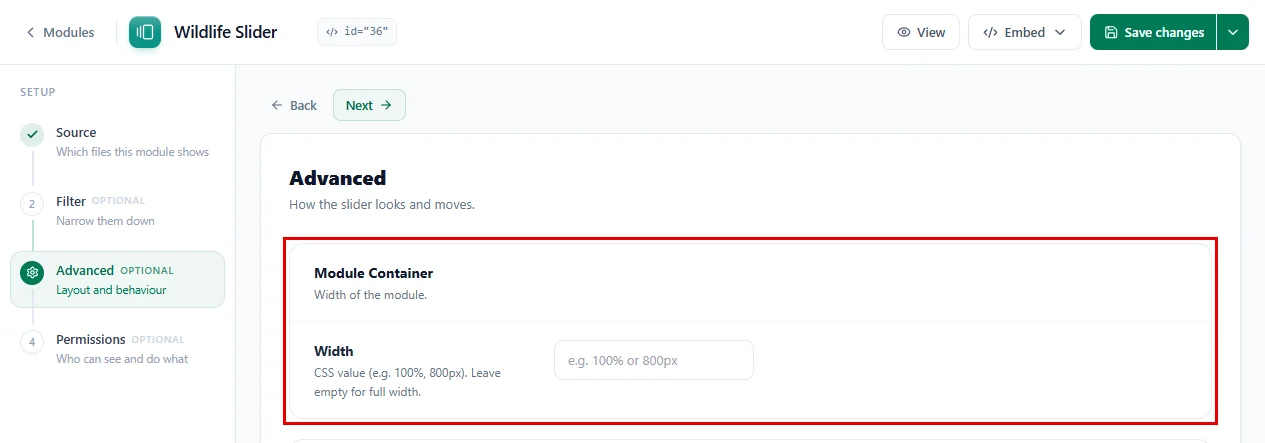
The height follows the Aspect Ratio you pick in the next step, so every slide keeps the same neat shape.
Step 6: Choose How the Slider Looks and Moves (Advanced Tab) #
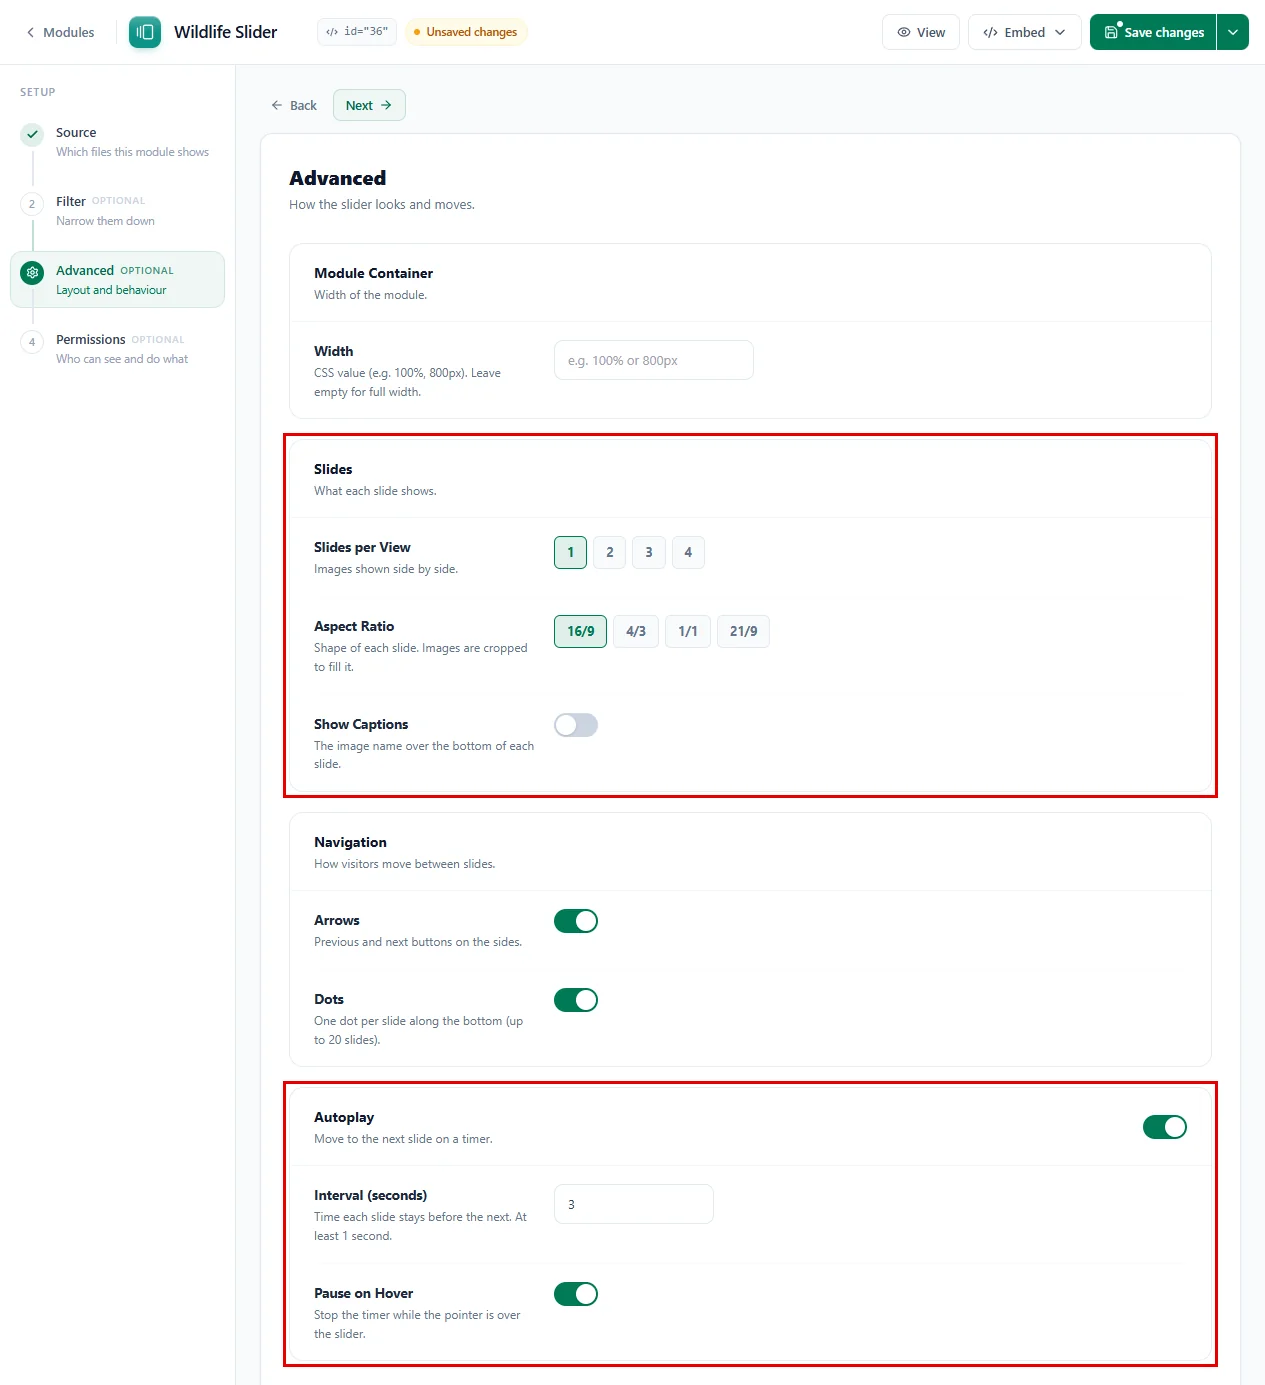
Still on the Advanced step, scroll down to style your slider:
- Slides per View: how many images show side by side, from 1 to 4.
- Aspect Ratio: the shape of each slide: 16/9, 4/3, 1/1 (square) or 21/9 (extra wide). Images are cropped to fill the shape.
- Show Captions: shows the image name over the bottom of each slide.
- Arrows: the previous and next buttons on the sides.
- Dots: one small dot per slide along the bottom, for up to 20 slides.
- Autoplay: turn this on to move to the next slide on a timer. Then set the Interval (seconds), for example
3, and keep Pause on Hover on so the slider stops while a visitor’s pointer is over it.
Step 7: Choose Who Can See It (Permissions Tab) #
Here, you can decide who gets to see your slider:
- Click on Permissions on the left.
- Scroll down and turn on Password Protection if you want to keep the slider private, then type a password.
- Under Visibility, use Display For to show the slider to Everyone or only to people who are Logged In to your website.
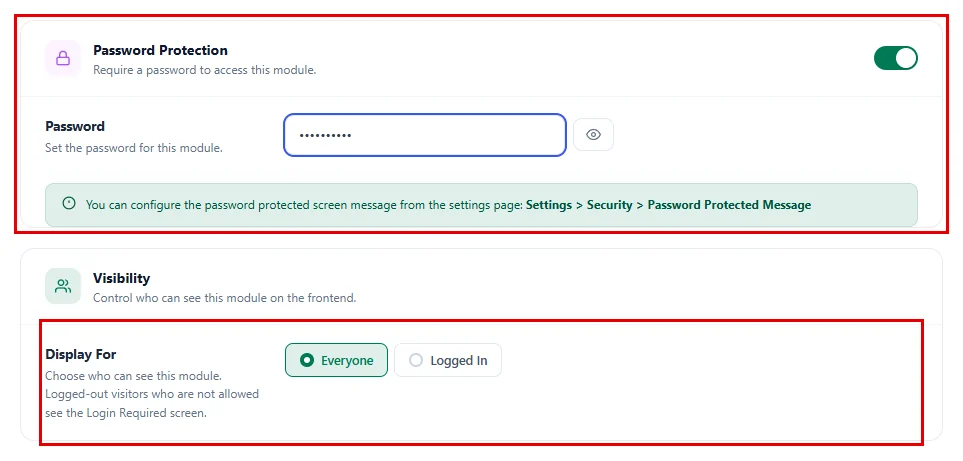
The slider has no preview or download buttons, so you won’t find those cards on this tab. You can leave Usage Limits off too.
Don’t forget to click the Save module button at the top right when you are finished! (On a module you have saved before, this button says Save changes.)

Step 8: Publish the Slider #
Once you’re happy with all the settings, put the slider on a page:
- Click on Embed at the top right.
- Click on Copy shortcode and paste it into any page or post, or hover over Add to a page to let DriveHub add it for you.
- Publish the page.
You can also add the slider with the block editor or the Classic Editor.
Now open your page. Your images show up as a clean, full-width slider:

Visitors can click the arrows, click a dot to jump to a slide, or use the left and right arrow keys. The small counter in the top right corner shows which image they are on.
With Slides per View set to 3 and Show Captions on, the same folder looks like this:

On a phone, the slider fits itself to the smaller screen, and visitors can swipe left or right to move between slides:

Benefits of Using DriveHub for Your Slider #
- Save WordPress storage: Your images stay in Google Drive, not in your Media Library.
- Always up to date: Add photos to the Drive folder and the slider shows them.
- Easy to browse: Arrows, dots and keyboard keys on every slide.
- Keep it private when you need to: Protect a slider with a password or show it to logged-in users only.
With DriveHub, turning a Google Drive folder into a beautiful slider takes just a few minutes.
Related guides:


