- Step 1: Install DriveHub and Connect Google Drive
- Step 2: Create a File Uploader Module
- Step 3: Choose the Upload Folder (Source Tab)
- Step 4: Let Visitors Pick a Folder (optional)
- Step 5: Give Each User a Private Folder (optional)
- Step 6: Choose File Rules (Filter Tab)
- Step 7: Change How It Looks (Advanced Tab)
- Step 8: Set Up Email Alerts (Notifications Tab)
- Step 9: Choose What Visitors Can Do (Permissions Tab)
- Step 10: Add the Uploader to a Page
- Benefits of Using DriveHub for File Uploads
Do you want clients, students or customers to send you files straight from your website, without filling up your email inbox? You can easily do this with DriveHub.
This setup is super useful because every upload goes right into a Google Drive folder you choose, so large files never sit on your web hosting, and everything stays neatly organized in one place.
Here is an easy, step-by-step guide to help you set it all up!
Note: This needs DriveHub Pro.
Step 1: Install DriveHub and Connect Google Drive #
First, make sure DriveHub is installed and your Google account is connected:
- From your WordPress admin, click on Plugins > Add New.
- Search for DriveHub.
- Click Install and then Activate.
- Follow the setup screen to add your Google account.
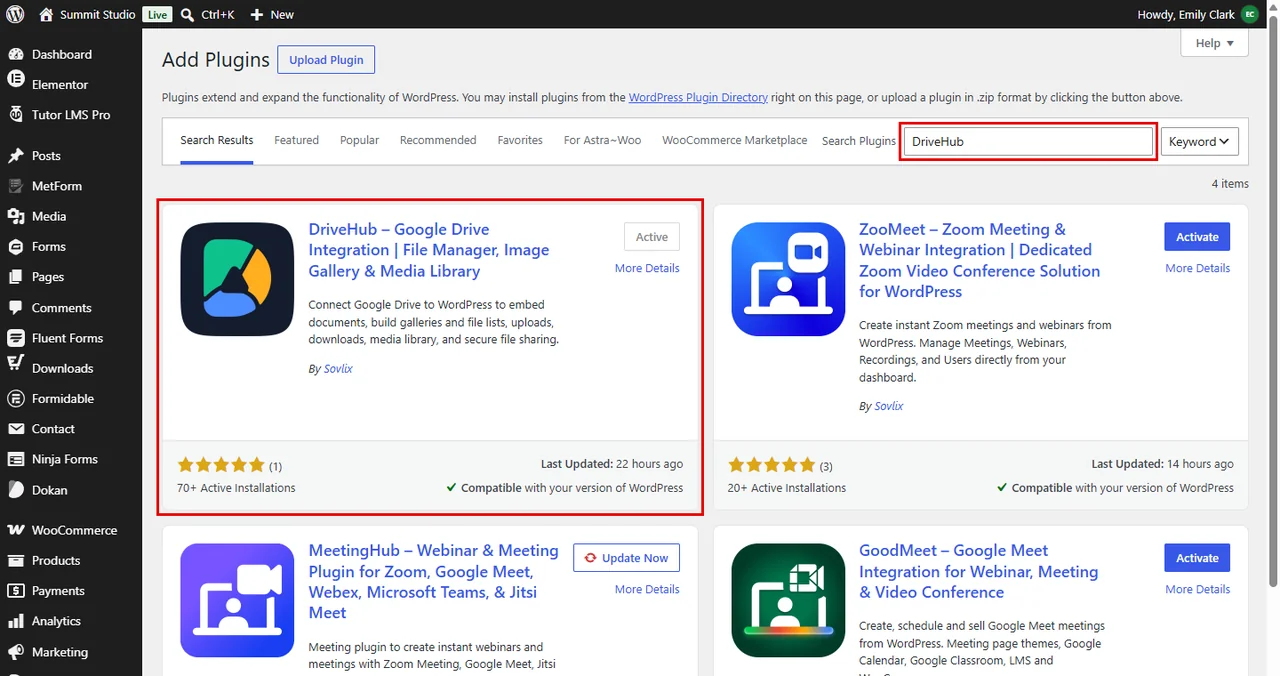
Read our step by step setup guide to avoid any confusion. The File Uploader is part of DriveHub Pro, so install Pro as well: see how to install and activate DriveHub Pro.
Step 2: Create a File Uploader Module #
The next step is to create a module for your upload box:
- Go to DriveHub > Modules.
- Click on Add module.
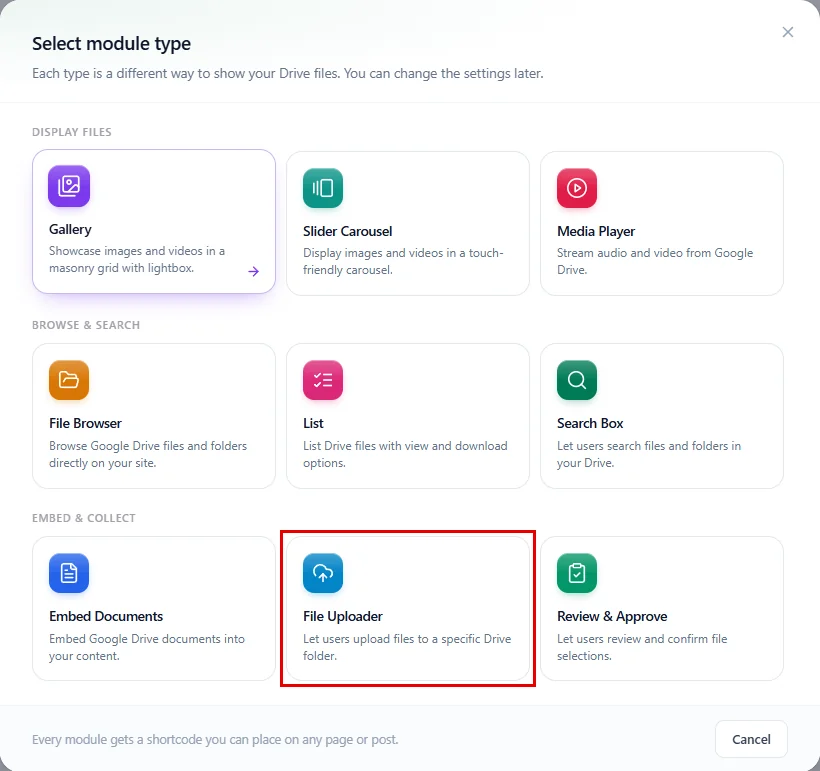
- In the Select module type window, click on File Uploader under Embed & collect.
- Click on the name at the top of the editor and give your uploader a name, for example Client Upload Box.
Step 3: Choose the Upload Folder (Source Tab) #
In this step, you pick where your visitors’ files will go:
- Stay on the Source step (it opens first).
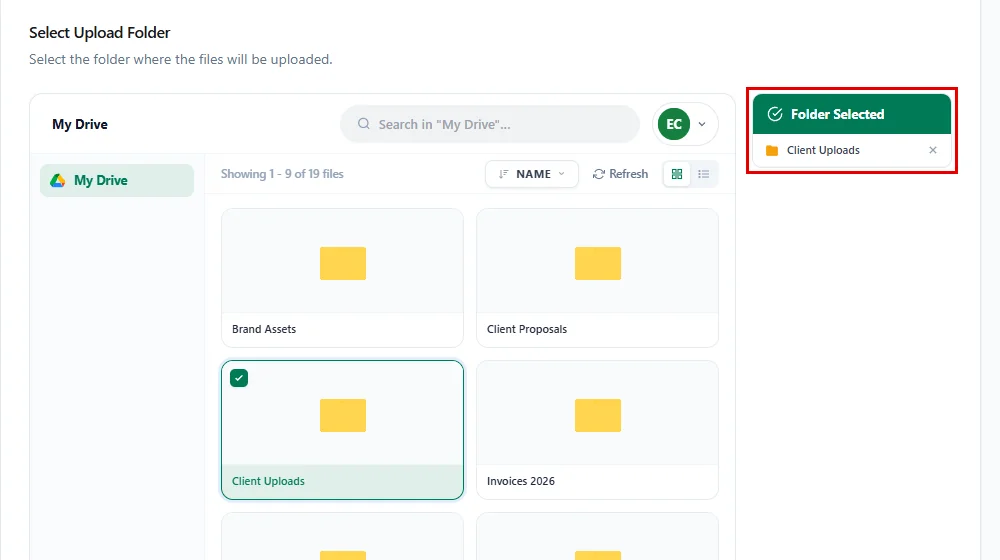
- Under Select Upload Folder, find the folder you want, for example Client Uploads, and tick it.
- The panel on the right now shows Folder Selected with your folder name.
If you skip this, DriveHub warns you with No upload folder chosen. Uploads have nowhere to go until a folder is picked.
Step 4: Let Visitors Pick a Folder (optional) #
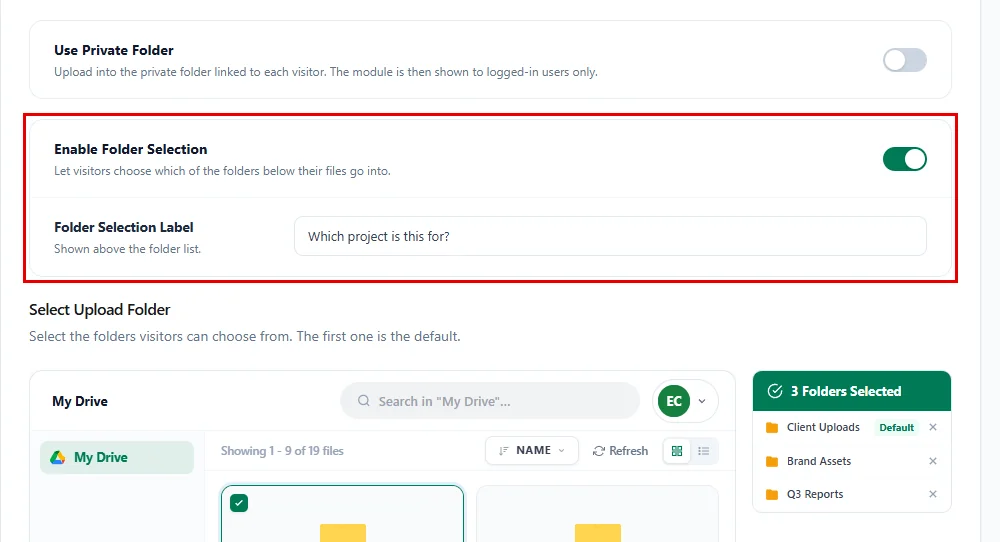
Do you want visitors to choose where their files go, for example Brand Assets or Q3 Reports? Turn on dynamic folder selection:
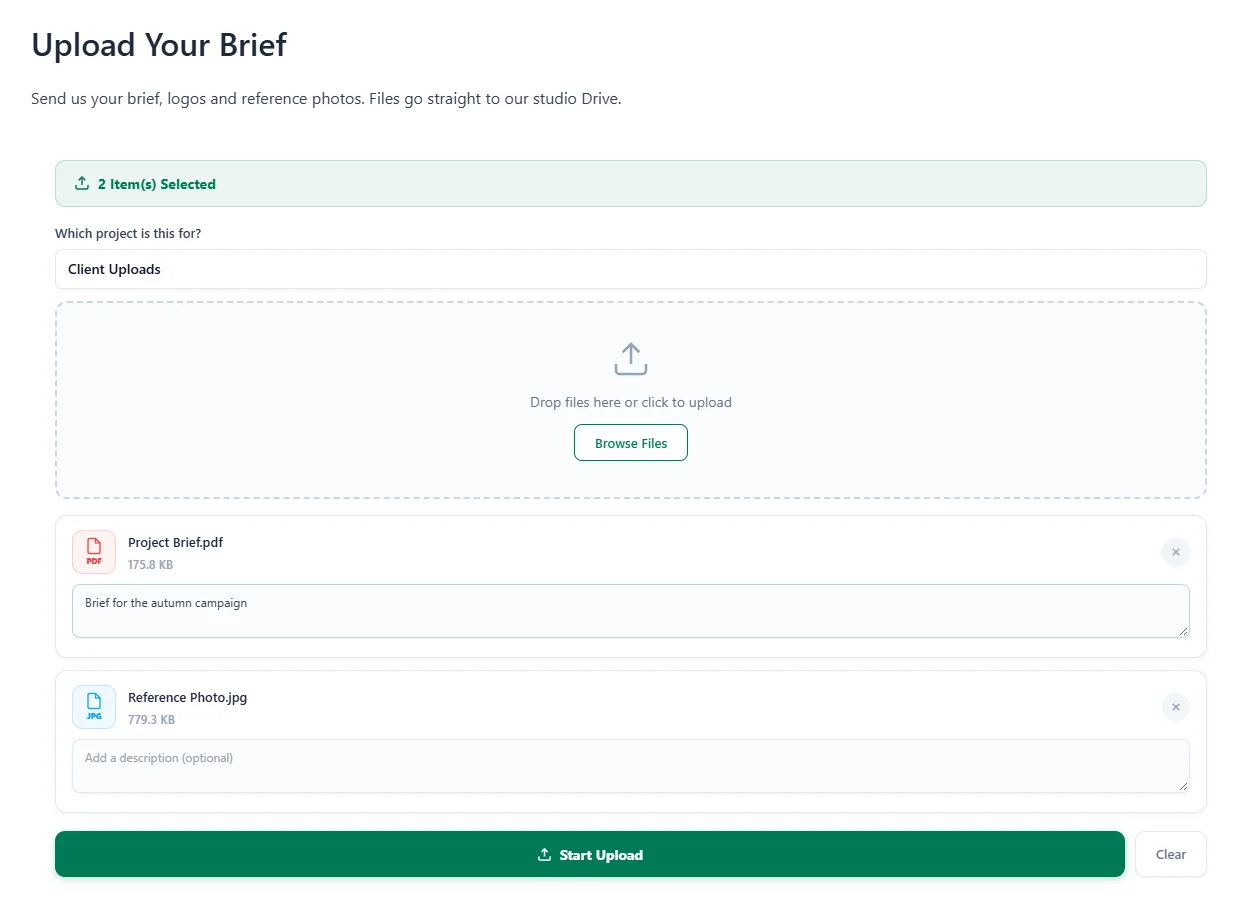
- At the top of the Source step, turn on Enable Folder Selection.
- In Folder Selection Label, type the text visitors see above the list, for example
Which project is this for?. If you leave it empty, visitors see Choose a folder. - Below, tick every folder visitors can choose from.
- The first folder you tick is the default one and gets a Default badge in the right panel.
Step 5: Give Each User a Private Folder (optional) #
If each logged-in user should upload into their own private folder instead, use this option:
- Turn on Use Private Folder. The folder picker goes away, because every visitor uploads into the folder linked to them.
- Turn on Create Private Folder if DriveHub should create and link a folder for users who don’t have one yet.
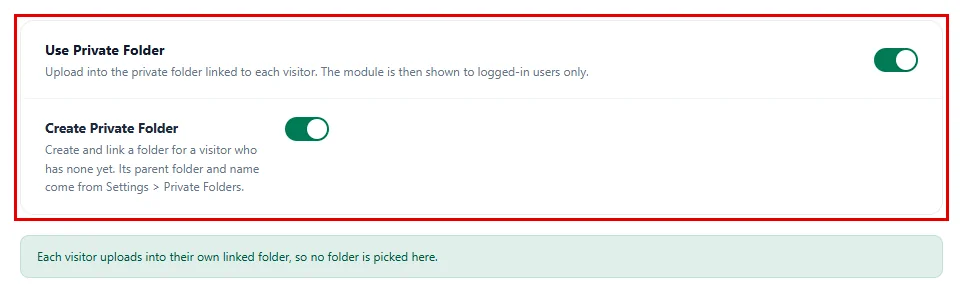
The parent folder and the name of these new folders come from DriveHub > Settings > Private Folders. With this option on, the uploader shows only to logged-in users. Learn more in how to give each user a private Google Drive folder.
Note: Use Private Folder and Enable Folder Selection can’t be on together. Turning on the private folder turns folder selection off.
Step 6: Choose File Rules (Filter Tab) #
Here, you can decide what kinds of files people are allowed to send:
- Click on Filter on the left.
- Allowed Extensions: Type the file types you want, separated by commas (like
jpg, png, pdf). If you leave it empty, people can upload any file type. - Allow all except: Turn this on to allow every type except the ones you list, for example
exe, php, js.

- Max File Uploads: The most files a visitor can add at once. Leave it empty for no limit.
- Min File Uploads: The fewest files a visitor must upload before a form with this uploader can be sent. Leave it empty for no minimum.
- Max File Size (MB): The largest file allowed. It starts at
100. - Min File Size (MB): The smallest file allowed. Leave it empty for no limit.
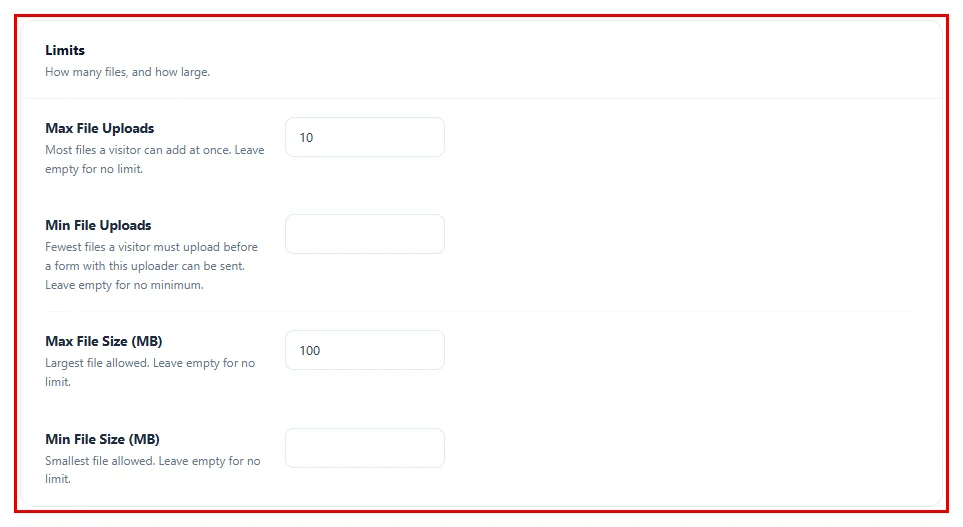
DriveHub checks these rules in the visitor’s browser and again on the server, so a file that breaks them never reaches your Drive.
Step 7: Change How It Looks (Advanced Tab) #
Now you can set the look and behaviour of the upload box:
- Click on Advanced on the left.
- Module Container: Set a Width (like
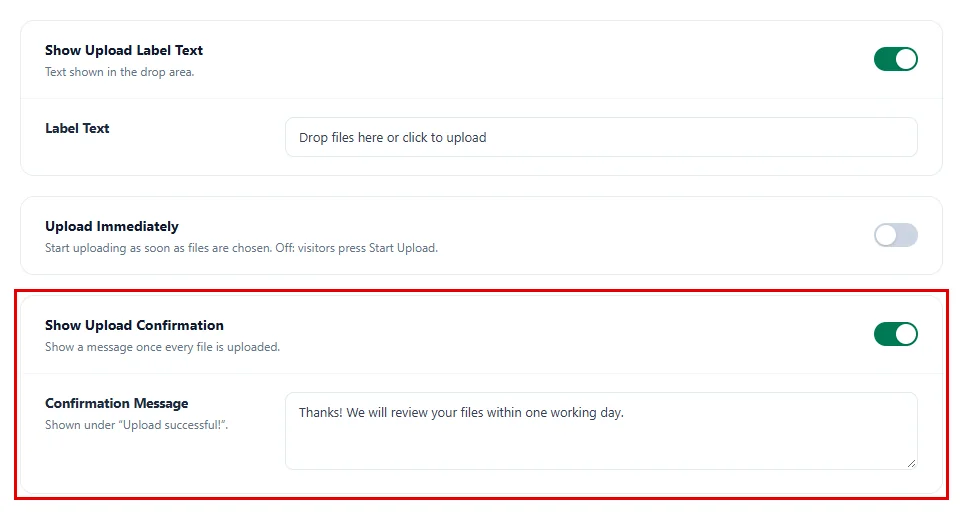
100%or800px) and a Height. Leave them empty to let the box size itself. - Show Upload Label Text: Keep this on to show a line of text in the drop area. Change it in Label Text.
- Upload Immediately: Keep this on to start uploading as soon as files are chosen. Turn it off if visitors should press Start Upload first.
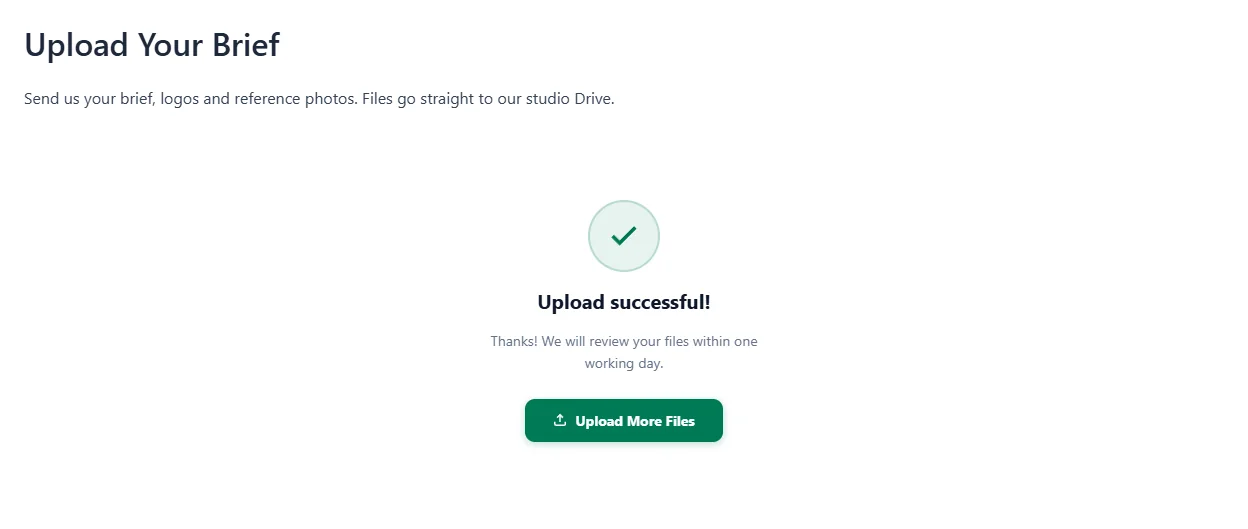
- Show Upload Confirmation: Shows Upload successful! once every file is uploaded. Write your own thank-you line in Confirmation Message.
Step 8: Set Up Email Alerts (Notifications Tab) #
- Click on Notifications on the left.
- Turn on Enable Notifications if you want an email when someone uploads files.
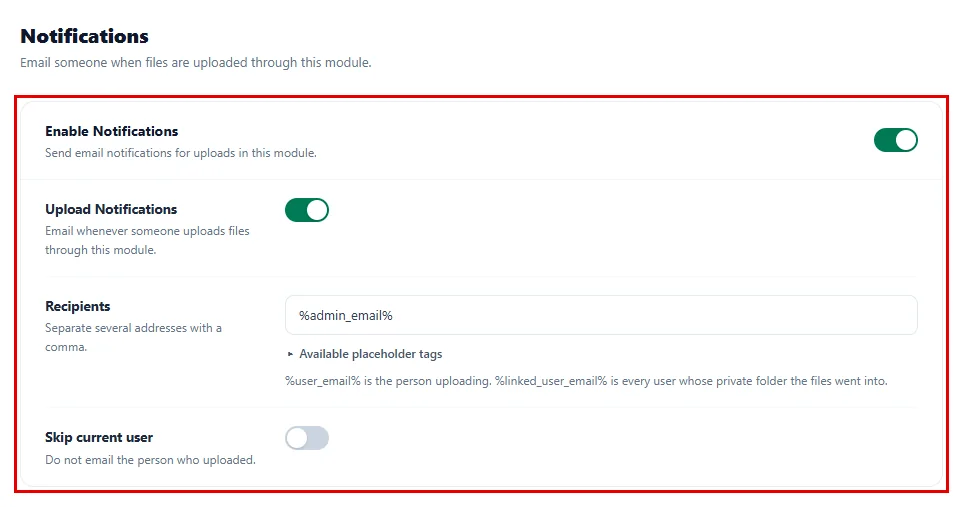
You can choose who gets the email and more. See how to get email notifications for downloads and uploads.
Step 9: Choose What Visitors Can Do (Permissions Tab) #
Here, you set the upload options and who can use the uploader:
- Click on Permissions on the left.
- In the Upload card:
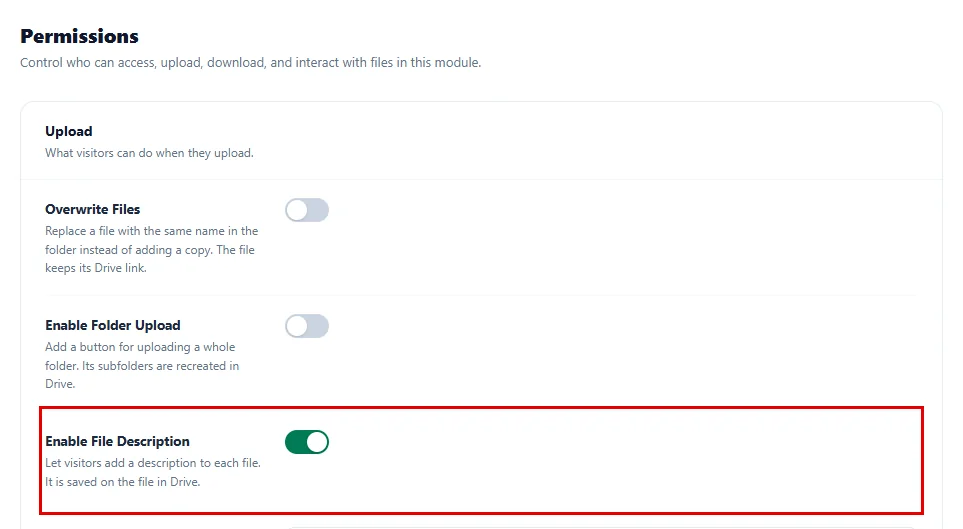
- Overwrite Files: Replace a file with the same name in the folder instead of adding a copy.
- Enable Folder Upload: Adds a Browse Folder button, so visitors can upload a whole folder. Its subfolders are created in Drive too.
- Enable File Description: Lets visitors add a short description to each file. DriveHub saves it on the file in Google Drive.
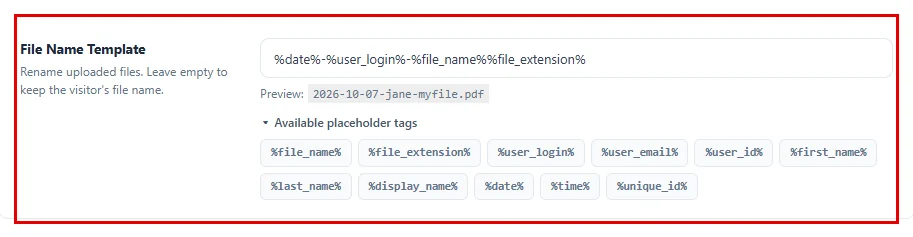
- File Name Template: Renames every uploaded file. Leave it empty to keep the visitor’s own file name. Click Available placeholder tags to add tags like
%user_login%,%date%or%unique_id%. For example,%date%-%user_login%-%file_name%%file_extension%puts the date and the user name in front of each file name. The Preview line under the box shows an example as you type.
- Scroll down to Password Protection if you want visitors to type a password before they can upload.
- Under Visibility, use Display For to show the uploader to Everyone or only to people who are Logged In.
Don’t forget to click the Save changes button at the top right when you are finished! (On a brand-new module this button says Save module.)

Step 10: Add the Uploader to a Page #
Once you’re happy with all the settings, put the uploader on a page:
- Click on Embed at the top right.
- Click on Copy shortcode and paste it into any page or post, or hover over Add to a page to let DriveHub add it for you.
- Publish the page.
You can also add it with the block editor, or inside a form like Gravity Forms or Elementor Form.
Now open your page. Visitors can drag files into the box or click Browse Files, add a description, and send them straight to your Google Drive:
When the upload finishes, visitors see your confirmation message, and the files show up in your Google Drive folder:
Benefits of Using DriveHub for File Uploads #
- Save WordPress storage: Files go straight to Google Drive, not your hosting.
- Organized from the start: Pick the folder, or let visitors pick one from your list.
- Clear file names: Rename uploads with the user name, date or a unique ID.
- Safe rules: Limit file types and sizes, checked again on the server.
- Private when you need it: Give each user their own folder, or protect the uploader with a password.
With DriveHub, collecting files from your visitors takes just a few minutes to set up.
Related guides:


