- Step 1: Install DriveHub and Connect Google Drive
- Step 2: Create a File Browser Module
- Step 3: Choose Your Folders (Source Tab)
- Step 4: Choose Which Files Show (Filter Tab)
- Step 5: Set the Size and Layout (Advanced Tab)
- Step 6: Choose What Visitors Can Do (Permissions Tab)
- Step 7: Save Your Module
- Step 8: Add the File Browser to a Page
- Step 9: See the File Browser on Your Website
- Benefits of Using DriveHub as a File Browser
Do you want visitors to open your Google Drive folders right on your website, move through the subfolders and preview or download any file? You can easily do this with DriveHub.
The File Browser module works like a small Google Drive on your page. It is super useful for client portals, team resources or a shared project area, because you keep the files organised in Google Drive and the page always shows the latest version.
Note: This needs DriveHub Pro.
Here is an easy, step-by-step guide to help you set it all up!
Step 1: Install DriveHub and Connect Google Drive #
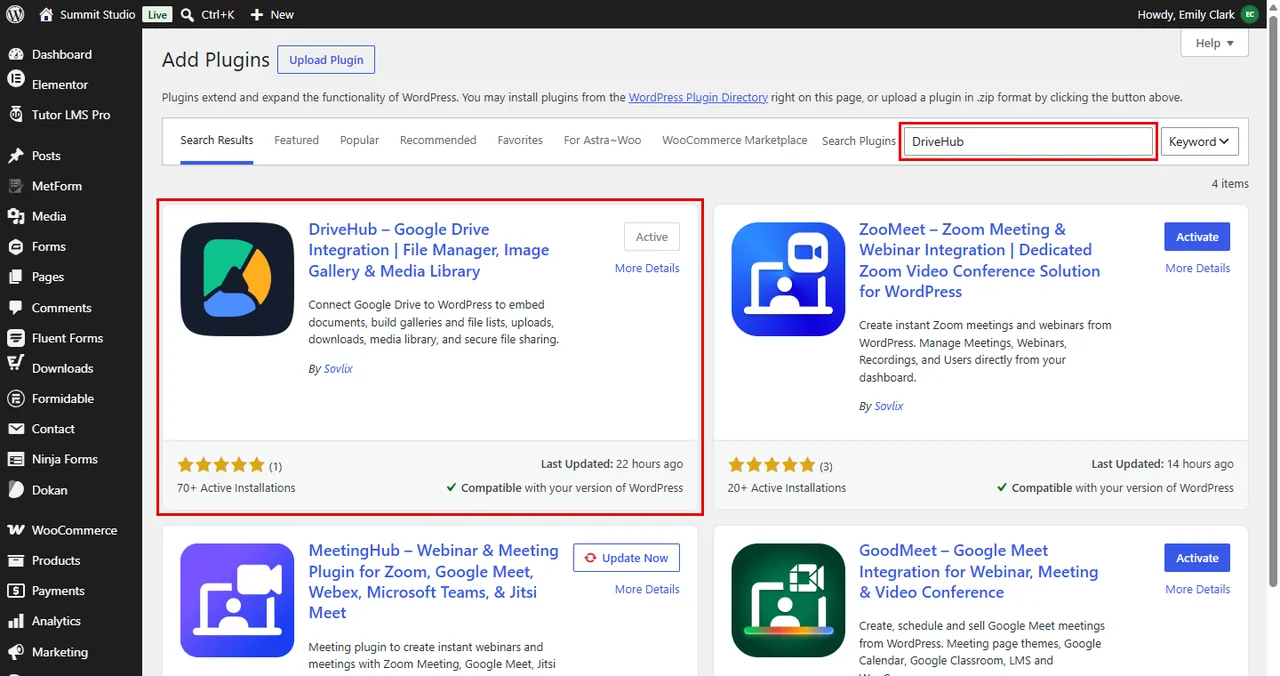
First, make sure DriveHub and DriveHub Pro are installed and your Google account is connected:
- From your WordPress admin, click on Plugins > Add New.
- Search for DriveHub.
- Click Install and then Activate.
- Follow the setup screen to add your Google account.
Read our step by step setup guide to avoid any confusion. To add the Pro add-on, follow how to install DriveHub Pro.
Step 2: Create a File Browser Module #
Every file browser you show on your website is a module. Let’s create one:
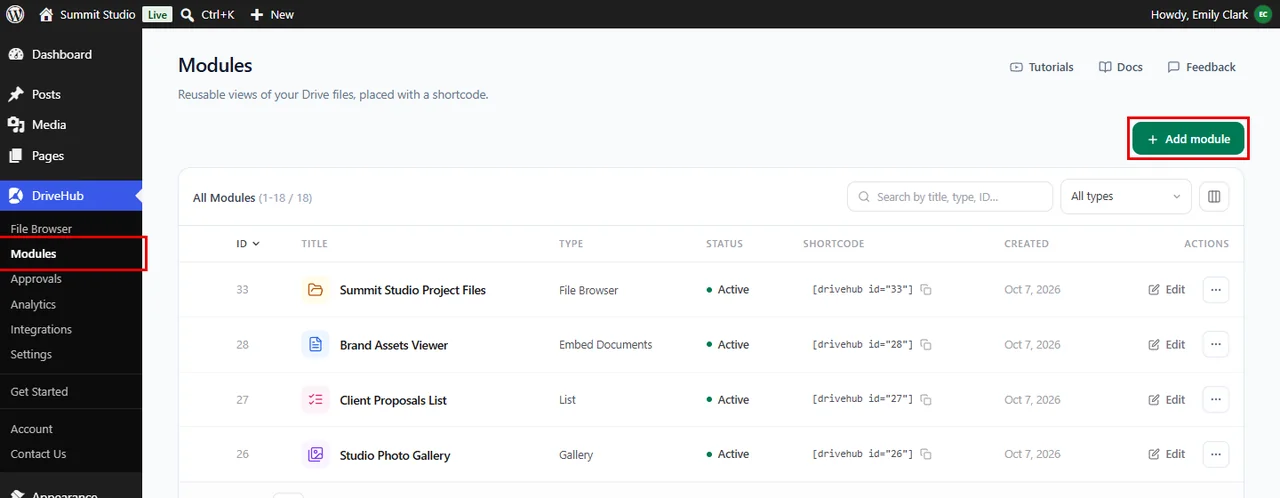
- Go to DriveHub > Modules from your WP-Admin.
- Click on Add module at the top right.
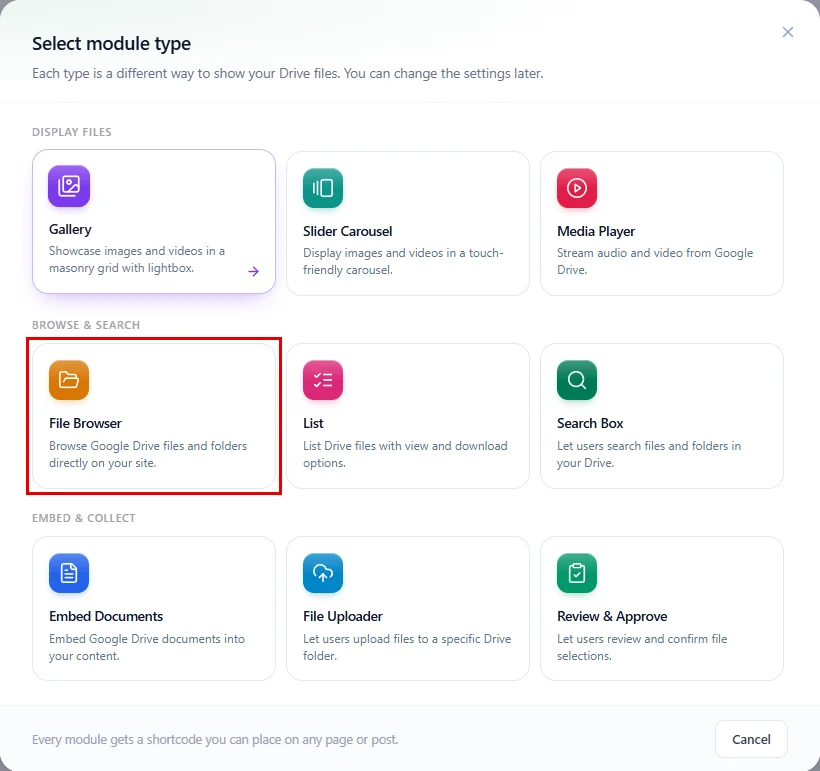
- In the Select module type window, click on File Browser under Browse & search.
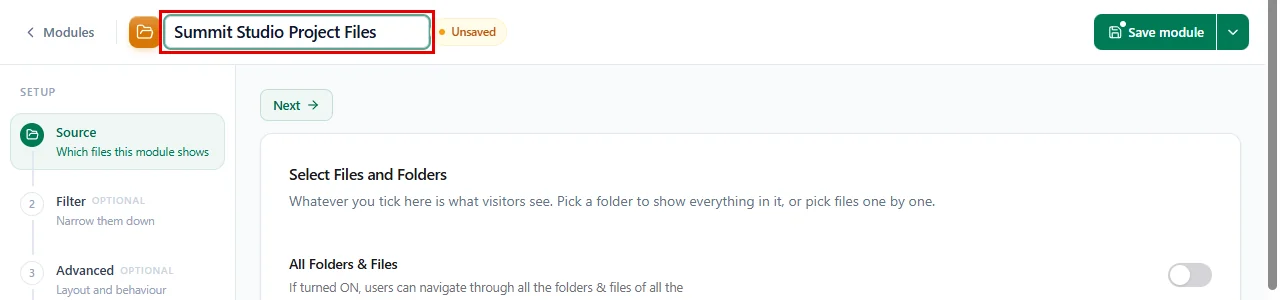
- Click on the name at the top of the editor and give your module a name, for example Summit Studio Project Files.
New to modules? Our guide on how to create your first DriveHub module walks through the editor in more detail.
Step 3: Choose Your Folders (Source Tab) #
In this step, you pick the Google Drive folders visitors can browse:
- Stay on the Source step (it opens first).
- Scroll down to Your Drive and find the folder you want to share, for example Client Proposals or Brand Assets.
- Hover over the folder and tick the box in its top left corner.
- Check the Items Selected panel on the right. Everything you ticked shows up here, and you can remove an item with the x next to it.
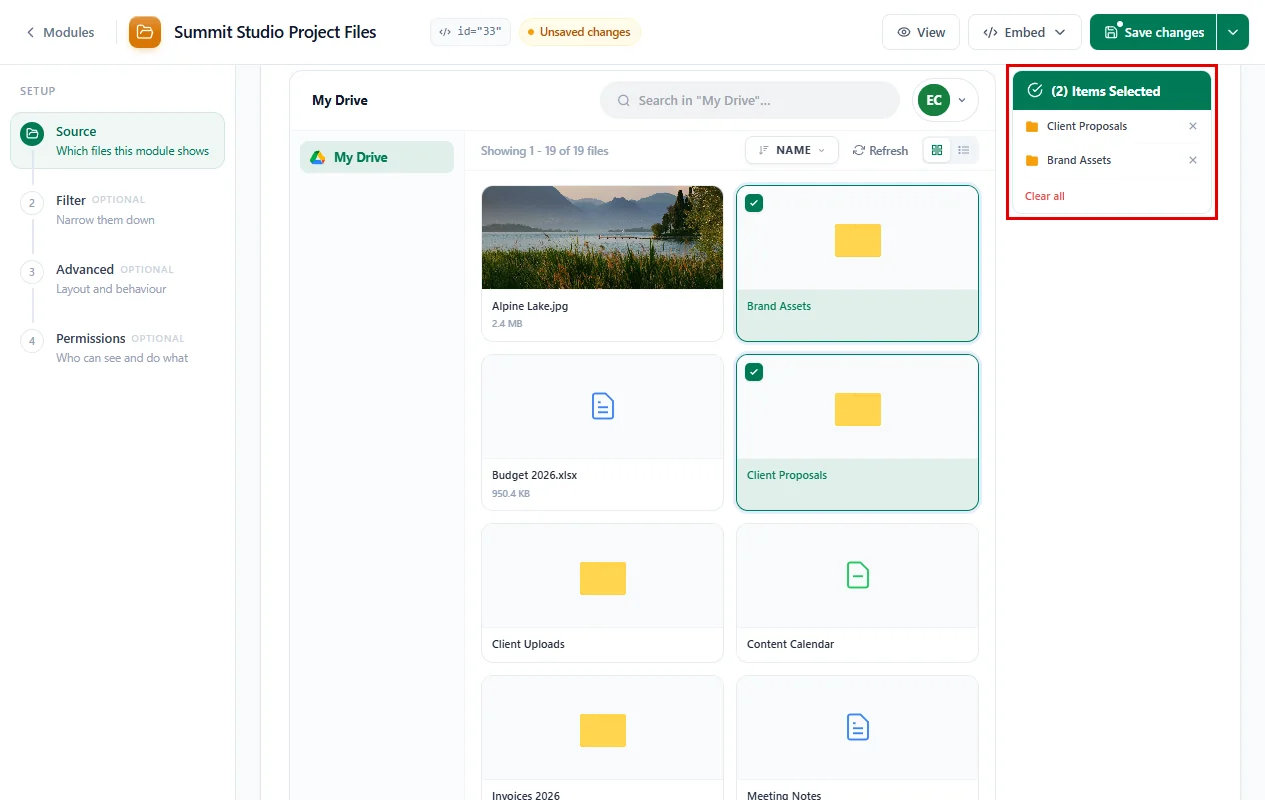
If you tick one folder, visitors land inside it. If you tick several, they start on a Home view that shows all of them, then click into any folder they like.
Above Your Drive you will also find a few switches:
- All Folders & Files: lets visitors move through every folder and file of your linked Google Drive accounts. Leave it off to share only what you ticked.
- Use Private Files: shows each logged-in user their own private folder. This is great for client portals, where every client only sees their own files.
- Use ACF field Files: takes the files from an ACF field on the page where the browser is placed.
- Merge Selected Folder Files: shows the files from all the folders you ticked together in one view. Turn on Include Subfolder Files to add the files inside their subfolders too.
Step 4: Choose Which Files Show (Filter Tab) #
Here, you can decide which files appear in the browser. This tab is optional:
- Click on Filter in the left menu.
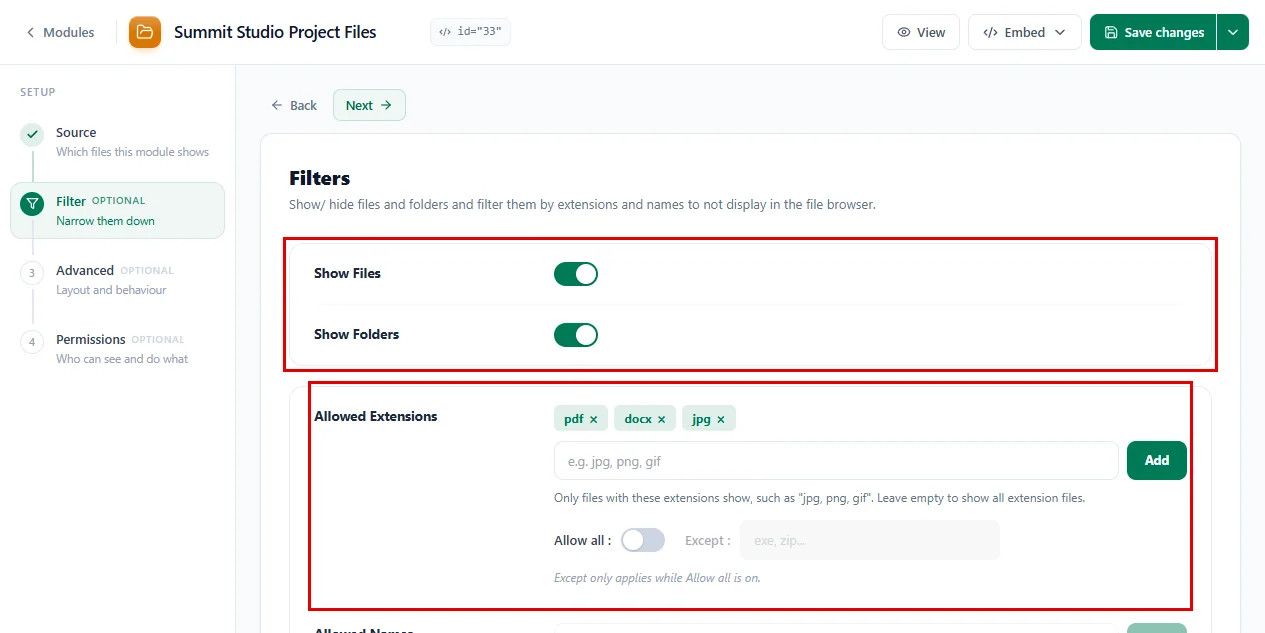
- Show Files: keep this on so your files show.
- Show Folders: keep this on so visitors can see and open your subfolders. Turn it off to show only the files, with no folders in the list.
- Allowed Extensions: to show only some file types, turn off Allow all, type the types you want (like
pdf, docx, jpg) and click Add. To show everything except a few types, leave Allow all on and type those types in Except (likezip). - Allowed Names: works the same way for file and folder names (turn off its Allow all first), and you can use wildcards such as
*proposal*. Use Apply to to choose whether the name filter checks Files, Folders or both. - Maximum Item Count: limits how many files show. Folders are not counted. Leave it empty to show them all.
Step 5: Set the Size and Layout (Advanced Tab) #
In this step, you choose how the browser looks and loads:
- Click on Advanced in the left menu.
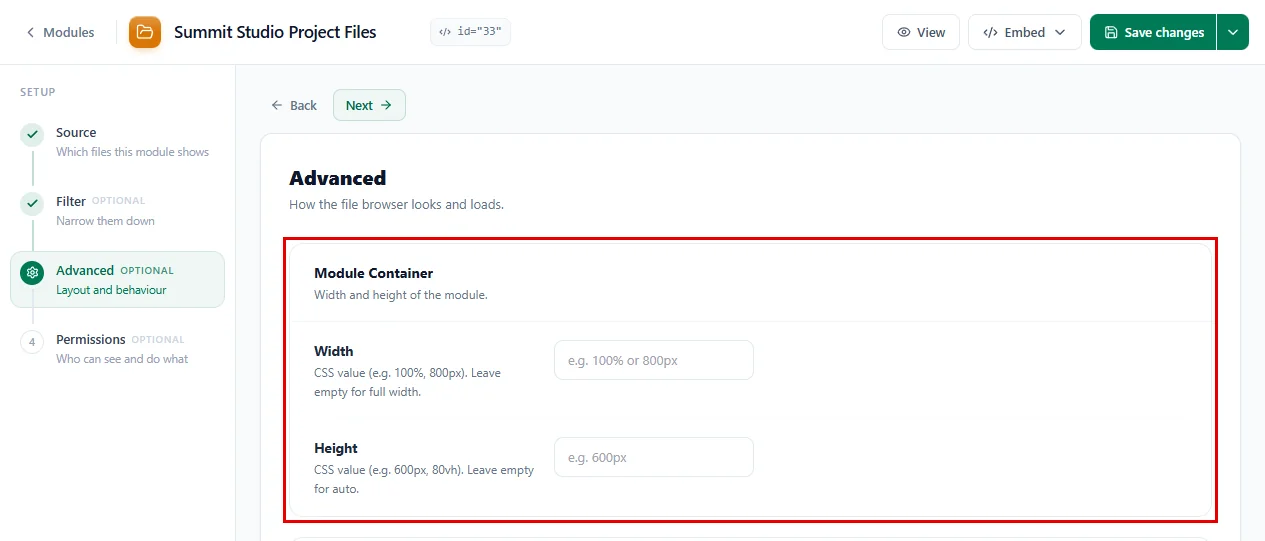
- Under Module Container, set a Width (for example
100%or800px) and a Height (for example600px). Leave them empty and the browser sizes itself.
Below it, you will find two more cards:
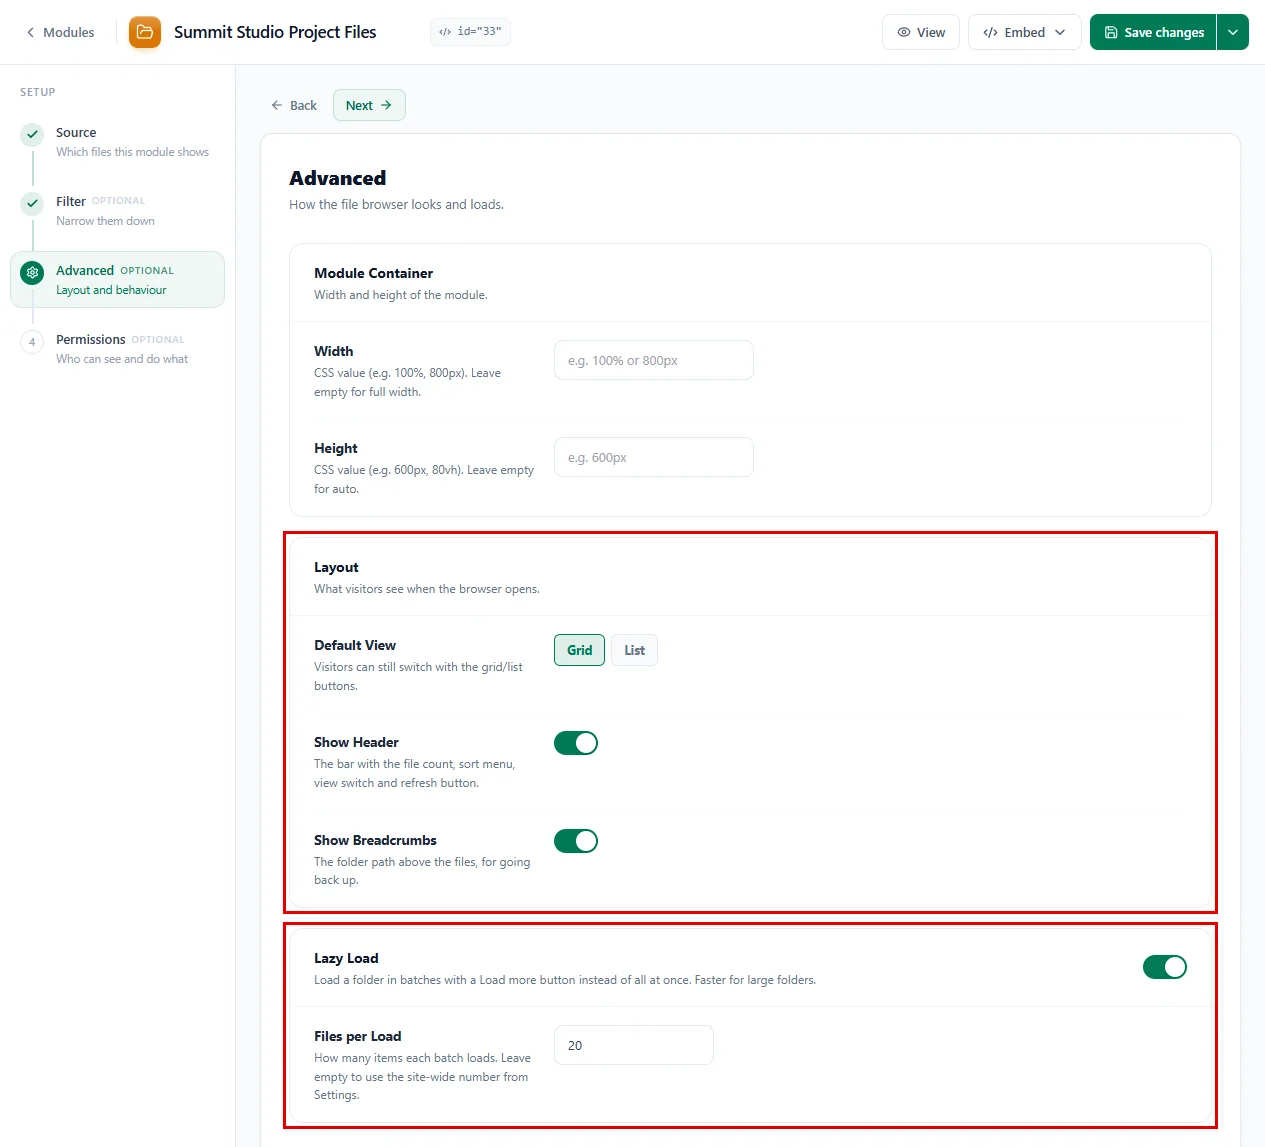
- Default View: pick Grid or List. This is how the files look when the page opens. Visitors can still switch with the grid and list buttons.
- Show Header: keep this on to show the bar with the file count, the sort menu, the view switch and the refresh button. Turn it off for a cleaner, simpler look.
- Show Breadcrumbs: keep this on to show the folder path above the files, so visitors can go back up a level.
- Lazy Load: keep this on for big folders. The browser loads the files in batches with a Load more button instead of all at once, which is faster.
- Files per Load: how many files each batch loads, for example
20. Leave it empty to use the number from your DriveHub settings.
Step 6: Choose What Visitors Can Do (Permissions Tab) #
Here, you decide what visitors can do with your files:
- Click on Permissions in the left menu.
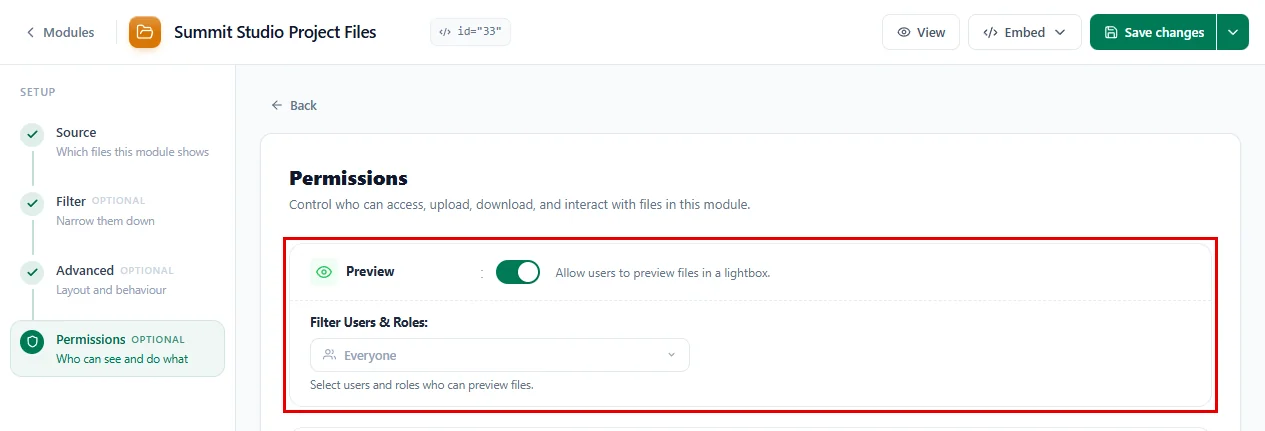
- Keep Preview on so visitors can open a file in a preview window. Use Filter Users & Roles if only some users should be able to preview.
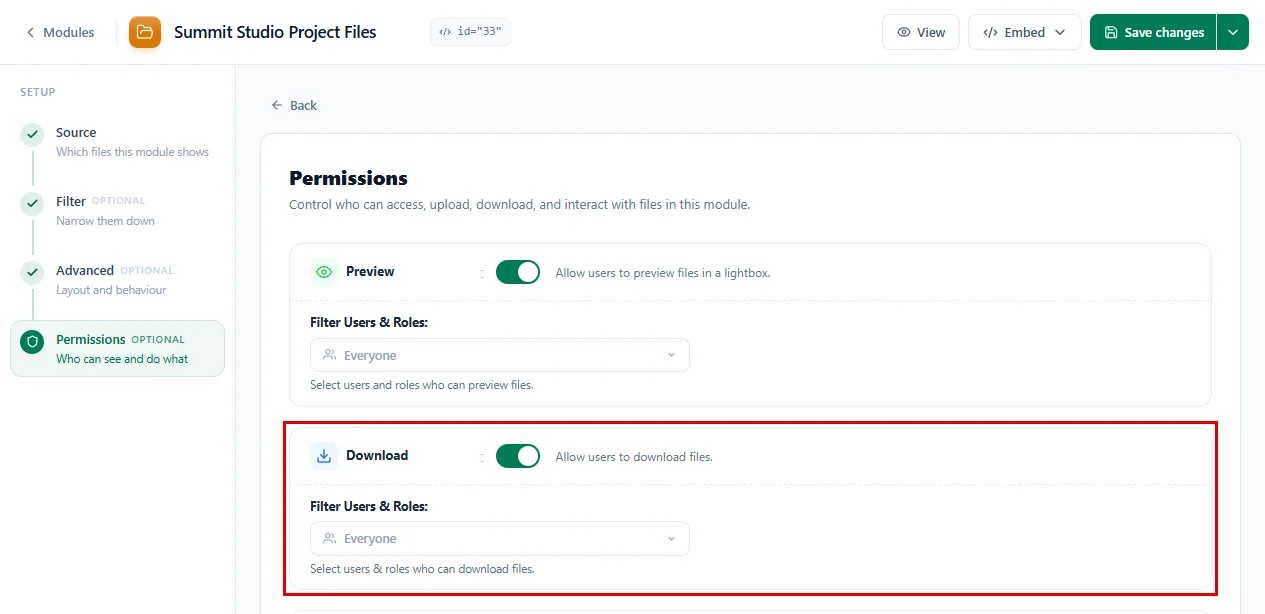
- Keep Download on so visitors can save files to their computer. Use Filter Users & Roles if only some users should be able to download.
Further down, you will find a few more cards:
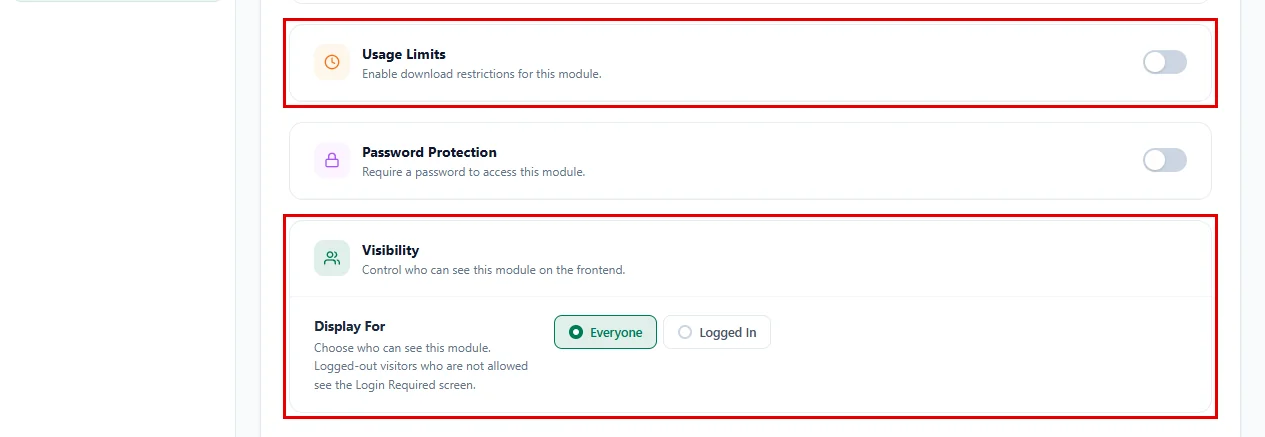
- Usage Limits: caps how many files each user can download per day, week or month. Pick a Restrictions Period, then fill in Download Limits, Download Limits per File, ZIP Download Limits or Bandwidth Limits (in MB). Use Exclude Users & Roles for people who should never be limited, like your team.
- Password Protection: asks visitors for a password before they see the browser.
- Visibility: under Display For, choose Everyone or Logged In. Pick Logged In for a client area, so only people with an account on your site can open it.
Step 7: Save Your Module #
Don’t forget to save your work:
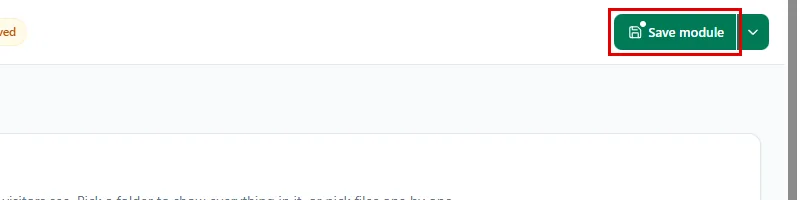
- Click on Save changes at the top right. (On a brand-new module this button says Save module.)
Step 8: Add the File Browser to a Page #
You can copy the shortcode, or let DriveHub add it to a page for you:
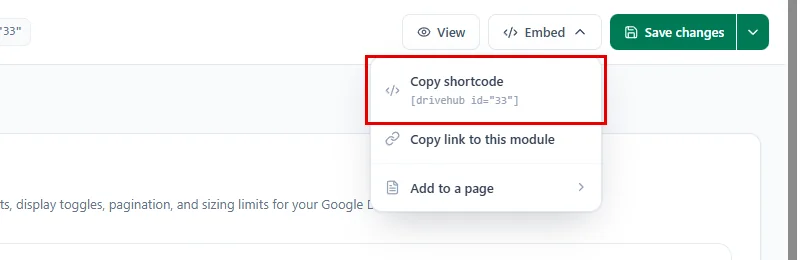
- Click on Embed at the top of the editor.
- To place it yourself, click Copy shortcode and paste it into any page or post. It looks like
[drivehub id="30"]; your number will be different. - Or hover over Add to a page and click on Create a new page, then type a Page Title (for example, Project Files) and click Create Page.
The List guide shows the Add to a page window step by step. You can also add the module with the block editor or the classic editor.
Step 9: See the File Browser on Your Website #
And that’s it. Open your page and you will see your Google Drive folders in a neat browser:
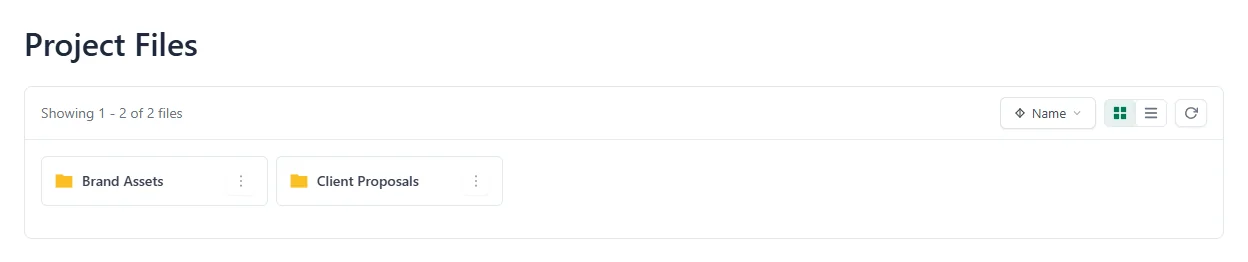
Visitors can:
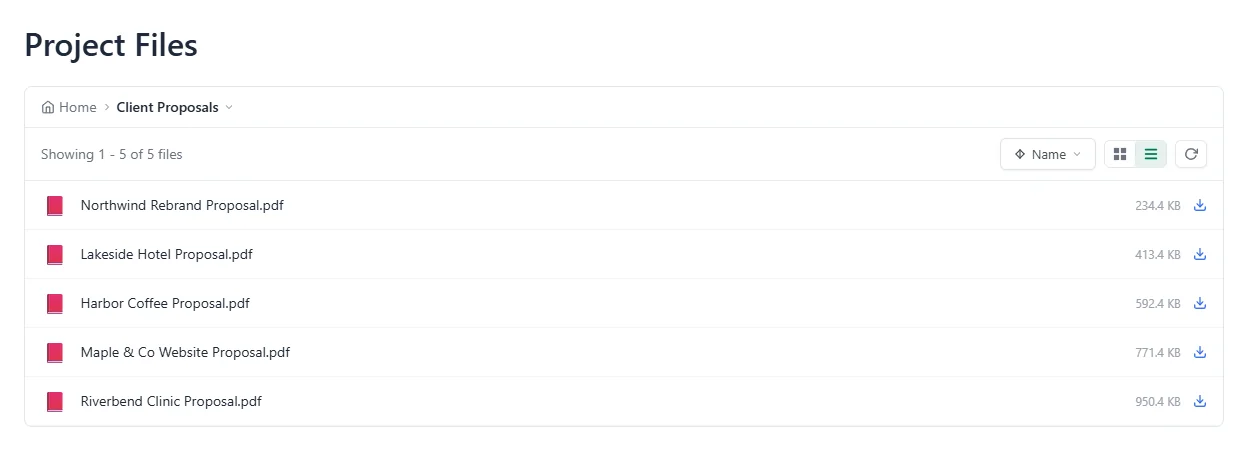
- Click a folder to open it, and use the folder path at the top to go back.
- Switch between Grid view and List view, sort the files and click Refresh to load the latest changes.
- Click a file to preview it, or use the three dots menu on a file and click Download.
- Click Load more at the bottom when a folder has more files than fit on one page.
Benefits of Using DriveHub as a File Browser #
- One place for every file: Share whole folders with all their subfolders in one module.
- Always up to date: Add or replace a file in Google Drive and the browser shows it.
- Save WordPress storage: Your files stay in Google Drive, not in your Media Library.
- You stay in control: Choose who can preview, download or even see the browser.
- Easy for visitors: Grid and list views, sorting and previews work just like Google Drive.
With DriveHub, giving clients and teammates a tidy view of your Google Drive takes just a few minutes.
Related guides:


