- Step 1: Open the File Browser
- Step 2: Browse Your Folders
- Step 3: Switch Between List and Grid View
- Step 4: Search for a File
- Step 5: Create a New Folder
- Step 6: Create a Google Doc, Sheet or Slide
- Step 7: Upload Files
- Step 8: Open the File Menu
- Step 9: Preview a File
- Step 10: Rename a File
- Step 11: Move or Copy a File
- Step 12: Share a File
- Step 13: View File Details
- Step 14: Work With Several Files at Once
- Step 15: Check Your Storage and Refresh
- Benefits of Managing Google Drive Files in WordPress
Do you switch between your WordPress dashboard and Google Drive all day just to upload a photo, rename a file or share a document? You can easily do all of this without leaving WordPress by using the DriveHub File Browser.
This is super useful because your Google Drive files sit right next to the rest of your site work. You can browse folders, upload new files, create Google Docs, and share links in a few clicks.
Here is an easy, step-by-step guide to help you get around the File Browser!
Step 1: Open the File Browser #
Once your Google account is connected, the File Browser is ready to use:
- Go to DriveHub > File Browser from your WP-Admin.
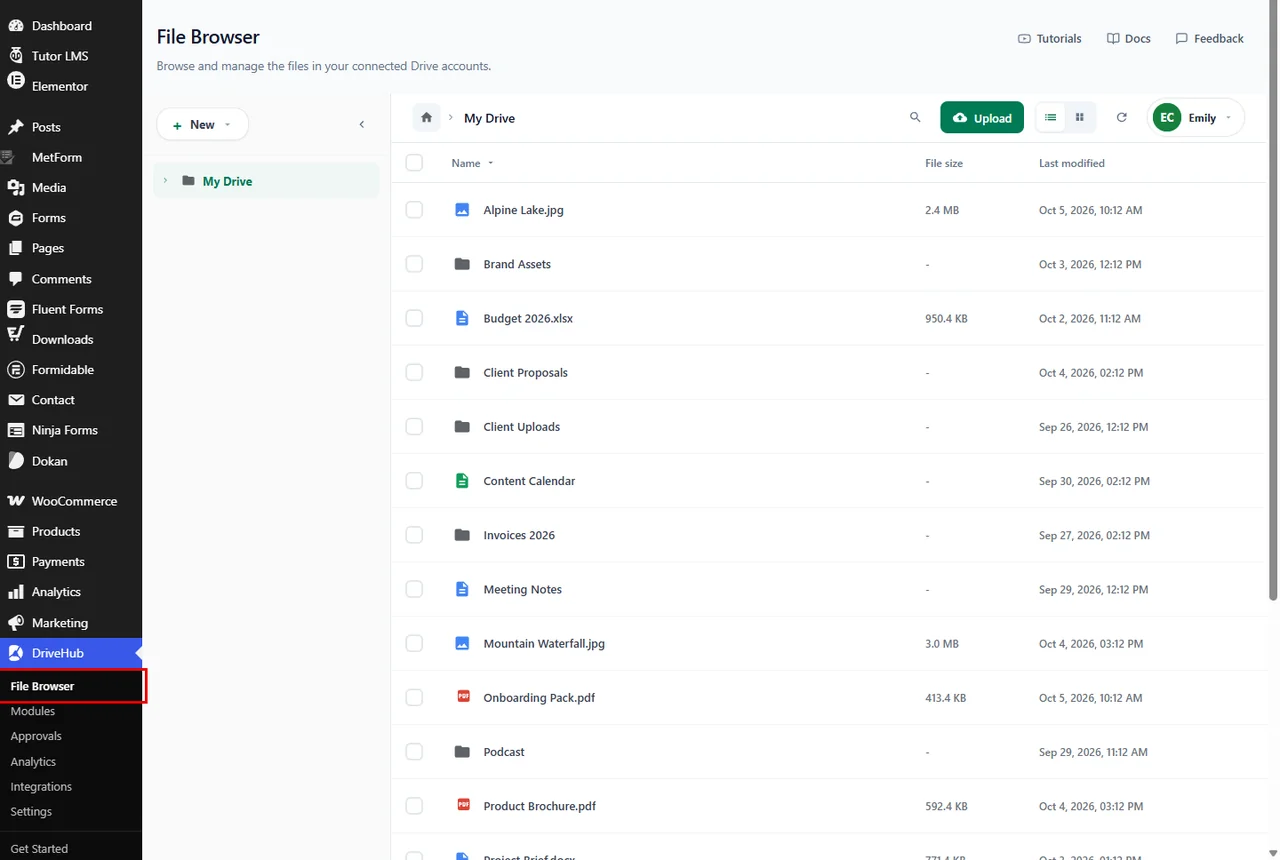
You will see your My Drive folder with the folder tree on the left and your files on the right. Next time, the File Browser opens right where you left off, in the last folder you had open.
Note: If you have not connected a Google account yet, read our step by step setup guide first.
Step 2: Browse Your Folders #
There are two ways to move between folders:
- Click a folder in the file list to open it.
- Or click the arrow next to My Drive in the left sidebar to show your folders, then click the folder you want.
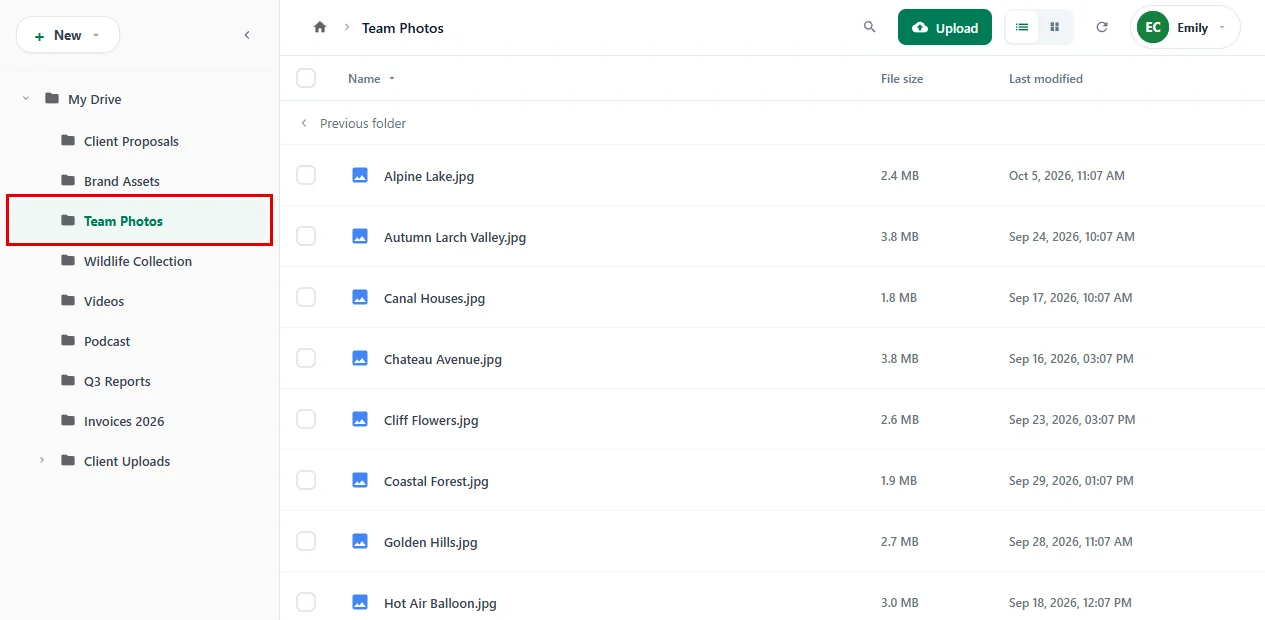
The path at the top shows where you are. Once you are inside a folder, the home icon stands for My Drive, so the path reads like home > Team Photos. Click the home icon to go back to the top, click any folder name in the path to jump back to it, or click Previous folder at the top of the list to go one level up.
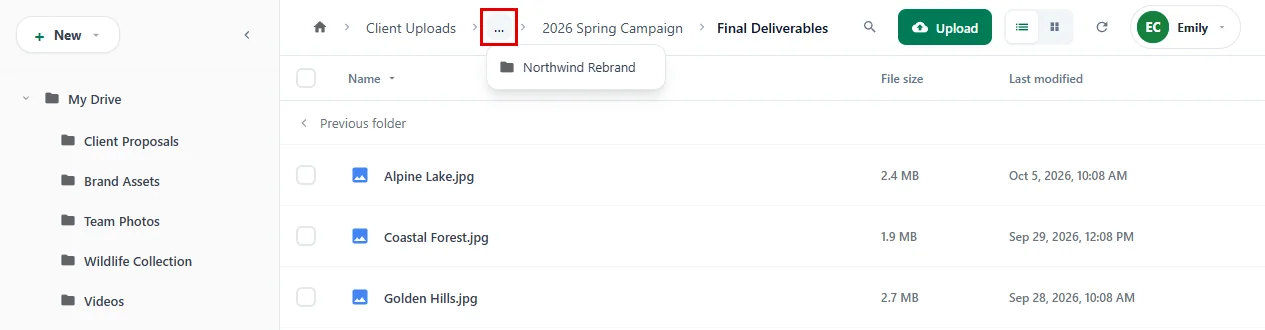
Tip: Deep inside your folders, the path keeps the first folder and the last two, and folds the ones in between into a … button. Click … to see the hidden folders and jump straight to one of them.
Step 3: Switch Between List and Grid View #
Photos are easier to find when you can see them:
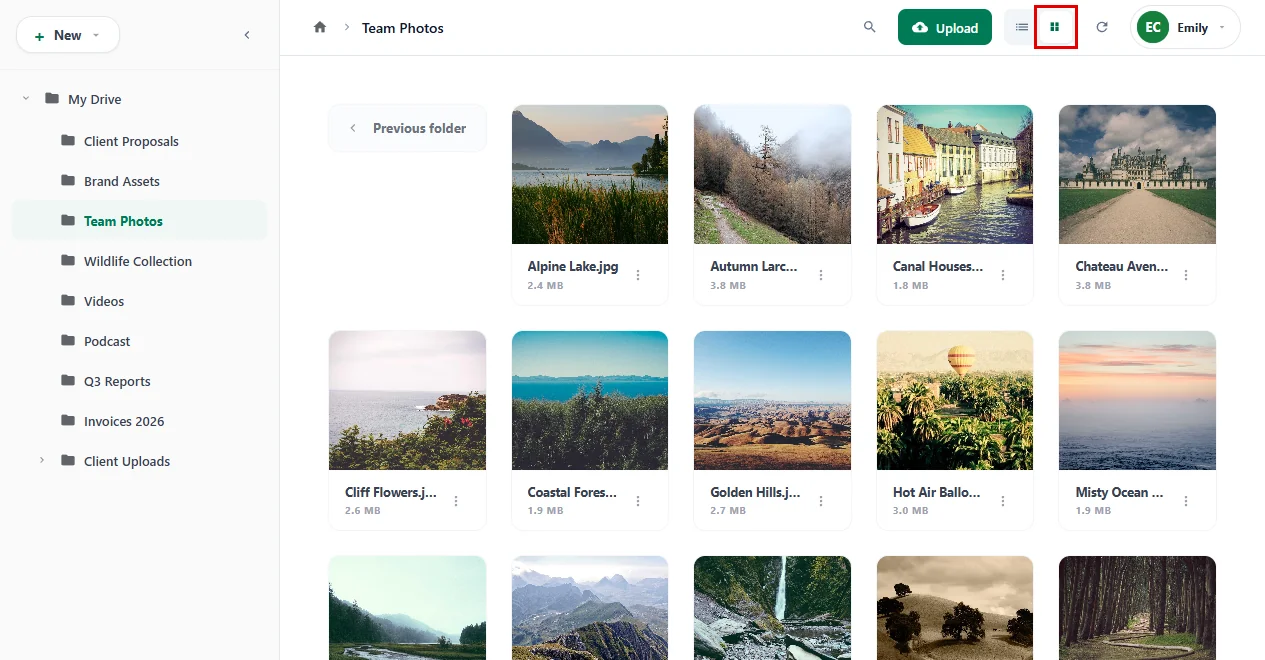
- Click the Grid view button at the top right to show your files as thumbnails.
- Click the List view button to go back to the list with Name, File size and Last modified columns.
Tip: In list view, click a column name such as Name to sort your files by it.
Step 4: Search for a File #
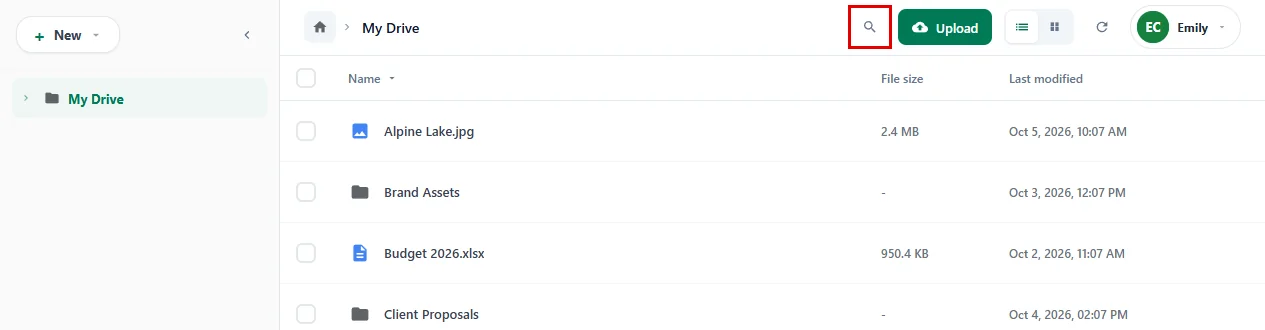
- Click the magnifier button at the top, next to Upload. The search box opens (it says Search in followed by the folder name).
- Type part of the file name.
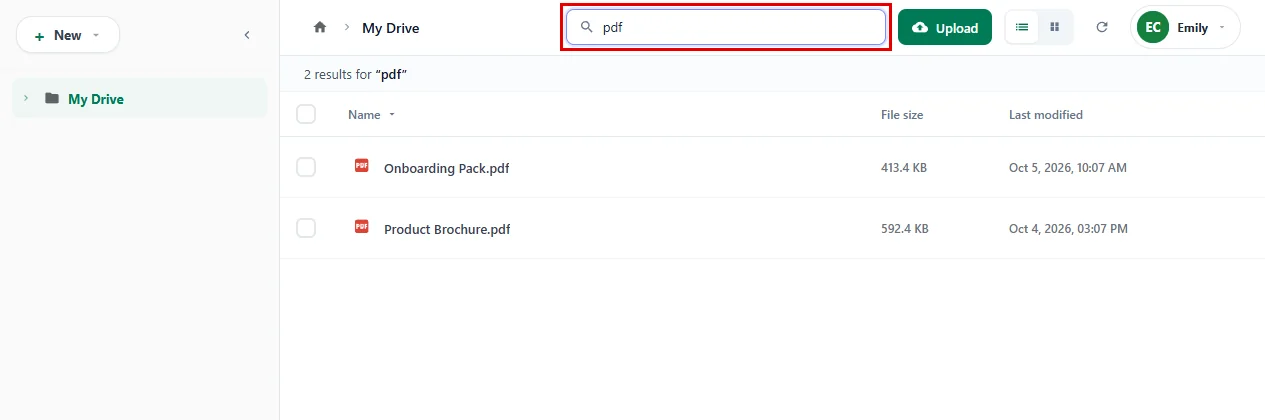
The list shows only the matching files, and the number of results appears right under the toolbar. The search looks inside the folder you have open, so open the right folder first.
Note: On a very wide screen, the search box is always open at the top, so you can click straight into it.
Step 5: Create a New Folder #
Keep your files tidy by adding folders right from WordPress:
- Click the New button at the top of the left sidebar.
- Click New Folder.
- Type a name for the folder, for example
Client Moodboards. - Click Create.
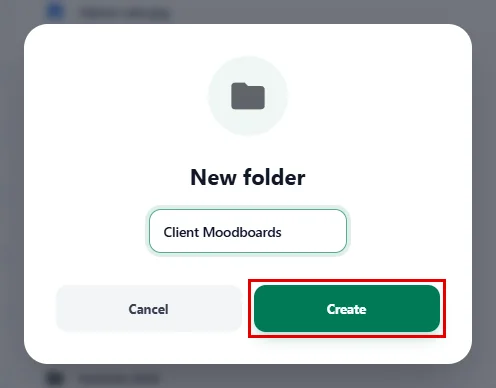
You will see the message Folder created successfully! and the new folder appears in the list.
Step 6: Create a Google Doc, Sheet or Slide #
You can also start a brand new Google file without opening Google Drive:
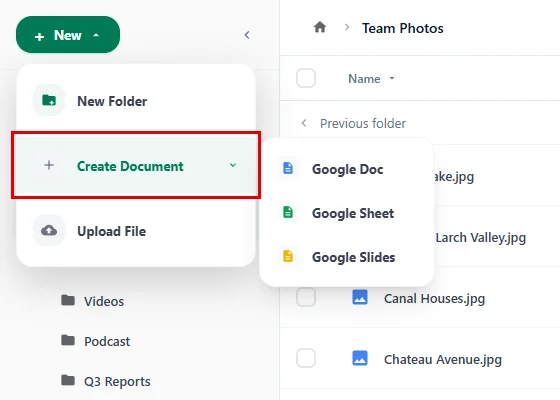
- Click New, then Create Document.
- Pick Google Doc, Google Sheet or Google Slides.
- Type a name for the file, for example
Project Kickoff Notes. - Click Create.
The New Google Doc window opens (or New Google Sheet / New Google Slides, depending on your choice).
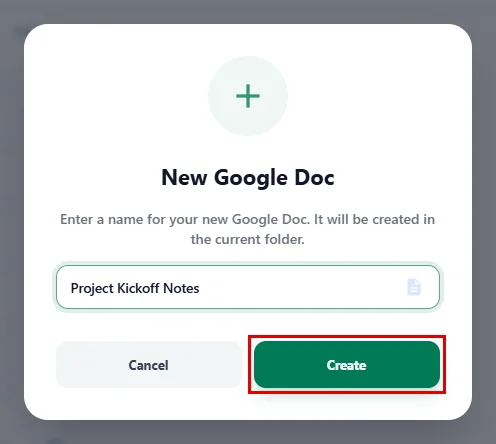
DriveHub creates the file in the folder you have open, and you will see the message Project Kickoff Notes created! (with your own file name). The new file opens in Google Docs, Sheets or Slides like any other Drive file when you choose Open in Google Drive from its menu.
Step 7: Upload Files #
- Click the green Upload button at the top (or click New > Upload File).
- Drag and drop your files into the window, or click Browse Files to pick files from your computer.
- To upload a whole folder with everything inside it, click Browse Folder instead.
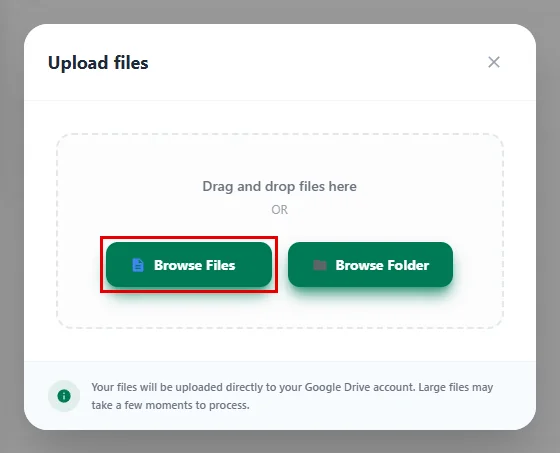
Your files go straight to your Google Drive, into the folder you have open. Large files may take a few moments to finish.
Step 8: Open the File Menu #
Every file and folder has its own menu with all the actions you need:
- Right-click a file in the list (or click the ⋮ button at the end of its row).
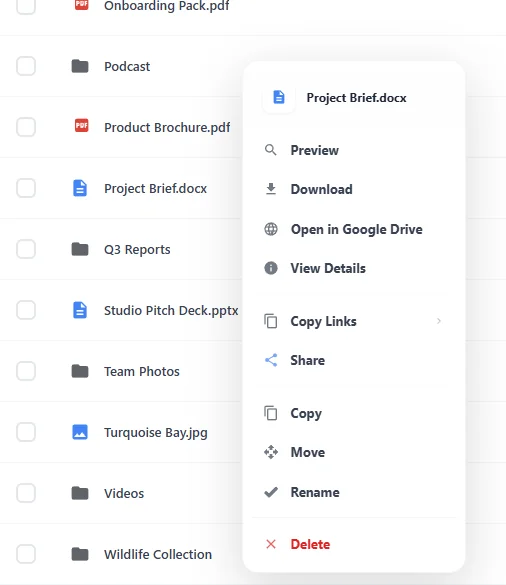
From this menu you can:
- Preview the file.
- Download it to your computer.
- Open in Google Drive in a new browser tab.
- View Details about the file.
- Copy Links to get a direct download or preview link. See How to Share Direct Preview and Download Links.
- Share the file with people.
- Copy or Move it to another folder.
- Rename it.
- Delete it.
Step 9: Preview a File #
- Click any file in the list, or choose Preview from its menu.

The preview opens right on top of the File Browser. Use the buttons at the top right to open the file in Google Drive, download it, or close the preview. Use the arrow on the side to move to the next file.
Step 10: Rename a File #
- Right-click the file and click Rename.
- Change the name in the box.
- Click OK.
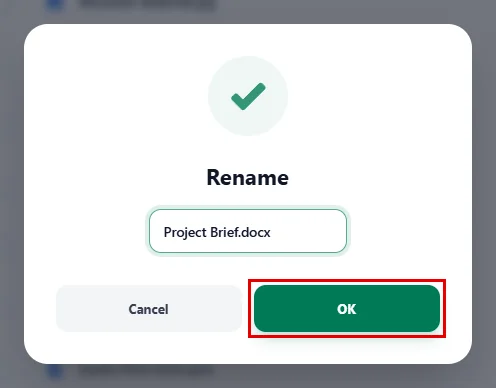
You will see the message File renamed successfully!
Step 11: Move or Copy a File #
- Right-click the file and click Move (or Copy to make a copy).
- In the Move to Folder window, tick the folder you want, for example Client Proposals.
- Click Confirm Selection.
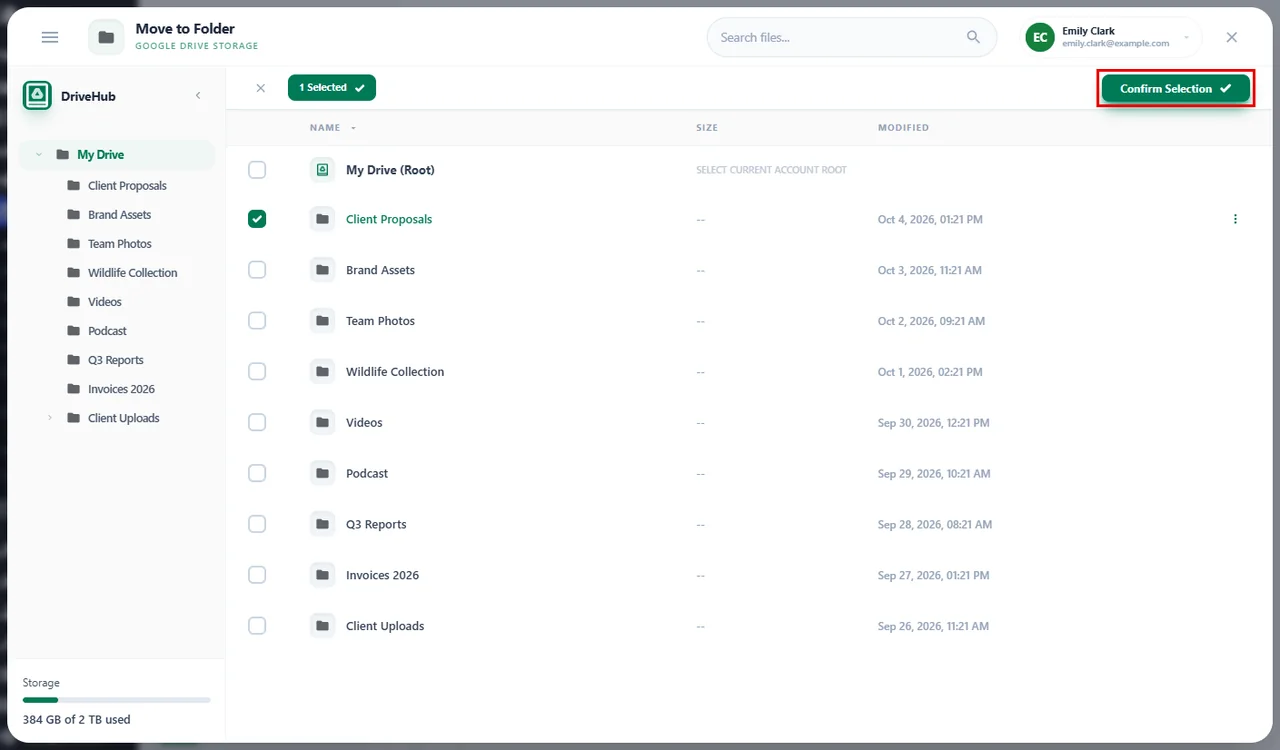
You will see the message File moved successfully! (or File copied successfully! for a copy).
Step 12: Share a File #
You can share a file with anyone, without opening Google Drive:
- Right-click the file and click Share.
- On the Link Sharing tab, choose:
- Link Type: Preview Link (opens in the Google Drive viewer) or Download Link (downloads straight away).
- Who can access: Anyone with link or Domain restricted (only people in your organization).
- Permission Level: Reader (can view only) or Writer (can edit).
- Click Create Permission, then click Copy next to the Shareable Link.
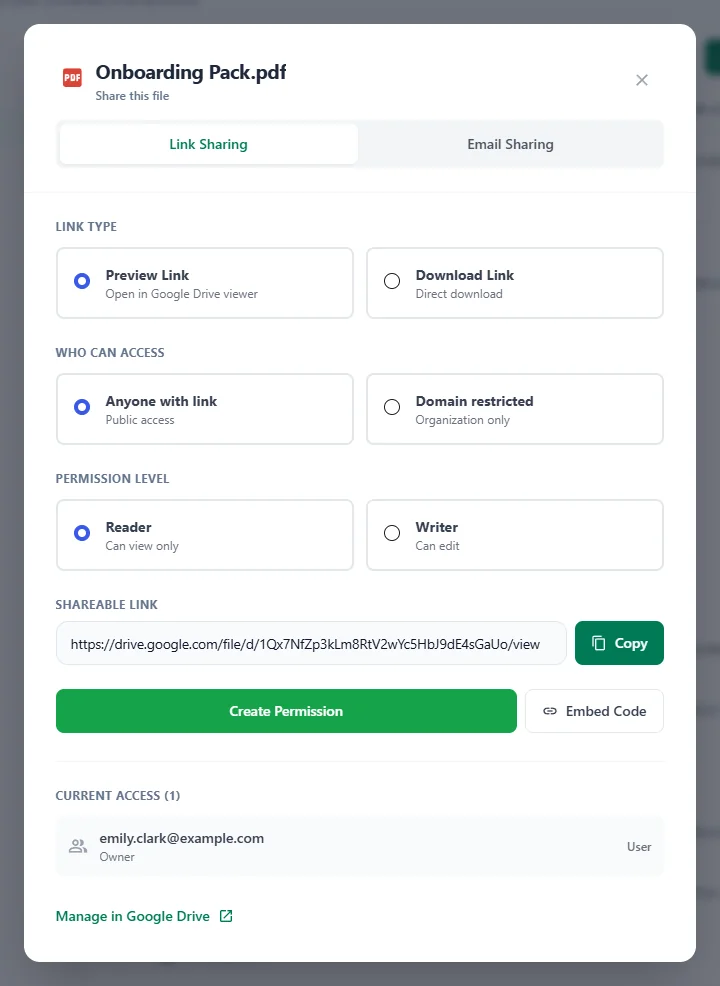
You will see Permission created successfully, and the Current Access list at the bottom shows who can open the file. To invite one person instead, open the Email Sharing tab, enter their Email Address, pick a Permission Level and click Send Invitation.
Step 13: View File Details #
- Right-click the file and click View Details.
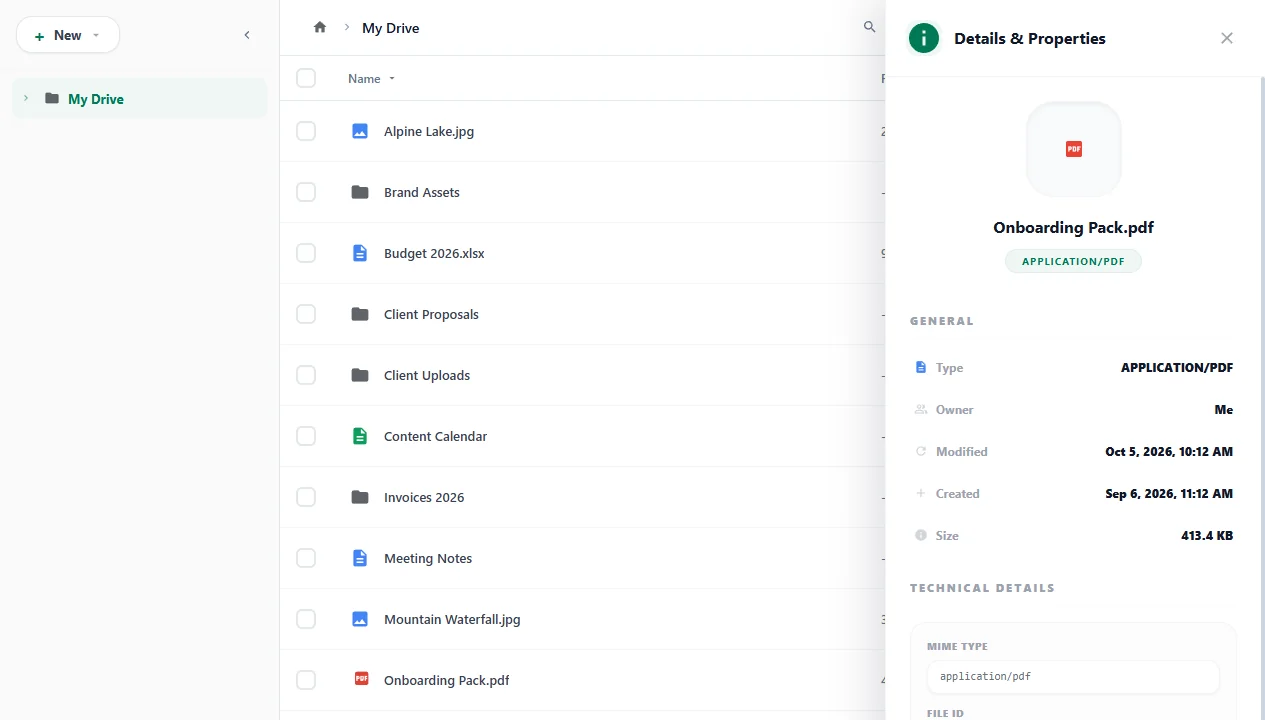
The Details & Properties panel slides in on the right and shows the file type, owner, modified and created dates, size, and the File ID. You can also add a Description to the file here. Click the × to close the panel.
Step 14: Work With Several Files at Once #
- Tick the box at the start of each file you want.
- Use the buttons that appear in the toolbar: Preview, Download, Link, Details or Delete.
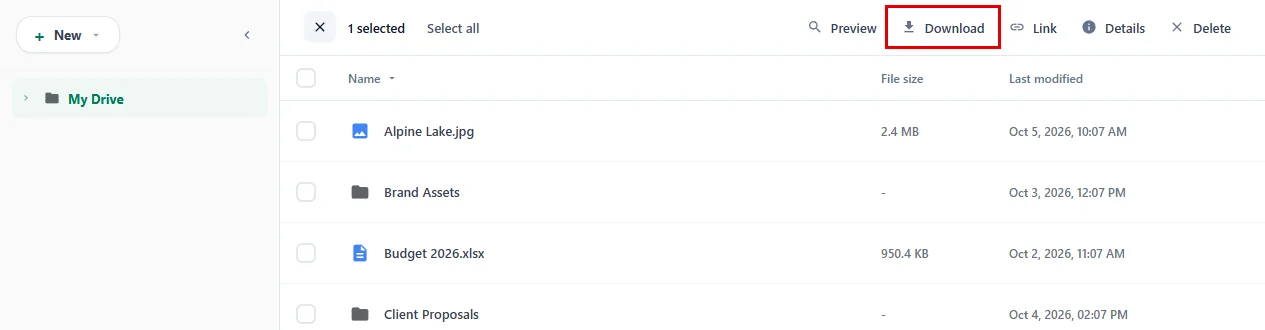
Preview, Link and Details show up when exactly one file is ticked. Click Select all to tick every file in the folder, or the × to clear your selection.
Important: Delete asks you to confirm first. Deleted files are removed from your Google Drive for good and do not go to the Google Drive trash, so double-check your selection.
Step 15: Check Your Storage and Refresh #
- Look at the bottom of the left sidebar to see how much of your Google Drive Storage is used.
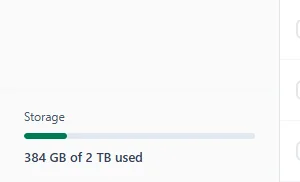
This is the storage of the Google account you are browsing, so it changes when you switch accounts. When your Drive gets close to full, uploads can fail, so it is worth a quick look before uploading large videos.
- If you changed something directly in Google Drive, click the Refresh button (the circular arrow next to the view buttons) to load the latest files.
- If you have more than one Google account connected, click your name at the top right to switch to another Drive. See How to Add, Switch and Remove Google Accounts.
And that’s it! Now you can manage all your Google Drive files right from your WordPress dashboard.
Benefits of Managing Google Drive Files in WordPress #
- One place to work: Upload, organize and share files without leaving your dashboard.
- Faster sharing: Create share permissions and copy links in a few clicks.
- Native Google files: Start new Google Docs, Sheets and Slides right where you need them.
- Tidy Drive: Create folders, move, copy and rename files while you build your site.
- Always in sync: Everything you do here happens in your real Google Drive.
With DriveHub, your Google Drive feels like part of WordPress.


