- Before you begin
- Step 1: Open the Connect Screen
- Step 2: Choose Selected folders (Access)
- Step 3: Sign In to Google (Connect)
- Step 4: Choose Your Google Account
- Step 5: Allow Access
- Step 6: Check That Your Account Is Connected
- Step 7: Pick Your Folders (Folders)
- Step 8: Check What You Picked
- Step 9: You're All Set (Done)
- Add More Folders Later (Settings)
- Add or Remove Folders from the File Browser
- Troubleshooting
- "The permission request was cancelled. Try again and choose Allow on the Google screen."
- "Your Google Workspace administrator has blocked this app."
- The Google window does not open
- "Google did not return a usable token for this account. Reconnect the account and try again."
- I picked a folder, but my files do not appear
- Frequently asked questions
- You're ready to use DriveHub
Do you want to show a few Google Drive folders on your website, without giving your site access to everything else in your Drive? You can easily do this with DriveHub.
DriveHub can connect Google Drive in two ways: Whole Drive and Selected folders. This guide covers Selected folders. It connects in one click through a Google app we run, so there is no Google Cloud project to create and no keys to paste. You hand DriveHub only the folders you pick, and the rest of your Drive stays private, including from us.
Here is an easy, step-by-step guide to help you set it all up!
By the end of this guide, you will have:
- Your Google account connected to DriveHub with Selected folders
- One or more folders picked with the Google folder picker
- A clear idea of which files your website can and cannot show
- Folders you can add or remove later from Settings or the File Browser
Estimated setup time: 2 minutes. There is nothing to set up in Google Cloud Console and no billing to turn on.
Before you begin #
Make sure you have:
- An administrator account on your WordPress site
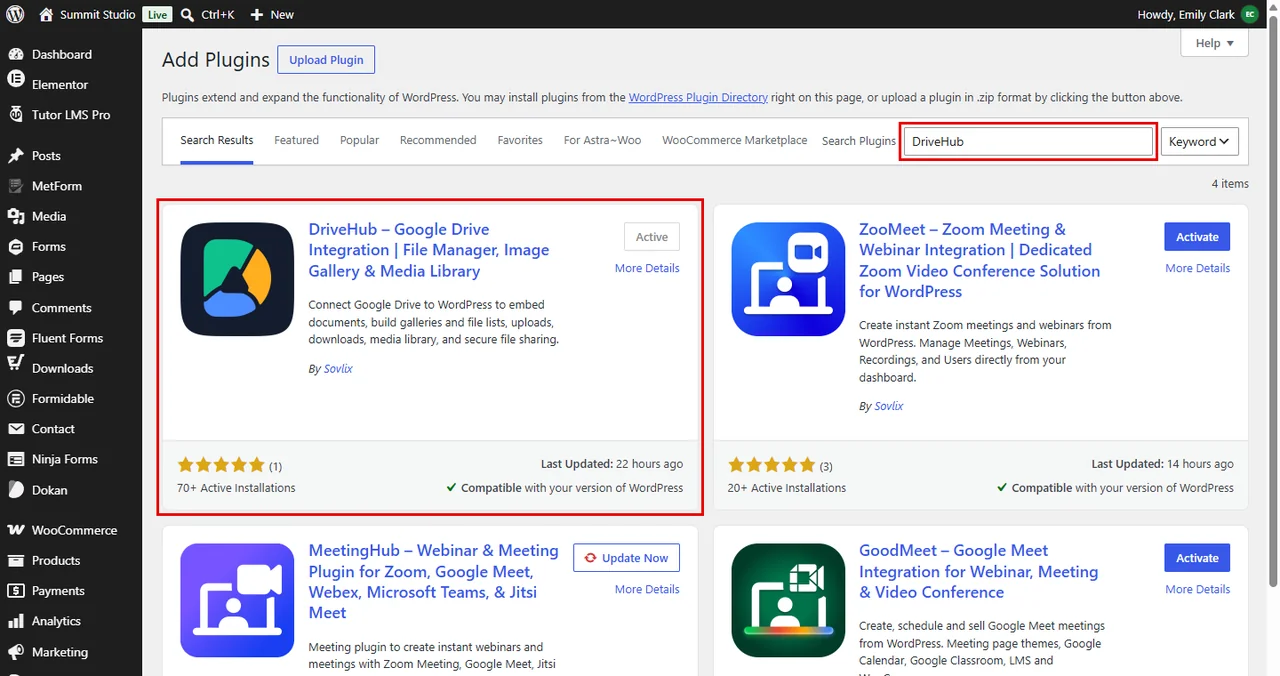
- DriveHub installed and activated (go to Plugins > Add New Plugin, search for DriveHub, click Install Now and then Activate)
- The Google account your files live in, and the folders you want to use already created in Google Drive
Whole Drive or Selected folders? #
Both modes use the same Google sign-in. The difference is how much of your Drive DriveHub can open:
| Whole Drive (Recommended) | Selected folders (Limited) | |
|---|---|---|
| What DriveHub can open | All your Drive files | Only the folders you pick |
| Files already inside a folder | Shown | Stay hidden, even after you pick the folder |
| Files added to a picked folder later | Shown | Shown, whether you add them from WordPress or from Google Drive |
| Setup | About 5 minutes: you create a free Google app and paste its keys | Instant, nothing to set up |
The important line is the second one. With Selected folders, a folder is connected from the moment you pick it. Anything added to it afterwards shows up in DriveHub; whatever was already inside stays private in your Drive and never appears on your site.
So pick Selected folders when you start fresh folders for your website, such as a folder where visitors’ uploads land, or one you fill with new photos for a gallery. If you want to show files you already keep in Drive, use Whole Drive instead and follow our step by step setup guide.
Let’s get started.
Step 1: Open the Connect Screen #
When no Google account is connected yet, DriveHub shows the connect screen first:
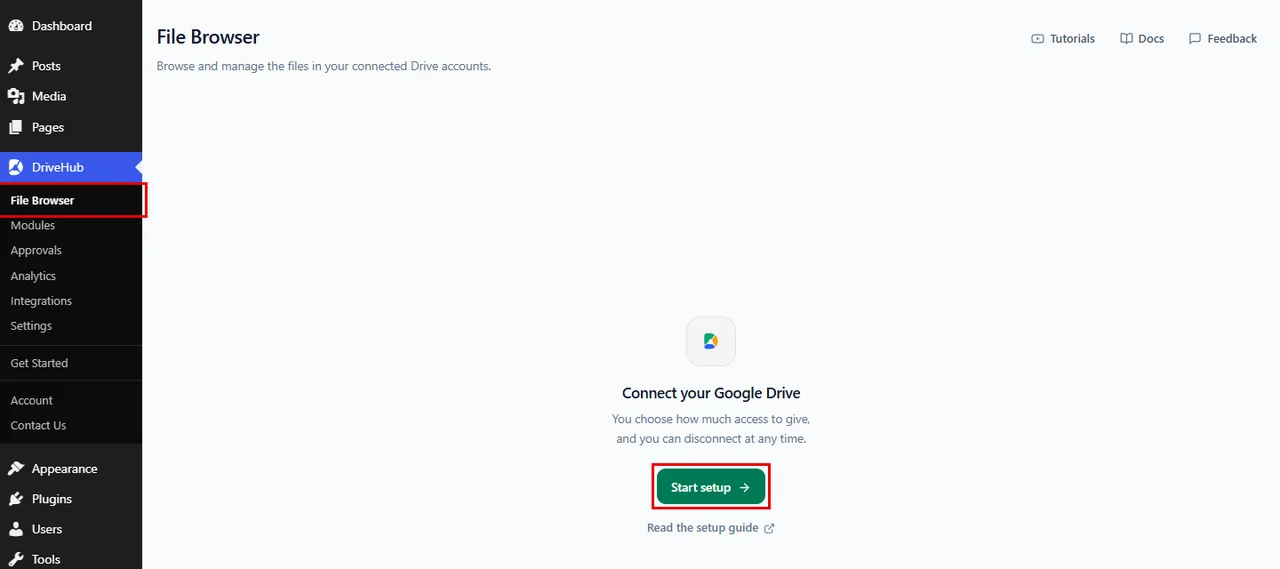
- Go to DriveHub > File Browser from your WP-Admin.
- You will see Connect your Google Drive. Click on Start setup.
Note: Already connected an account? Go to DriveHub > Settings > Google Drive and click Change in the How this site connects card. It opens the same setup.
Step 2: Choose Selected folders (Access) #
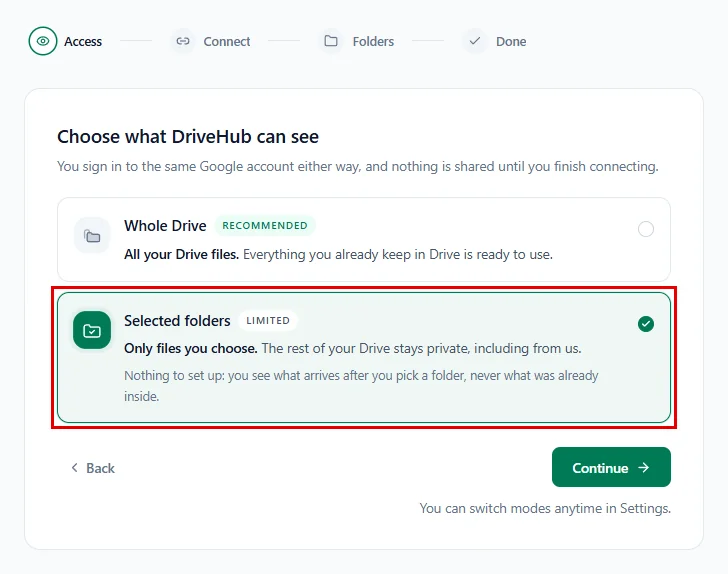
The first step, Access, asks you to Choose what DriveHub can see:
- Click on the Selected folders card. It carries a Limited tag and reads Only files you choose.
- Read the line under it: Nothing to set up: you see what arrives after you pick a folder, never what was already inside.
- Click on Continue.
You can switch modes anytime in Settings, so this choice is never final.
Step 3: Sign In to Google (Connect) #
Now you connect your Google account:
- Click on Sign in with Google.
- Click What happens next? if you want to see the three things that happen: a Google window opens, you choose the account and press Allow, and the window closes and brings you back here.
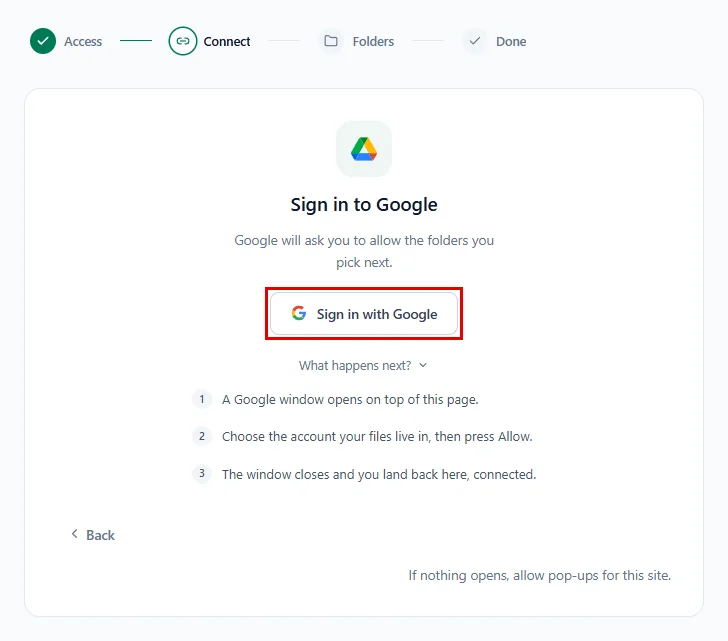
Tip: If nothing opens, allow pop-ups for your website in your browser and click Sign in with Google again.
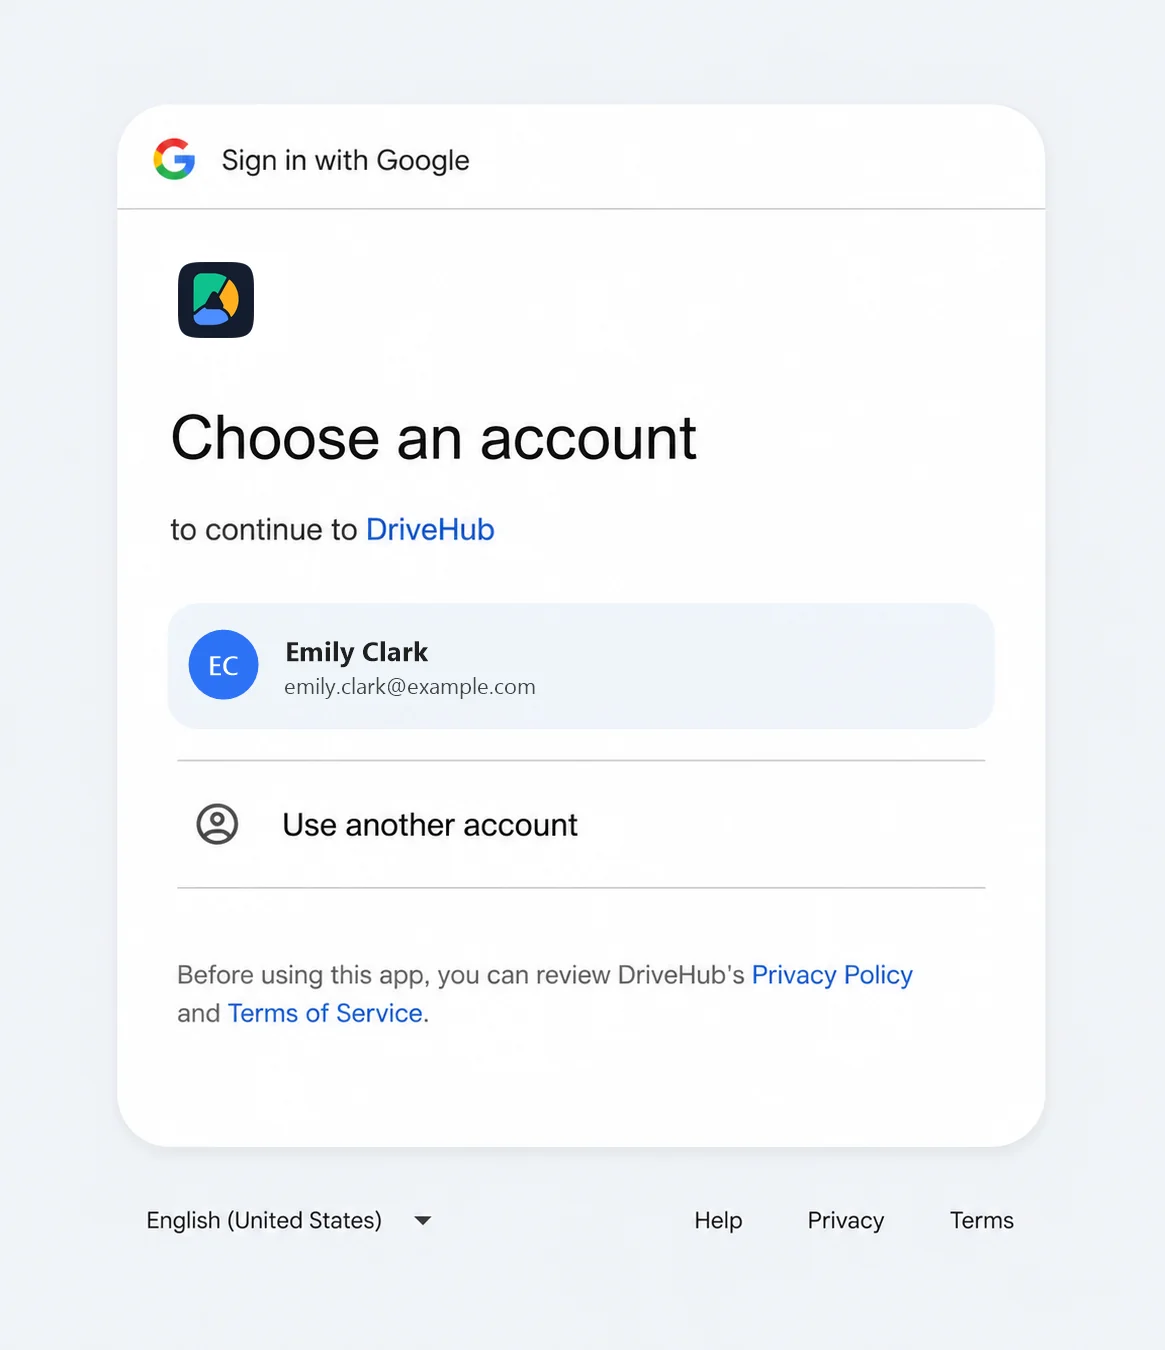
Step 4: Choose Your Google Account #
A Google window opens on top of the page:
- Select the Google account your files live in.
- If it is not in the list, click Use another account and sign in.
Step 5: Allow Access #
Google shows what DriveHub is asking for:
- Check that the account at the top is the right one.
- Click on Continue (or Allow, depending on your Google account) to give DriveHub access.
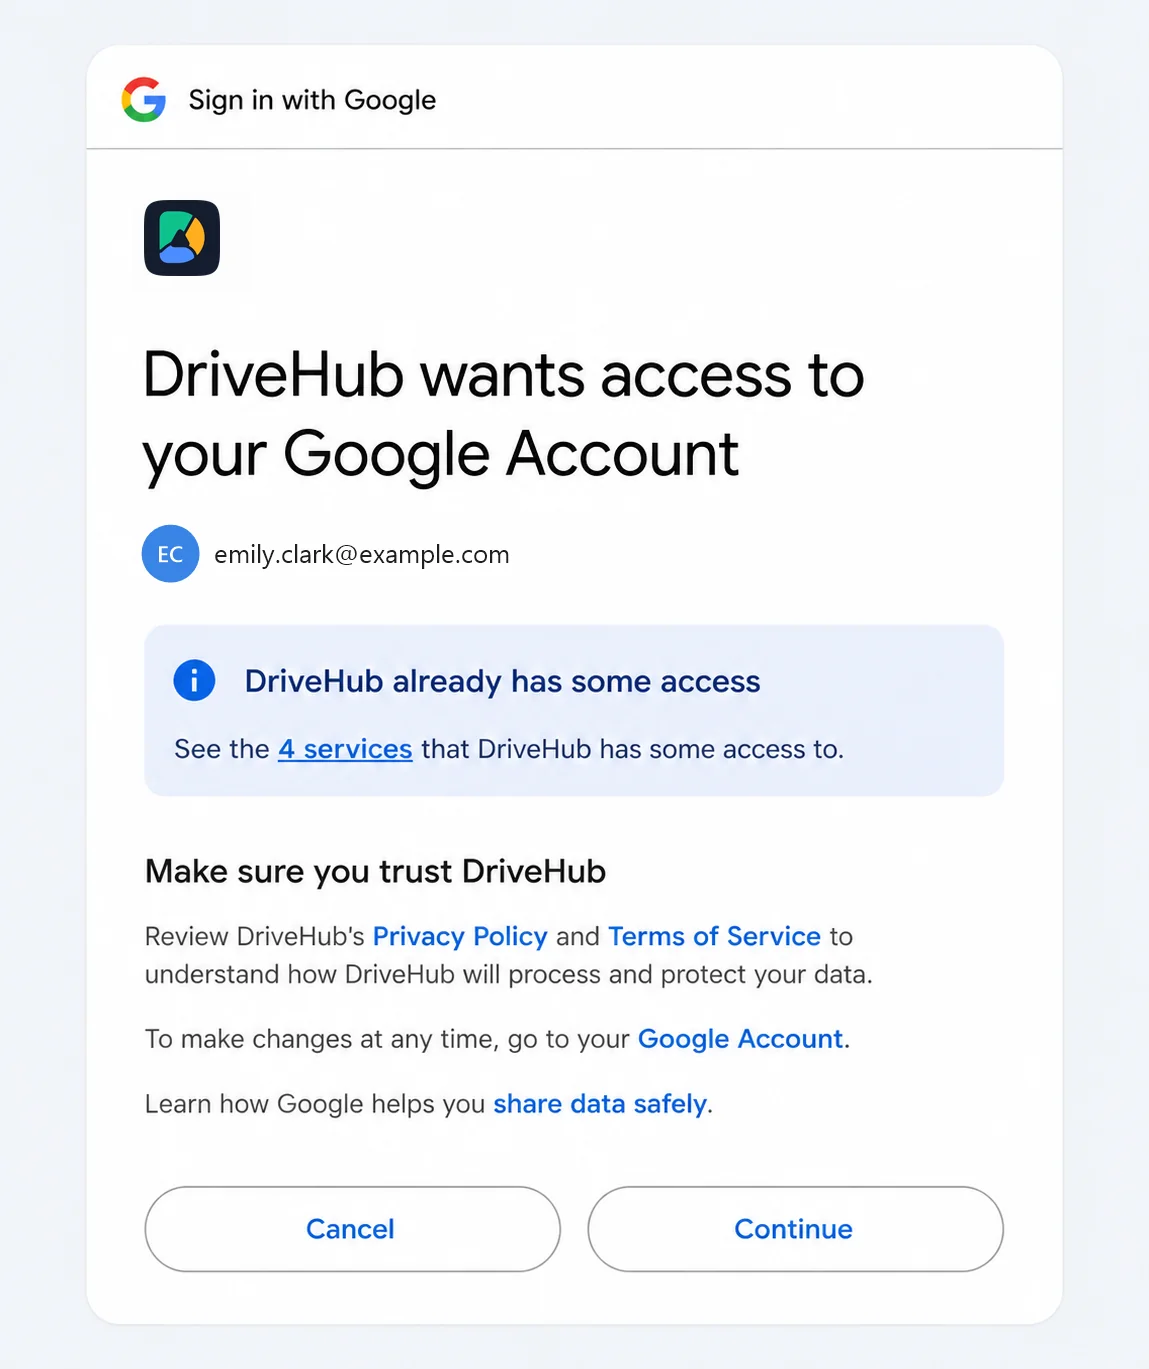
With Selected folders, this permission only covers the folders you hand to DriveHub in the next step. It does not open the rest of your Drive.
Step 6: Check That Your Account Is Connected #
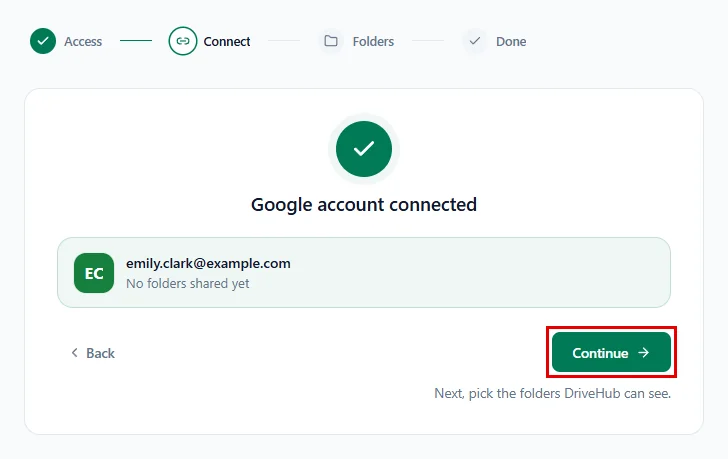
The Google window closes by itself and you land back in DriveHub:
- You will see Google account connected with your email address.
- Under the email it says No folders shared yet. That is expected, because you have not picked any folders.
- Click on Continue.
Step 7: Pick Your Folders (Folders) #
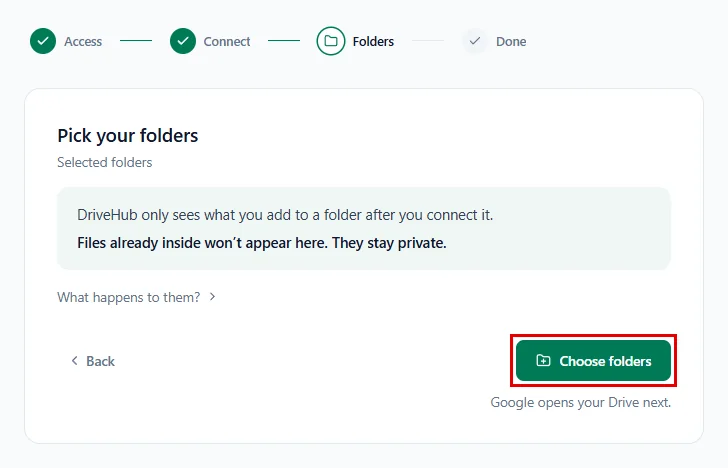
This is where you hand folders to DriveHub. The Pick your folders step reminds you that Files already inside won’t appear here. They stay private. Click What happens to them? if you want the short answer: they stay in Google Drive, untouched, and DriveHub is never given access to them.
- Click on Choose folders. Google opens your Drive in a small picker window.
In the Google picker:
- The picker is Google’s own window. It shows only folders, never single files, so your Drive looks like a list of folder tiles.
- Click on each folder you want to use. You can pick more than one, for example Team Photos and Client Uploads. A picked folder gets a blue highlight and a check mark.
- Need a folder inside another one? Double-click the parent folder to open it, then pick the folder inside.
- Click on the blue Select button at the bottom. To close the picker without picking anything, click Cancel.
Step 8: Check What You Picked #
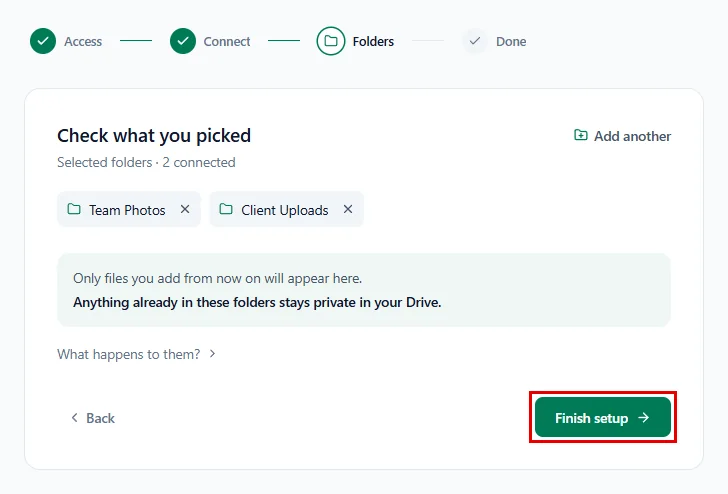
DriveHub shows the folders you picked and a short message, Folder connected. New files in it will appear here. (or 2 folders connected. New files in them will appear here. when you pick more than one):
- Look at the Check what you picked list. Each folder is a small chip, for example Team Photos and Client Uploads.
- Picked the wrong one? Click the × on its chip to remove it. You will see Folder removed. The files stay in Google Drive.
- Need one more? Click on Add another at the top right.
- When the list looks right, click on Finish setup.
Step 9: You’re All Set (Done) #
The last step confirms that everything is ready:
- You will see You’re all set.
- Click on Add files to a page to build your first module, or Or browse your files to open the File Browser.
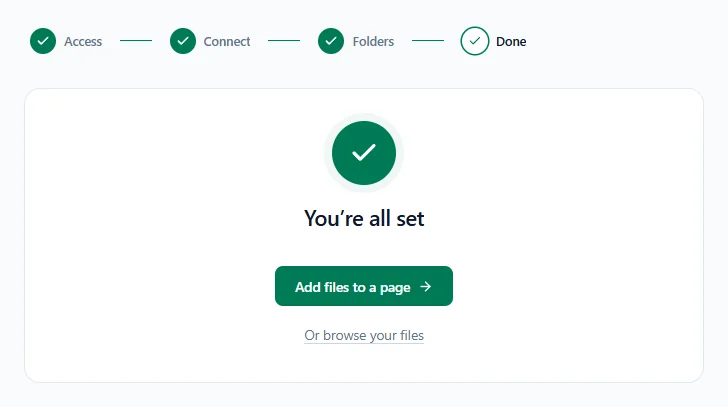
And that’s it! Your Google account is connected, and DriveHub can use the folders you picked. When you build a module, you choose its files from these folders, so your website can only ever show what you put in them.
Add More Folders Later (Settings) #
You can hand DriveHub more folders at any time, without going through the setup again:
- Go to DriveHub > Settings from your WP-Admin.
- Click on Google Drive under Setup in the settings menu.
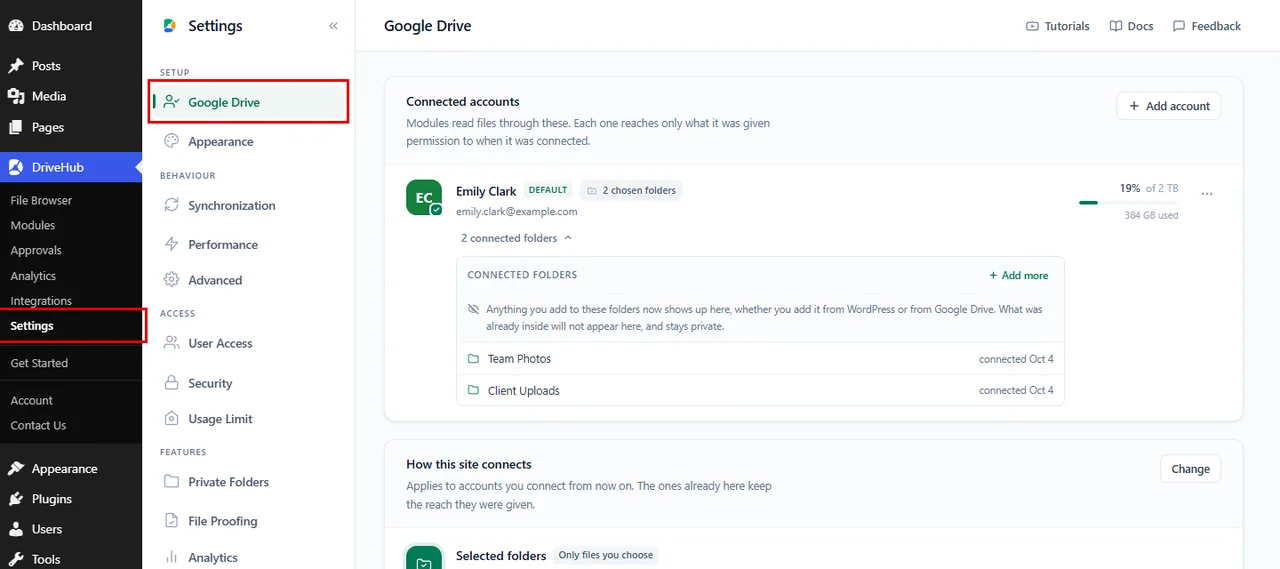
In the Connected accounts card:
- Click on 2 connected folders (the number matches your own folders) under the account’s email to see the list. Each folder shows the date it was connected.
- Click on Add more and pick the new folders in the Google picker.
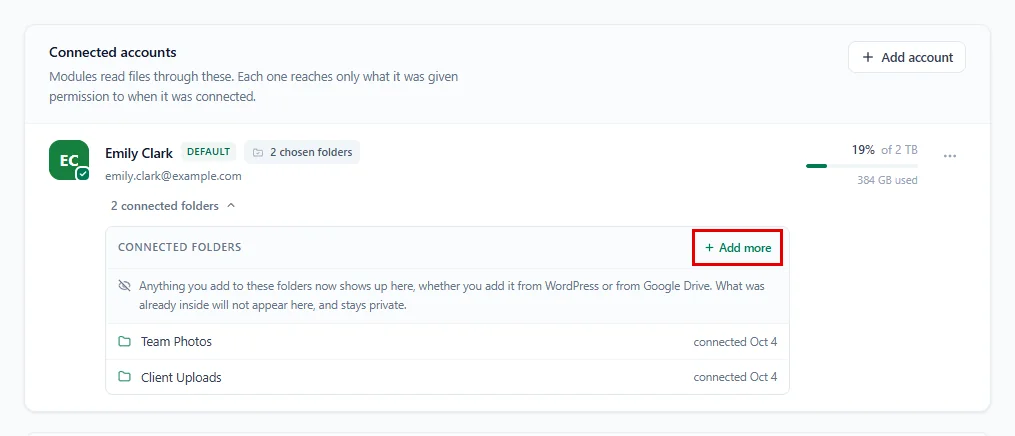
DriveHub reloads the page and the new folders appear in the list.
Add or Remove Folders from the File Browser #
The File Browser also lists your folders, under Shared Folders in the left sidebar:
- Go to DriveHub > File Browser. It opens inside the first folder you picked, for example Team Photos.
- Click on Add folder to pick more folders in the Google picker.
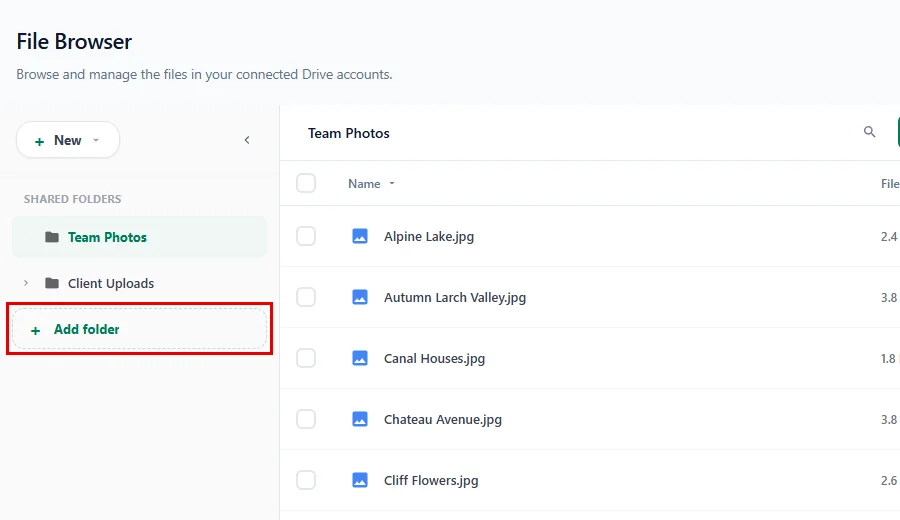
The path at the top starts at the folder you picked, not at My Drive, because DriveHub can only open the folders you handed it. So there is no Previous folder row at the top of a picked folder; to move to another one, click it under Shared Folders. If you switch to another Google account, the File Browser opens that account’s first folder.
To stop using a folder:
- Hover over the folder in Shared Folders.
- Click the × button that appears at the end of the row.
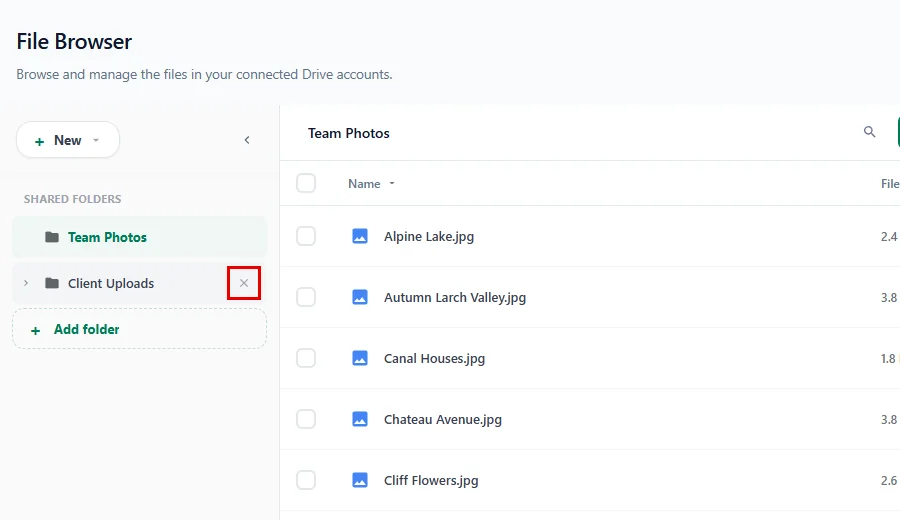
DriveHub asks Remove Folder? and explains that you can add it back anytime:
- Click on Remove to confirm, or Cancel to keep it.
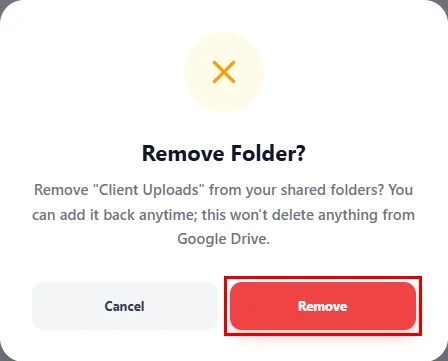
Removing a folder only takes it out of DriveHub. Nothing is deleted from Google Drive. Modules that use files from that folder stop showing them until you add the folder back.
Troubleshooting #
“The permission request was cancelled. Try again and choose Allow on the Google screen.” #
You closed the Google window or clicked Cancel on the permission screen.
Check that:
- You click Sign in with Google again and finish both Google screens.
- You allow the permission on the last Google screen.
“Your Google Workspace administrator has blocked this app.” #
Your company’s Google Workspace does not allow DriveHub to connect.
Check that:
- Your Workspace administrator allows the app, or
- You connect a personal Google account instead.
The Google window does not open #
Your browser blocked the pop-up. The connect screen says so under the button: If nothing opens, allow pop-ups for this site.
Check that:
- Pop-ups are allowed for your website in the browser’s address bar.
- You click Sign in with Google again after allowing them.
“Google did not return a usable token for this account. Reconnect the account and try again.” #
DriveHub could not open the Google picker for this account, usually because the account’s permission expired.
Check that:
- You reconnect the account from DriveHub > Settings > Google Drive (see How to Add, Switch and Remove Google Accounts in DriveHub).
- You then click Add more or Add folder again.
I picked a folder, but my files do not appear #
This is how Selected folders works, not an error. Files that were already in the folder before you picked it stay private. Only files added after you picked it show up.
Check that:
- You add new files to the folder, from your website or straight in Google Drive.
- Or, if you need the files that are already there, switch to Whole Drive with Change in the How this site connects card.
Frequently asked questions #
Do I need a Google Cloud project for Selected folders? #
No. Selected folders connects through a Google app we run, so there is nothing to create and nothing to paste. Only Whole Drive needs your own free Google app.
Can visitors see the rest of my Drive? #
No. DriveHub can only open the folders you picked, and only the files that arrived in them after you picked them. Visitors see even less: only the files inside the modules you add to your pages.
Can I switch to Whole Drive later? #
Yes. Go to DriveHub > Settings > Google Drive and click Change in the How this site connects card. The new mode applies to accounts you connect from now on; accounts already in the list keep the reach they were given.
Does removing a folder delete anything? #
No. Removing a folder only takes it out of DriveHub. The folder and its files stay in your Google Drive.
Can I connect more than one Google account? #
Yes. Click Add account in the Connected accounts card. See How to Add, Switch and Remove Google Accounts in DriveHub.
You’re ready to use DriveHub #
Your Google account is now connected with Selected folders, and DriveHub can use exactly the folders you picked and nothing else. Add new files to those folders, and they are ready to show on your website.


