- Before you begin
- Step 1: Open Zoom Users
- Step 2: Read and search the list
- Step 3: Add a Zoom user
- Step 4: Edit a user
- Step 5: Remove a user
- Step 6: Choose the host for a meeting
- Benefits of managing Zoom users in ZooMeet
- Troubleshooting
- Frequently asked questions
- Security best practices
- You're ready to manage your Zoom hosts
Every Zoom meeting belongs to a Zoom user, its host. The Zoom Users screen lists the people on your Zoom account, so you can see who can host, add new instructors and keep the list tidy, all from WordPress.
The hosts you see here are the same ones offered in the Host field when you create a meeting or webinar.
By the end of this guide, you will have:
- A view of everyone on your Zoom account, with their plan and status
- A new Zoom user invited from WordPress
- A user’s name or plan changed without opening Zoom
- The right host picked for each meeting, with an alternative host as backup
Estimated setup time: 5 minutes. Viewing the list changes nothing. Adding, editing and removing users change your Zoom account, so read each step before you click.
Before you begin #
Make sure you have:
- ZooMeet installed and activated, with Zoom connected. See How to connect Zoom with ZooMeet using Server-to-Server OAuth.
- An administrator account on your WordPress site
- Admin rights on the Zoom account, and a Server-to-Server OAuth app with the user scopes, if you want to add or change users
- A paid Zoom plan, if new users need the Licensed plan to host scheduled meetings
Step 1: Open Zoom Users #
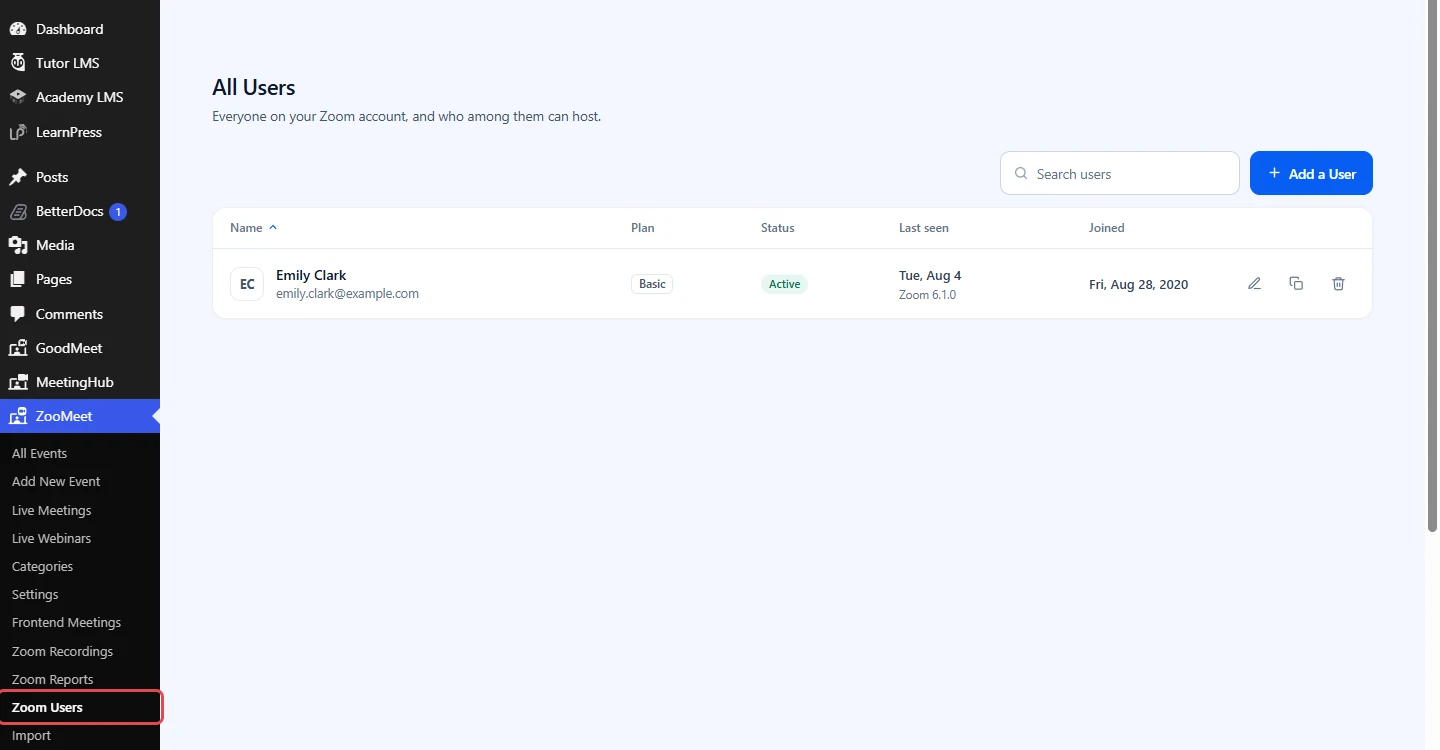
The Zoom Users item appears in the ZooMeet menu once Zoom is connected.
- In the WordPress admin menu, go to ZooMeet > Zoom Users.
- The screen opens on All Users, with the line Everyone on your Zoom account, and who among them can host.
Step 2: Read and search the list #
Each column tells you something about hosting.
- Plan: Basic, Licensed or On-prem. Only Licensed users can host scheduled meetings without Zoom’s free-plan limits.
- Status: Active, Pending (invited, not yet activated) or Deactivated.
- Last seen: the last time they signed in to Zoom, and the Zoom app version they used. Never signed in means they have not used the account yet.
- Joined: when the user was added to your Zoom account.
- Type in Search users to find someone by name, email or Zoom user ID.
- Click Name, Status, Last seen or Joined to sort by that column.
- When your account has users in more than one status, tabs appear above the list: All, Active, Pending and Deactivated. Click one to filter.
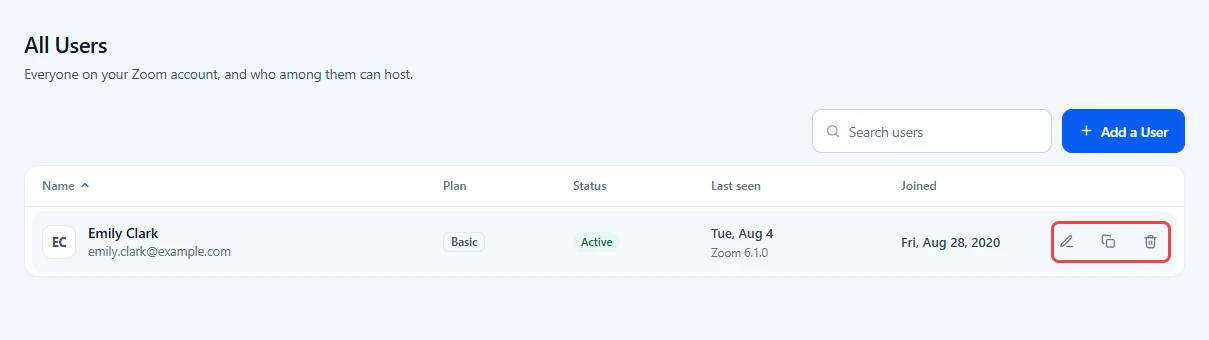
Hover over a row to use its actions.
- Click the pencil icon to edit the user.
- Click the copy icon to copy their Zoom user ID. You see User ID copied.
- Click the bin icon to remove them from the account.
Step 3: Add a Zoom user #
Add a user when a new instructor needs to host meetings under your Zoom account. Zoom sends them an email to activate the account.
- Click Add a User.
- Under Who are you adding?, fill in Email Address, First Name and Last Name.
- Pick a Plan: Basic or Licensed. Only Licensed can host scheduled meetings.
- Leave How the account is created on Email them an invitation, unless Zoom told you otherwise.
- Click Create User.
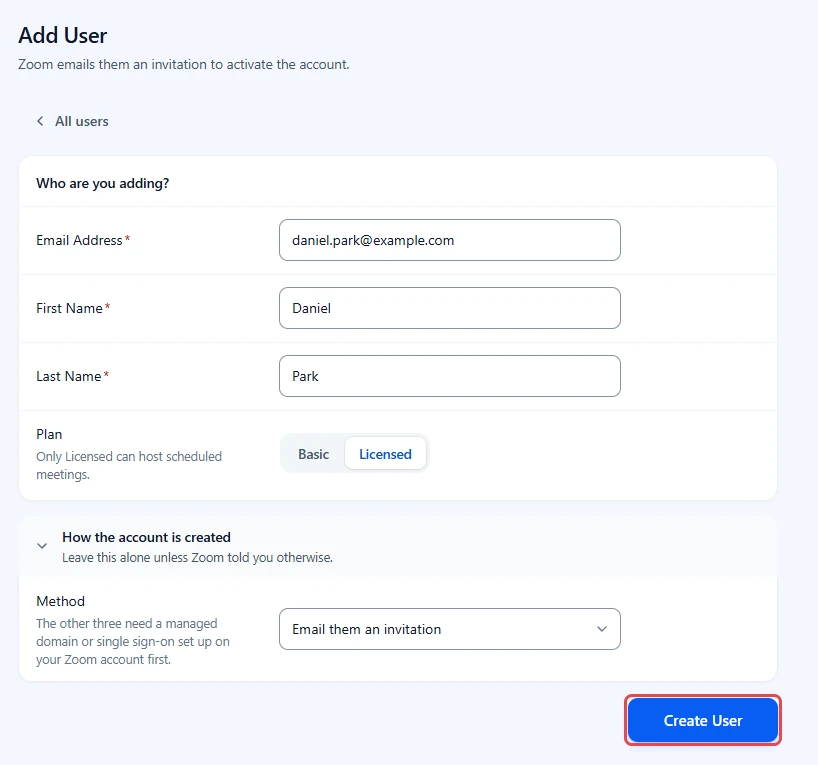
When Zoom accepts the request, you see User created and the person appears in the list.
The Method list under How the account is created has three more options: Add without an invitation, Add without a password and Add for single sign-on. They need a managed domain or single sign-on set up on your Zoom account first.
Note: A Licensed user takes one of the paid licences on your Zoom plan. If you have none left, Zoom refuses the request.
Step 4: Edit a user #
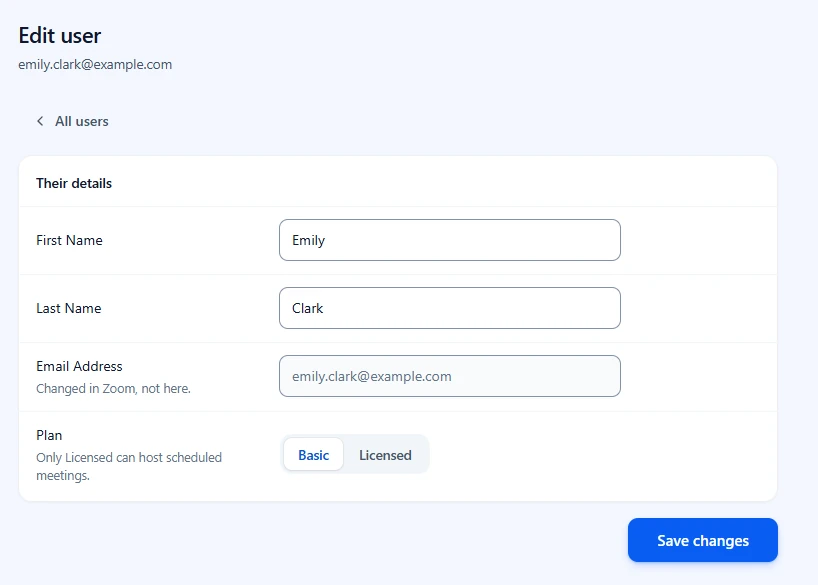
- Hover over the row and click the pencil icon.
- In Edit user, change the First Name or Last Name under Their details.
- Change the Plan if they need to host scheduled meetings, or no longer do.
- Click Save changes. You see User updated.
Step 5: Remove a user #
Removing takes the person off your Zoom account. Do it when someone has left your team.
- Hover over the row and click the bin icon.
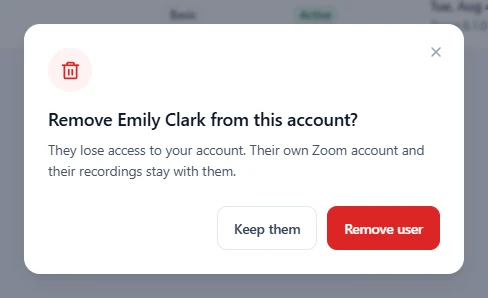
- Read Remove … from this account? They lose access to your account. Their own Zoom account and their recordings stay with them.
- Click Remove user to confirm, or Keep them to cancel.
Important: Before you remove a user, move their upcoming meetings to another host. Edit each meeting, change Host, and save.
Step 6: Choose the host for a meeting #
Every Zoom user on this screen can be picked as a host. You choose one on each meeting or webinar.
- Go to ZooMeet > Add New Event, or open an existing meeting from ZooMeet > All Events.
- Click Access and controls on the left.
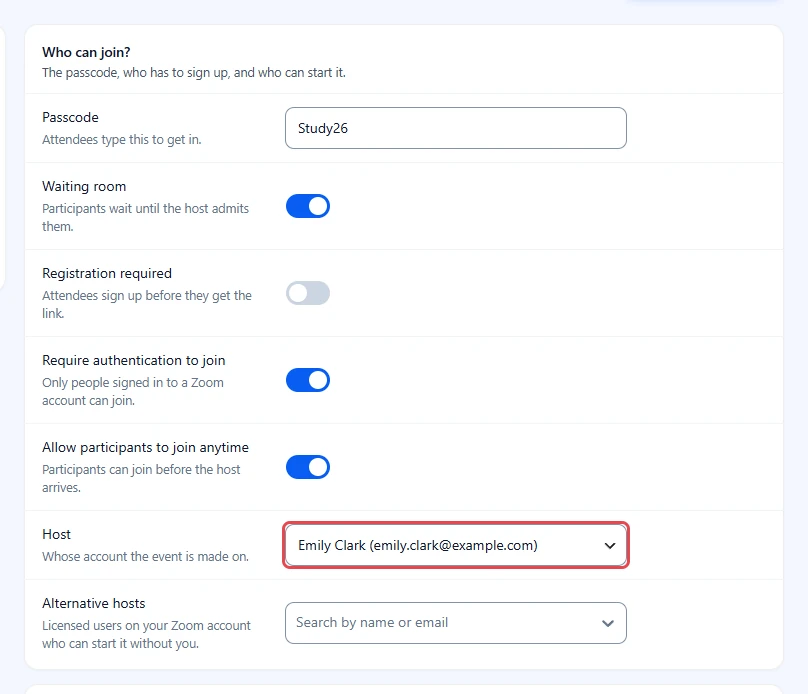
- In Host, pick the Zoom user the meeting is made on. Their Zoom limits apply, such as meeting length and webinar access.
- In Alternative hosts, search by name or email and add anyone who may start the meeting without you.
Tip: To add the same alternative hosts to every new meeting, set them once in ZooMeet > Settings. See How to control access and alternative hosts with ZooMeet.
Benefits of managing Zoom users in ZooMeet #
- One place for hosts: See who can host without opening the Zoom web portal.
- Faster onboarding: Invite a new instructor in under a minute.
- Fewer failed meetings: Spot users on Basic before you schedule a long class on them.
- A clean account: Remove people who have left, with a clear confirmation first.
Troubleshooting #
“Zoom did not answer” #
The request for the user list failed. Click Try again, or click Open Zoom settings and check that Zoom is connected.
“Some users could not be loaded, so this list is incomplete.” #
Zoom answered for some users but not all. Click Try again.
“Could not create the user” #
Zoom refused the new user, and the reason is shown with the message.
Check that:
- The email address is not already on a Zoom account.
- You have a free licence, if you picked Licensed.
- Method is Email them an invitation, unless your Zoom account has a managed domain or single sign-on.
“Your Zoom app is not allowed to manage users. Check its scopes in the Zoom Marketplace.” #
Your Server-to-Server OAuth app does not have permission to add or change users. In the Zoom App Marketplace, add the user scopes to the app, then try again. See How to connect Zoom with ZooMeet using Server-to-Server OAuth.
A meeting is cut off at 40 minutes #
The host is on the Basic plan. Change their Plan to Licensed, or pick a licensed user as the Host.
Frequently asked questions #
Do I need ZooMeet Pro to manage Zoom users? #
No. The Zoom Users screen is part of the free plugin.
Are these WordPress users? #
No. They are users on your Zoom account. Adding someone here does not create a WordPress account, and WordPress users do not appear here.
Does removing a user delete their recordings? #
No. Their own Zoom account and recordings stay with them. They only lose access to your account.
Can I change a user’s email here? #
No. Email addresses are changed in Zoom.
Security best practices #
- Give the Licensed plan only to people who host, so licences are not wasted and fewer accounts can start meetings.
- Remove users as soon as they leave your team.
- Keep the Zoom app’s user scopes only if you manage users from WordPress. Remove them in the Zoom App Marketplace if you do not.
You’re ready to manage your Zoom hosts #
You can now see everyone on your Zoom account, invite new hosts, change plans and pick the right host for each meeting. Next, set access rules and default alternative hosts, or create a meeting on your new host.


