This guide shows how to create your first meeting in MeetingHub and display it on your WordPress website.
Before You Start #
Make sure:
- MeetingHub is installed and active
- Your preferred meeting platform is configured
- You have admin access to WordPress
Tip: For a quick test, you can start with Jitsi Meet before connecting platforms like Zoom, Google Meet, Webex, or Microsoft Teams.
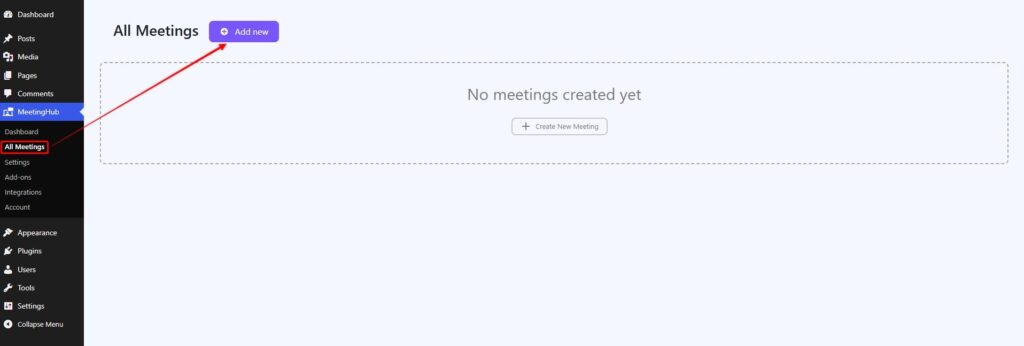
Step 1: Open Add New Meeting #
From your WordPress dashboard, go to:
MeetingHub → All Meetings → Add New
Step 2: Add Meeting Details #
Enter the basic meeting information.
Add:
- Meeting title
- Meeting description
- Date
- Start time
- Timezone
- Thumbnail/image, if needed
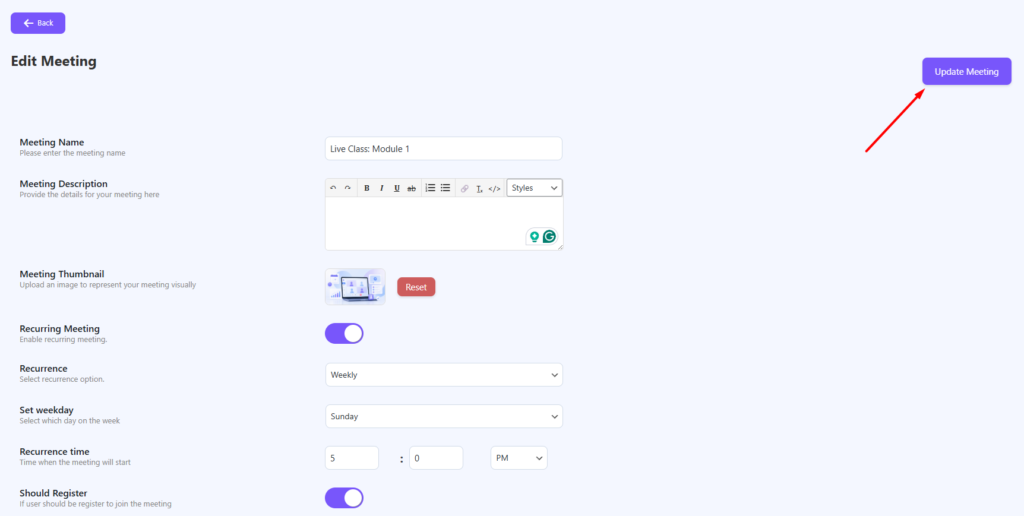
Best Practice: Use a clear title like Weekly Product Demo or Live Class: Module 1 so users instantly understand the meeting purpose.
Step 3: Configure Meeting Options #
Depending on the selected platform, you may see extra options.
Common options may include:
- Meeting password
- Host information
- Waiting room
- Registration
- Recurring meeting
- Join before host
- Meeting visibility
Only enable the options you actually need.
Step 4: Publish the Meeting #
After adding the required details, click Publish.
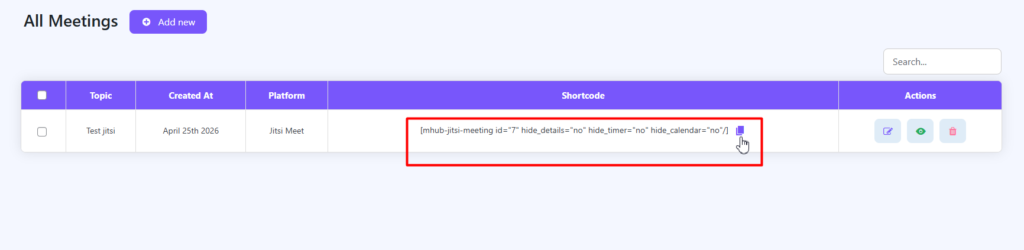
Once published, the meeting will be saved in:
MeetingHub → All Meetings → Copy Meeting Shortcode
After publishing, copy the meeting shortcode.
It may look similar to this:
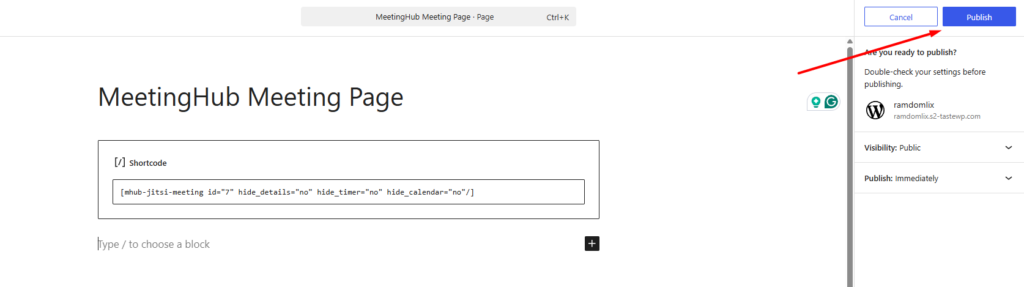
Step 6: Display Meeting on a Page #
Create or edit the page where you want to show the meeting.
Go to:
Pages → Add New
Or, go to any page where you want to add this meeting
Paste the meeting shortcode into the page content area.
Then click Publish or Update.
Common First-Time Mistakes #
Wrong Time or Timezone #
If the meeting time looks incorrect, check the timezone inside:
Settings → General → Timezone
Also check the meeting timezone inside MeetingHub.
Shortcode Not Showing the Meeting #
Make sure:
- The shortcode is copied correctly
- The meeting is published
- The meeting ID is valid
- MeetingHub is active


