This guide will help you install MeetingHub Free and MeetingHub Pro on your WordPress website.
MeetingHub Free is required as the main plugin.
MeetingHub Pro adds advanced features on top of the free version.
Install MeetingHub Free #
You can install MeetingHub Free directly from your WordPress dashboard.
Step 1: Go to Add New Plugin #
From your WordPress dashboard, go to:
Plugins → Add New Plugin
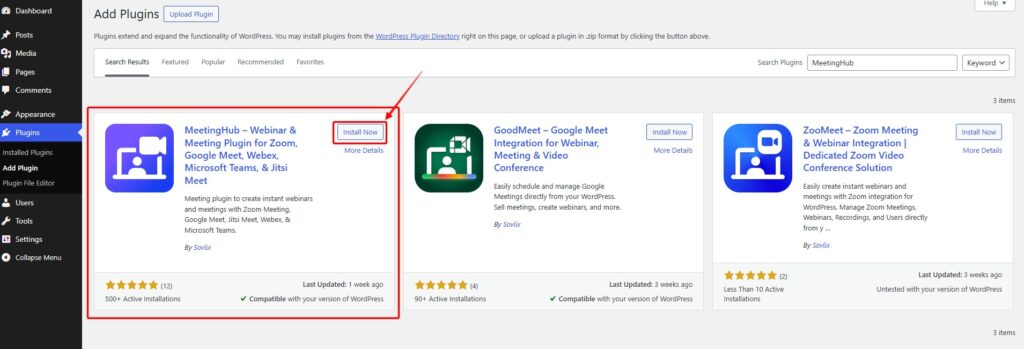
Step 2: Search for MeetingHub #
In the plugin search box, type: MeetingHub
When MeetingHub appears, click Install Now.
Step 3: Activate MeetingHub #
After installation, click Activate.
Once activated, MeetingHub will appear in your WordPress dashboard menu.
WordPress Dashboard → MeetingHub
Install MeetingHub Pro #
MeetingHub Pro unlocks advanced features such as integrations, frontend meeting creation, LMS support, WooCommerce workflows, reports, recordings, and more.
Step 1: Upload MeetingHub Pro #
From your WordPress dashboard, go to:
Plugins → Add New Plugin → Upload Plugin
Click Choose File and select your MeetingHub Pro ZIP file.
Then click Install Now.
Step 2: Activate MeetingHub Pro #
After installation, click Activate Plugin.
You should now have both plugins active:
MeetingHub Free: Active
MeetingHub Pro: Active
Important: Do not deactivate MeetingHub Free while using MeetingHub Pro.
Activate Your Pro License #
After activating MeetingHub Pro, activate your license key to receive updates and use Pro features.
Go to the license area from your WordPress dashboard.
Usually, you can find it from:
MeetingHub → Settings
or from the plugin license option under:
Plugins → Installed Plugins
Enter your license key and click Activate License.
Tip: Keep your license active to receive updates, improvements, and compatibility fixes.
Confirm Installation #
After installation, check if the MeetingHub menu is visible in your WordPress dashboard.
Go to:
WordPress Dashboard → MeetingHub
You may see options like:
- Dashboard
- All Meetings
- Settings
- Add-ons
- Integrations
Depending on your enabled features, you may also see extra menus like Zoom Users, Reports, or Recordings.
What to Do Next #
After installing MeetingHub, complete the basic setup:
- Go to MeetingHub → Settings
- Choose your preferred meeting platform (Zoom, Google Meet, Jitsi, Webex, MS Team, or any)
- Connect your account if required
- Create a test meeting
- Copy the meeting shortcode
- Paste it into a page
- Preview and test the meeting page
Recommended: Create a private test page first before publishing a meeting for real users.
Common Installation Issues #
MeetingHub Menu Is Not Showing #
Try these quick checks:
- Refresh your WordPress dashboard
- Make sure MeetingHub is activated
- Confirm you are logged in as an administrator
- Clear your site cache
- Deactivate and reactivate the plugin
Pro Features Are Not Showing #
Check the following:
- MeetingHub Free is active
- MeetingHub Pro is active
- Your license is activated
- Required third-party plugins are active
For example, WooCommerce features require WooCommerce to be installed and active.
“The Link You Followed Has Expired” Error #
This usually happens when your server upload limit is too low.
To fix it:
- Increase the upload limit from your hosting panel
- Ask your hosting provider to increase
upload_max_filesize - Upload the plugin using FTP or File Manager


